
What is playpen time?
Time when a baby or young child plays in a safe environment within a set boundary with a selection of age appropriate toys for a set amount of time.
Why have playpen time?
Playpen time is introduced as a regular part of a flexible daily routine. Independent playtime away from all other distractions teaches a child how to focus and concentrate on a few selected items, rather than flitting from one activity to another. It teaches them to be content on their own and to know that it is ok to be separated from Mum for a short time – that she will come back. It alleviates the separation anxiety many young children feel when Mum leaves the room because they know through experience that she will return and they will be ok.
Playpen time provides you as a parent with a period of time where you can take a shower, complete some of your own responsibilities or homeschool older children – all the while knowing that your younger child is safe and happily playing with their own toys.
How do I introduce playpen time?
Ideally, introduce playpen time from before your baby can even crawl. (See tomorrow’s post on starting late.) An emotionally healthy baby can lay or sit for a short period of time happily focussed on their own toys in a secure and safe environment. Make it a part of your daily routine, a couple of times a day for 10 or 15 minutes right from a very young age. If you wait until they can roll and crawl to get where they want and then suddenly impose a barrier, baby will be frustrated and let you know. If they are used to spending some time in a playpen every day it will simply be something they expect and happily participate in.
Obviously babies need lots of time with Mum and other family members, cuddles, attention and the like – I am not advocating using a playpen continuously throughout the day. It is for planned periods of time and for a reasonable length of time.
Where?
Somewhere that you can check on your child regularly, but where they cannot see you. Somewhere away from the traffic flow of the house. When siblings or others walk by, a child’s attention is diverted from what they are doing and they will swiftly become discontent with being there. If they see you check in on them, they will likely cry for your attention and want to get out, whereas once settled an uninterrupted child will happily focus for an extended period.
When do I use it?
When your child is well fed and well rested and at a consistent time each day. Make it a part of your routine so that the child begins to know what will happen throughout the day and is happily ready to go in when that time comes.
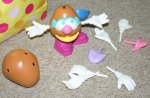
Toys
Choose a small selection of toys. Too much choice means that children will not focus on any one item but swap and change from one to another. Ensure that toys are age appropriate; not too easy or too difficult for them to use. If the toys are not interesting to the child, playpen time will be a struggle. Rotate toys so that there is regularly “new” toys to enjoy.
I sort my baby and toddler toys into several plastic crates – one for each day of the week. This way, I don’t have to go though wondering what to put in today – I simply put in the next crate. It also means they only see the toys once a week so they are fresh and interest stays high. When I only had one child, I didn’t have as many toys as I do now so rotating was harder, however I will be adding lots of ideas of toys to make for toddlers and babies so check out those blog posts for ideas. You could also swap toys with friends or join a toy library.
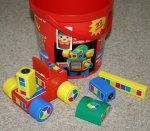
Toy storage
Do not expect children to pack toys in to bags or boxes, it is too fiddly and time-consuming. Open baskets and crates are best as toys can quickly and easily be plopped inside. Large toy boxes are also not a good idea as all the toys get jumbled together, pieces are all mixed up and it is very difficult to quickly pull out a good selection for playpen time.
I have a mental list of categories to help me ensure a good selection of toys which varies according to the age of the child:
(For babies) Something to:
- mouth or cuddle (favourite teddy or any suitable baby toy)
- look at (stimulating cardboard books, fabric books, photograph books)
- listen to (music makers, squeakers)
- feel (texture related toys)
- kick or bat at (dangle toys, those that clip on the side of the pen)
(For toddlers) Something to:
- read
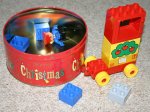
- push (vehicles)
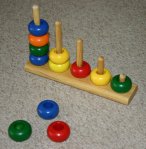
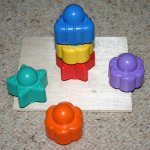
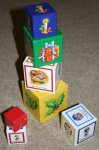
- stack
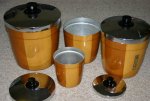
- open and shut
- touch and handle, tip or put into the containers (shells, rocks, pegs)
- wear (hats, necklaces, bangles, scarves )
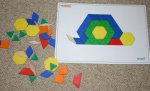
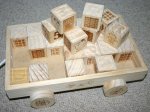
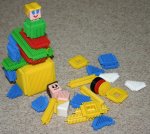
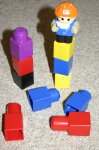
- build or construct with (Mega-blocks, Duplo, magnetic blocks, stickle bricks, train tracks)
- pretend play with (teddies, dollies, bottles, dishes, cups, clothes, food)
- post (a hole in the top of a small cardboard box with something to post like noodles, blocks, pipe cleaners, straws or pegs)
- practice with (I wander through the house looking for items they are currently interested in like hair brushes, hats, shoes, cleaning cloth, tea towel, hair clips)
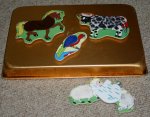
- solve – puzzles (beginner peg puzzles)
- make music or noise with (maracas, clappers, drums or other percussion, pots and pans or battery operated toys)
Toddlers plus:
Packing away
Teach your child to pack up right from the first use of the playpen. Initially it will be you packing away with them watching. Encourage them to help you put the toys away, perhaps placing a small item in their hand and guiding it to the basket and thanking them with a big smile for helping Mummy pack up. It won’t take long for them to understand what you want them to do and you can gradually pull back on the amount of packing you do until the child is completely responsible for this task themselves.
Several of my children have been heard to vigorously start throwing toys back in the crate without me telling them to do so – a very clear sign that in their opinion playpen time is done! While this is very cute, it is important that they realise Mum decides when playpen time is done, not them, or they will simply pack their toys away after a few minutes and expect to come out.
Filed under: Routine and daily activities: structuring your child's day | Tagged: babies, concentration, homeschooling with toddlers, managing large families, playpen time, routine, separation anxiety, toddlers, toys, training | Leave a comment »


