Learning Styles & hands-on learners

img_2656

(Free printable vertical addition cards below.)

Catering for a variety of learning styles can sometimes be a challenge for homeschoolers. If you have a number of children you have probably worked out by now that not every curriculum works well for all students and that as wise educators we need to adjust our approach to suit the learning styles of our children. That said, I believe that ALL children must learn to sit still and concentrate as a necessary life skill, regardless of whether they find that easy or difficult. The difference is that requiring all learning to take place in the same way (bookwork for example) will make life very unpleasant for you and your hands-on kinaesthetic learners.

img_2659We have started school for the year and the past week has been full of the usual teething problems that a new year and new programme presents. I started my 3 youngest students on a completely hands-on mathematics programme this term. After trialling it for a week, my 7 year old daughter has gone back to purely bookwork, using manipulatives only when absolutely necessary to understand a concept. She loves to work in books, especially brand new ones and it was killing her to have her maths book just sitting there while she was being forced to work through problems with manipulatives when she’d much rather do it on paper or in her head. My 7 year old son has settled on a midway compromise; one day of bookwork followed by one day of hands-on experiences to back up the concept being covered.

img_2658

My 4 year old does not get a choice – he will be working with concrete manipulatives because I believe that at his stage of development this is the most successful method for developing a good handle of the basic mathematical concepts and skills he needs as building blocks for higher level concepts.

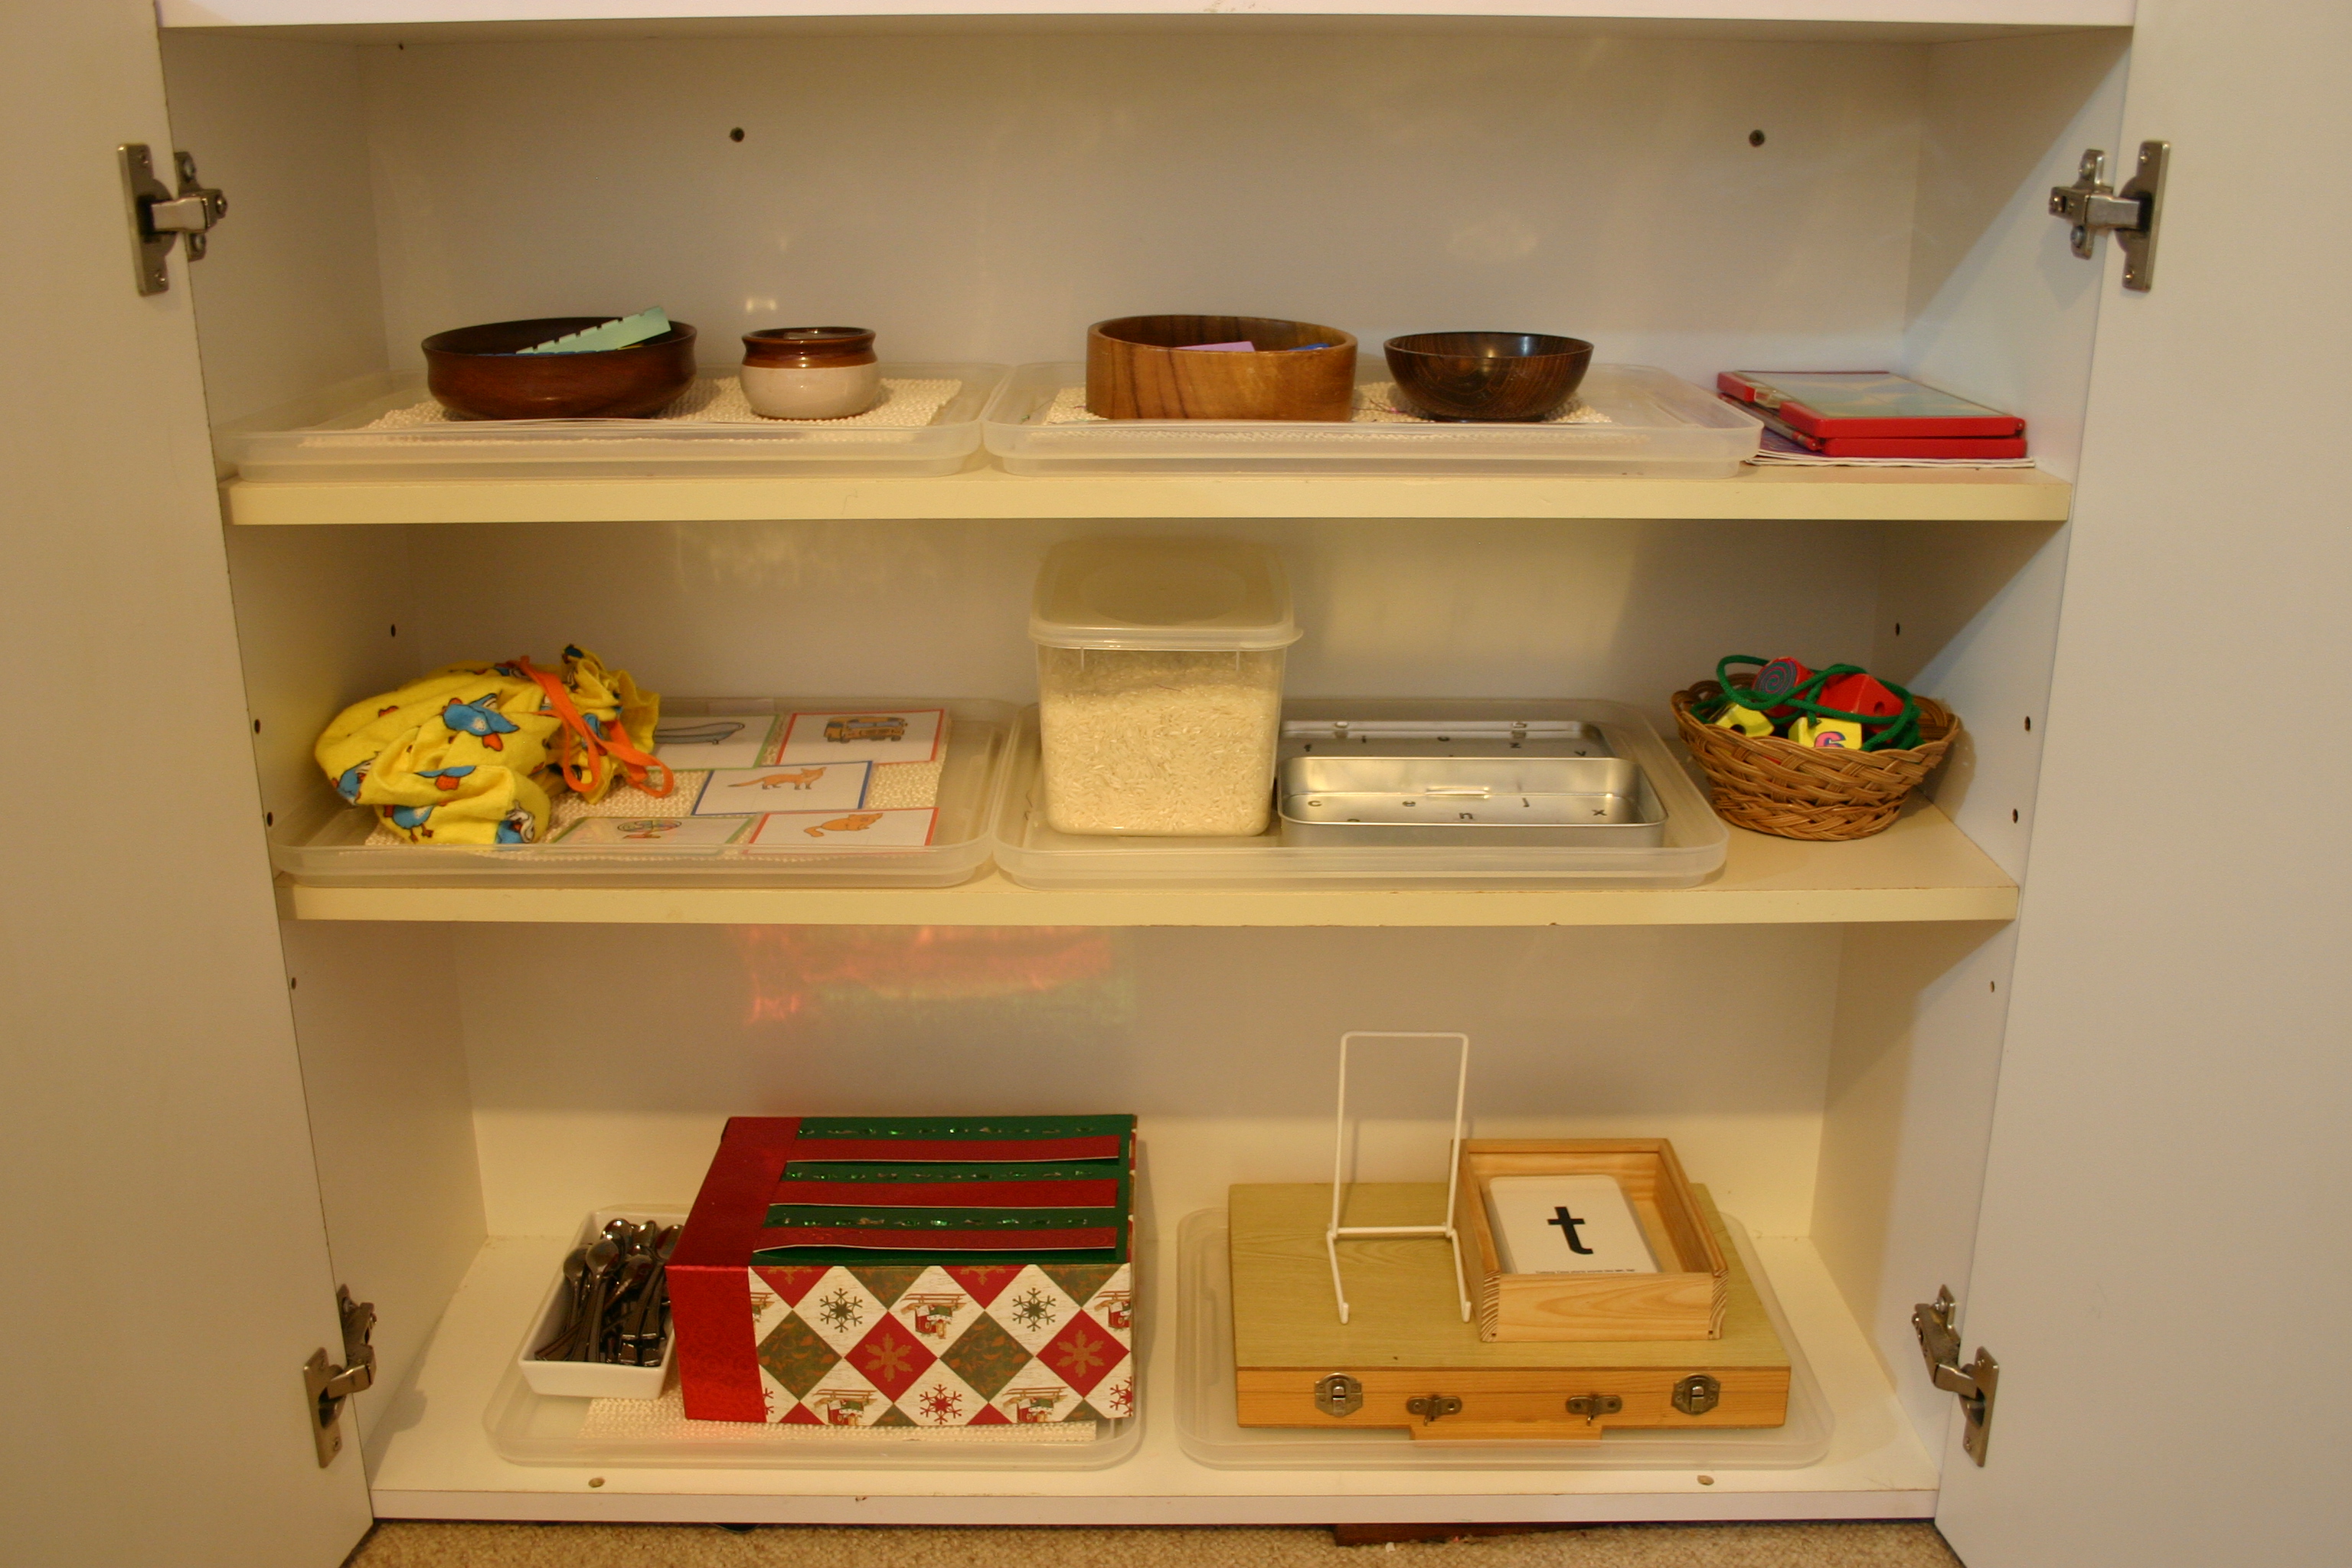
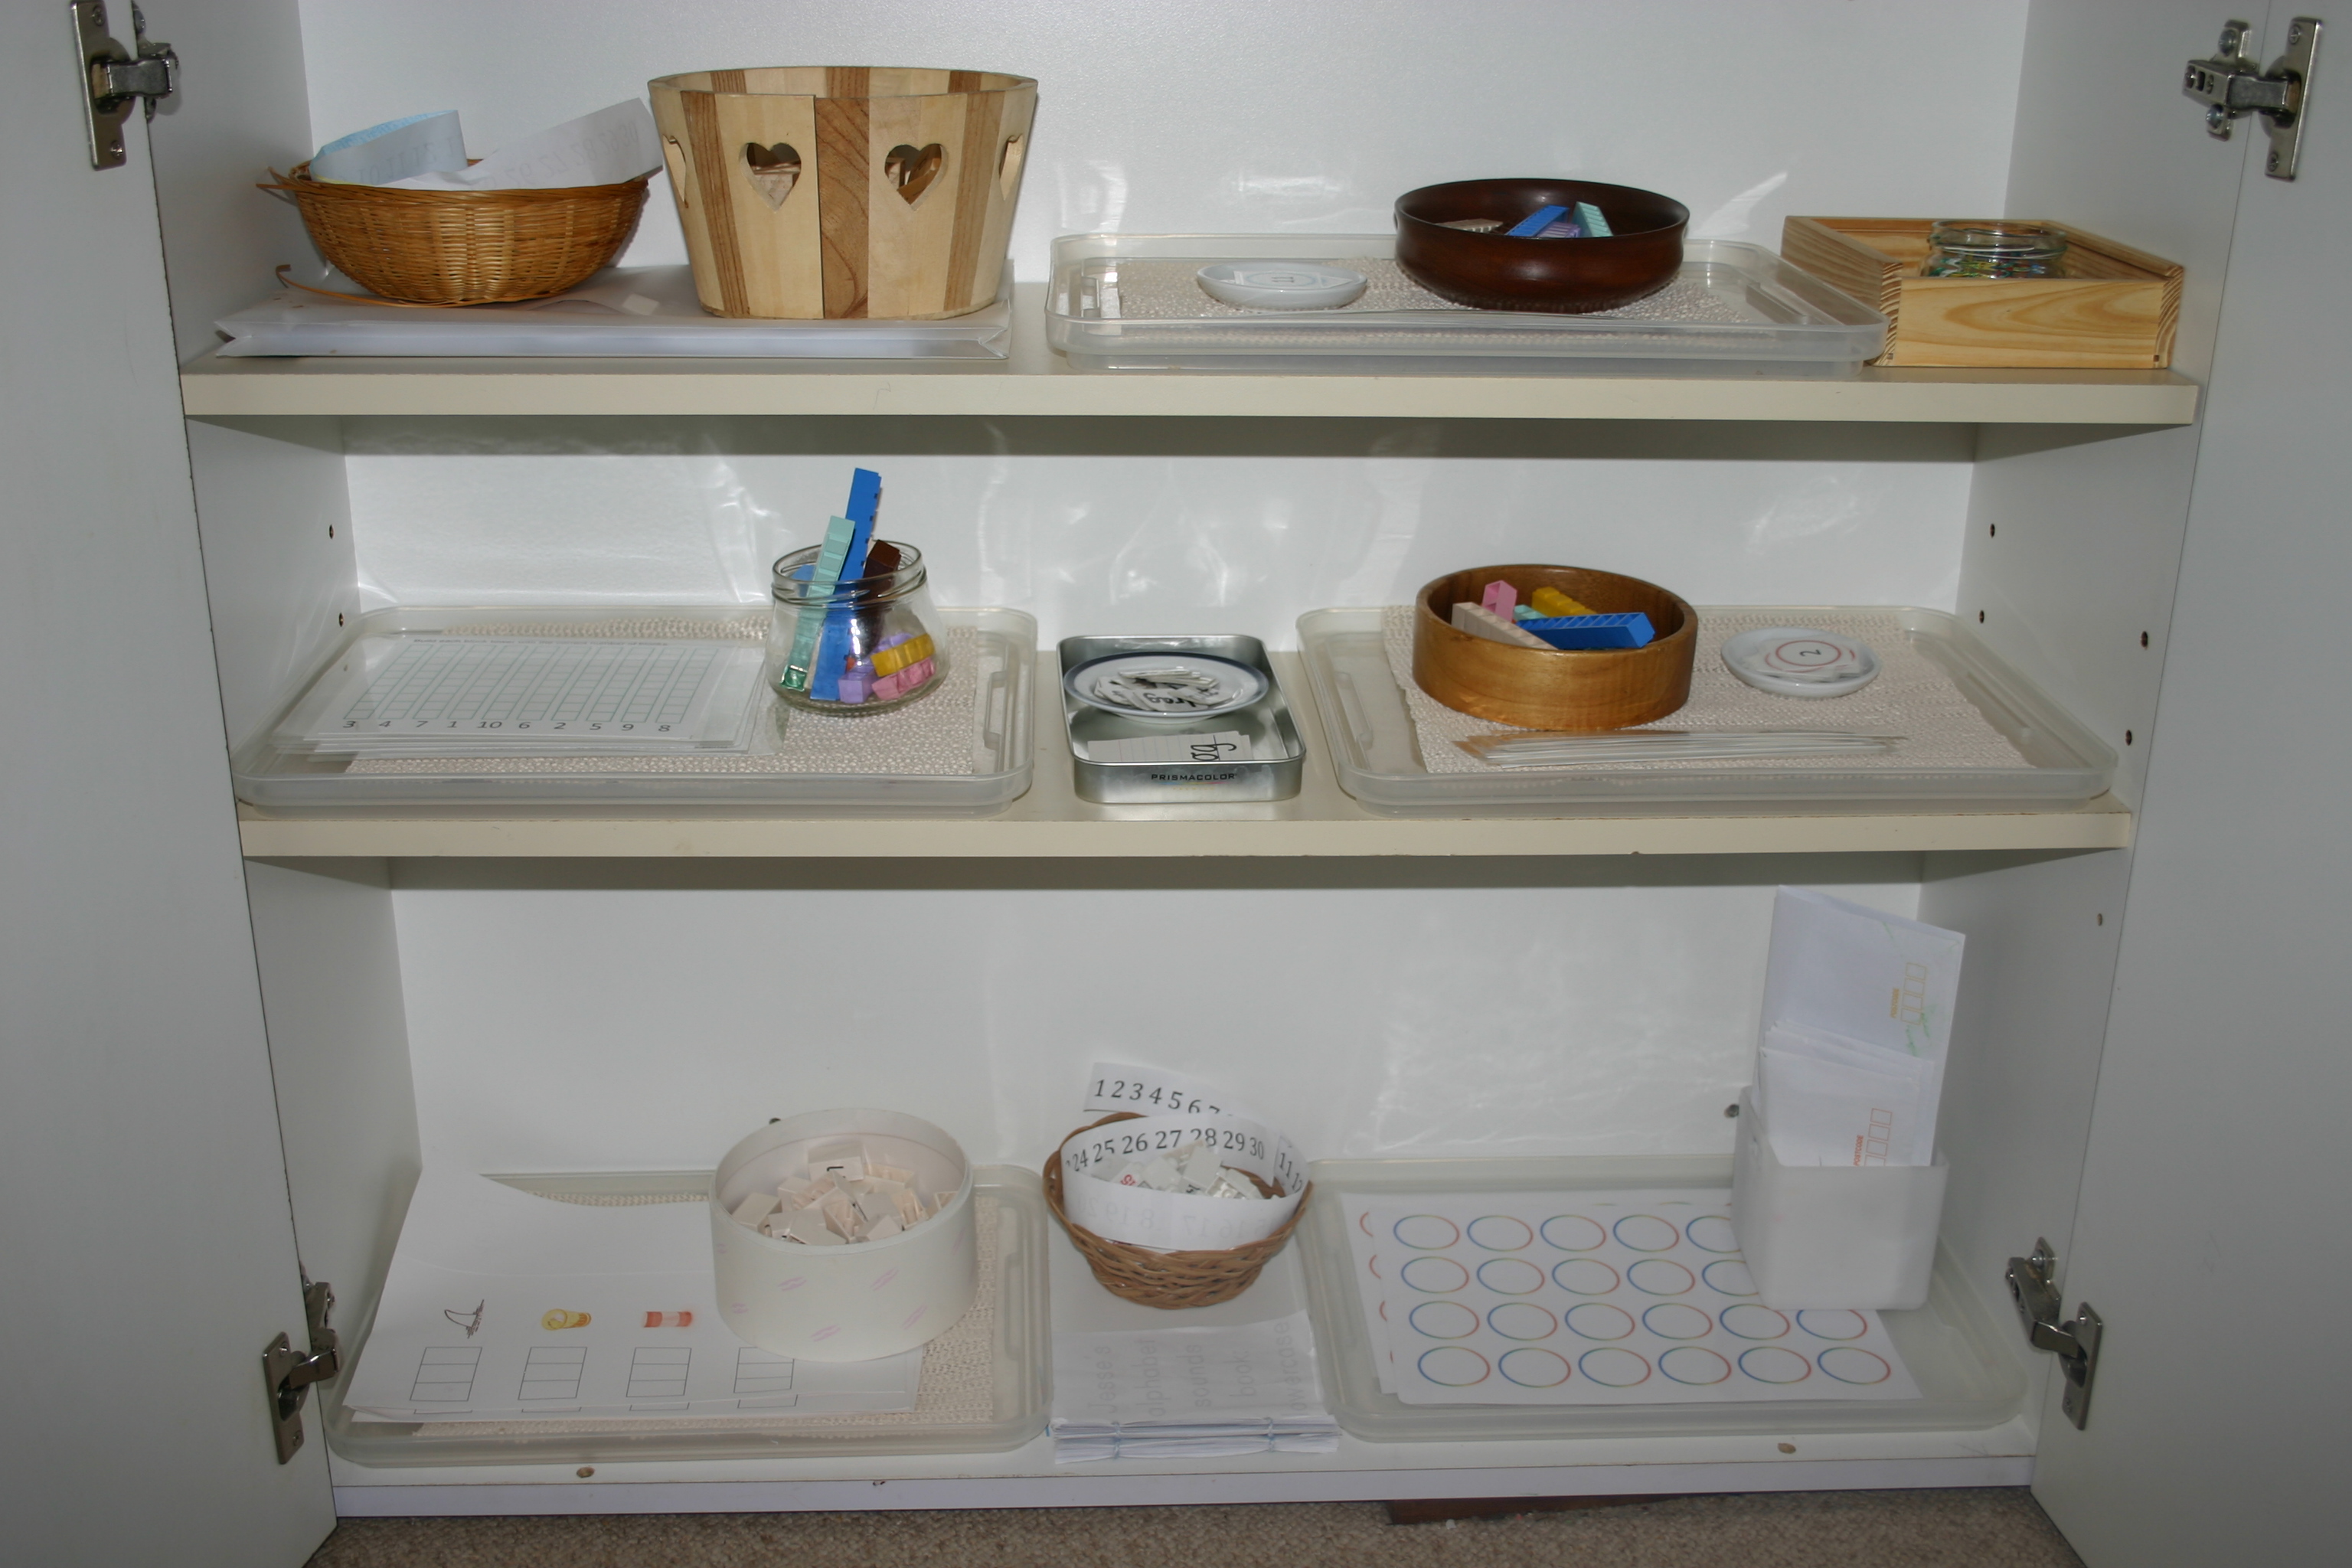
So in light of all that, here are some of the hands-on trays that we are using this year for maths, with more to come in subsequent days if and when I get a chance to photograph them!

img_2602

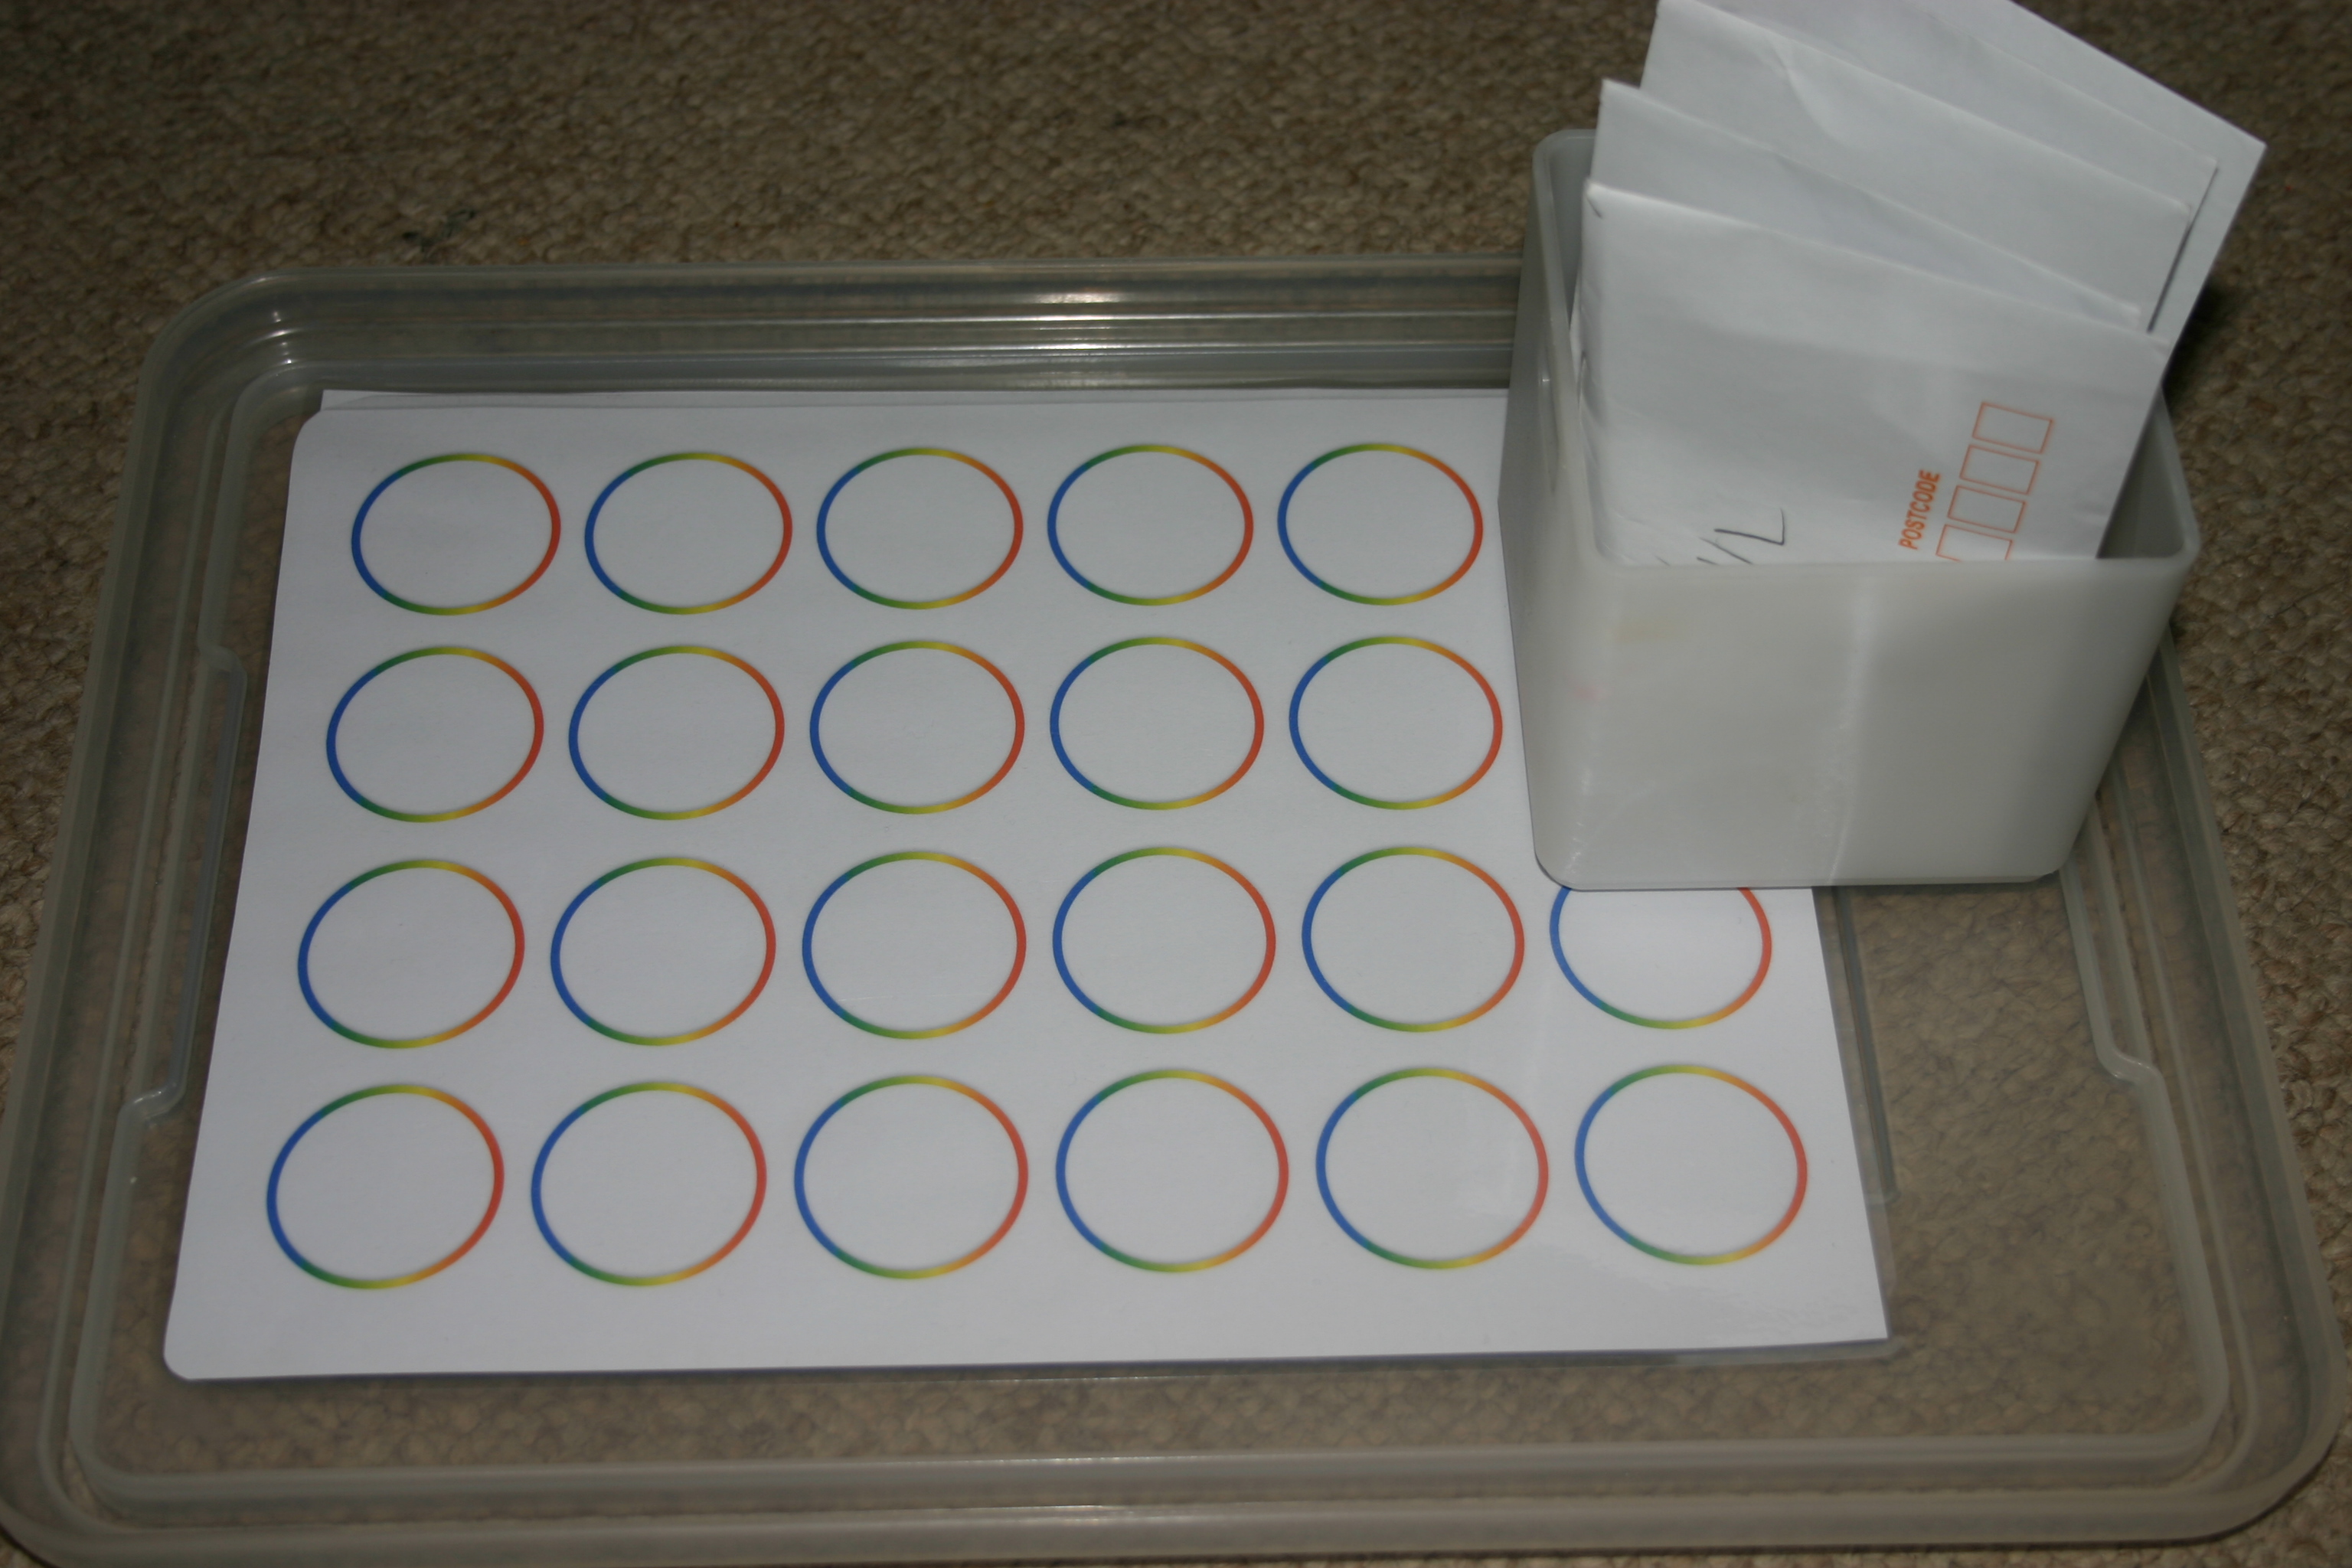
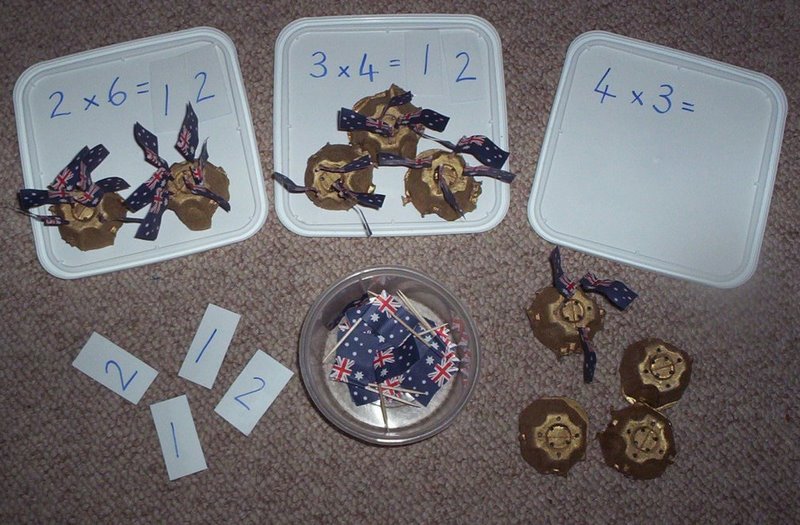
Our addition trays have 2 kinds of materials to make it visually clear that we are counting out 2 separate groups before adding/joining them together to work out how many there are altogether. The cards are in sets that only work on adding 1 number at a time, for example 0+3, 1+3, 2+3, 3+3, 4+3, 5+3, 6+3, 7+3, 8+3, 9+3 and 10+3.

img_2608

I printed and laminated the cards and provided felt pens (textas) to write the answer or wooden numbers to “build” the answer for those who prefer not to have to write. (For free printable vertical addition cards click here.)

img_2605

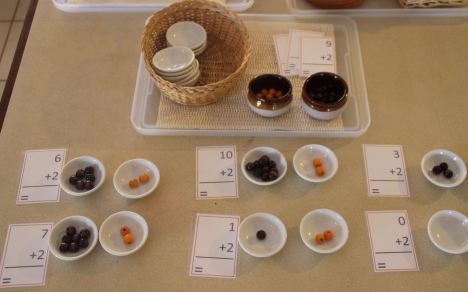
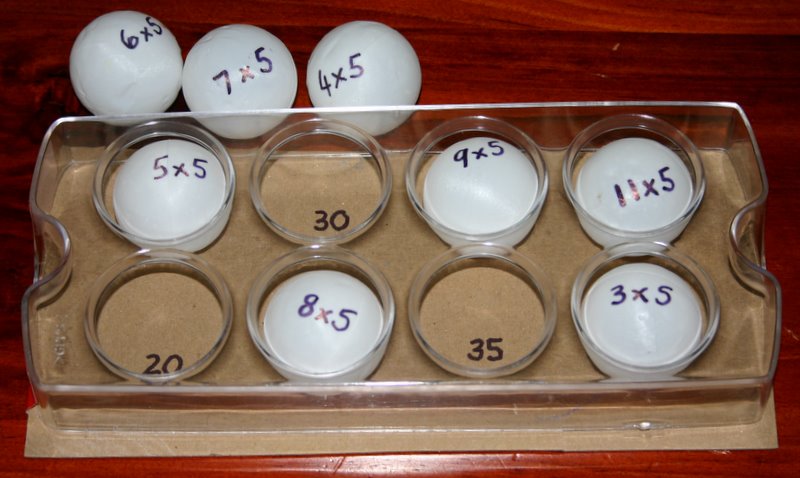
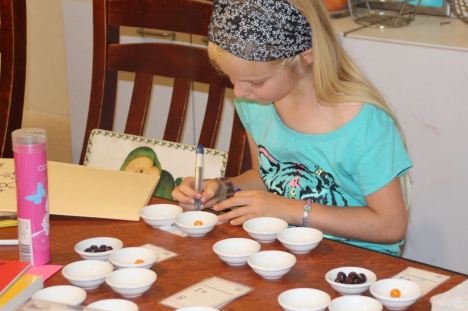
I also added several types of containers so that the materials could be set out in pairs to contain them and illustrate the problem being worked on. These included stiff cardboard cupcake liners, disposable tinfoil pie tins and these white dishes.

These hands-on Montessori style trays complement the Math-U-See curriculum that we choose to use in the early years and provide the extra practise needed by some in order to grasp the new concepts.

Advertisement

Preschool at our house; hands-on homeschooling

IMG_0374

Almost a month exactly has passed since I last updated the twins (4 1/2 years) preschool activities. Changing them out once a month takes me an hour or two at the most (without interruptions!) and with approximately a month until I need to do it again, isn’t too much of a burden. If I take the time to plan for interesting activities then I find I have a positive attitude to “school” time and of course, with something new and interesting to do, so do they. A little internet surfing and Pinterest pinning and I have more ideas than I could possibly put into practise.

The children have plenty of time during other parts of the day for play-based learning and some free choice, but school time has a little more structured. I like the activities to be hands-on where possible and try to keep in mind that we have years ahead for academic learning. Right now it is more of a priority that they learn to sit, focus, concentrate and obey my instructions than it is for them to learn a particular academic skill.

IMG_0408

This is what the school cupboard looks like this month. With the broad categories of mathematics, reading and writing in mind, we are focussing on adding small numbers, sequencing numerals to 30, identifying upper and lowercase letter names and sounds, sounding out 3 letter words, forming letters and fine motor skills.

IMG_0401

These addition strips are once of the free printables I designed to go with Mathusee Primer level. We are working on basic addition facts, this month: adding on 3 and 4.

IMG_0386

These plastic party spoons have the numerals 1 to 30 written on them. The child needs to put them in order and then post them into the right slot in the shoebox. If unsure of where to put them, they can lift up the red strip to see the numerals below.

IMG_0387

IMG_0367

This is the favourite by far. The twins dig out the buried jewels from the rice sensory box and match the uppercase letters to the lowercase letters on the trays.

These large jewels are the kind you find for displaying flowers/candles and are a very inexpensive way of creating your own Montessori moveable alphabet. A set of black letter stickers was all I needed to purchase and with the jewels came to a grand total of $4.50. The rice I had in the cupboard from my other large sensory tubs and the metal trays are a pencil tin that my daughter no longer needed.

IMG_0398

After mastering initial sounds, we have started work on 3 letter words. The bag holds the letter tiles which are lucky dipped and matched up to the correct space under the consonant-vowel-consonant  (CVC) words. There are no spare letters so the activity is self-checking. The answer could be written on the back of the cards too but I find that my little darlings like to turn them over and cheat check if I do that! The free printable CVC picture cards are available here.

IMG_0392

This salt tray has been on my to do list for ages. All you need is a tray of some sort with a brightly coloured but plain background. Rainbow stripes or large blocks of colour will work well, but avoid busy pictures and patterns. Place a thin layer of salt into the tray, provide a paint brush and let them at it. Allow plenty of time for free “painting” first and once the novelty has worn off somewhat, add some letter cards to copy. A cue tip/ear bud will work and some people suggested just using a finger but I didn’t think the salt felt very nice. My children don’t get to paint as much as they’d like so I figured the brush would make them feel like they were doing art!

IMG_0393

One drawback of the suitcase style was that my daughter closed the lid and picked it up by the handle to pack it away. Nope, not salt tight! Oh well, sweeping up mess is educational too.

IMG_0395

Starter Styles are a commercial educational toy that we purchased years ago. The older children remember them fondly and have all sat down for a fiddle at some stage or other since they came back out. The children sequence the number tiles then use them to answer questions in the book by placing them into the correct square. If their answers are right, the tiles will make a pattern when flipped over in the lid. The little books that go with them cover pre-number skills right on through to some more difficult concepts, as well-as pre-reading, reading and spelling. Not a must-have but a novel way of working on some basic skills. The logic required to work out how to place the tiles alone is quite difficult for little children.

IMG_0404


Threading is always good for fine motor skills. These blocks are numbered so it can be a sequencing activity also but as both my preschoolers are past this I won’t be worrying about whether it is in numerical order or not.

Last months preschool activities are here. The month before are here.

Coming up: The monthly overhaul of the two-year-old’s highchair activity cupboard.

What is your preschoolers’s favourite school-time activity?

Preschool at my house this week – large family homeschooling (with toddlers!)

IMG_0115 It was time for an update of the activities available for my preschoolers this week. This cupboard is only used for “school” time with Mummy once a day by the twins (4 years) and contains our more formalised school activities – number and letter work etc. (Last months activities are here.) We are making the most of the next 2 months before baby number 7 is due to work on preschool skills. Once bub arrives these activities will be changed to more play based choices and able to be used independently, rather than requiring my direct supervision. Please keep in mind that I am not suggesting all 4 year olds are ready for this level of work. I work steadily with my children, moving ahead as far as their understanding and development allows. I do not stick to teaching skills by grade or age, but rather follow each child’s development as far as they are able. This changes from child to child and the ideas here are more traditionally at pre-primary to year 1 school level. It is more important that children learn to sit and concentrate, follow instructions, learn Godly character etc. than a list of rote learning or academic skills. The twins happen to be able to cope with these activities and show an interest in them so I will go with that for now. If it becomes burdensome and onerous for them, we will take a break. IMG_0097 
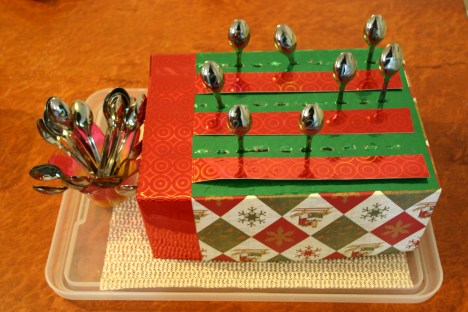
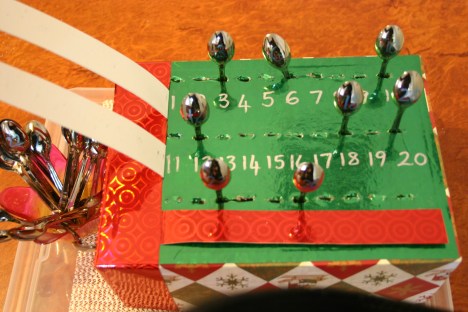
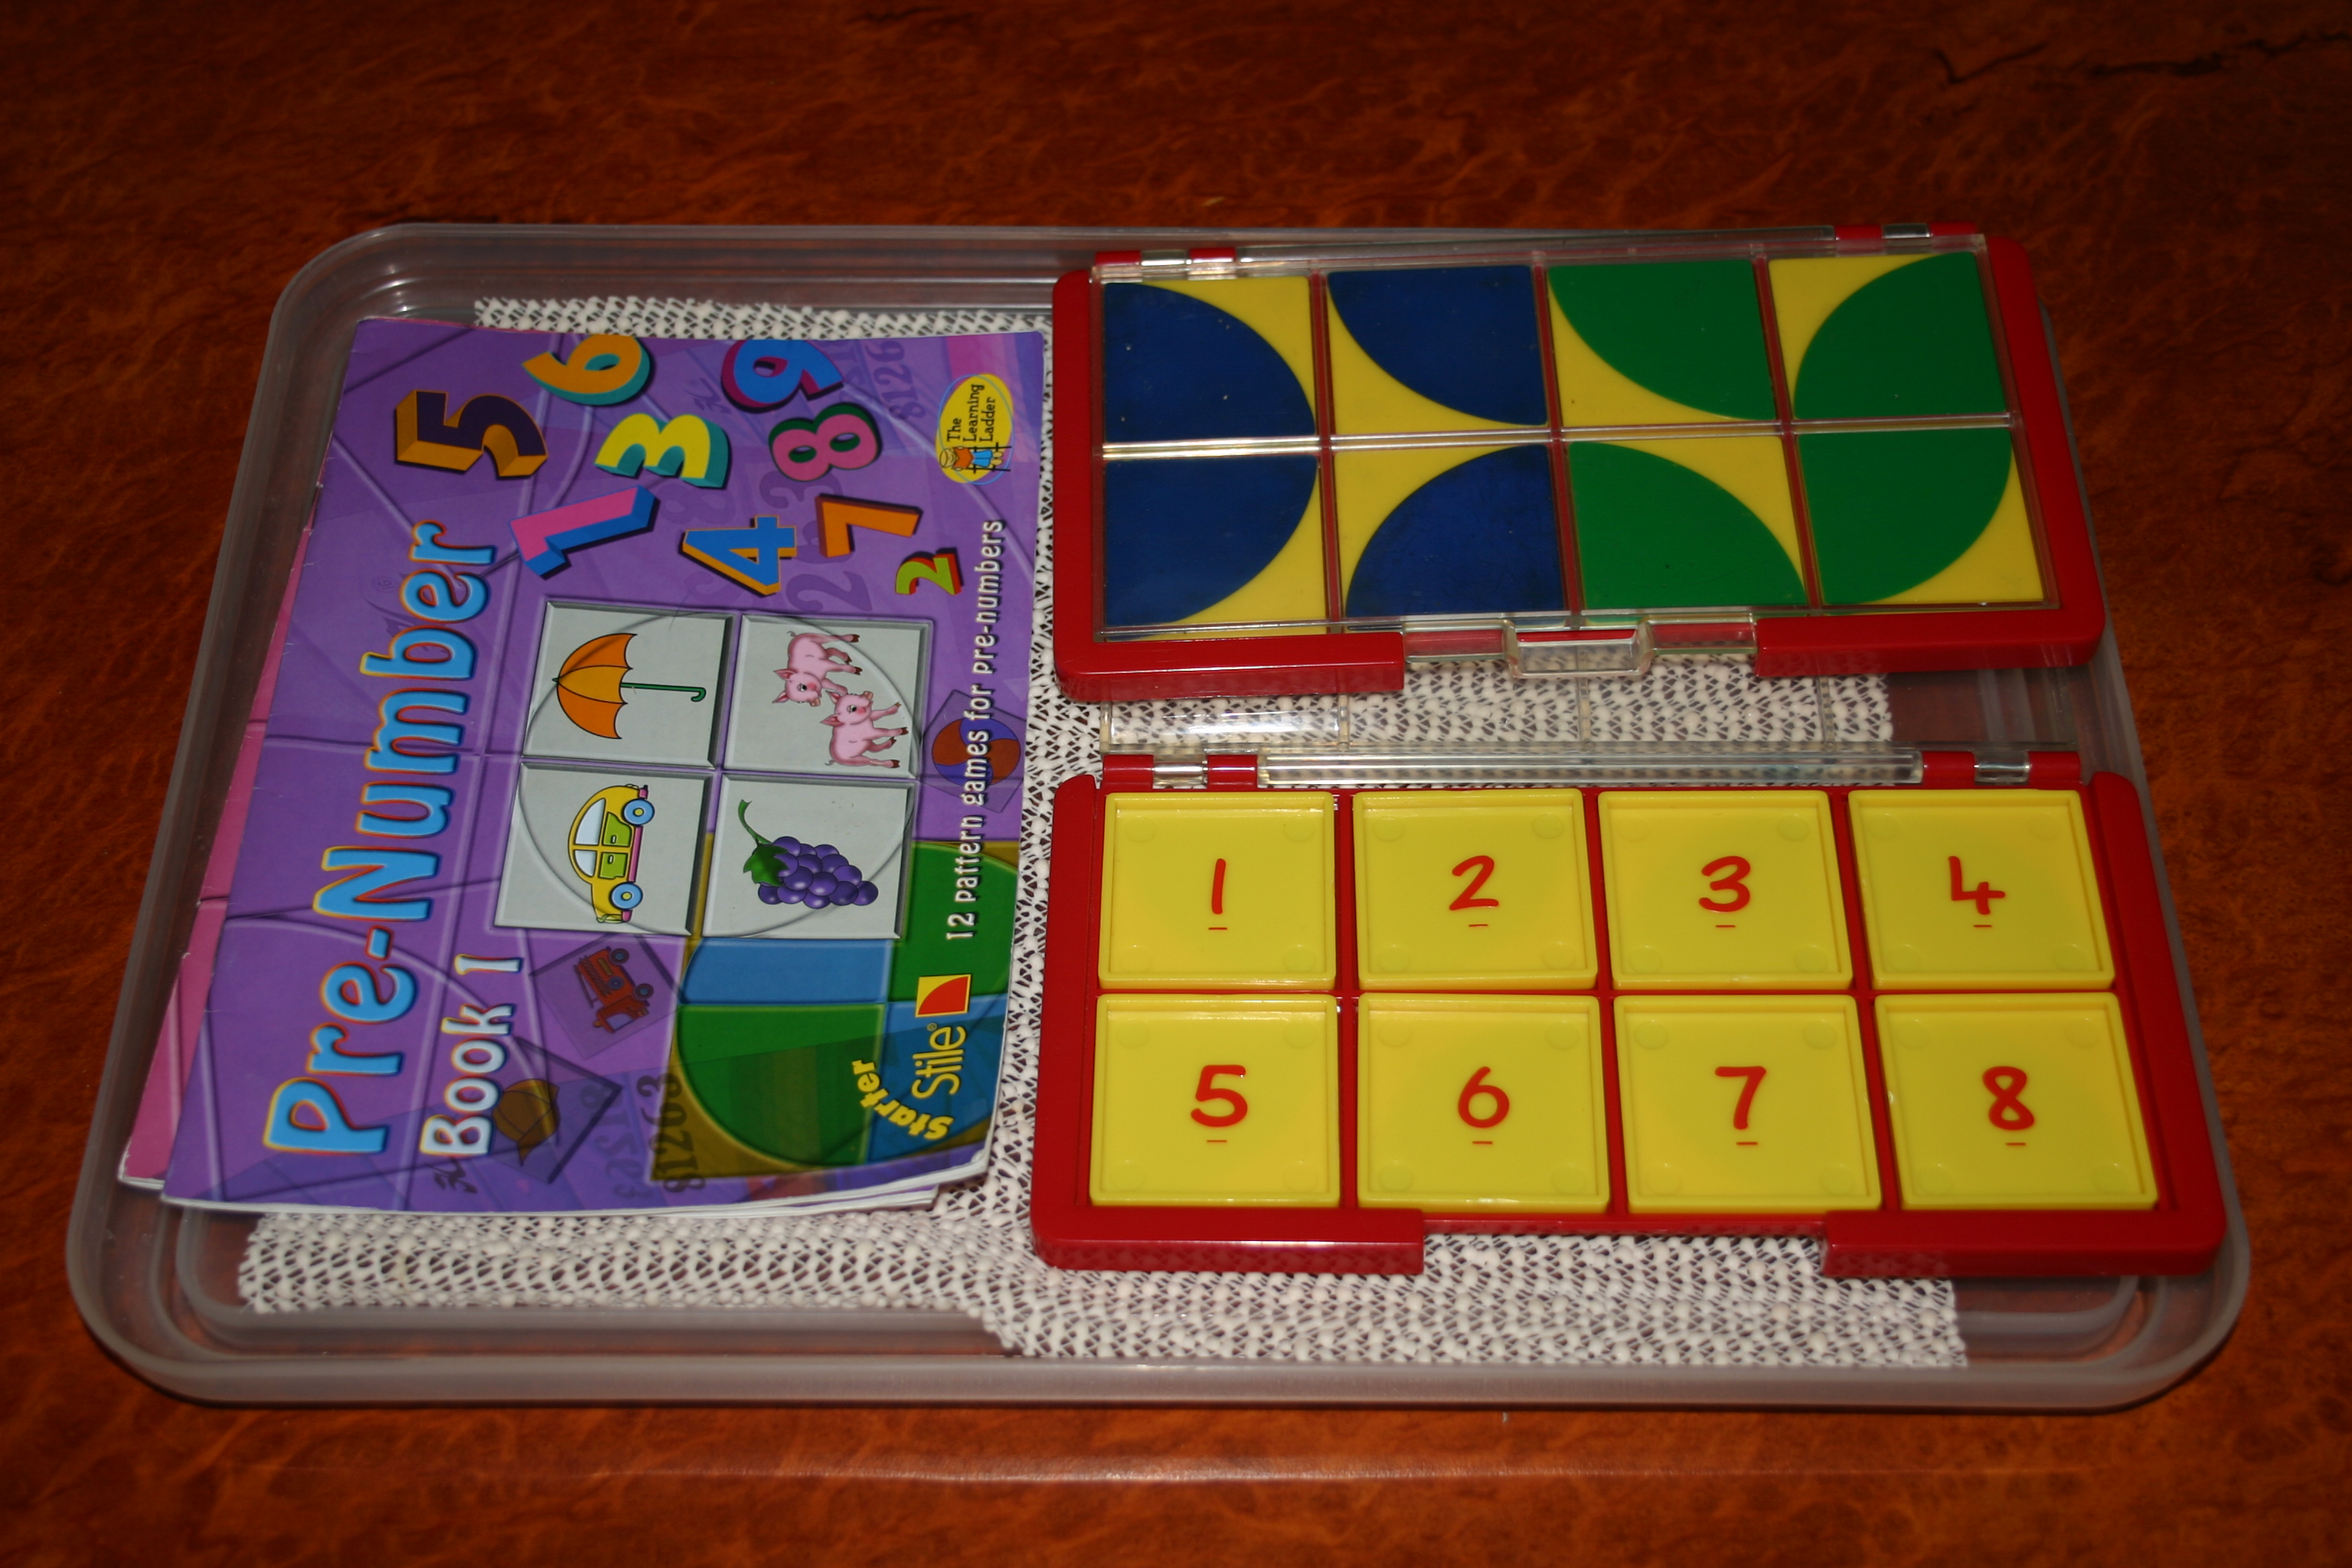
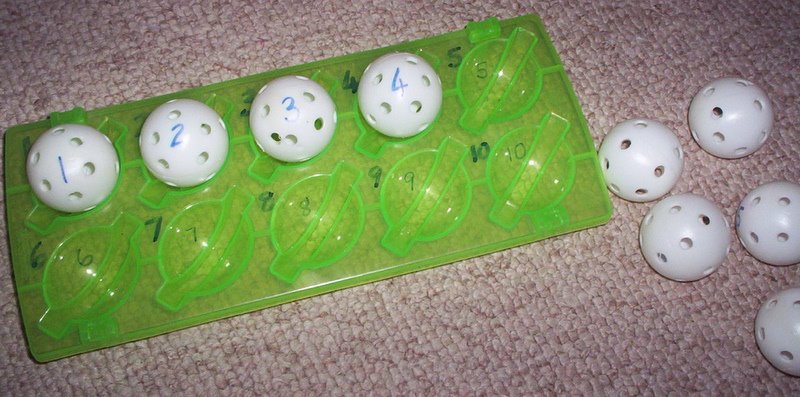
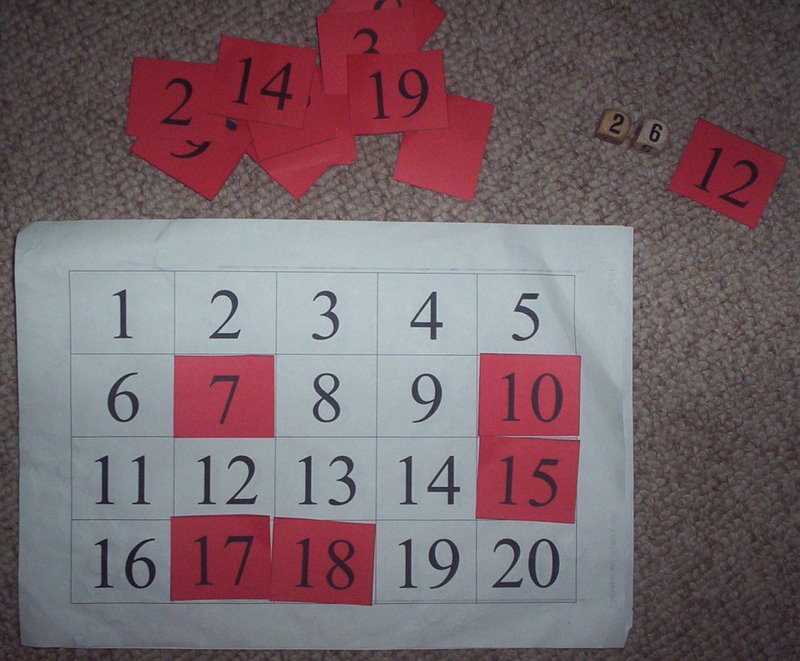
I found these plastic tiles at an op shop. I have no idea what their original use was, however they link together nicely for this number sequencing activity. Having 3 colours meant I could quickly separate out only the 1 to 10 blocks, then add the 11 to 20 and finally 21 to 30 as they were able to complete the “path” as we called it. I provided a coloured number strip to use as a guide while they were still learning the numeral sequence. IMG_0104 IMG_0099 This is the same activity using a different style of block. These came from a build-your-own 3D desk calendar I bought for $1. You could also purchase Coko bricks which are almost identical and can be used on Duplo base boards. The twins have learnt to count to 30 out loud and have fairly good one-to-one correspondence so we are now working on recognising and sequencing numerals to 30. IMG_0105 IMG_0119 We use Mathusee in the early years (moving on to Saxon math later) but as my preschoolers are not ready to do a lot of written work I used the sequence of skills from the Primer book to develop a bunch of hands-on activities. These block manipulatives also come from the Mathusee resources. In the example above, the children need to recognise the numeral and count to find the right block to place above it. Click  HERE for a FREE PRINTABLE. IMG_0120 IMG_0121 
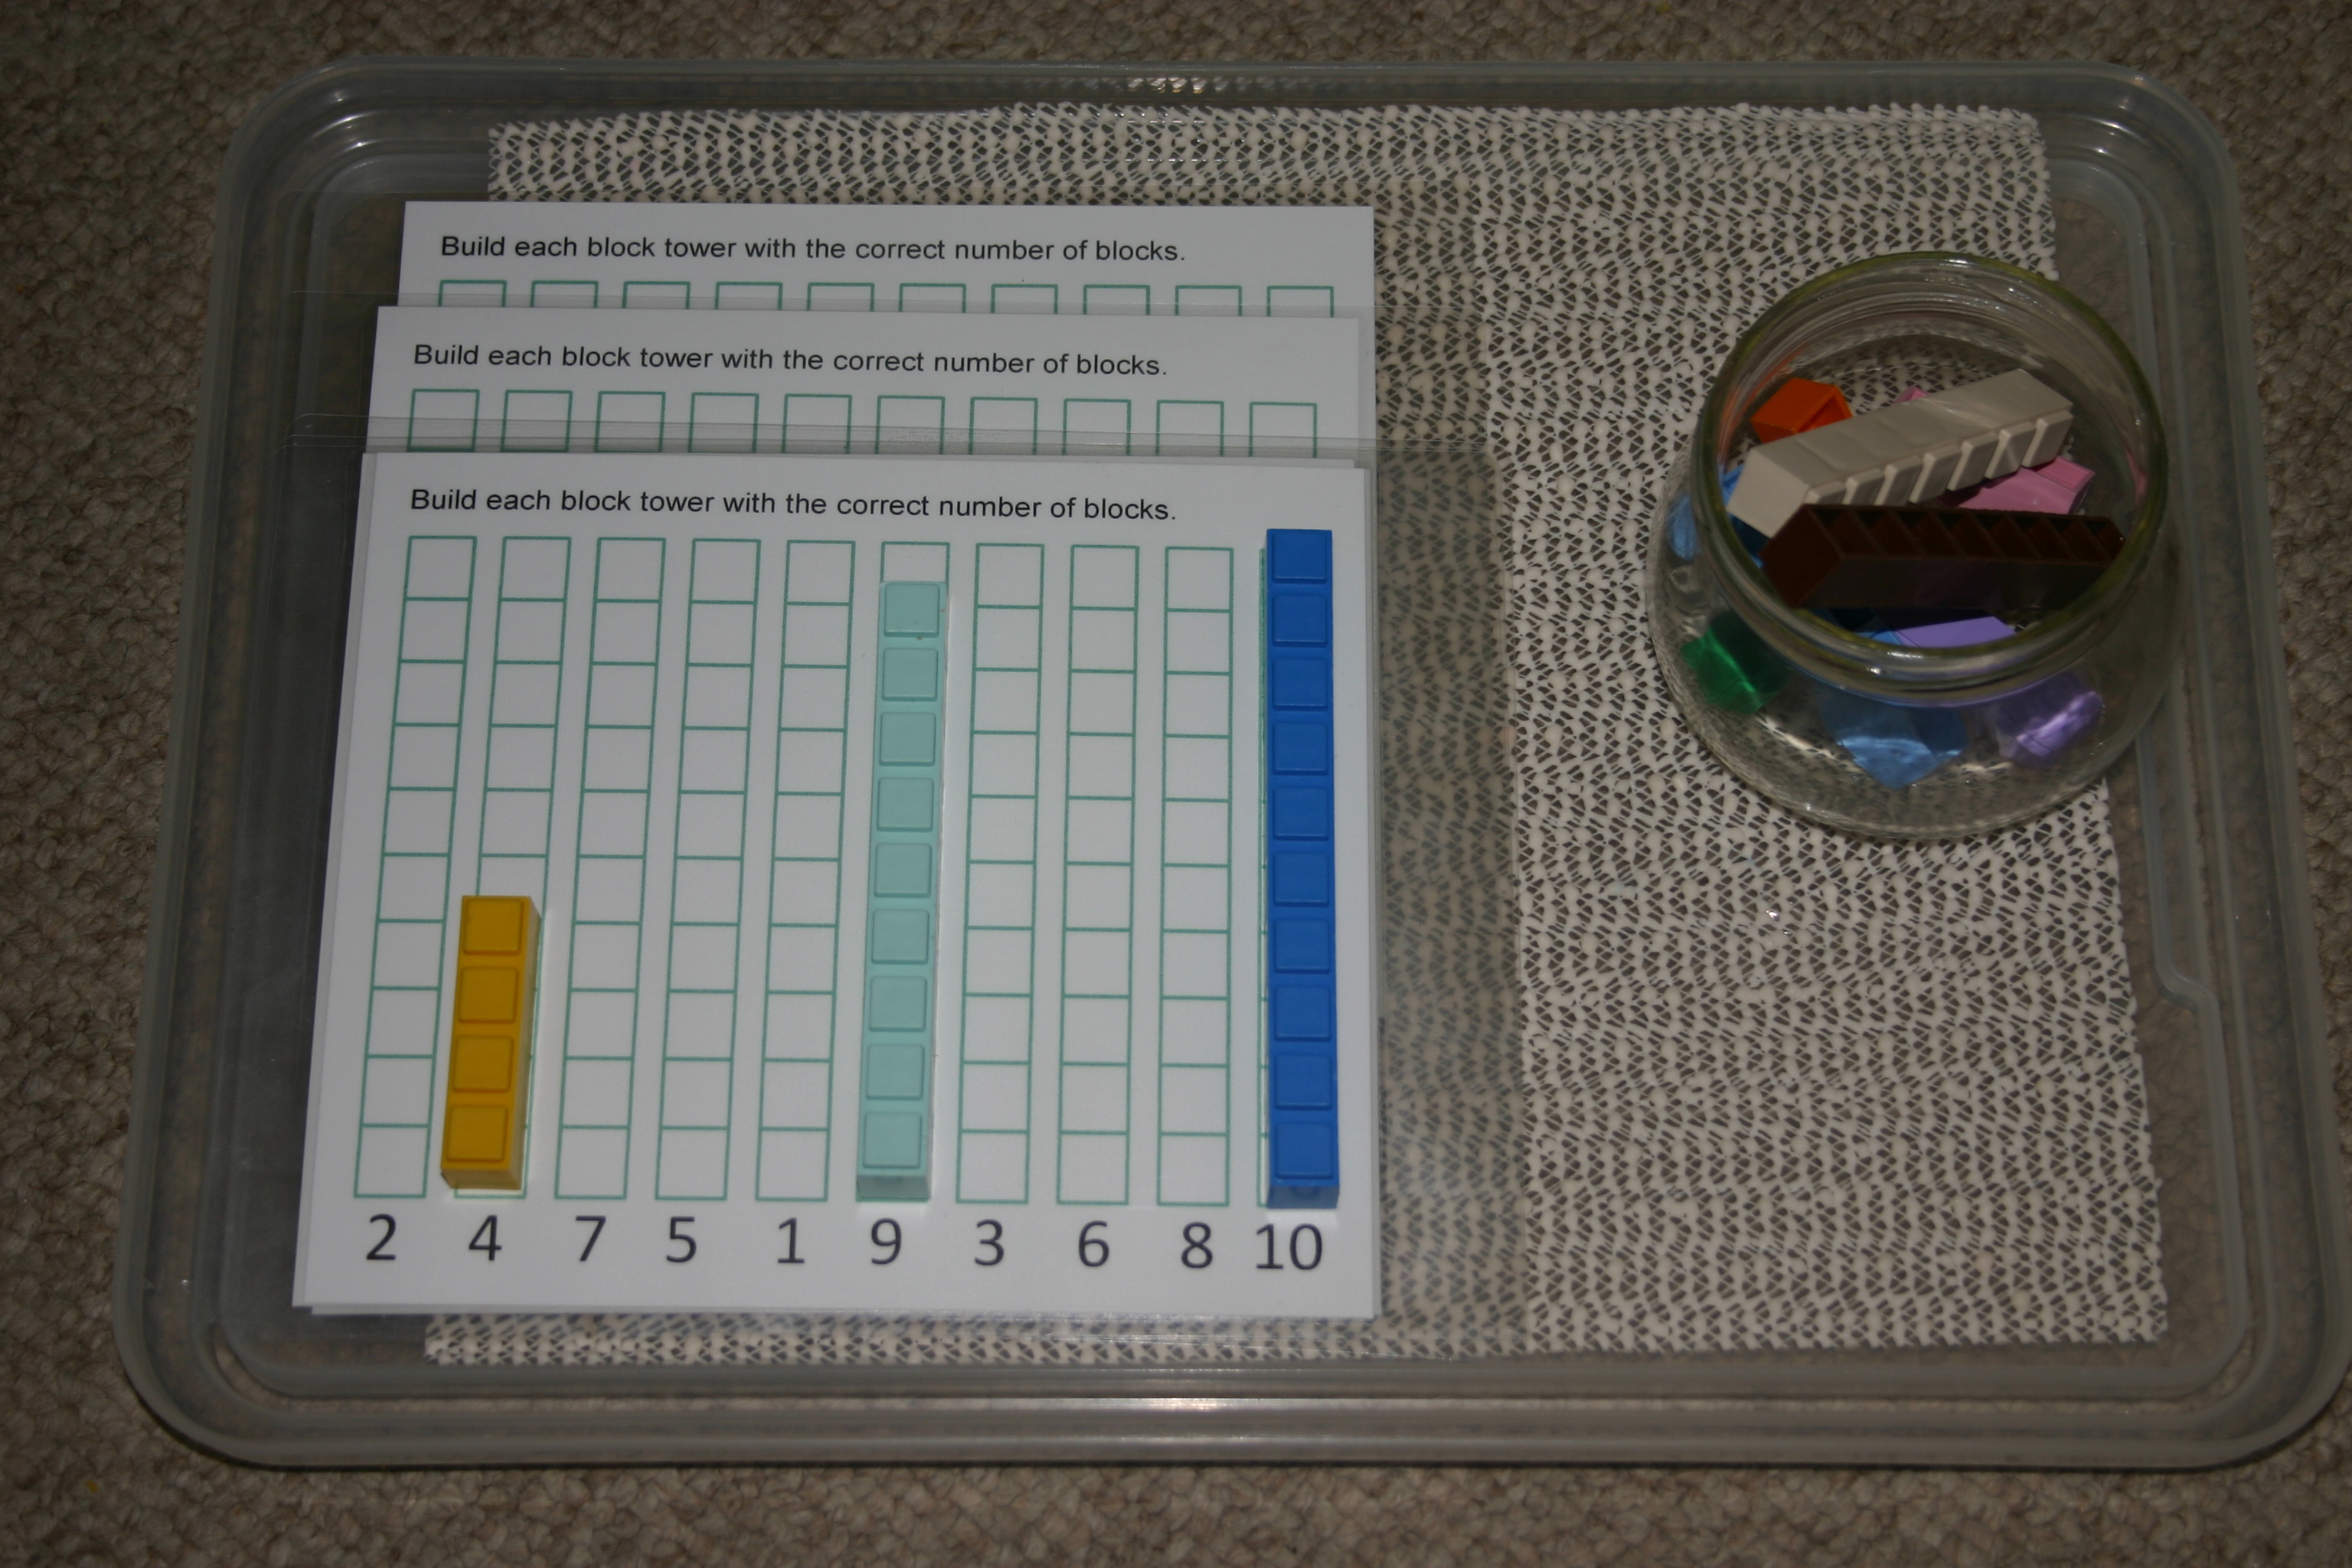
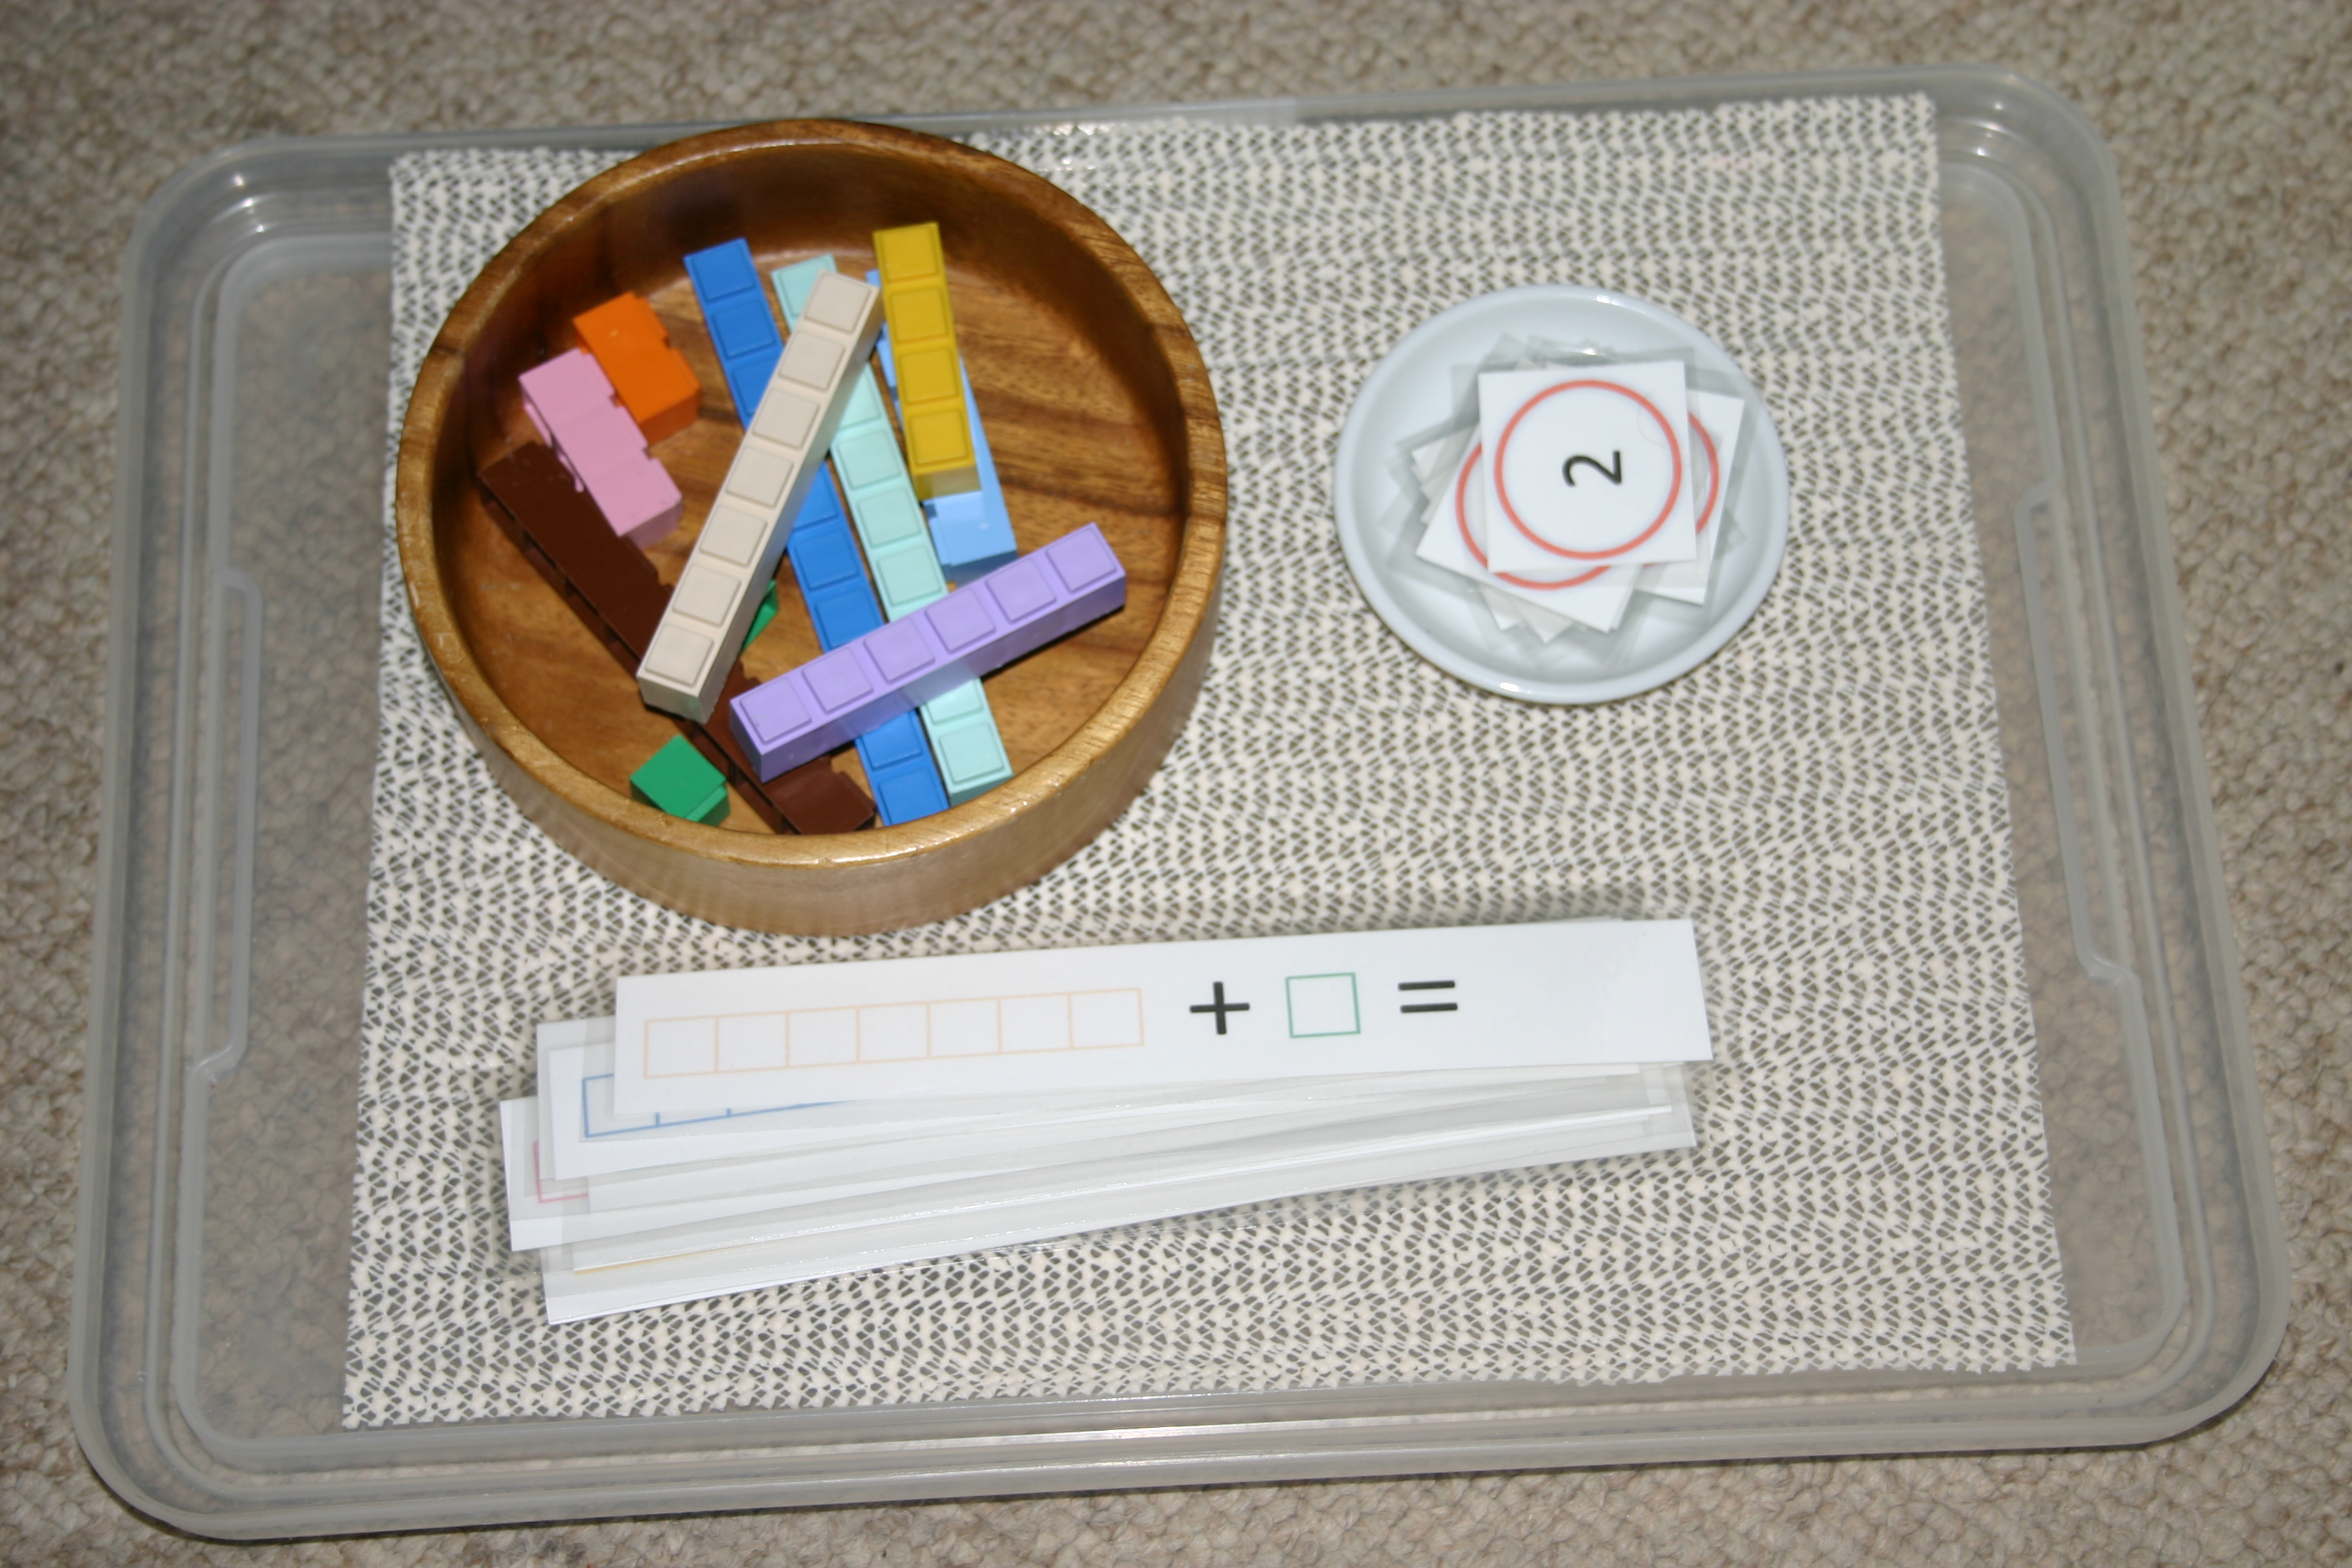
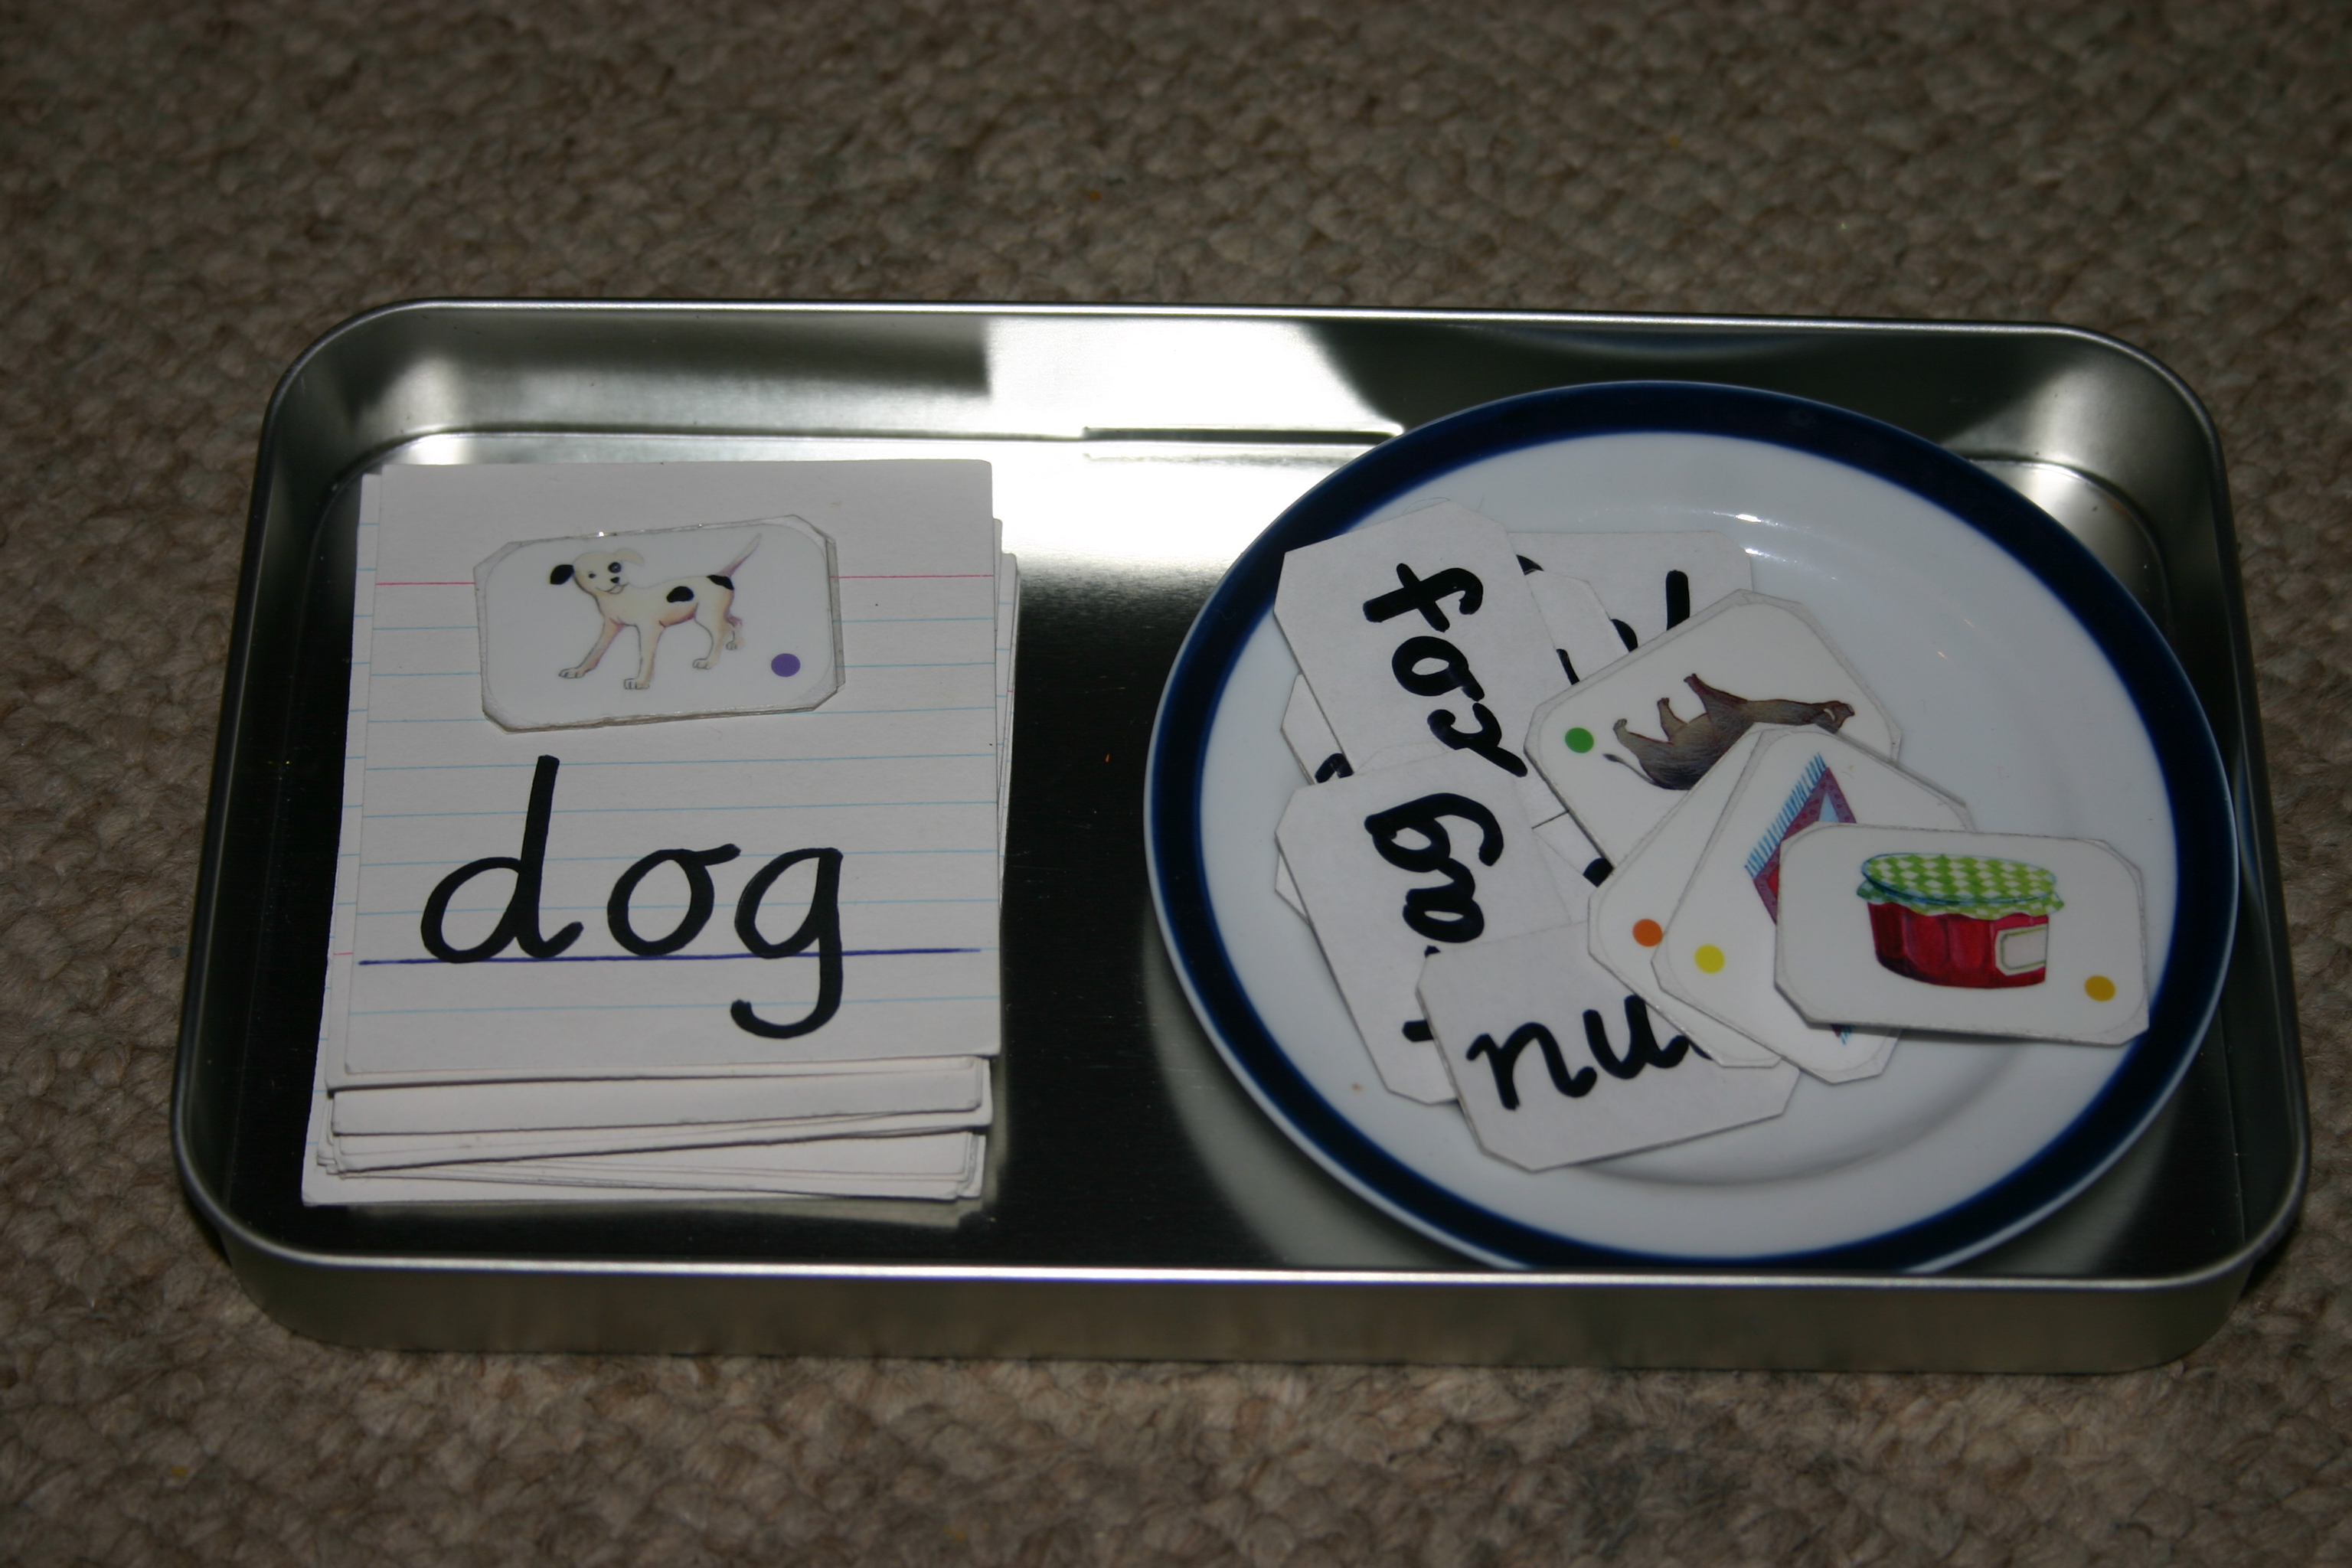
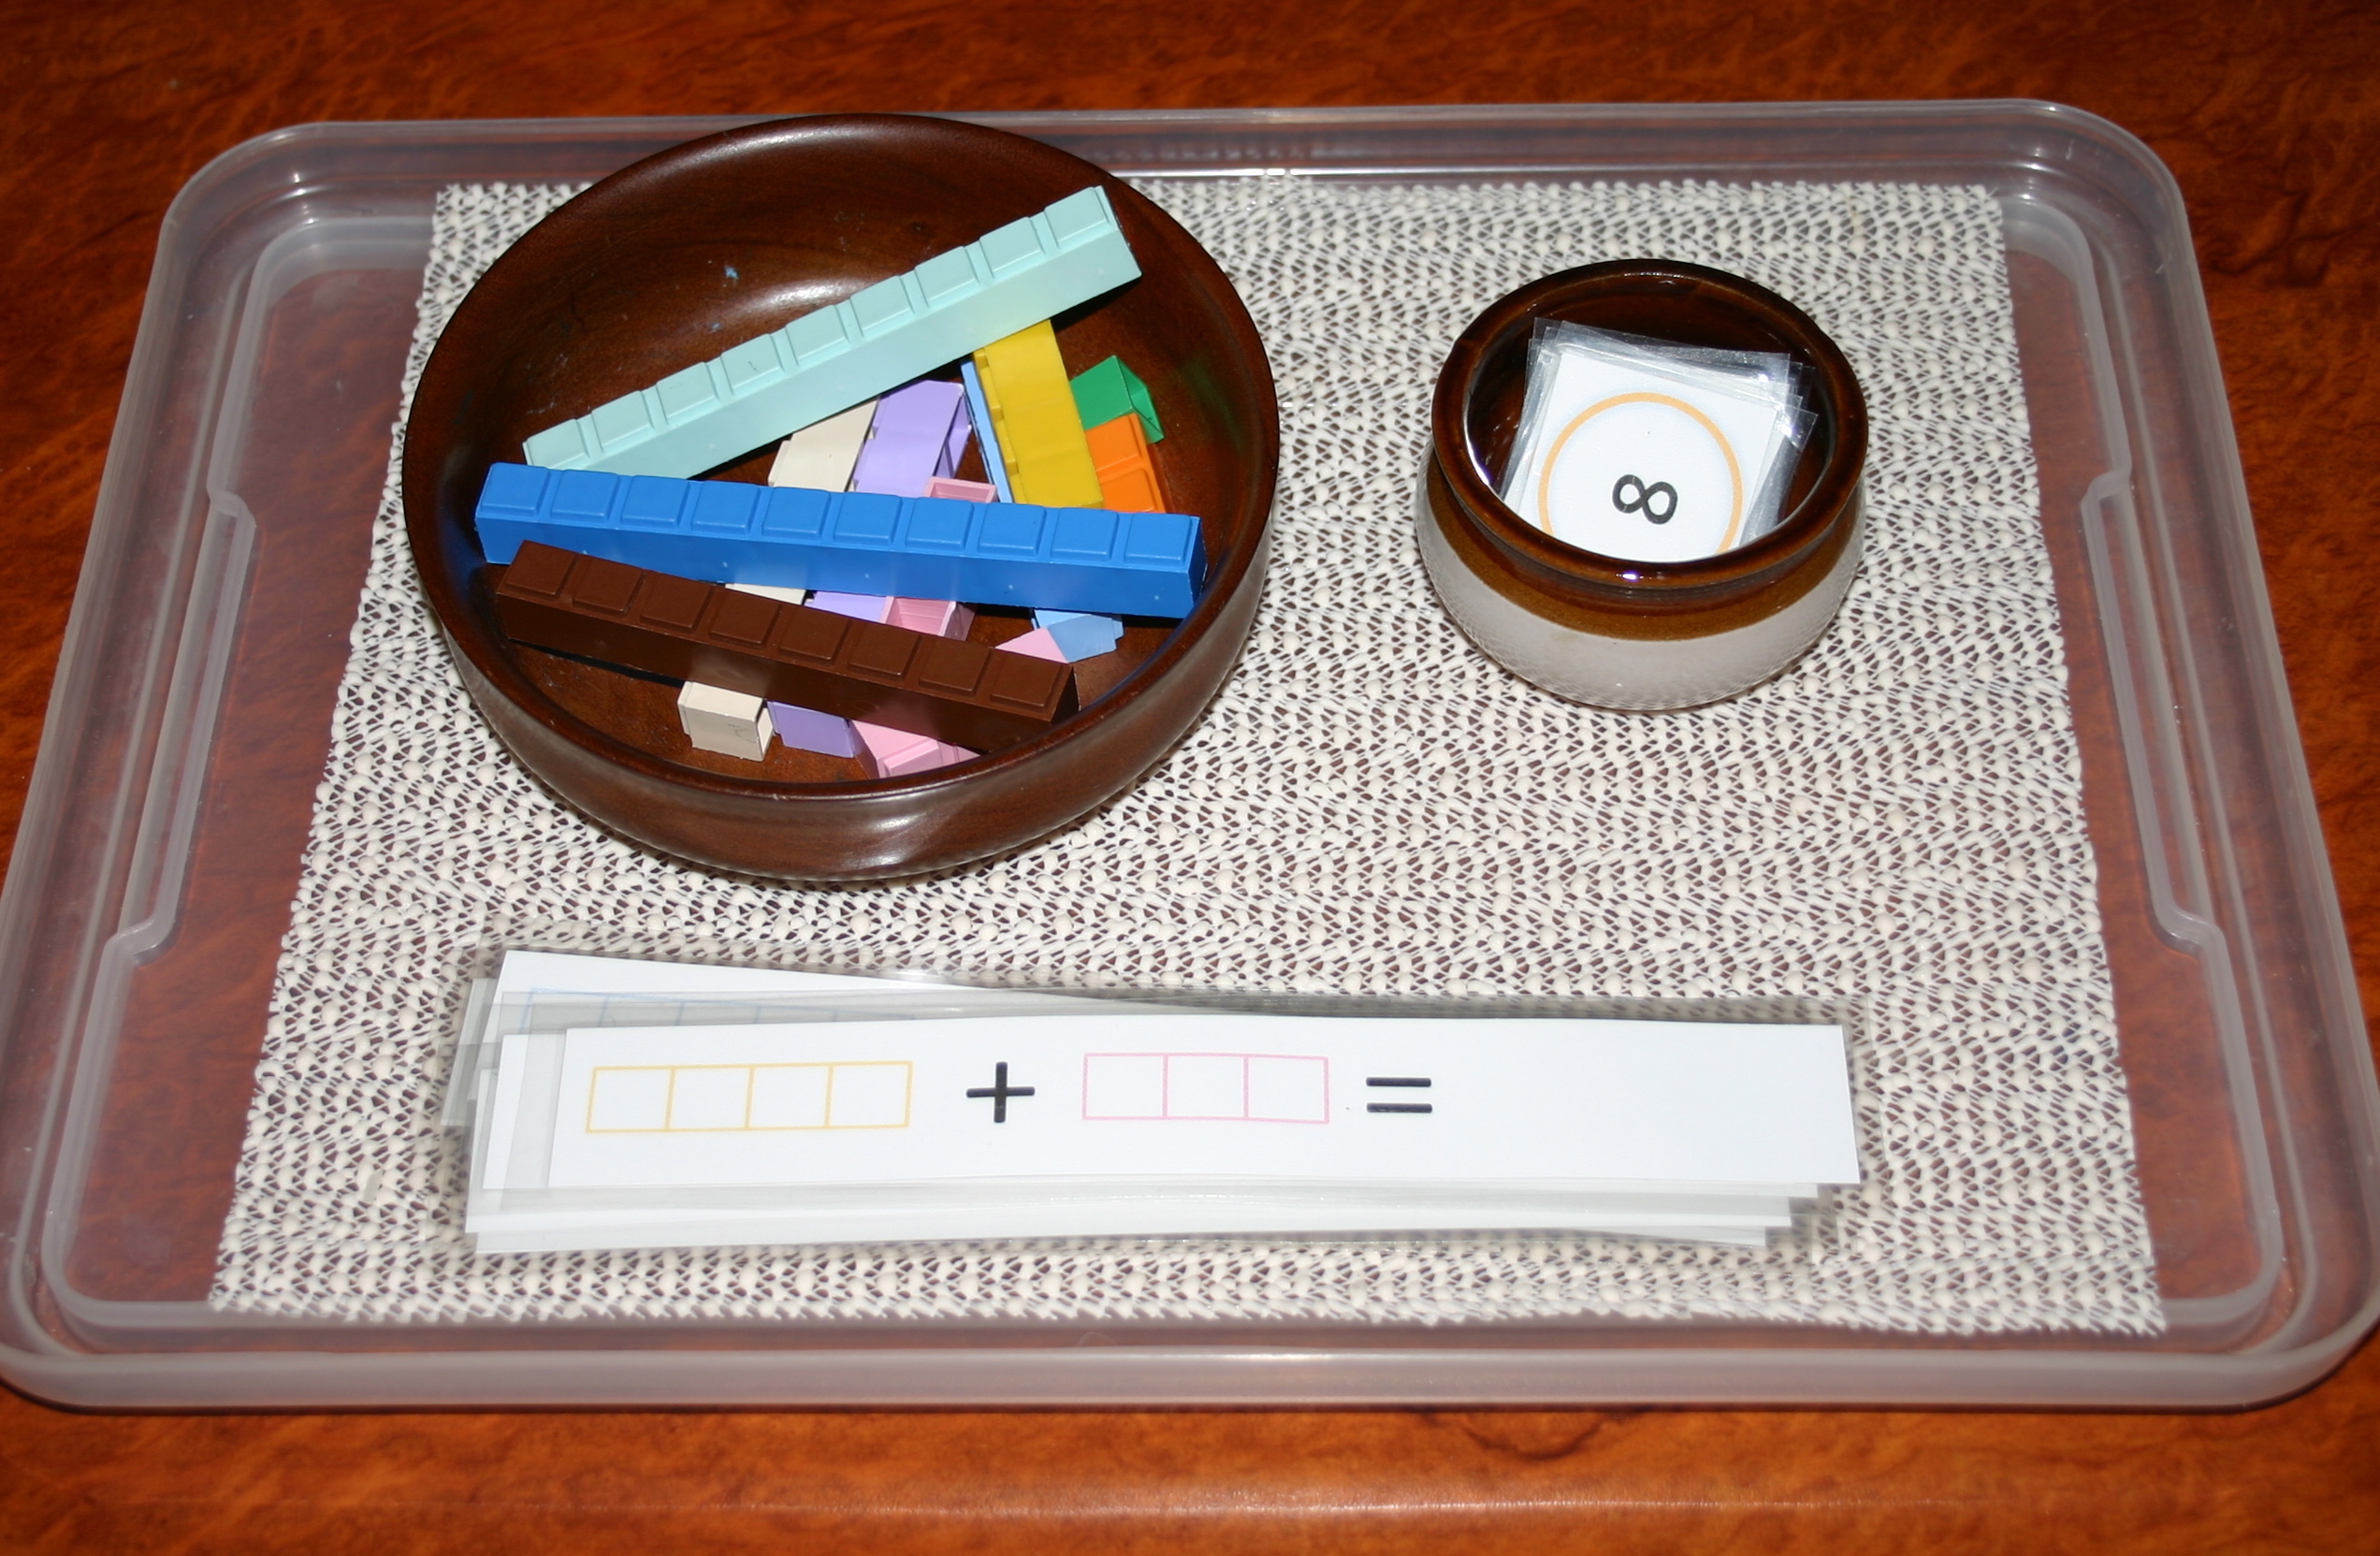
Another Mathusee based activity; basic addition facts using the manipulatives and numeral answers. The number strips I have out at the moment are plus 1 and plus 2. Learning basic addition facts now will help with more difficult mathematical skills later on. Click the links below for FREE PRINTABLES: Plus  1 Plus 2 Plus 3 Plus 4 Plus 5 Plus 6 Plus 7 Plus 8 Plus 9 Plus 10 IMG_0122 We have moved on from letter names and sounds and identifying initial sounds to 3 letter words. These are Coko bricks and each board has groups of consonant vowel consonant (CVC) words with the same endings to keep it simple. The children carefully sound out the words and find the matching bricks to make them. IMG_0123 IMG_0124 The back side of the card has the answers to make the activity self-checking. No printable for this one sorry – the pictures are not mine! IMG_0125 These alphabet sounds books were simply a book form of flashcard. We use them to review the letter names and sounds and sticker the letters they know. I found the school font I wanted to use online, enlarged it and printed them out. IMG_0126 This is an initial sounds activity. Free printable circle pictures and letters are available from this blog. I made a simple backing page to use them in a slightly different way than the original author intended. The sets are sorted into 3 or 4 initial sounds in each envelope to keep it simple and avoid having the whole alphabet mixed up together. For a FREE PRINTABLE of my circles backing page click here. IMG_0127 IMG_0128 I made these consonant-vowel-consonant (CVC) 3 letter word matching cards using pictures from cheap sticker books. The children choose a picture and find the matching word card before turning the picture over to check their answer on the back. IMG_0129 A basic counting and/or colour matching activity from an activity bag swap I posted on a while back. The concept is far too easy for the twins now but I wanted something for fine motor skills so popped this one out again. The idea is to slide the correct number of paperclips onto each foot after ordering the numerals from 1 to 5. You may also require them to match the colours at the same time.

Hand commands and missionary minded children

IMG_8802

It has come to my attention recently that we apparently have been reading too many heroic missionary stories that end in martyrdom or less than idyllic life situations. My three older children emphatically stated that they “never wanted to be missionaries!” and “Why would anyone want to?” Never mind what God’s plans for them were….

I decided to address this less than positive attitude by commencing the 40 day Mission minded family challenge by Ann Dunagan. We watch a 5 minute YouTube clip each morning that includes a quick geography lesson on locating countries around the world, some inspirational quotes by missionaries, a couple of thoughts from Ann herself and a related bible verse. While the quality of the film is less than professional, what she has to say is worthwhile listening to and has been a great springboard for mission related discussions. She offers a daily missionary challenge for you to do as each segment concludes to start you on the path to becoming more missionary minded.

After the first session, I printed out a free geography quiz and made a velcro label the continents and oceans activity and the eldest 3 had those memorized in a couple of days. We spent half an hour or so watching clips about the floating Mercy Hospital Ship and the amazing work they do around the world and got them all fired up about medical missionary work. Interestingly, this was followed by a couple of days of outdoor time when all the children decided to play “Mercy ship” in the back yard and doctored each other, complete with making the patients line up to be treated!

IMG_8805

I printed out the ocean and continent maps (one blank, one control map) and laminated them before adding velcro to the labels. In 5 minutes a day, with minimal effort, the children had the continents and oceans memorised. Kids love velcro!!

Day 6 to 10 has seen us learn Ann’s “Hand Commands” for the ten commandments. Genius!! I thought Ray Comfort’s visual number version on YouTube was brilliant (and it is) but you always have your hands with you and these are even better! While the children already had the 10 commandments down after watching Comfort’s video a couple of times, Dunagan’s Hand Commands had them practicing the moves and all ready to share them with others. Definitely worth a look. There is a written explanation here or watch the 5 clips from day 6  (the first screen and voice-over says day 11 but it is actually day 6 ) to day 10 to see it in action. I recommend the live recording because the movements, especially for number 8, are very clever.

I am not sure what the next 30 days of the challenge will have us doing, but the children’s attitude has already shown a great improvement.

Montessori multiplication trays: Hands-on mathematics

multiplication board

Wooden peg-board (the kind you use to hang tools from in the garage) is a cheap and simple alternative to purchasing a multiplication board.

Continuing on with my mathematics tray ideas this week (introduction and addition trays here, subtraction trays here), here are some multiplication ideas for learning times tables. We made our own homemade Montessori multiplication board using pegboard wood for a cheap alternative. For another easier method using a rubber bath mat, see this post. While the Montessori multiplication boards are an excellent idea, my children found it quite tedious placing the beads into each little hole every time, preferring to use the blocks from our Math-U-See sets, MAB’s or other manipulatives instead.

Whichever way you choose to present multiplication, make it visual, tactile and concrete to begin with, before moving to abstract concepts. The following tray ideas are for children who already understand the concept of multiplication and simply need some more practise of their basic facts (their times tables) in order to commit them to memory.

times table popstick start finish game

Threading beads onto pipe cleaners (bend the ends to keep the beads from slipping off) is a home-made alternative to the Montessori bead materials. They become the manipulatives, with the multiplication problems written on popsicle sticks. The popsticks are laid out, making sure that the word “start” and all the answer sides are upright. The child turns over the “start” stick and uses the bead strings to solve the problem on the other side. They find the answer to that problem on the next stick and turn it over to reveal a new sum on the other side and continue on in the same way until they reach the “finish” stick. If at any time they turn over the finish stick before they have completed all the other sticks, it indicates they have made an error along the way.

mab multiplication

Wooden MAB’s (multi-based arithmetic blocks) are the “old fashioned” mathematics manipulative that I grew up with. They can be used in place of bead chains for many math concepts. Here they are set out for learning the 10 times table (multiplying by 10’s.) The sum is on the left and the small circles show a running total, with the large circle answer at the end of the chain. A small pad is included for recording the answers.

count by 10s MABs

These plates are actually set up for skip counting in the photograph, however with the addition of some multiplication problems, lend themselves very well to practising times tables.

icecream lid popstick 9 times table

Popsicle sticks with answers are matched to multiplication problems on an icecream container lid.

egg carton 8 times table

Popsicle sticks with the problem are slid into slots with matching answers on the egg carton.

multiplication times table puzzle

A cheap (yet difficult) puzzle was a fun way to practise. Answers are written on the back board to match the puzzle piece with the corresponding problem. The puzzle must be difficult enough that the child cannot easily cheat by just following the picture, rather than working out the sums. (Not that any of your children would ever do that!!)

white ball to iceblock tray match 1 to 10

Plastic balls with problems are matched to the answers in an iceblock tray.

wood peg on cont 7 table

Pegs with problems are pegged on to the answer segment on the container, which doubles as a storage place.

mixed operation bingo

Dice are thrown (you need 3) to create any combination of addition, subtraction or multiplication problem and the answer is covered on the board. The idea is to continue until all answer squares have been covered. This is for children who already have a fairly good mastery of their basic number facts and tables.

4 times table multipication jewel cont

Each square container holds 4 little plastic shot glasses for practising the 4 times table. Jewels are counted into each glass and totalled to find the answers.

pattipan in box 4 times tables

A plastic lunchbox filled with pattipan answers to match problems on circle.

castle flag multiplication

The correct number of flags are inserted into the castles, with the castles showing how many groups.

pink plate plastic pegs 6 times

Pegs are slid on to the matching answers on the paper plates. A manipulative is needed for working out the problems unless the child is able to complete them mentally.

ping pong ball egg tray 5 times table

Ping pong ball problems are matched to the answers in an egg holder from the fridge.

Montessori subtraction trays: Hands-on mathematics

subtraction tray IMG_8368

These Montessori style hand-on subtraction activity ideas are great for preschoolers and young children who need plenty of experience with concrete materials to consolidate basic mathematical skills. (See my last post for more info.)

As with the addition trays, the subtraction facts that  the child has already memorised are added to the screw-top jar to provide a visual indicator of their progress.

Initially, the subtraction problems are split into sets; subtract 0, subtract 1, subtract 2 and so on and only 1 set is out at a time.  Once they know the sets fairly well individually, we combine the lot, taking out the ones they have mastered and working on what is left. As with addition, learning to take away 0, 1, 2, and 10  is very easy, so starting with these gives the child a boost of confidence as they quickly master the first sets, filling that jar almost immediately.

sub tray set out IMG_8371

The subtraction materials are set out as above. The first and last plate are deliberately different from the second to provide a visual reminder of the relationship between the two. Subtraction must be done in order (numbers are not interchangeable as they are for addition and multiplication problems) so the child first counts out the number of objects they are starting with into the first plate. The smaller plate shows what has been taken away (removed, subtracted etc.) and what is left on the first plate is scooped over to the final plate, providing the answer.

When the novelty of the plate tray wears off, I present the subtraction problems the child has not mastered in different formats to provide extra practise and revive interest in the activity.

icecream cont sub pegging

Subtraction problems on pegs are pegged onto the side of the container with the correct answer. The counters are the manipulative. Provide more than one container or a multi-sided container if you want a broader scope of answers.

Cinderella's slipper subtraction

These subtraction cards are a set from Kmart that we were given. A dry erase marker can be used to mark the answers on the cards. The “glass” slippers are wedding favours. My girls love this activity just because they get to handle the tiny shoes! An attractive material will draw them in every time. Add an interesting story to the tray (How many spare slippers Cinderella keeps in her closet?) and you will have them begging to have a go.

bead string subtraction

The same subtraction card set paired with any manipulative of your choice gives you a fresh “new” activity. This time the children were doing the problems in their heads and finding the correct bead string for the answers – good for those who find writing a chore. There is exactly the right number of bead strings so if the strings do not match the last cards this alerts the child to an error that they can find and address.

It doesn’t take too much extra time or effort to keep learning engaging and enjoyable. Have a look around your house or check out your local discount variety store for a couple of different kinds of manipulatives and you are on your way.

Posts you may find useful:

List of useful materials to collect and buy for hands-on tray activities  

Building focussing and concentrating skills in toddlers

Workboxes – homeschooling multiple ages

Surviving new babies, sick kids and interruptions 

Multiplication: Learning your times tables

Most of us will remember the days of practising our times tables over and over again until they came without a  second thought. As much as children often detest learning this skill it is nonetheless a very important mathematical foundation that will underlay so many of the more difficult maths concepts later on. If these simple multiplication equations are not mastered it will slow progress and make maths just that little bit harder.

With his in mind, here are some activities to drill the times tables that make it just a little bit more fun and will be especially helpful to those kinesthetic learners who need the hands-on experience to really lock these facts into their memories. They can be used as workjobs, shoebox tasks, Montessori style tray activities, work stations or simply as part of your every day maths programme.

This is an egg holding tray from my refrigerator with a cheap set of plastic ping-pong balls from the $2 shop. The multiplication problem is written on each ball with the answers in each circle on a piece of card taped to the back. The balls are simply matched up to the correct answer. (Children usually have no problem with 0, 1 or 10 times any number, so if there are not enough spaces I leave these equations out of the set.)

A paper plate has the answers written around the edge with multiplication problems slid into the end of plastic pegs. Children work out the sum and slide the peg on to the correct place.

The 7 times table is written onto wooden pegs with the answers on coloured contact stuck around the edge of a plastic container. Pegs are stored in the container when the activity is complete.

Small slots are cut into the top of each egg carton segment with the answers to the 8 times table written on each. Fat shaped popsticks (paddle-pops) have the sums written on each and are poked into the corresponding hole. The last segment has a larger hole to place al the sticks when the activity is complete.

Popsticks with answers are matched to the 9 times table written on an icecream container lid.

An empty container (lunchbox etc.) plus some pattipans and card circles are all that is needed for this activity. The patti-pans have the answers and the card circles have the 4 times table written on them.

Rainy day activities: Balls and stockings

Ahh, the first rains of winter have hit. Easter as usual has suddenly turned cool and I must dig out the winter clothes and have a trying on and handing down session as the children’s little goose-pimpled legs are freezing.  While I quite like the rain (especially if I am curled up somewhere warm with a good book to read) it brings with it its own challenges for a household full of energetic children. What do you do with them when it’s too wet to go outside and all “sitting and concentrating” capacity is gone?

Time for the stocking balls. We are lucky enough to have a large patio area out the back that gives us a reasonable amount of play space under cover. I gather up a bunch of old pantyhose, stockings or tights and slide a tennis ball inside one leg before tying them to the cross beams of the patio. I hang a couple at a time so several children can play at once and have them at varying heights to cater for a range of sizes. They also need to be well clear from each other and preferably out of walk ways or those toddlers will almost definitely end up with someone’s bat in the face.

We use bats from the totem tennis set, tea-ball bats and whatever else we have at the time and everyone whacks away as hard as they like. (A sturdy cardboard tube is a good option for those not so coordinated toddlers.) Boys in particular seem to like this activity, using up energy and having a good time smashing away. The stockings do tend to stretch after a while so perhaps hanging them a little higher than you actually want them would be useful and yes, the balls will eventually break through the stocking. Mine have lasted for several weeks at a time and can simply be thrown away and replaced when they wear out. An economical and easy to set up activity that will help to bring peace to my household this winter. Now, where are those stockings…

Copywork and narration ideas for the new school year.

The school year start is fast approaching and I am aiming to be extremely organised as we will be interrupted soon into it by the arrival of baby number 6. Everything needs to be sitting there, prepped and ready to go, so today’s thought processes revolve around Charlotte Mason style copywork and dictation for the oldest.

Depending on the age of the child, this year’s copywork and dictation will be a selection from the following:

At least one of my children is excited by brand new fresh workbooks and the opportunity to fill them with beautiful work. I remember the feeling of being given a brand new pad in Primary School and ruling up those fresh unblemished pages. Surely everyone gets at least a glimmer of excitement out of new school books? Stationary shops? Organisational systems?? Hmmm, perhaps that’s just me!

Teaching Toddlers to Cut

Thin card strips (about one inch) are a good first cutting experience. Parallel and diagonal lines can be added to the strips for a new challenge once random snipping has been mastered.

With older siblings to watch, the littlies are always very keen to cut. Rather than have them constantly nag me or try to grab those scissors and have a go on whatever is handy when I’m not looking, I prefer to spend some time and teach them to cut safely – under supervision! It is great for long stints of uninterrupted school time with older children while young ones are happily occupied on a purposeful and satisfying activity.

The stiffness of straws makes them easy to hold and cut. Cut straw pieces can be used for threading activities.

A good pair of child-sized scissors is important. Make sure that they have a larger hole in one side of the handle so the all of the child’s fingers can fit inside, rather than the kind that have two equal sized small handle holes. (See the pair in the photo.) I also buy proper scissors straight away, rather than safety scissors, simply because of the frustration children feel when scissors are not sharp enough to cut well. The initial paper based cutting experiences outlined here would be fine with safety scissors, but once they move on to the straws and other materials they may not be sharp enough.

Streamers are more difficult to cut because they do not stand stiffly out from the "holding hand."

Cutting strips should be about one inch wide so that the child can cut completely through the strip in one snip. Sliding scissors forward and making a second snip to cut through paper is a more difficult skill and should be introduced later. Show your child which hole is for the thumb and check that they continue to hold the scissors correctly with the blades facing away from them. Young children tend to turn their hands around, rather than the object they are cutting, which causes them to end up in all sorts of interesting and uncomfortable positions.

A new level of difficulty. Use cut beads for various craft projects later.

The first material to present is the easiest to cut – one inch strips of thin card stock. Regular paper is too thin and does not stand out stiffly from the child’s hand, flopping down and making it difficult to cut. Remind your child to keep moving their holding hand away from the scissors as they go.

Tinsel makes pretty off-cuts for craft projects. It is quite difficult to handle for beginner cutters though.

I usually set my cutting activities up in the same format (same tray with basket or two wooden bowls) so that once familiar with the task, there is no need to re-explain what to do when a new material is introduced. Scraps are caught in the empty bowl or basket and can be collected and used for art activities such as gluing or collage.

Curling ribbon is also quite difficult to cut because it curls! Add snippets to your collage or other crafty supplies.

When the first cutting experience is presented I demonstrate first, explain what they need to do, then supervise very closely for a time, until I am sure that the child has mastered holding the scissors correctly, points them away from their body, moves their holding hand while cutting, collects their scraps in the container provided and is generally using the scissors in a responsible manner. I am then able to relax my supervision a little and begin to vary the materials once interest in those already available is beginning to wane.

The photographs throughout this article are in a suggested order of difficulty. Stick with thin card strips until the skill is well mastered, moving to thin card strips with straight and diagonal lines to cut along, before introducing the other suggested materials. Moving too fast will simply result in frustration as the material proves too difficult for the child to manipulate and cut successfully. Other items (such as the animals pictured below) can be added to keep interest levels high. Following on from here, a variety of interesting papers, shapes and other materials can be presented, including those that require the child to slide the scissors along and make several cuts. Start with free cutting, straight lines, then curves and other shapes.

My toddlers love this activity. They focussed for an incredibly long time, cutting the streamers into food for the animals to eat. (The scissors should be presented on the tray with the blades facing away from the child.)