Magnetic pompoms

man  on fridge IMG_8447

Magnetic pompoms are a great idea for table time, highchair time, mat time, while travelling with children or any other time you would like a quiet activity for your toddlers or preschoolers.

Simply buy your pompoms and hot glue gun magnets on the back. I used the free flexible strip fridge magnets that come in the mail on the back of advertising.kissing man on fridge IMG_8450

For a sit down activity, use a small magnetic whiteboard, biscuit or cookie tray or any other magnetic surface. They could easily be adapted for sorting by colours and/or counting or simply combined to make creative pictures on the fridge as my daughter is doing in these photos. counting IMG_8285

My original plan was to use them with the multitude of “do-a-dot” pictures that can be found on the internet, so I printed out a stack and laminated them for durability. (These pictures have circles all over them that you can dot with bingo markers or stick on small stickers for a fine motor activity.) The fridge magnets however are not strong enough to hold the pompom on to the surface through the laminate so I am going to make a second set with stronger magnets for that purpose and leave these for free creating. pompom heart IMG_8284

Wooden bead and pipecleaner peg dolls for dollhouses

queen and baby IMG_8224After making our new dolls house furniture and our shoe box dolls houses, we needed some dolls to enjoy them. These examples are cheap and very easy to make and with a few simple materials, you can put together a whole family in a very short time. A glue gun really is necessary to ensure that the beads do not slide off again, although you may find a craft glue that would do the job.yellow mum and baby IMG_8226

For one doll you will need:

  • 1 long pipecleaner (or 2 regular pipecleaners)
  • 2 small beads for the hands and 2 larger beads for the feet
  • 1 large wooden bead for the head
  • hair of some kind (wool, lamp shade trim – see pic above)
  • scraps of fabric, felt, lace and other bibs and bobs for clothes

how to make a man IMG_8235Method:

  1. Cut your extra long pipe cleaner into 2 pieces; with a ratio of approximately one third to two thirds.
  2. Bend the smaller piece in half and twist the centre to secure. The centre becomes the neck so leave enough to glue the head onto later.
  3. Bend the larger piece in half and slide the neck of the smaller piece through the centre and twist to secure – this should give you a headless pipecleaner man shape (See pipecleaners above.) Give the body a few gentle twists and leave the legs free and open.mum and green baby IMG_8229
  4. Decide on your clothing. For men I folded the felt in half and cut wide pants, leaving the top joined with only a small hole to poke the pipecleaner body through. Shirts are made the same way – fold a piece of felt in half and cut the sleeves and shirt shape, leaving the top attached. Bend over to snip a small hole just big enough for the neck of the pipecleaners to stick through. mums and babies all IMG_8231
  5. For the ladies, I cut a full circle with a tiny hole in the middle for skirts and a V-shaped top with a small hole for the neck, leaving it joined along the top (As for the men’s shirts.)
  6. Put the pipe cleaner bodies into your clothes and hot glue them on.
  7. Glue on the bead hands, feet and heads.
  8. Add hair and any other fashion accessories you desire!

making babies all bits IMG_8222

I found the idea for the babies here. They are made using a similar method, with a small piece of wadding needed to stuff the sleeping bags. The head beads need to be the kind that are only partly drilled – that is the hole does not go all the way through. Otherwise, you will need to give your baby a beanie or something similar to cover the hole!

  1. Bend a short piece of pipecleaner in half and twist for the neck.
  2. Fold a piece of felt in half and cut the shoulders and sleeping bag shape, leaving the top joined.
  3. Cut a small hole to slide the neck of the pipecleaner through.
  4. Glue on the head and hand beads and down the sides of the sleeping bag, leaving an opening to stuff it with.
  5. Push the stuffing inside and glue the hole shut. Of course, you could sew these if you prefer. men on couch IMG_8266

You could make the dolls without faces to allow greater imaginative play scope (they are not stuck being “happy” all the time!) but my girls were adamant they wanted faces and in the end I gave in! I find that they are not constrained by the face I have drawn anyway.

Dolls houses in a shoebox

G's shoebox dolls house IMG_8279

Dolls houses in a shoebox are a wonderful travel activity, take away toy for holidays, table activity, quiet time or room play idea or highchair activity for younger children. They are very portable,  simple to make (these examples were created by my 5 1/2 and 8-year-old daughters) and the possibilities for open-ended imaginative play are endless. We will be making them with a group of girls for our 8 year old’s birthday party next month and with a little bit of preparation, they will be an easy craft to engage a group of young ladies for a couple of hours.c's shoebox dolls house IMG_8272

I will be adding some miniature food (novelty erasers from a discount variety store) plus a couple of ceramic ornaments to use in their little houses and the girls will create the furniture, make wooden peg doll babies (instructions in my next post) and decorate their rooms.mini dolls house furniture IMG_8275

The furniture is made from balsa wood hot glued together with beads for legs and felt pieces for cushions. We cut up cheap plastic bead necklaces to decorate the top of the chairs. A jar lid glued to a plastic shot glass and covered with a circle of fabric and ribbon forms the table. The mirror is a piece of CD surrounded by beads and glued to two shells as the base. The lamp is a small craft stick with a large wooden bead on top and a circle of card cut to form the lamp shade. It stands in a wooden circle that came with the sticks.

A printed clock face glued to a plastic disk, plus some old tiles from a board game with miniature photos inside, decorate the walls. Photos and magazine pictures of outdoor scenes give our rooms a view.mini dolls house furniture bottoms IMG_8278The girls were able to wall-paper and “carpet” their boxes, plus put together all the contents in a couple of hours and with a little more preparation our party guests should be able to complete theirs in an hour and a half.

Lots of fun for all ages and a lovely gift for any little girl.

Other posts you may like:

Wooden clothes peg dolls house furniture

My next post (still to come) on simple peg dolls from pipecleaners and wooden beads.

Wooden clothes-peg dolls house furniture

people around peg table IMG_8254I have had a great time creating a set of wooden clothes-peg furniture for a child’s dolls house this week. After searching the web for designs I combined pegs, popsicle sticks (coffee stirrers), large popsticks (tongue depressors), wooden blocks from a Jenga game and some colourful felt to create the furniture in these pictures. A hot glue gun made the job super fast and my 10-year-old son even made the table and helped with a couple of the other items.table chair back IMG_8258

I have included back and side view photos to make it easier to copy the designs if you would like to. table chairs upside down IMG_8257

Two pictures I used for the designs are here and here.men on couch IMG_8266

Felt doesn’t fray so I just cut the edges with pinking shears to make it look nice and glued it on as cushions and mattresses, plus a couple of extra blankets for the beds and rugs for the floor.couch back IMG_8269The cot (below) was the only piece that required any cutting for the green edges. A Stanley knife did the job but I wouldn’t want to cut a lot that way. A mini hacksaw or something similar would be better if you plan to cut a lot. My designs specifically revolved around not having to do any trimming to make them quick and easy.beds 1 IMG_8261

Hot glue guns are not very forgiving so some of the furniture is a little wonky! White wood glue would probably be better but I was after speed and convenience!bed bottoms IMG_8262

With a collection of basic craft equipment and a pattern to follow or an idea in mind, you could have a set of these done in a couple of hours tops. Enough to make any little girl happy. (And if my younger son’s reaction is anything to go by, they might keep your boys happy too!)bed ends IMG_8265

I’ll be posting in the next little while about how to make a dolls house in a box, as well as how to make a family of peg dolls. I’d love to hear your ideas – I could always add on to the set!

Sensory tub ideas for toddlers and preschoolers

sensory tub A teddies IMG_8196

Sensory tubs are great for mat time (blanket time) or as a table activity and are excellent for when you need to school older children, cook dinner, or during any other time when you need your little ones well occupied and absorbed in a worthwhile activity.

They are quick and easy to put together, cheap or free (depending on what you already have lying around the house) and can be used daily as part of your flexible routine for babies, toddlers, preschoolers and even older children. Obviously the materials you present will change according to the age of the child who will be playing with them, with safety always a factor for little ones who may put small items in their mouths.

There is no limit to what you can put into your tubs. Ideally the materials will be open-ended; that is they can be combined and used in a variety of ways.sensory tub trains IMG_8187

Younger toddlers do not have a well-developed imagination and therefore need more hands-on options, rather than pretend play materials. For example, in the trains tub above, I included a variety of scoops and containers to fill, transfer, tip and pour as well as the trains themselves. A young toddler may examine the trains before setting them aside in favour of transferring the stones from container to container. The older children may go straight for the trains and set up a complicated rail system with rocks delineating the tracks and the containers used as sheds for the trains. Another may decide to serve dinner on the silver pie tins or set up a picnic for the trains.

sensory tub trains JIMG_8193

I find that the tubs themselves are not large enough for the children to play within. They like to sort through, put aside what they are not using and generally spread out, so I use a blanket or sheet for them to play on. When play time is finished, the corners of the sheet are lifted up and all the materials can be quickly tipped straight back into the tub without a tedious pack-up session.

sensory box horses jewels IMG_8183

The older girls were practically drooling over this jewel and miniature pony tub as I was putting it together – usually a sure sign it will be well-loved by the younger children as well! Again, a variety of scoops, containers, bottles and boxes with sparkly jewel squares and pebbles. (The kind used in vases or to fill bowls – from the discount shop.)

sensory box sea IMG_8185

Blue and green gem stones, plastic sea animals, shells, bowl, spoons, scoops and empty pill boxes. This tub covers opening and closing skills, spooning, scooping, tipping, pouring (all transferring skills) and could be extended to sorting and categorizing as well as the pretend play options.

sensory tub S jewwels IMG_8192

My youngest daughter used the pony and jewel tub this morning for the first time. She carefully removed all the ponies and put them back in the box before making a picnic for her teddy bear and the 12 disciples (!) with the containers and jewels. The older girls (6 and 8) have already asked to use it later and tell me they plan to set the jewels up as food for the ponies. The beauty of open-ended, attractive materials is that they will appeal to a variety of ages. My 15 month old can barely restrain himself and wants to dive straight in whenever he sees these tubs out. Unfortunately the pieces are just too small for him to use safely.

sensory tubs A teddies IMG_8194

This is the 15 month old’s sensory “tub” this week. He loved it and used the scoop (a large measuring spoon) to transfer from the large basket to the small bowl, filled and stacked the metal cups and filled and tipped out the basket numerous times. Provide a container or two and something to put in and dump right back out again and it will always be a hit with anywhere from an 8 month to a 2-year-old. 12 to 18  month olds particularly love to fill and dump.

For a stack of ideas to fill your sensory tubs,see this post. Many of the other ideas I have posted as table activities, highchair activities or mat time activities would all work in a sensory tub. See pasta play and teddy food play as examples.

Montessori counting trays 1 to 5

It constantly amazes me how much we can get through in only 15-30 minutes of focussed time. I really encourage all those overwhelmed homeschool Mothers with multiple children that you only need a small window each day to teach basic reading, writing and arithmetic skills.

Montessori style hands-on activities make it enjoyable and interesting for the children and encourage them to be active participants and motivated learners. I have a good stockpile of useful materials collected and organised and in an hour I put together these counting activities for my 3 year olds who have just started doing some tray activities with me on a daily basis. For a more detailed idea of how to introduce these, see here.

counting 1 to 5 rocks IMG_8137

Natural materials like wood and rocks are very appealing. My older children love these rocks and all wanted a quick go of this tong transfer activity. The jewel beads are numbered 1 to 5 and placed in order around the segmented tray before the correct number of rocks are transferred into each section.
counting 1 to 5 doves IMG_8137

These doves and little heart boxes are wedding favours from our local discount store. They are so cute the kids can’t resist playing with them. Half the battle to get children to learn is won when they are interested in what you are presenting to them. Make up a little story to go with it and they will be eating out of your hand. I told mine that the birds have been specially trained by the King and Queen to fly back to their own love heart bed for the night and gave them a couple at a time to count in order to figure out which bed they had to put them into. Taking the lids off to discover what number was inside was a good opening and closing activity in itself and added to the mystery. We also used a number strip to match the lids to as they do not yet recognise the numerals.

counting 1 to 5 jars IMG_8137

A simple popsicle counting tray. You could colour-code the sticks for beginners to sort by colour first before counting and placing into the correct jar. These colours could also match the sticker on the jar for an added self-checking aspect.

counting 1 to 5 fruits IMG_8137

These iceblock fruits (the kind that come filled with water for freezing and adding to drinks) have been a hit from day one. They are a lot brighter and more attractive than they look in the photo and combined with some milk bottle lid numbers (liquid papered on) and a chip and dip tray from the local op shop, this took me about 2 minutes to put together.

counting 1 to 5 gold plates IMG_8137

Sparkle pompoms, some gold plastic disposable plates and teabag tongs  with baby food jar lid numbers make another easy activity tray. If you make up a funny story about guests at a restaurant who are ordering different amounts of food and tell the children that they (as the chef/waiter) need to deliver exactly what the customer wants, they will be enthralled. My guests got progressively more greedy as the numbers increased and this had the twins giggling along. Somehow my children always find it funny when we pretend play about bad manners!

counting 1 to 5 clips IMG_8137

These clips were a mistake right from the start. One side is shorter than the other and they are quite stiff so the children can’t get a good grip to press them open and clip them onto things. I let them have a try but we usually just end up sorting them into the compartments. I’ve kept them because they are bright colours and the kids do find them an attractive material to handle.

Six trays in an hour of prep (most of which was getting the stuff out and packing it away when I’d finished) and I am set for a good few weeks. I’m guessing that by the time the interest in these wears off, they will both be able to count to 5 and ready to move on to counting to 10 trays. Or back to initial sounds, or 3 letter words or… whatever takes our fancy next.

More posts you may be interested in:

Montessori tray activities – starting out

More ideas for 1 to 5 counting

Make your own baby and toddler Montessori toys 

circle time

Montessori style cutting box with free printable patterns

cutting box IMG_8158

I have just finished making this Montessori style cutting activity tray for my 3 year olds. They have had some experience with cutting strips of paper and other objects (see teaching toddlers to cut) and as they are very interested in chopping everything in sight to bits this should be a hit! I added the beads and straws to cut up as well, just because having an empty spot in the craft box bothered me! The glue is included so that they can take all the little bits of paper they have cut up and glue them onto coloured card if they want to.

cutting box papers IMG_8158

After searching the net for free printable patterns for the cutting strips I eventually gave up and created my own. So to save you the trouble, here are the links for you to download and print my patterns. Enjoy!

14/6 Edited to add that I found the original designer of this idea here: http://teachingfromatacklebox.blogspot.com.au/2012/03/paper-cutting.html

vertical straight lines

diagonal straight lines

curved lines

wavy lines

V shaped lines

square spiral easy

square spiral difficult

circular spiral

Other posts you may like:

Teaching toddlers and preschoolers to glue

Cutting, gluing and stickers

Ziploc activitiy bags for preschoolers and toddlers

Homeschooling with toddlers and preschoolers

More no sugar snacks and desserts for children (and adults!)

layered glasses IMG_7763

We have recently removed a lot of sugar from our diets. The original aim was to avoid all sugar but we have now settled on a workable arrangement for us. I am using honey, fresh, stewed and dried fruits and real maple syrup to sweeten the baked items and desserts that I make and we are all enjoying them. If visitors bring something sweet we go ahead and enjoy it and the same goes while we are out. I have noticed that some things we would have previously enjoyed are now too sweet and don’t taste that good anymore. Chocolate however has not lost its attraction!

Here are some of our treats and creations that have been a hit recently.

fig nut layered parfait glasses IMG_7572

Parfait or tall glasses filled with layers of anything really – they just look so cool! We like:

  • stewed apple, plums, pear etc.
  • natural yoghurt with a little honey or maple syrup
  • whipped cream or double cream or creme fraiche
  • gingered cream (Just add a little ground ginger before beating)
  • date ‘n’ nuts (Throw 2 cups of mixed nuts and 1 cup of dates or other dried fruit in your food processor and pulse until combined and chopped as fine as you like it. A good way to eat nuts like Brazil nuts that no one really likes but are so good for us.)
  • fresh fruits (These figs were from my Mum’s tree – delicious!)
  • cream cheese (or marscapone cheese) whipped/pureed with honey, maple syrup or fruit puree – fresh, stewed or dried made into puree.)

strawberry dip pikelets IMG_7134

Pikelets with toppings. Any of the those listed under parfait glasses are good, along with:

  • honey syrup (half to 2/3 honey, 1/3 to half hot water. Mix together and pour over pancakes or pikelets liberally. Kind of like maple syrup but without the huge cost. Covers the pancakes or pikelets so much better than straight honey and we go through much less. Everyone still feels like they get a good soaking but actually use so much less than they would if spreading straight honey.)
  • maple syrup (of course!)banana butter pikelets IMG_7100
  • banana butter (pureed banana with or without vanilla)prune butter pikelets IMG_7099
  • prune butter (place prunes in a glass bowl and pour over just enough boiling water to cover. Allow to sit and soften before pureeing.) Tastes better than it sounds but be careful not to eat too much – we all know what prunes are good for!!
  • apple sauce (Stew apples and puree)
  • strawberry dip (Fresh strawberries pureed with a little cream or yoghurt)
  • pumpkin dip (see below)
  • any kind of stewed fruit

pumpkin dip IMG_8104

Pumpkin dip. Yes, it sounds terrible but it was really very tasty. Sweet, not savoury by the way as my children were quick to clarify with me when I served it. Mix together 1/2 cup cooked and pureed pumpkin, 1 cup cream, 1/4 cup maple syrup (or more to taste), 2 tspns vanilla, 1/2 tspn ground cinnamon, 1/2 tspn ground ginger, 1/2 tspn ground nutmeg and 1/4 tspn mixed spice/allspice. (Or just use 2 tspns pumpkin pie spice)

apple pie IMG_7753

Apple pie. I know, I know -it looks like meat pie but I assure you it was fruit and much yummier than it appears! I often use the mixed nuts/date mix from above with unsugared stewed fruit to make pies. I will be experimenting with soaked sourdough pastry soon to make it even more healthy.

pistachio fig scroll biscuits IMG_7735

Scroll biscuits. Yet another use for my date/nut mix! This time I used figs in place of dates, added some honey and cinnamon and processed it smooth to make a paste. The dough is 2 cups plain flour, 2 tspns baking powder, 1/2 tspn salt, 1 tspn vanilla, 1/3 cup melted butter and 2/3 cup milk or water. Mix together to make a dough and roll out into a rectangle. Spread with the nut mixture and roll up (jam roll style) before slicing and laying flat to bake.

no sugar biscuits IMG_7090

No-sugar biscuits. I am trying a bunch of recipes from the internet. So far they are all just ok. Most use banana puree and/or dates & dried fruit to sweeten them but turn out soft. They are satisfying hunger wise, but don’t give the crunch I am after in a biscuit. The kids don’t care though! If you have any great recipes, I’d love for you to share them.

nourishing traditions 9780967089737Soaked sourdough crackers. After reading Sally Fallon’s “Nourishing Traditions” we have made several changes to our diets and taking a sour dough class recently really helped me finally get started with sourdough bread baking. I made a double batch of this recipe and they turned out great. Make sure you roll the dough very thin though to get crispy biscuits.

fruit bread sourdough IMG_8065

Sour dough fruit toast. Mixed fruit, nuts and spices make a great homemade fruit loaf. There’s nothing like the smell of fresh bread baking. I have just used this loaf to make a bread and butter pudding for dessert which was gobbled by all and all the fruit butters from above work well with this too. Or simply toast and spread liberally with butter. Mmmmm.

Nutballs are our latest favourite and these are almost chocolatey in taste. They turn out differently every time but we haven’t had a bad batch yet. Use the food processor to munch up 2 cups of mixed nuts with 1 cup of dried fruit. Add 2 cups of rolled oats, 1 cup of desiccated coconut, 1/2 cup seeds of choice, 1/2 cup cocoa, 1/4 cup honey and process until a “dough” forms and it starts to stick together. Use a dash of milk/coconut milk etc if needed to make it stick but don’t get it too wet. Tip the mixture out and roll into balls or press into a lined lamington tin to cut up later if you are feeling lazy. Can be rolled in coconut if you like.

Smoothies/milkshakes are always popular. Chuck in any kind of milk, banana, fruits, vanilla, yoghurt etc etc. I never follow a recipe and everyone always drinks them.

apple burgers IMG_7067-001

Apple burgers are fun. Spread halved and peeled apples with nut butters and press into seeds of your choice. A bit fiddly, but well-loved. Personally, we have never had to coerce our children to eat fruit. Spending hours making fruit kebabs to entice fussy fruit eaters is never on the agenda. They are lucky if I remove the core before I toss them an apple and tell them to wash it themselves! These apple burgers come out when I want hurrahs.

Proactive living

Unfortunately none of us have a fairy Godmother who is going to come along and make everything change in the blink of an eye. We've got us and the Holy Spirit. Let's get moving!

Unfortunately none of us have a fairy Godmother who is going to come along and make everything change with a swish of her magic wand.

In the parenting courses that we run, we discuss a concept called proactive parenting, as compared to reactive parenting. Reactive parents do exactly that – react to situations as they arise and parent in the heat of the moment. Proactive parents have a plan to get where they want to go and actively take steps to get there.

Hosing her off outside, hanging upside down by the toe... tempting!
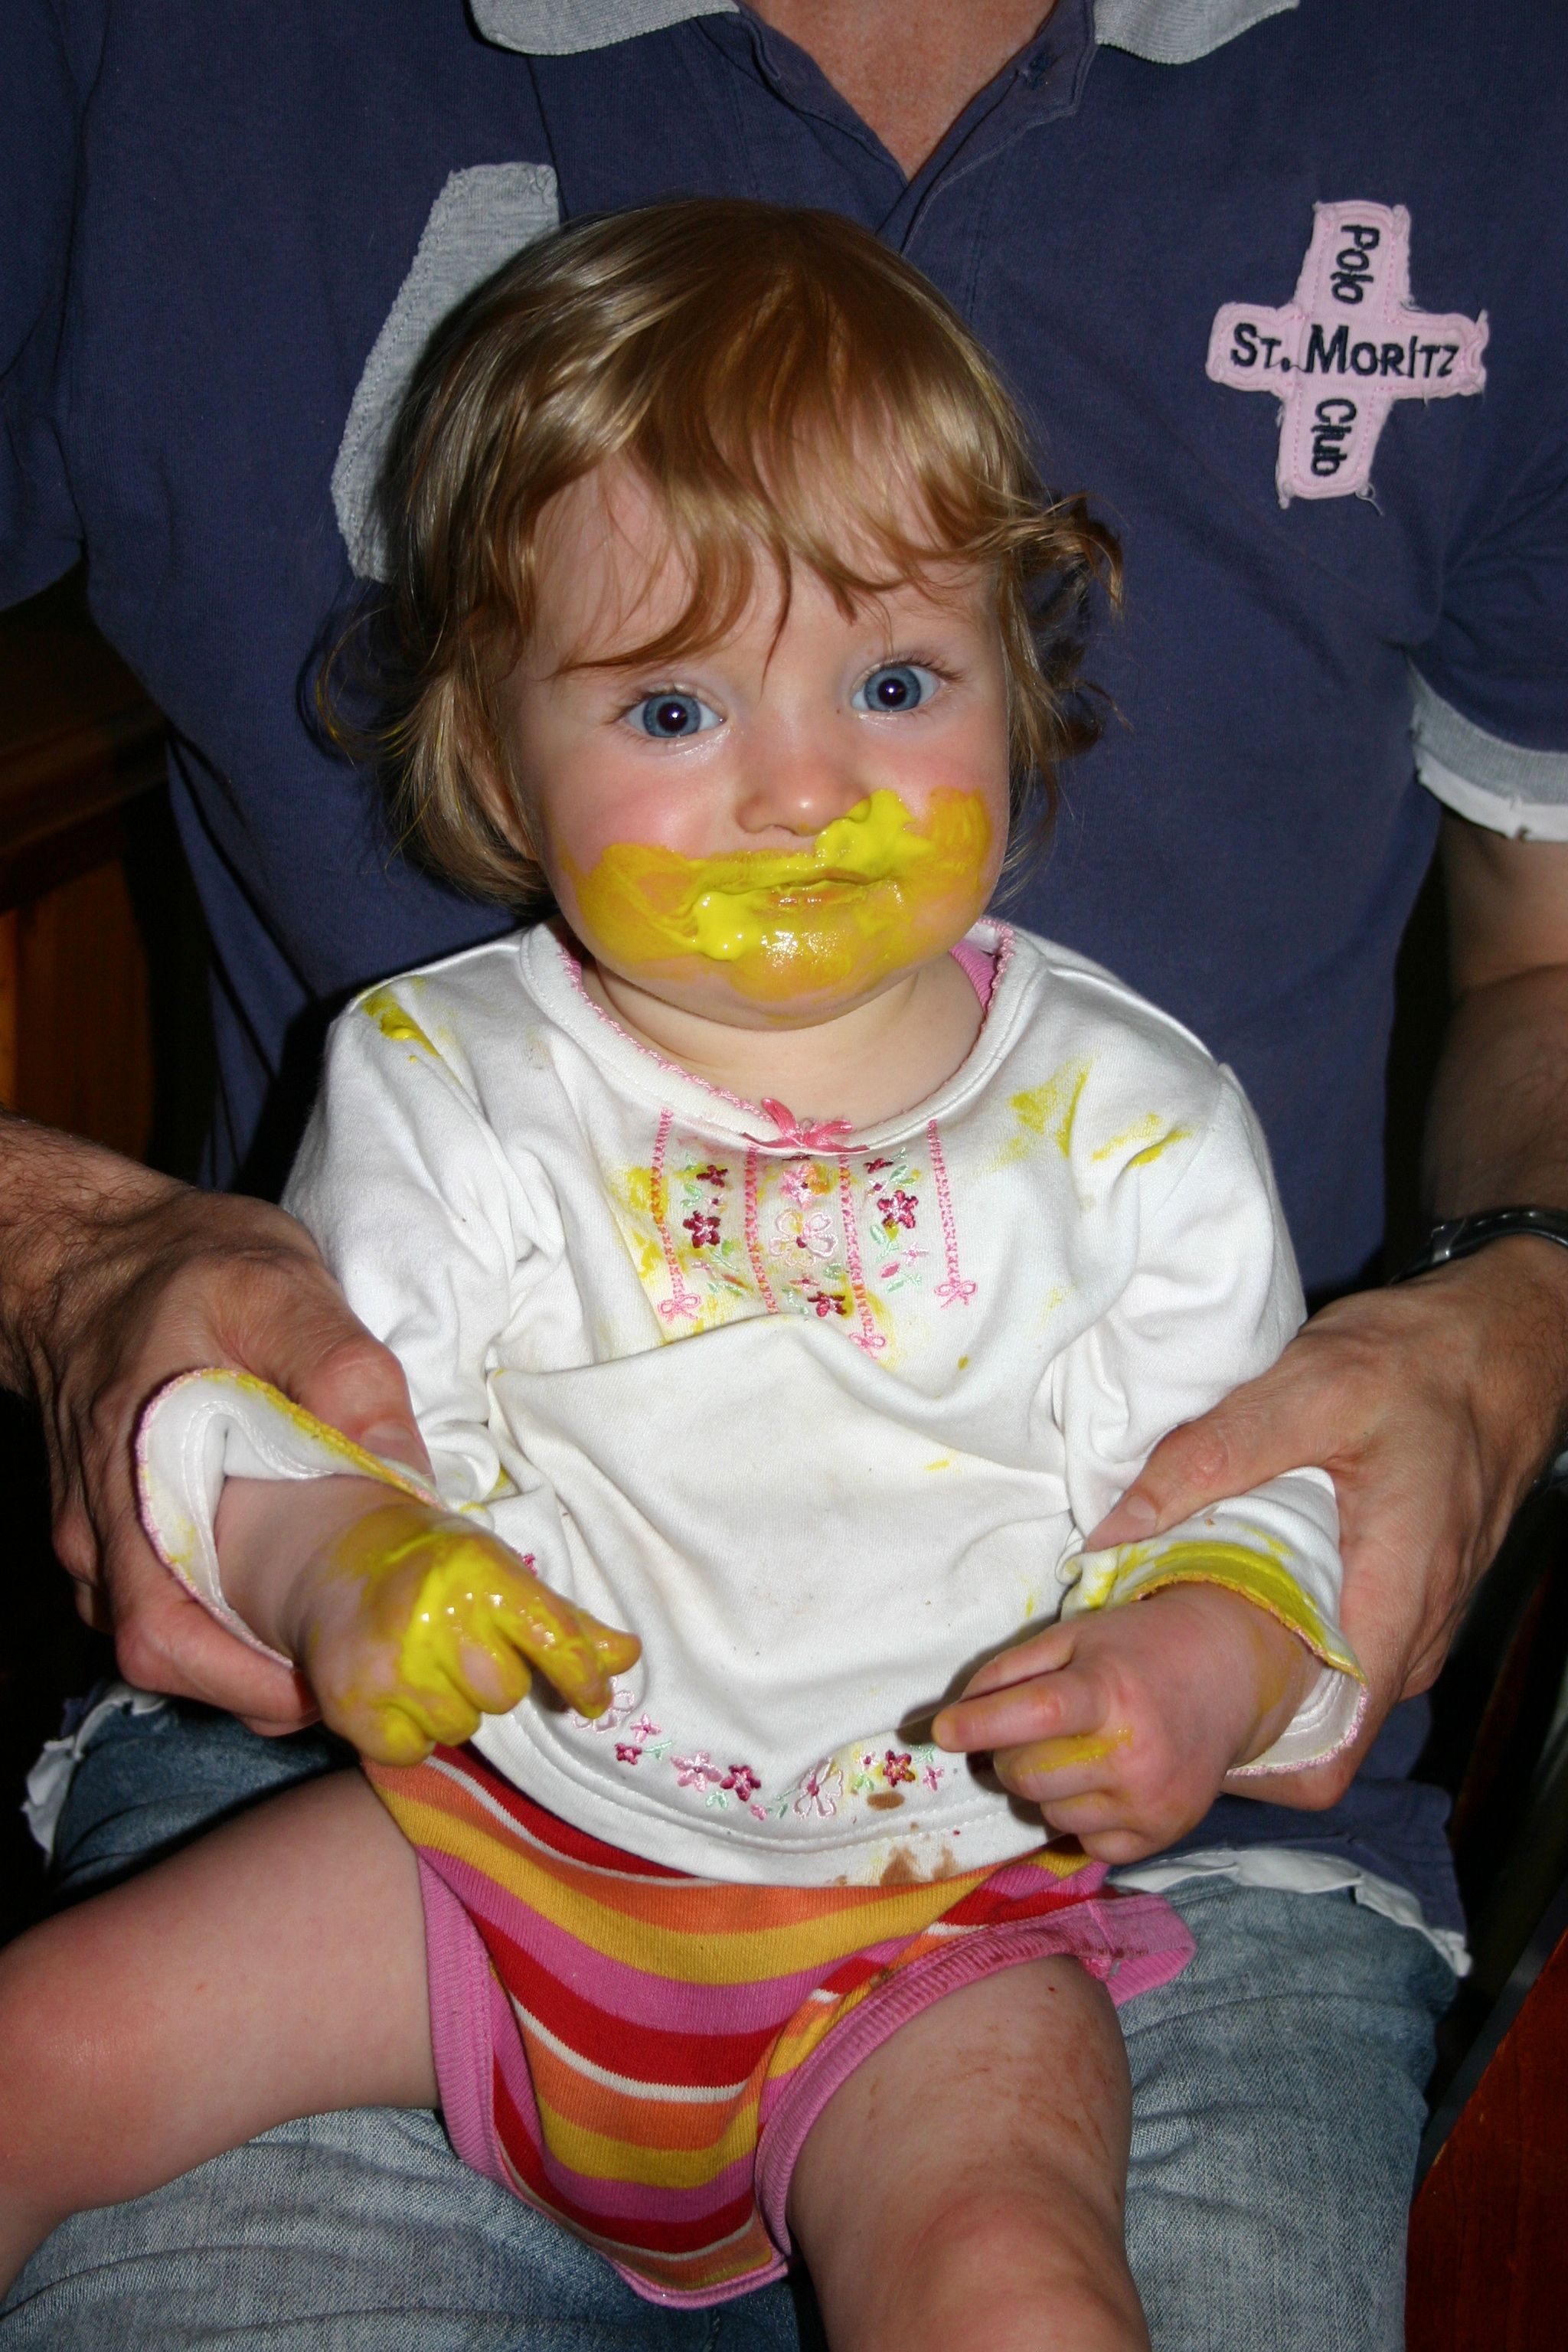
 When I found my  11 month old sitting next to the art cupboard covered in yellow paint from head to toe I had a choice. Yell, moan about how difficult raising children is, decide that she was the last child we were ever going to have, remove all paint from our house and ban art forever, take her out in the back yard, dangle her by the big toe and hose her off to teach her a lesson (that was tempting!) or I could accept responsibility for the disaster and plan a proactive method to ensure this situation was not repeated. I chose to tweak my flexible routine to ensure that she didn’t have unsupervised time to roam the house in the future.

In life, we all have the choice to live pro-actively or reactively – which way are you choosing?

When was the last time you sat down to honestly reflect on your life and evaluate what is going well and what needs work? Where are your sticky patches? Your areas of stress and difficulty? What are you trying to ignore, get around, push under the mat and otherwise refuse to deal with head on? What can you pat yourself on the back about and sit back to enjoy? What is getting up your nose and ruffling your feathers? What direction are you headed in and is this where you really want to go? Is it where God really wants you to go?

As areas of concern are identified, I write them down; with specifics. Exactly what or who is this problem about. Seeing it on paper helps me to realize that what I feel about a situation is not always accurate or relative to the problem. Sometimes the thing that is unhealthy is a lot smaller and simpler than my feelings would suggest. Sometimes it is a lot bigger and needs to be honestly acknowledged.

Now comes the hard part. Without a strong desire to change, even the best advice will be worthless. Without effort and commitment to improve, chances are you will still be facing the same problems in the future. Do you just want to talk about the problem? Do you just want sympathy? Or are you truly seeking a way to move forward and make the necessary changes? Some circumstances can’t be changed, but the way that you react and respond to them can. We can eliminate some of our problem areas, avert others or at least improve almost all of them.

Some changes take money. Some just take time, some take mental or physical effort. All change will take a decision by you to make it happen and an investment of some kind.

At the end of today’s post, there is a list of headings. You will probably be able to come up with several more of your own to add to it. I would encourage you over the coming week to take some time out to go through the list and give yourself a proactivity check.  Identify the areas you would like to change and write them down. If you are like me, you will have a rather long list, which can be a little demoralizing. Perhaps you might like to focus on the most pressing issues. Have a look through your list and choose 3 things to begin with.

What were your dreams and ambitions? Did you always want to paint? Write a book? Sing? Pray an instrument?

Do you have unrealised ambitions or goals? Always wanted to paint, sing, play an instrument, write a book?? Now’s the time to start.

It may be a good idea to focus on only one large, serious thing, and two smaller problems that will be quick and relatively easy to change. You can now make a plan and move forward.

So how do you move forward? You could do one or several of the following:

  • Pray through each area and ask God for wisdom and direction. (Maybe the underlying issue is that your relationship with God is not where it should be. It is possible to make changes in your own strength, but so much more effective to make them with the help of the Holy Spirit. Perhaps now is the time to get right with God.)
  • Read the bible and see what He already has to say about it.
  • Find a Godly older, more mature or more experienced woman to serve as a mentor. (God’s idea, not mine; see Titus 2)
  • Ask your husband for his ideas. I’m sure he has plenty! They might involve leopard-print, but hear him out anyway! Your husband has wisdom and insight that will help you to see issues in a different light.
  • Find the resources you need. Buy or borrow a book, listen to a talk on CD, surf the net
  • Find a friend or family member who is strong in the area of your weaknesses and ask for their help.
  • Speak to a professional if necessary. Be it counselor, Pastor, financial planner, doctor, nutritionist etc.

Try to be realistic with your goal setting. One of my daughters was very disappointed to be told that she would never realize her ambition of growing up to be a Daddy! She quickly got over it though and decided she would be a snail instead!

When I see the heading “Physical health”, I immediately think of how I would like to bake fresh sour dough bread for our family. I have tried this once and the result was a brick-like loaf that would have made a better doorstop than a sandwich. Clearly, I need more than a recipe printed out from the internet. I am planning to take a 4 hour class with an expert on sour dough and come home equipped with the knowledge I need to achieve my goal. It requires some time, some money and the commitment to go ahead and get it organised.

Perhaps the mess is driving you insane. Find a home organisation book, train your children to do chores and de-clutter!
Perhaps a mess is driving you insane. Find a home organisation book, train your children to do chores and de-clutter!

When I look at the heading “Household” my linen cupboard comes to mind. Every time I opened the doors, towels and sheets exploded out at me from the over-filled bottom two shelves, while the top 2 shelves sat almost bare of their contents. My daughter is responsible for folding and putting away these items as they come through the wash. As she is only 7 ½ she finds it difficult to reach the top shelves, which results in the contents gradually migrating downwards. The solution? Two $8 sea grass storage baskets to store some of the towels in the other bathroom, re-arranging the cupboard so that the least used items were up the top and storing sheet sets in their matching pillowcases as a compact bundle (a tip from a home organisation book that I read.) While migration does still happen, it has been slowed greatly by the new arrangements.

Who needs pants?

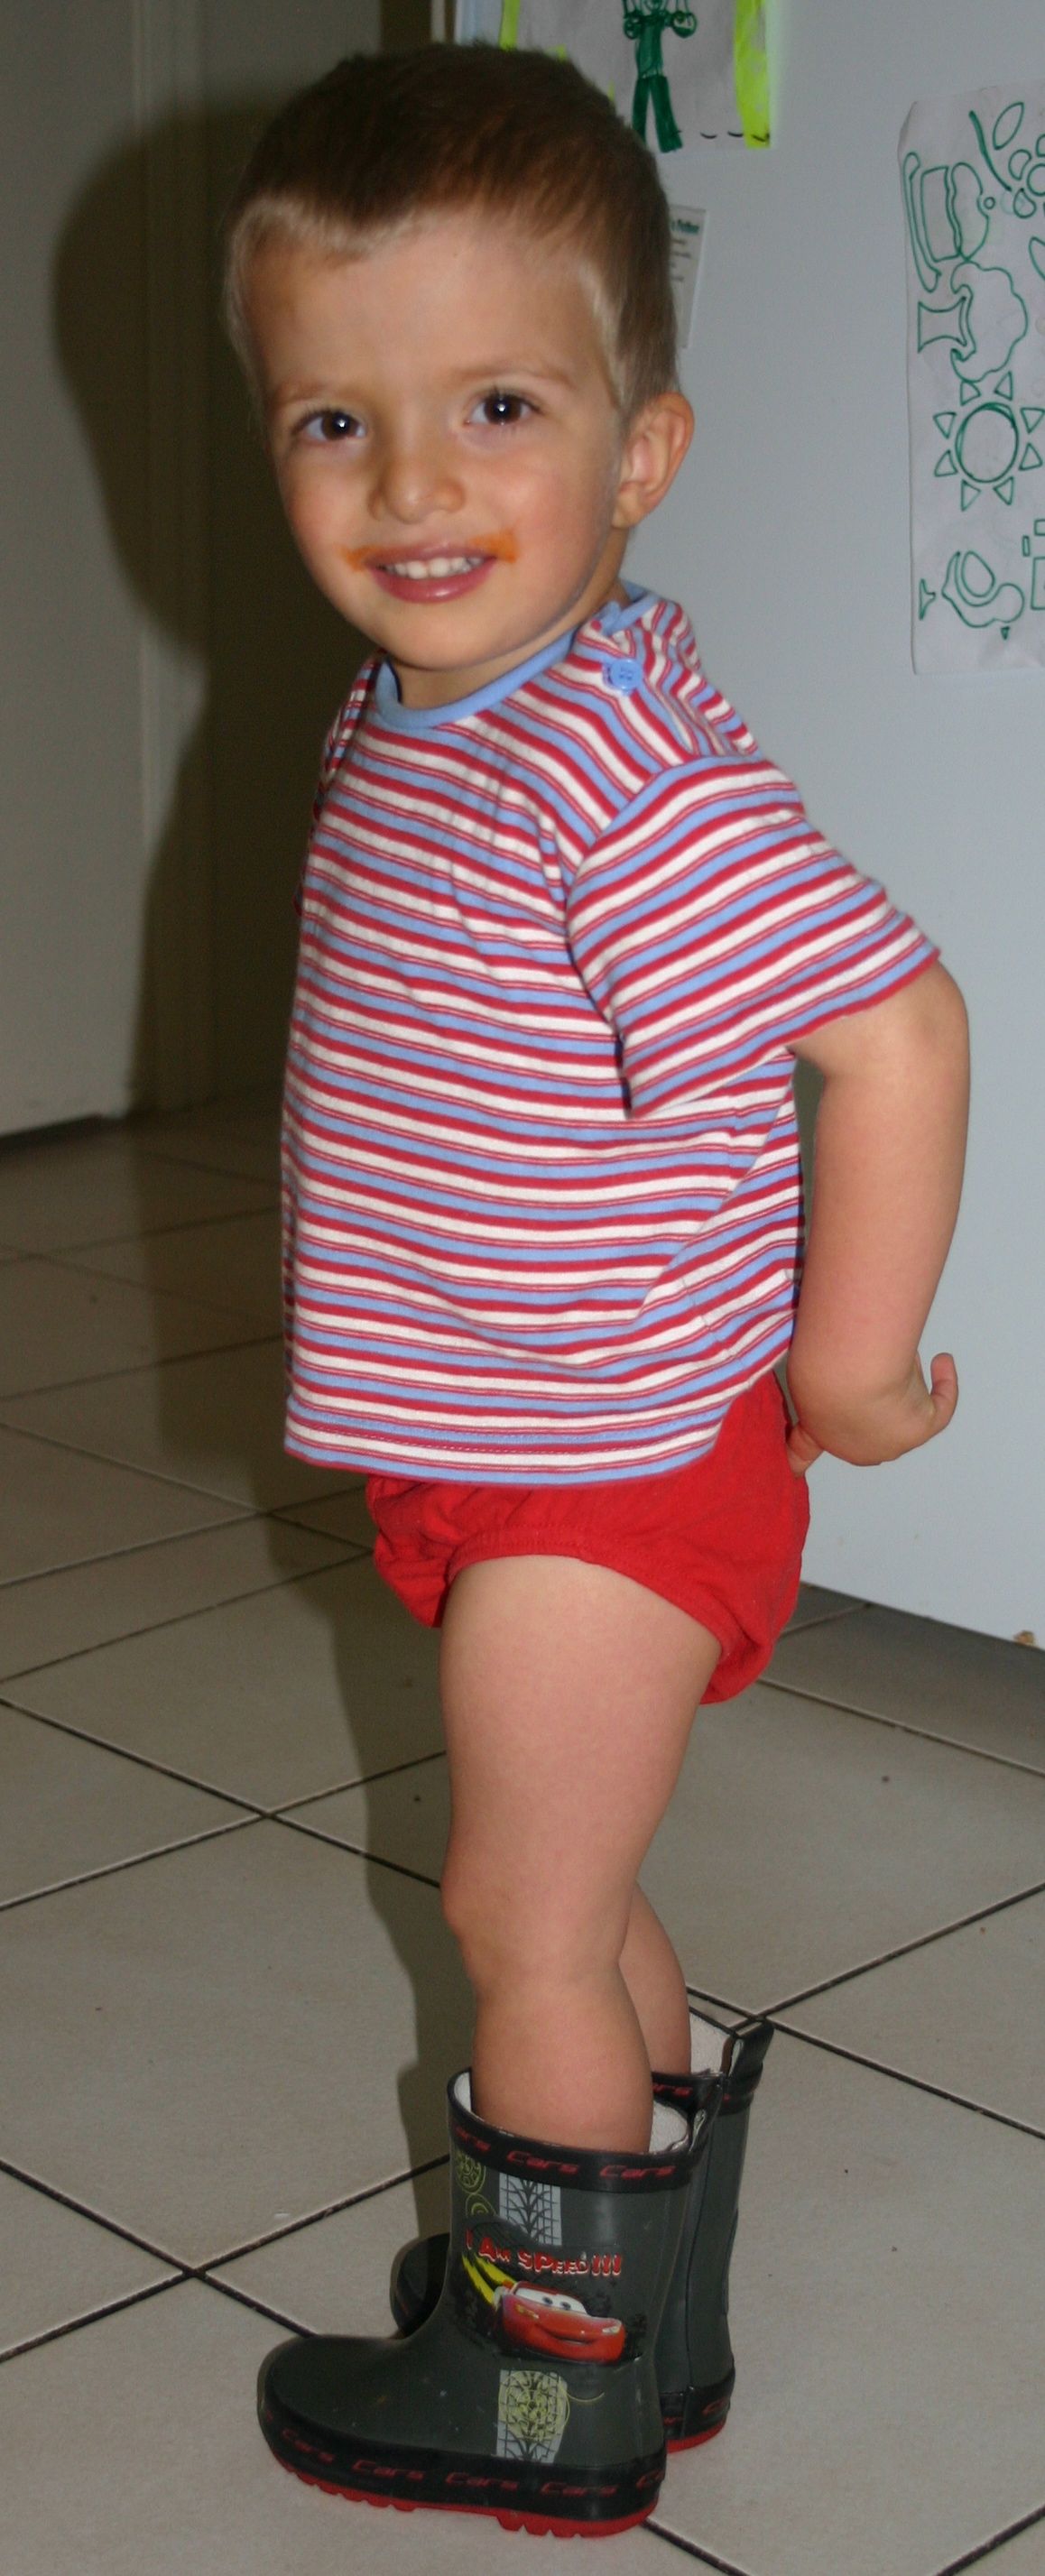
The heading “Children and family” brings to mind a current issue we are facing. Our 3-year-old son quite often exits the toilet naked from the waist down, regardless of who is at the front door or how many visitors we have in the house.  Modesty is something we work on as a family and as my husband and I want our children to be a blessing to others rather than a menace this is a problem we need to address and resolve – before he turns 16.

Some circumstances can't be changed, but we can choose how we react to them.Your problem areas may be far more serious than the examples I have given. Perhaps you are a single parent, divorced, facing addiction or abuse of some kind. Maybe you have lost 10 kgs and nothing in your wardrobe fits anymore. Perhaps you have gained 10 kg and nothing fits anymore. Maybe you need to get right with God. Whatever it is, it’s time to take action.

Perhaps it's time you gave your appearance an overhaul, starting with your wardrobe.

What’s wrong with my clothes??

Now you may not be a Mother, or wife, but if you are a Christian, your general priorities should be: God first, husband second, children & family third and on from there.

Do not bury your head in the sand and hope your difficulties will go away. Face the problem head on and climb that mountain. We all have an obligation to use our God given talents to the best of our ability.  Live intentionally and be proactive.

Your diet will have an impact on your outlook, energy levels and overall health. Is change needed here?

Here are some headings to get you started on your pro-activity check:

Self-improvement (grooming and appearance, wardrobe, character, self-image, skills, talents, hobbies, interests, creativity, goals, aspirations, dreams, leadership)

Mental health (depression, stress, emotional problems, phobias, compulsions, suicidal feelings)

Physical health (diet & nutrition, exercise, weight control, sickness & pain)

Spiritual health (bible study, prayer life, relationship with God, spiritual gifts, teaching, evangelism, discipleship, proverbs 31 woman, Titus 2)

Social/relational (friendships, re-connect with someone, forgive someone, conversation & communication skills)

Marriage (husband/wife relationship, love languages, sex life, date nights, communication, marriage seminars, counseling)

Children and family (character, behaviour, relationships, discipline and training, routine)

Household (menu planning, hospitality, organization, home improvements, decorating, time management)

Work & study (time management, computer, facebook, emails)

Money (budgeting, giving, debt, saving)

Issue Plan of attack – resources I need or action to take
1.
2.
3.

Read-alouds, audio books and dramatised stories.

6 kids in car roadtrip 2 IMG_7073-001

We have just returned from a family holiday which involved much driving. Having chosen not to go down the road of DVD’s in the car, we instead loaded up the IPOD with a stack of classic audio books and listened to those as a family.

I am very aware of the value that comes from spending time reading aloud to my children. Exposing them to great literature is a priority for me but the reality is that I am just not getting around to it as much as I would like. One of the side effects of this is that the quality of play that the children are involved in has dropped. Gone is the Little House on the Prairie winter house with “Pa”(my eldest son) out protecting “Ma” and the “kids” from wild bears and other wildlife, gone is Captain Hook’s pirate ship and so many other wonderful imaginings that characterised their outdoor time together.

During our holiday we had a wonderful time listening to “The Swiss Family Robinson” while we drove around looking at the beautiful scenery. Conversations have abounded about survival skills and how we would have fared in a similar situation and best of all, our first day back saw the 4 eldest children together outside building a pretend sled to carry their tools, weapons, horses and other survival gear as they set out on an imaginary adventure together.

I have also downloaded and burnt a bunch of classic stories to CD for the children to listen to during their daily room time, over lunch when conversations are getting silly, on beds during rest time (for those no longer sleeping every day) or occasionally at bedtime. Five of the children shared a room at our farm-stay accommodation during our time away so having something to listen to as they were falling asleep helped cut down (but not eliminate!) the silly excitement of being in the same room together and allowed the little ones to get to sleep while the older ones could lay awake a little longer listening to the story.

Visit librivox.org for literally thousands of books that are in the public domain and therefore absolutely free. Volunteer readers (some better than others) have recorded these stories and all you have to do is download them for your listening pleasure. Other sites I have not yet used but offer a similar service are gutenburg.orgaudiobooksforfree.com and verkaro.org,

Many dramatised audiobooks are available through online booksellers such as bookdepository.comFocus on the FamilyLamplighter and others. We purchased “Sir Knight of the Splendid Way” from Lamplighter and after stopping at our destination only part way through the story were barely back in the car before I heard “Aren’t you going to put The Splendid Way back on?” – from my husband!