101 (mostly) stay at home family night ideas

Dog and Bone newspaper hockey championships.


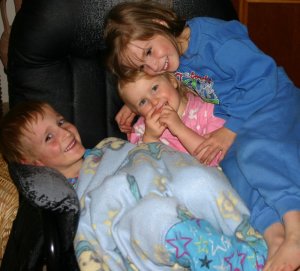
We are about to start another family night. Tonight the plan is for each family member to make their own pizza following a rousing game of Dog and Bone newspaper hockey, with perhaps a sock wrestle afterwards, depending on the state of the troops.

Family night for us is actually in the late afternoon so that we can do all our special things and still get the kids into bed at the usual time. It feels later than it is because we have done so much together before bedtime rolls around.

We have family night as part of a deliberate strategy to build family identity, foster unity and strengthen family ties. The old adage that “the family that plays together stays together” still applies and both quality and quantity time are important. With that in mind, here are lots of ideas to get you started.

  • dark hide and seek A variation on traditional hide and seek which is also lots of fun. Wait until the sun goes down and turn off all the lights in the house. Players move in pairs of one older and one younger family member which reassures those little ones who don’t like being alone in the dark. Hiders use torches to find their place to hide before switching them off, with older family members helping their younger partner to find a hiding place before hiding themselves.  Seeker pairs find by feel and peering about in the dark. It allows a wider variety of hiding places simply because in the dark you can be more exposed and still remain undiscovered. Works well as “Sardines” also – see further down the list for an explanation.
  • photo albums Children are fascinated by photos of themselves and love re-living family memories together. They also enjoy seeing their parents as children and hearing stories about them growing up. My children regularly ask us to tell them about our childhood and ask all sorts of questions about other family members too. Having a new baby and watching me photograph all his milestones prompts a heap of questions about themselves as babies and it is fun to go back through the albums I have created for each child to show them their own special milestones and events.
  • family shields Another way to build family identity is to create shields, banners and flags with mottos, goals, creeds and values that you want to cultivate and uphold as a family. There are lots of examples on the web and instructions on how to do these with ideas and examples of the kids of things you may like to include.
  • sleep-outs Whether it be in the back yard in a tent or cubby house or indoors in the loungeroom, a sleep-over is always heaps of fun. Combine it with fun food, story telling and games or any other family night ideas and you will have a memorable time together.
  • toast marshmallows It’s rare for us to have the opportunity, but a campfire cook-out is always very special, especially for boys! Toast marshmallow, roast damper and potatoes or BBQ over the camp fire for a great evening. Whether it be the real deal, combined with camping out, or simply an evening in the backyard with a gas burner, sitting about the fire is a great way to bring the family together.
  • late library run Once at the library, everyone heads off to find picture books that interest them and meet back together for a shared reading time. Older children can read their picture book to the family and choose a chapter book or two to take home for themselves. If you are game enough, the whole family can go in their PJ’s for some extra fun. The kids will love it and won’t be able to stop giggling at Mum and Dad in their pyjamas too. (Neither will the public, but I dare you to do it anyway!)
  • Duplo charades See here for instructions and ideas.
  • board games and card games Play in teams with older and younger pairs; younger children count squares, move counters and hold the cards while older family members deal with the strategy side of the game.
  •  dog and bone/newspaper hockey Split into 2 teams. Traditionally numbers are allocated so that a given pair (ie. number 1 from each team) comes to the middle when their number is called, however we play that a name from each team is called so that uneven ability matches can be evened out and uneven numbers of team members are not a problem. Each pair races to the middle (we crawl because we play in a combined space), grabs their newspaper bat and hits the ball towards their team goals while the other person attempts to do the same. See photo at top of article.
  • icecream run 50 cent cones from drive through at McDonalds are a bargain for us. Grab one each and head to a beach or somewhere with a view to eat them.
  • trampoline star-gazing On a clear night, take sleeping bags, pillows and blankets onto the tramp to watch the stars and find as many constellations, satellites, aeroplanes or falling stars as you can. Take some kind of treat to snack on while you do it and be prepared for littlies to be jumping all over you while you do it. Perhaps combine this with a good sock wrestle. (See below.)
  • sock wrestling Every family member puts on socks (the longer the better, but only one pair allowed!) The simple rules are that the last person left wearing a sock wins. You may like to confine the wrestling to a certain place or make it a fast paced, wide-ranging game that moves throughout the house. Ground-rules are necessary and older children must be taught how to look after the little ones and how to make it fun for them ie. NOT removing both their socks in the first 3 seconds of the game or handling them too roughly. We like to sock wrestle on the trampoline and Mum and Dad both enjoy the tussle. With little kids, we pretty much wrestle each other while they gang up on us to try to get our socks. It’s harder than you think but lots of fun. You can play that once you have no socks you are out of the game but we let the children continue regardless.
  • giant icecream Sundays Provide a stack of yummy ingredients and everyone helps to create one large masterpiece. All dig in with spoons to the same dish to enjoy the creation once complete. A large serving tray or similar works well.
  • feeling rich? Visit the local ice-skating or roller-skating rink, theme park, miniature golf, bowling, indoor playground centre or other attractions in your city.
  • fish and chips at the beach Summer is perfect for a fish and chip dinner and sandcastle competition or even a dip. If the budget is tight, take tomato sauce, mayo, and a loaf of fresh bread from home and just get a bulk lot of chips for chip buddies.
  • progressive dinner Follow clues to track down the entrée and enjoy it wherever you find it. More clues lead you to the main in a different part of the house and still more to an interesting location where dessert is waiting.
  • museums Museums are usually free and can be interesting. Find out what is on first and choose a couple of sections to visit that will appeal to the children. Don’t drag them through every single display and insist on reading every plaque or they will hate museums for ever! Many museums have sections especially designed for children and some even have hands-on displays and activities to do. Find out what they usually do for school class visits and ask for an activity pack or whatever they usually supply to the students.
  • sardines Another variation on hide-and-seek. One person hides and everyone searches. As each seeker finds the hider, they must join them in their hiding place until everyone is squashed in like sardines. The trick is not to hop in the hiding place when others are watching, but to wait until you are alone to join the hider.
  •  hiking/nature walks Head to the country, local lake or river or anywhere scenic for a nature walk. Take a kite, football, quoits, bocce or any other outdoor games to enjoy together. Enjoy a picnic along the way and perhaps have the children create their own trail mix to take with them before you leave home.
  • pick fruit or berries together Visit a fruit orchard or berry farm and pick tonnes of luscious fruit for jams or just to enjoy fresh off the tree. Have fun cooking it up into treats when you get home.
  • bake-off Choose you favourite biscuit and/or cake recipes and hold a bake-off. Pair older and younger participants. Take some of the delicious cakes and cookies to neighbours, visit someone who is sick in hospital or spend time visiting a retirement home.
  • art and craft night Find some simple craft activities the whole family can enjoy. Things that require mess and/or effort that you wouldn’t normally get around to. There are unlimited ideas available on the net.
  • make birthday, Christmas or special occasion gifts and cards
  • catch a bus or train to an area you don’t usually visit. Perhaps go to a cafe and let the children choose a special drink or snack.
  • indoor picnic or backyard picnic. Under the kitchen table, in the cubby, under or on the trampoline, in a sheet tent, at the local park, beach, bush area etc.
  • Go on a neighbourhood walk. See how many different kinds of plants and flowers you can identify. Prepare a list of items to spot along the way. Perhaps the kids can ride bikes while Mum and Dad walk.
  • tub of icecream  Swing past the supermarket for a tub of icecream. (Don’t forget the spoons.) Take it to the local park and let everyone grab a spoon and go for it. If you want to be more civilized, buy a pack of cones as well.
  • backwards dinner Start with dessert and work backwards. Tip: Don’t prepare a large main meal or entrée. Chances are the kids won’t get that far!
  • movie night Make caramel popcorn or another suitable movie style treat. Set up a snack stand and “sell” the treats and drinks for Monopoly money. Roll out the red carpet (bath mats, towels, sheet etc) and make pretend tickets for the kids to distribute. Darken the room and have ushers seat guests by torch-light. Set out doonas, pillows, beanbags and cushions. We watch very little TV on a day-to-day basis so a movie night is something special for the kids.
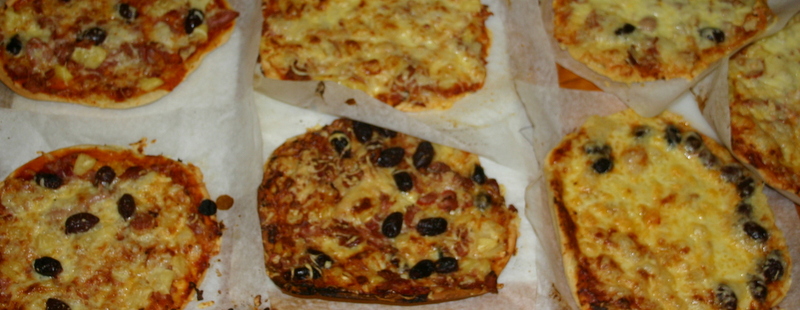
  • make your own pizza. Roll out the dough and top it with sauce. Set out a selection of toppings and let the kids choose their own. Don’t forget to make a dessert pizza too.

  • puzzle night Choose some difficult and some easy puzzles to work on as a family. For the younger kids, hide puzzle pieces around the room and have them search until they have completed the puzzle. Perhaps have a race against the grown-ups or older children to see who can complete theirs first.
  • watch home videos Most of us take home videos from time to time so sit down and enjoy watching them together. Kids love to see themselves on TV.
  • make home movies Sing songs, perform plays, read radio dramas, record favourite stories to make your own read-along audio tapes complete with sound effects, record video “letters” to friends or family who live a distance away, write scripts and act them out or try scripted funny home movies.
  • press flowers Go for a nature walk to collect flowers and sprigs of attractive leaves to press in home-made flower presses or in the pages of telephone books. A couple of weeks later, use them to make home-made cards for friends and family. Make sure children get permission before taking flowers from neighbours’ plants or trees.
  • Hold a gingerbread man decorating competition. Pre-make the dough and provide rolling pins, cutters, cutting boards, knives, toothpicks and the like. Lay out the icing and toppings for everyone to decorate to their heart’s content. Have several categories for winners (most interesting, most colourful, neatest, most appetising etc.) so that everyone can have a prize (eating the gingerbread man of course!)
  • obstacle course Use household items and equipment to set up an indoor or outdoor obstacle course and run time trials. Place time handicaps on older participants or have them do it running backwards etc.
  • old-fashioned games night Go bobbing for apples, play jacks, hopscotch and other traditional games.
  • scavenger hunt Collect all of the items on a written or pictorial list as quickly as possible.
  • treasure hunt Follow clues to get to the location for the next clue or look up bible verses to provide answers to questions that must be complete before the next clue is handed out. Don’t forget to have a “prize” at the end; perhaps a special snack to share together.
  • neighbourhood trivia hunt Spread out around the local area in teams with an older child or adult leading each one. Go to various locations to answer trivia questions once they arrive at the designated place. For example, “What colour is the letter box at number 10 James St?” or “How many trees are there in Mrs Jones’ front garden?”
  • playdough Pictionary Use suitable cards from Pictionary or create your own. One member from each team looks at the card and both race to create the object using playdough. The first team to guess what it is wins a point. Be sure to match abilities of team representatives for each round as evenly as possible.
  • visit the confectionary and chocolate isle at the local supermarket and let the children have the chocolate or lolly of their choice. When children are not regularly eating this kind of food it’s a big deal to do something like this. This can also be done in the lunchbox snack area with all those pre-packaged processed lunchbox snacks that I never buy my kids!
  • tower or castle building competition Use Duplo, Lego or whatever construction materials you have at home with a time limit for construction to take place.
  • Visit the local Bunnings, McDonalds or Ikea playground. Have a cone or sausage sizzle while you are there.
  • shopping centre adventure Ride on one of the merry-go-rounds you usually say no to before going into the supermarket and letting the kids choose items for lunch at the park afterwards (fresh rolls, packet of biscuits, snack cheese, sliced sandwich meat, yoghurt tub, mini chip packets or whatever takes their fancy and fits within your parameters.) Don’t forget to grab a cheap packet of  plastic spoons for those yoghurt pots – it’s very difficult to scoop out chocolate Yogo with your hands. (And yes, I am speaking from experience!)
  • $2 dollar shop Go to the local discount variety store and give each child $2 to spend.
  • op shopping Visit the local recycling boutique or secondhand store and give each child $3 to spend. The catch is, they lucky dip the name of a sibling or family member first and must choose something for them, rather than themselves. Supervision is required here for the younger ones. While my 4 year old daughter was sure my 8 year old son would LOVE a pair of pink sparkly shoes, I was not so convinced.
  • google playgrounds and parks in your city and visit one you have never been to before. We were introduced to a new one recently that was just 10 minutes from our house that we didn’t know was there and it was great!
  • charades Play in teams and dress-up in costumes and props from around the house.
  • bike rides Bike riding is always fun. Use tag-alongs, baby seats or toddler trailers for the littlies and take the bikes, scooters or skateboards to the local bike path, unused basketball or netball courts or just for a cycle around the local neighbourhood.
  • wet weather exploring Don wet weather gear, get out the gumboots and go for a rain walk, jumping in as many puddles as you can find along the way.
  • karaoke/Australian idol Rehearse and perform for a family concert. Organise a ticket booth and snack bar as for movie night. Video proceedings for a laugh later.
  • surprise lunch For those whose children are at school, a surprise pick up and special lunch at a nearby park or take-away venue will be a memorable treat. Collect Dad from work in his lunch hour and “kidnap” your school children. (With the teacher’s knowledge of course!)
  • breakfast dates Head out early before church or school for a family breakfast together. This also works well for one-on-one dates with Dad or Mum.
  • dress up Choose from the dress-up box or Mum and Dad’s wardrobe if you’re game. The kids will love it, especially the shoes. There’s just something about shoes! Have a photo session with everyone in crazy attire, followed by a disco dance session to boppy music with a couple of rounds of musical bobs and musical statues.
  • talent quest and family orchestra or marching band Singing, playing instruments, acting, skits, reciting a poem and telling jokes are all suitable for the talent quest. Finish off with a family orchestra – everyone grabs a percussion instrument and plays along to lively music while marching about the house.
  • cooperative drawing Cover the table with a huge roll of paper and everyone draws. Try blindfold drawing. Everyone closes their eyes to draw a picture and has a laugh at the results.
  • pamper night Give everyone face masks (yes, even Dad!), paint nails, give the girl’s “up do’s,” spike up the boys’ hair and get dressed-up in fancy clothes. Take family photos now that everyone looks so nice and go out somewhere to take advantage of everyone looking so good. The photos could be serious (set up lighting, use a tripod) or silly (weird clothes, expressions and poses.)
  • teddy bear’s picnic or tea party All stuffed animals and dolls must be dressed for the occasion. Make invitations and menus. Cook some tiny food treats to share.
  • tapas night Serve authentic Spanish tapas or just little plates of nibblies. We put out heaps and heaps of tiny plates from every tea set we own with 7 of everything on each plate – one per person. 7 strawberries, 7 meatballs, 7 apricots, 7 grapes,  7 finger sandwiches and on and on. Ours was just regular food but after you’ve eaten one block of cheese, 1 cherry tomato, 1 mini muffin and so on, it makes for quite a meal.
  • outdoor movie nights Check local guides over summer for sessions and go all out with a fancy picnic. Don’t forget the chairs and blankets – even on summer nights these events can get chilly.
  • beanbag wars (See here for instructions.)
  • spy missions  (I’ll post on this separately another day)
  • story telling Combine this with a sleep-over, star-gazing or other family night idea. Take turns adding one sentence at a time to the story. Play “Fortunately/Unfortunately” where each person adds on a small section of the story at a time, alternating between fortunately and unfortunately. (1st person: We were driving along in the car when unfortunately the tire blew. 2nd person: Fortunately we had a jack in the boot. 3rd person: Unfortunately the spare tyre was missing.)
  • ping-pong (table tennis), badminton or tennis championships Play round robin style games where everyone gets a go and rotation is fairly fast.
  • junk modelling Collect boxes, tubes, containers and decorative bibs and bobs of all kinds. Use them to create sculptures and amazing creations as a family. (If the creations are suitable, the children may like to keep them in their rooms for a few weeks to play with eg. castles, 10 story building etc.)
  • nobody’s birthday party Complete with cakes, party food and party games. Choose gifts and donate to a charity organisation.
  • puppet shows Set up pairs of chairs with sheets draped across as makeshift theatres. Use old socks, paper bags, bottles, wooden spoons or other simple items to make puppets. Use your puppets to rehearse and put on a puppet show for each other.

Well, there you have it; please share your ideas via a comment below – its always nice to glean a new idea from someone else!

The 3 times rule

My wonderful husband; the only adult who got in there with the kids on the black plastic water-slide at family camp.

I wrote some time ago about the 10 times rule for children. Today it’s the 3 times rule for husbands. At an Easter conference for families and leaders in ministry, the wives got together for an informal chat about ways to support our husbands. There were many ideas bandied around, most of which I had heard before. But one was new to me and worth passing on. It is very simple; the first time your husband does something that irritates, grates, you dislike or simply don’t want him to do for practical reasons, say nothing. The second times he repeats the action, say nothing. After the third occasion it is time to raise the subject – at an appropriate time. More on that in a minute.

Let me give you an example. I like my house to be fairly tidy but don’t knock myself out about it. With 6 children I’ve had to face the reality that it will never look like a display home. However, when I have cleaned up and it is looking good, the first bit of mess or clutter that is dumped really bothers me. My husband arrived home to a spotless kitchen and dining area (rare I know) and proceeded to kick his shoes off underneath the bench before heading outside to play with the children. My immediate impulse was to tell him (politely) not to leave his shoes there please, with the fear that he might start doing it regularly. When I stopped to think about it I had to concede that he usually doesn’t leave his shoes there and that this was a one-off occurrence. With that in mind, I said nothing.

If however, he began to kick them off there day after day it would be time to raise the matter. Now to the next important point; how to raise it. With my personality type, I tend to confront immediately and efficiently and solve what I see as the problem straight away. It is in fact often wiser to wait for a moment when you are free from conflict, both calm and relaxed and you have had time to think through the words you will use and how to phrase the problem so as to not sound negative, angry or like a nit-picking, nagging wife.

It may be that it is time to praise some of the things you do like about what your husband does, before starting on the things you don’t like. Next time you catch yourself about to jump in with a negative, stop and think. Is this the third time? You’ll be surprised at how many things can be left to slide by without comment, leaving only those that you really do need to talk about. Your husband will appreciate it.

[9] It is better to live in a corner of the housetop
than in a house shared with a quarrelsome wife.
(Proverbs 21:9 ESV)

Make your own baby and toddler toys

There comes an awkward age somewhere between 12 months and two years where it becomes more difficult to keep babies and young toddlers interested in their toys. They are no longer content to just shake and slobber on something that feels and look appealing, toys now need to DO something.

To complicate matters further, children generally do not develop imaginative play skills until around the age of 2. New toys are appealing but often lose that appeal quickly once they have been explored a few times and are too expensive to be constantly purchased. You can swap with friends, join a toy library or simply make your own. For me, the make your own option is the easiest, the possibilities are almost endless and they often turn out to be the long-term favourites. Here are some of my home-made baby toys that I use for mat time, highchair time, playpen time, table time and room time.

Find a bunch of small flat-bottomed toys, blocks, shapes, plastic figures or suitable objects and a base to stick them to; piece of smooth wood, plastic lid, small tray etc. Use self-adhesive velcro to attach each piece to the base so that children can stick them on and take them off again, enjoying that satisfying ripping sound as they do so. If you have enough, it is better to cover the base with the velcro so that objects can be stuck anywhere rather than only on a small matching dot. Older toddlers like this too if small people, animals or other figures are used and enjoy manipulating the pieces to play-act and tell stories.

Use an old baby wipes container and any flat objects that are slim enough to fit through the slot and not so small as to pose a choking hazard. Old credit cards, large plastic construction pieces, dominoes, poker chips, Jenga blocks  or anything similar will do. When interest wanes, simply change the material to post.

Wooden dolly pegs have dozens of uses. Young children find it challenging to slide them on and off objects and enjoy the sound of plunking them into tins and containers. My youngest loved to take them off the sides of containers like the ones above but not to put them back on again. They only did that part once – when they packed the activity away! Posting bottles and tissue box posting are other ways to use dolly pegs.

Formula tins have a large number of uses. They are great as rattle cans for crawlers to push about and with a hole, slot or cross-shaped cut in the top, act as posting tins for any number of small objects. Pegs, popsticks, dominoes, wooden shapes, milk bottle lids or whatever you have will do.

Toddlers are fascinated with Mum’s purse although most of us will agree that it is not a toy and it is unwise to allow toddlers to access it in that way. Because of that, some parents feel that even providing a similar option is not a good idea, fearing that children will not know the difference and think it is ok to touch Mum and Dad’s. I wondered about this too but in my experience have found that by the time they are able to manipulate cards and photos in and out of a purse or wallet, they are old enough to tell the difference between the play version and the real thing.  Find a bunch of old family photos, some fake credit cards (the display version that comes in junk mail trying to get you to sign your life away) and any other small objects that will slide in.  An old handbag is another version that toddlers love. Pick one up from an op-shop with as many zippers, pockets, divisions and press-studs as you can find and fill it with a bunch of small items. This works great for mat time on the go and can be re-stocked with different items on a regular basis to keep interest high.

For more toddler and baby activities, click on the “toddlers and babies” or “workjobs and Montessori activities…” categories on the left hand side bar.

Book Review: Grandpa’s Box by Starr Meade

We have just about finished reading “Grandpa’s Box” by Starr Meade for family devotions and we will be sad to see the end. This fresh retelling of some of the major bible stories is biblically accurate, entertaining, humorous at times and grabs the attention of all ages.

Grandpa shares bible stories with Marc and Amy using wooden figures from his special box as symbols and framing each one as a battle between God and Satan. The use of wooden symbols links in beautifully with a Jesse Tree at Christmas time or a Jesus Tree for Easter.

With insights that taught even the adults something new at times, this clever recount comes from an angle you wouldn’t ordinarily consider and rather than being scary, focuses on redemption and the promised child who comes to win the battle once and for all.

With a scripture reading and reference at the end of each chapter this is a perfect resource for circle time, family devotions or as a read aloud. Each chapter is complete in itself so provides a neat chunk of reading time with a natural conclusion. Beginning in Genesis and working its way chronologically through to Revelation it will help children to develop their understanding while having them eager for more.

My children look forward to evening devotions and constantly ask to hear another chapter through the day, despite the fact that Daddy doesn’t want to miss out!

The “if…then” chart

From around the age of three it is important that children begin to understand the principles behind the behaviour we expect from them – the moral reason “why” of any given situation. This allows them to apply the principles to any and every situation they are facing, including those that are entirely new to them. As Christians, this moral reason should be based on the authority of scripture.

It was somewhat of a surprise to me to realise that while I know the right thing to do, I didn’t actually know the biblical reason why in some situations. Everything came back to obedience and respect. While these are important, there has to be a little more to it as our children grow. “Because Mummy said so” is a legitimate response, especially for the very young child, however children need more than that as they mature. Similarly, “because the bible says so” does not cut it for ever. Where does it say so and exactly what does it say?

I also find myself easily falling into the habit of nagging, reminding and scolding the children while not actually doing anything about the behaviours in the form of applying suitable consequences. Many times in the past when I have sat down and thought through what our problem areas are and applied consistent consequences (explaining clearly the moral or practical reasons why behind the rules) it has been a matter of days before those behaviours are no longer a problem. With a plan and consistent reinforcement it takes only days to eliminate behaviours that at times have been driving me nuts for months! Ideally my husband and I will sit down once a week to take stock, plan and work on our children’s moral development, character and behaviour together.

One tool we find helpful is the “If…then” chart. (Available from here or make your own.) Ours has space for a bible verse explaining the moral reason (or practical reason) behind the rule, a description of the behaviour we are working to eliminate and the consequence that will be given if the behaviour occurs. At the same time we work on the positive side of the character trait. It is no good telling children what not to do if they do not clearly understand what it is they should do.

I am also transferring each behaviour onto an A4 page and each child will illustrate the ones particularly applicable to themselves for display. This will help the non-readers to remember what we are working on. I used the book “Proverbs for Parenting”  to find a verse to back up each rule. The book has proverbs sorted into categories/topic areas relevant to parenting which makes it easy to find bible verses relating to a particular kind of behaviour.

We will focus on 2 or 3 behaviours per child that are problem areas for each of the eldest children (consequences will apply to all though) and add more once those problem areas have been significantly reduced. I am hoping to see some very positive changes across the next few days and weeks and I know I will be less frustrated because I have a plan of how to deal with the situations. I will be proactively parenting in these areas, rather than reactively parenting, which is always a better way to go!

Mealtime madness – conversation skills, table etiquette and manners

Meals are a time for sitting face to face around the table and sharing our thoughts, feelings and experiences together. A time of bonding and growing with worthwhile discussions across a broad range of topics, inclusive of all those at the table. While using your cutlery correctly and displaying beautiful manners of course. Well, in my ideal world they are!

The reality at the moment is that meal times are often full of foolish talk, semi foolish behaviour and questionable manners. The latest spanner in the works is a newborn who’s feeds often coincide with everyone else’s meal time, requiring me to leave the children eating together without supervision during lunch. What to do? Here are a few ideas that we have used in the past to combat the lunch time sillies and to try to redeem this time.

  • Reading aloud. I either eat before or after the children and use the meal time itself to read aloud from excellent literature. Quality conversations can often be had relating to the themes and ideas we are reading about. Reading aloud is such a valuable activity and all children should have the opportunity to be exposed to good literature even before they develop the ability to read it for themselves. There are times that I do manage to insert lengthy read aloud sessions into our day and then there are times that it is much more difficult. A couple of chapters a day is better than nothing.
  • Audio Books. When reading aloud is not practical I substitute audio books instead. Not as nice as a “live” voice but they are still being exposed to great literature. There are thousands of classic stories available online for free download at librivox.org. Some of the volunteers who have recorded the stories are more polished and easier to listen to than others but the children don’t seem to mind.
  • Discussion starters. I trawled the net a while back for discussion starter ideas and printed out hundreds of them onto coloured paper before cutting them into strips. When conversation isn’t going well, one of the children lucky-dips a conversation starter and we all take turns to answer the usually thought-provoking question. Some of the sites with lists of ideas are here, here, here, herehere, here, here, here, here, here, here and here.
  • Etiquette posters. I purchased a set of etiquette posters from above rubies and have those on display. (The “etiquette posters” link above is the American site but you can order from the Australian site; “above rubies” link.) We occasionally read through them and discuss different scenarios, situations and occasions where a variety of manners and behaviours are expected and considered polite and respectful. We play “What would you do if…?” where we set up a  story situation for the children to respond to by using good etiquette or manners.
  • 3 marbles. When we were running our manners marble jar reward system I was putting 3 marbles in front of each child at the beginning of a meal. If poor manners were used, I didn’t lecture, I simply removed one marble. Any marbles that were left at the end of the meal were added to the marble jar.
  • 3 warnings. Assuming your children already know what is expected, the time for nagging is over. When fingers go in food or other behaviours that we have been repeatedly working on, I hold up one finger without a word. That is the signal for one warning. A second warning is given in the same way and the meal is placed in the centre of the table for a couple of minutes. If the same behaviours are used again, the meal is over for that child. (For those who use this as a convenient excuse to get out of eating the food they don’t like, we ask them to go and finish their meal in the laundry.)

Materials and storage for workjobs and Montessori tray activities

Plastic Chinese food containers fit neatly into my drawers and are a cheap and easy storage system for the items I use to make home-made workjobs and Montessori tray activities.

If you are setting yourself up for workjobs  or Montessori style tray activities for the first time there are unlimited numbers of materials that you could buy. Commercial Montessori products are beautiful but very expensive and particularly for the toddler and preschool ages it is relatively easy to make your own activities  for a fraction of the cost.

I generally source my materials secondhand form op shops, swap-meets and markets and buy the rest cheaply from discount variety stores or gather them from around the house. Each tray activity or workjob usually costs no more than $4.00 and many of the items can be re-used and presented with a different combination to make other “new” and interesting activities.

Some useful items to collect include the following:

Materials to count, transfer or manipulate:

  • Feathers
  • Buttons
  • Spools & film canisters
  • Jar & milk bottle lids
  • Pasta, macaroni, dried beans & rice
  • Corks
  • Sea shells
  • Popsicle sticks (popsticks)
  • Jewels & beads
  • Rocks, stones & pebbles
  • Straws
  • Fancy toothpicks
  • Golf tees
  • Stirring or cocktail sticks
  • Costume jewelry, bangles & strings of beads
  • Pipe cleaners
  • Rubber bands
  • String, twine, yarn, wool,shoe laces & cottons
  • Oversized metal or plastic needles
  • Paper bags, plates & cups
  • Plastic cutlery
  • Ribbon & bows
  • Hair clips & lackies
  • Magnets
  • Pompoms
  • Wedding favours eg. fake rings, mini doves, glass slippers etc.
  • Plastic & wooden pegs & dolly pegs
  • Dog clips, over-sized paperclips & other fasteners
  • Cardboard shapes
  • Number and letter tiles, cards & pieces from old board games
Materials for storage or presentation of trays and workjobs:
  • Glass, metal, china, cane & wooden bowls, trays, baskets & containers
  • Plastic tubs & lids
  • Cardboard tubes, boxes, egg cartons & food containers
  • Plastic containers & lids
  • Material/fabric scraps
  • Wood scraps
  • Shoe boxes
  • Ice-cube trays, dip trays & other divided containers
  • Plastic & glass jars
Utensils & tools for manipulating materials:
  • small hammers
  • Tongs, scoops, spoons & ladles
  • Tweezers
  • Measuring cups & funnels
Stationery:
  • Pens, pencils, textas, scissors & crayons
  • Glue, staplers, masking tape, sticky tape
  • Rulers, stencils, fasteners
If you have other ideas, please let me know and I will add them to the list.

Other posts you may like:

Montessori style tray activities; starting out

Montessori overview

Workjobs & learning styles

Hands-on Montessori tray activities for toddlers: Length comparison

Following on from my last post, here is an example of one of my toddler activity tray categories. For one term I designated a tray to length comparison; sorting various materials into “long” and “short.”

The child first finds the two matching pieces (strings of coloured beads in the tray above) and places them together to make a pair (a matching activity in itself.) They then sort the pair into the “long” or “short” containers which are also long and short in themselves to reinforce the concept.

After a week or two, when they are losing interest in the material they are sorting, I simply change it for a new material, leaving the containers and tray set up the same. Interest is revived and the concept is practised and reinforced.

My daughter who last used these length activities was 2 years and 2 months of age when she started and easily grasped the the concept. I used the Montessori activities while I was breastfeeding because it allowed me to supervise, encourage and explain if necessary while she was well occupied with challenging, yet age and developmental appropriate and enjoyable activities.

Matching, comparing and sorting coloured ribbons.

Matching, comparing and sorting coloured pencils.

Matching, comparing and sorting strips of coloured paper.

More lace ribbons to sort and compare.

Ideally the popsticks should be the same thickness so as not to confuse a child with two changing attributes; length and width. I may have been better to use the large popsticks and cut some shorter rather than use the two different kinds. It didn't seem to worry my daughter though.

Matching, comparing and sorting more coloured ribbons.

Matching, comparing and sorting coloured straws.

Matching, comparing and sorting coloured chenille sticks (tinsel pipe-cleaners.)

Montessori style tray activities for toddlers: starting out

Easter holidays are almost over and it’s time to get back into the swing of things. The twins are old enough to start Montessori tray activities so I thought I’d post today about some of the activities I’ve used for my beginners in the past.

The first thing you need to think about when you are setting out tray activities for the first time is how you will store and present them. They do take up a bit of space so a small bookshelf or shelved cupboard is ideal to place open trays, bowls and baskets in. If you don’t have enough space for this, perhaps you will need to use a system of shoe-boxes or similar so that they can be stacked away when not in use. They are not ideal as the toddler cannot see the contents easily, however they are better than nothing.

The tray or container itself is the next step. True Montessori style places a big emphasis on beautiful natural materials; everything being wood, metal, stone, glass etc and avoiding plastic and the like. While commercial Montessori materials are truly beautiful, the reality for me is that they are expensive and I am making my own, so I have to work with what I have. I initially visited a bunch of swap-meets, op shops, second-hand shops, discount variety stores and the like and bought a stack of wooden bowls, wooden trays, glass dishes, metal baskets and anything else that fitted into the natural and aesthetically pleasing category.

The trays were another matter. Wooden trays look great but cost too much and I couldn’t find any secondhand so I ended up using the flat plastic lids from small plastic storage crates I already had around the house. A roll of non-stick drawer liner cut to size for each tray stops the dishes and smaller items from slipping around.

The next step was to find a bunch of attractive materials to use for practical life activities. (See materials and storage ideas here)

To make it workable for me, I choose a selection of categories for my activities and have one tray for each kind. For example, one tray is for tong and spoon transfer, one tray for counting, one tray for colour matching and sorting, one for pegging and clipping, one for matching etc. Once I have my chosen categories set up, I use the same tray and containers for the whole term and only change the material that is presented.

This means that once my toddler is familiar with the tonging activity (I have presented it and demonstrated what to do) they are able to approach each new material without me having to re-explain what to do. They see a pair of tongs (different each week or two) with a new material to transfer but the same two containers to transfer back and forth from.  Eventually I change the containers too, but to begin with I keep it very similar so that they feel confidant in what they need to do.

On the first day the shelves are empty apart from 3 or 4 tray activities. I sit down and present each new activity which I demonstrate first before the toddler takes a turn. Depending on their attention span, I will introduce all 4 trays and stop for the day. Part of this process is showing them how to carry the tray to their work area (a carpet mat), complete the activity, place all materials back in their places and return the tray to the shelf.

The following day the child chooses which activities they would like to work on and completes them independently. If necessary, I will sit down and demonstrate the activities again. Once I can see that they understand what to do with the 4 that are already out I introduce just one new tray a day until I have built up to having all the categories in circulation.

Once they are confidently using one of each type of activity, I can change the materials without changing how it is presented (as explained above) and usually do not have to spend time explaining what to do as the concept is already familiar to them. (The next post will give you a photographic example of what I mean.)

Other posts you may like:

Mega marble transfer

An introduction to sorting

Teaching toddlers to cut

More pantry mixes; almost instant meals and snacks

Our latest blessing is 3 weeks old today and while my husband is still on holidays and the children are having a break from school for Easter I have been making up and trying out some more pantry mix recipes. I am loving being able to get a meal ready in a matter of minutes, especially when I’ve left it all too late to put anything fancy together.

My absolute favourite so far is the onion soup mix. I love dip made from a packet of French onion soup mixed with sour cream but I don’t like the additives and nasties that come with the shop bought product. This home-made mix tastes the same as the commercial version and I know exactly what’s in it. There are so many quick and easy recipes that use dry French onion soup in a packet as a base that I had previously crossed off my list that I can now go back and add to my weekly menus. VERY pleased with this one!

Another base that is used in a lot of quick recipes is cream of chicken (mushroom etc.) soup in a can. Another selection of easy meal ideas that I love for the convenience but haven’t been using because of the additives in commercial soup products.  I’ll have to play with the amount of water to add to the mix for cooking because I didn’t factor in the thin soup noodles I added to the mix (I wanted chicken noodle soup in a cup) and they soaked up a lot of the liquid and by the time I served it it was too thick. Taste was still good but a bit gluggy. Still a keeper though as I’m sure with a better water ratio it will be fine.

Layered soup mix in a jar (Friendship soup mix) was next on the list. Again, 5 minutes to put together and pop into the slow cooker. Taste is great but it’s more like a thick casserole than soup. We are going to use it to make stuffed potatoes, put on top of rice and in tacos.

We tried the butterscotch pudding mix and I was disappointed to find that it tasted like a bland custard mix. The kids still liked it though. The chocolate pudding mix is still a favourite but I won’t bother with the butterscotch mix again.

The last one I’ve tried is corn bread mix. So quick and easy; 3 minutes total! Add oil, egg and water to the mix and tip into a cake pan. 15 minutes later fluffy cornbread is ready to eat. This will be great in winter to have with hot soup for lunch. We had it buttered fresh from the oven and it was delicious.

There are many more ideas out there and I will explore some in the future, but I’m done for now. I have several containers of nearly instant meals and snacks just sitting in the pantry and I’m sure these will be well used in the busy weeks ahead.