Materials and storage for workjobs and Montessori tray activities

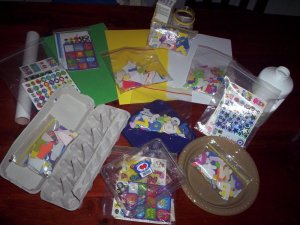
Plastic Chinese food containers fit neatly into my drawers and are a cheap and easy storage system for the items I use to make home-made workjobs and Montessori tray activities.

If you are setting yourself up for workjobs  or Montessori style tray activities for the first time there are unlimited numbers of materials that you could buy. Commercial Montessori products are beautiful but very expensive and particularly for the toddler and preschool ages it is relatively easy to make your own activities  for a fraction of the cost.

I generally source my materials secondhand form op shops, swap-meets and markets and buy the rest cheaply from discount variety stores or gather them from around the house. Each tray activity or workjob usually costs no more than $4.00 and many of the items can be re-used and presented with a different combination to make other “new” and interesting activities.

Some useful items to collect include the following:

Materials to count, transfer or manipulate:

  • Feathers
  • Buttons
  • Spools & film canisters
  • Jar & milk bottle lids
  • Pasta, macaroni, dried beans & rice
  • Corks
  • Sea shells
  • Popsicle sticks (popsticks)
  • Jewels & beads
  • Rocks, stones & pebbles
  • Straws
  • Fancy toothpicks
  • Golf tees
  • Stirring or cocktail sticks
  • Costume jewelry, bangles & strings of beads
  • Pipe cleaners
  • Rubber bands
  • String, twine, yarn, wool,shoe laces & cottons
  • Oversized metal or plastic needles
  • Paper bags, plates & cups
  • Plastic cutlery
  • Ribbon & bows
  • Hair clips & lackies
  • Magnets
  • Pompoms
  • Wedding favours eg. fake rings, mini doves, glass slippers etc.
  • Plastic & wooden pegs & dolly pegs
  • Dog clips, over-sized paperclips & other fasteners
  • Cardboard shapes
  • Number and letter tiles, cards & pieces from old board games
Materials for storage or presentation of trays and workjobs:
  • Glass, metal, china, cane & wooden bowls, trays, baskets & containers
  • Plastic tubs & lids
  • Cardboard tubes, boxes, egg cartons & food containers
  • Plastic containers & lids
  • Material/fabric scraps
  • Wood scraps
  • Shoe boxes
  • Ice-cube trays, dip trays & other divided containers
  • Plastic & glass jars
Utensils & tools for manipulating materials:
  • small hammers
  • Tongs, scoops, spoons & ladles
  • Tweezers
  • Measuring cups & funnels
Stationery:
  • Pens, pencils, textas, scissors & crayons
  • Glue, staplers, masking tape, sticky tape
  • Rulers, stencils, fasteners
If you have other ideas, please let me know and I will add them to the list.

Other posts you may like:

Montessori style tray activities; starting out

Montessori overview

Workjobs & learning styles

Advertisement

Hands-on Montessori tray activities for toddlers: Length comparison

Following on from my last post, here is an example of one of my toddler activity tray categories. For one term I designated a tray to length comparison; sorting various materials into “long” and “short.”

The child first finds the two matching pieces (strings of coloured beads in the tray above) and places them together to make a pair (a matching activity in itself.) They then sort the pair into the “long” or “short” containers which are also long and short in themselves to reinforce the concept.

After a week or two, when they are losing interest in the material they are sorting, I simply change it for a new material, leaving the containers and tray set up the same. Interest is revived and the concept is practised and reinforced.

My daughter who last used these length activities was 2 years and 2 months of age when she started and easily grasped the the concept. I used the Montessori activities while I was breastfeeding because it allowed me to supervise, encourage and explain if necessary while she was well occupied with challenging, yet age and developmental appropriate and enjoyable activities.

Matching, comparing and sorting coloured ribbons.

Matching, comparing and sorting coloured pencils.

Matching, comparing and sorting strips of coloured paper.

More lace ribbons to sort and compare.

Ideally the popsticks should be the same thickness so as not to confuse a child with two changing attributes; length and width. I may have been better to use the large popsticks and cut some shorter rather than use the two different kinds. It didn't seem to worry my daughter though.

Matching, comparing and sorting more coloured ribbons.

Matching, comparing and sorting coloured straws.

Matching, comparing and sorting coloured chenille sticks (tinsel pipe-cleaners.)

Montessori style tray activities for toddlers: starting out

Easter holidays are almost over and it’s time to get back into the swing of things. The twins are old enough to start Montessori tray activities so I thought I’d post today about some of the activities I’ve used for my beginners in the past.

The first thing you need to think about when you are setting out tray activities for the first time is how you will store and present them. They do take up a bit of space so a small bookshelf or shelved cupboard is ideal to place open trays, bowls and baskets in. If you don’t have enough space for this, perhaps you will need to use a system of shoe-boxes or similar so that they can be stacked away when not in use. They are not ideal as the toddler cannot see the contents easily, however they are better than nothing.

The tray or container itself is the next step. True Montessori style places a big emphasis on beautiful natural materials; everything being wood, metal, stone, glass etc and avoiding plastic and the like. While commercial Montessori materials are truly beautiful, the reality for me is that they are expensive and I am making my own, so I have to work with what I have. I initially visited a bunch of swap-meets, op shops, second-hand shops, discount variety stores and the like and bought a stack of wooden bowls, wooden trays, glass dishes, metal baskets and anything else that fitted into the natural and aesthetically pleasing category.

The trays were another matter. Wooden trays look great but cost too much and I couldn’t find any secondhand so I ended up using the flat plastic lids from small plastic storage crates I already had around the house. A roll of non-stick drawer liner cut to size for each tray stops the dishes and smaller items from slipping around.

The next step was to find a bunch of attractive materials to use for practical life activities. (See materials and storage ideas here)

To make it workable for me, I choose a selection of categories for my activities and have one tray for each kind. For example, one tray is for tong and spoon transfer, one tray for counting, one tray for colour matching and sorting, one for pegging and clipping, one for matching etc. Once I have my chosen categories set up, I use the same tray and containers for the whole term and only change the material that is presented.

This means that once my toddler is familiar with the tonging activity (I have presented it and demonstrated what to do) they are able to approach each new material without me having to re-explain what to do. They see a pair of tongs (different each week or two) with a new material to transfer but the same two containers to transfer back and forth from.  Eventually I change the containers too, but to begin with I keep it very similar so that they feel confidant in what they need to do.

On the first day the shelves are empty apart from 3 or 4 tray activities. I sit down and present each new activity which I demonstrate first before the toddler takes a turn. Depending on their attention span, I will introduce all 4 trays and stop for the day. Part of this process is showing them how to carry the tray to their work area (a carpet mat), complete the activity, place all materials back in their places and return the tray to the shelf.

The following day the child chooses which activities they would like to work on and completes them independently. If necessary, I will sit down and demonstrate the activities again. Once I can see that they understand what to do with the 4 that are already out I introduce just one new tray a day until I have built up to having all the categories in circulation.

Once they are confidently using one of each type of activity, I can change the materials without changing how it is presented (as explained above) and usually do not have to spend time explaining what to do as the concept is already familiar to them. (The next post will give you a photographic example of what I mean.)

Other posts you may like:

Mega marble transfer

An introduction to sorting

Teaching toddlers to cut

Rainy day activities: Balls and stockings

Ahh, the first rains of winter have hit. Easter as usual has suddenly turned cool and I must dig out the winter clothes and have a trying on and handing down session as the children’s little goose-pimpled legs are freezing.  While I quite like the rain (especially if I am curled up somewhere warm with a good book to read) it brings with it its own challenges for a household full of energetic children. What do you do with them when it’s too wet to go outside and all “sitting and concentrating” capacity is gone?

Time for the stocking balls. We are lucky enough to have a large patio area out the back that gives us a reasonable amount of play space under cover. I gather up a bunch of old pantyhose, stockings or tights and slide a tennis ball inside one leg before tying them to the cross beams of the patio. I hang a couple at a time so several children can play at once and have them at varying heights to cater for a range of sizes. They also need to be well clear from each other and preferably out of walk ways or those toddlers will almost definitely end up with someone’s bat in the face.

We use bats from the totem tennis set, tea-ball bats and whatever else we have at the time and everyone whacks away as hard as they like. (A sturdy cardboard tube is a good option for those not so coordinated toddlers.) Boys in particular seem to like this activity, using up energy and having a good time smashing away. The stockings do tend to stretch after a while so perhaps hanging them a little higher than you actually want them would be useful and yes, the balls will eventually break through the stocking. Mine have lasted for several weeks at a time and can simply be thrown away and replaced when they wear out. An economical and easy to set up activity that will help to bring peace to my household this winter. Now, where are those stockings…

Highchair and mat activities: Montessori style practical life tong transfer activity for toddlers: Pom-poms, fruit and bugs

Over-sized pom-poms and tea bag tongs are a great starter set for tong transfer activities. The tongs are easy to manipulate and the pom-poms do not slip out.

As I have been tweaking my routine this week in readiness for our latest bundle of joy (now 3 days overdue!) I have been setting up some new tray activities for highchair time. Having toddlers on the loose while I breastfeed (especially when there are two of them) is a recipe for disaster. These activities can be used in a highchair, on a mat, for table time or for playpen time , however because I am introducing them to young toddlers and need to keep a close eye on them to begin with , I use highchair time.

Tonging is a simple practical life activity for toddlers and is excellent for fine motor control. Try to find small tongs that are not too stiff or your little ones may not have the dexterity to manage them. Tea bag tongs are easy to squeeze, as are ice tongs. Check your local opportunity shop (secondhand shops, $2 shops etc.) for supplies. Two containers and something to tong are your only other materials and usually with a bit of imagination you can find something around the house that fits the bill.

When I set up my trays I have a category for each kind of activity so that I can quickly change them over every couple of weeks without a lot of thought. Tong transfer is one category that I use and these are some of the examples I have set up in the past.

Slightly smaller pom-poms with the same easy to manipulate tea-bag tongs take the activity to the next level of difficulty.

The easiest first experiences are soft items like oversized pom-poms, cotton wool balls, balls of wool, or anything else that will not easily slip out of the tongs. Put only a few items in the container to begin with to encourage success as toddlers may quickly tire of the concentration and control needed to manage the tongs. Our “rule” with tray activities is that they should be completed before they are packed away so I want to ensure that the toddlers can be successful right from the beginning.

Larger and longer tongs are more difficult to use. These are still easy to squeeze but their length makes them more unwieldy to handle.The fruit are plastic iceblock shapes from the $2 shop.

A small set of salad tongs and a bag of plastic bugs were all that was needed for this tray.

The reality of young toddlers and tray activities is that they will have a limited concentration span and the interest shown for each activity will vary. I try to make each tray so that they can be easily completed in around 5 minutes. This means that if you want 30 minutes of highchair time to be well occupied, you will need around 6 activities. Some will be very absorbing for the child and they will complete and repeat them over and over. They will find some very challenging and perhaps even difficult and may want to spend less time on these. Reduce the amount of material on these trays accordingly. If you see that an activity is too difficult for the child to complete successfully, simply remove it and re-introduce at a later date. The perfect activity has a bit of a challenge but not so much that the child is frustrated by their inability to complete it.

Other posts you may like:

Mega marble transfer

An introduction to sorting

Bucket of giant beads transfer

Montessori style tray activity for toddlers: Bucket of giant beads

Today I’m moving away from water transfer for all those who can’t stand the mess or have little ones who are just not ready for that yet! This is the second Montessori style tray activity for toddlers that I ever introduced, to follow on from the mega marbles transfer. Both require less fine  motor control and can be completed successfully by young toddlers. Easy to set up and adapt to the materials you have on hand, you can get this one together in minutes. A great highchair or table activity, it works well for keeping little ones occupied while homeschooling and can easily be carried to the Montessori mats traditionally used to delineate each child’s work-space.

DESCRIPTION:

  • The child uses the scoop provided to transfer the large wooden beads from one bucket to the other and back again.

CATEGORY/SUBJECT AREA:

  • Practical life: dry transfer

CONCEPT/SKILL:

  • Fine motor development
  • Control of ladle or scoop
  • Transferring dry materials

EQUIPMENT & MATERIALS:

  • Ladle (scoop, icecream scoop, measuring spoon, large spoon, pasta spoon or any other utensil that fits one bead at a time into it. Choose a short-handled utensil for ease of manipulation.)
  • Large beads or alternative material to transfer
  • 2  containers (metal containers make a pleasing sound as the beads drop in.)
  • Tray

Please see my articles titled “Workjobs and Learning Styles” and “Brief Montessori Overview” for more information.

Homeschooling with toddlers: Duplo copy and build

Here’s another fun yet educational activity for your toddlers or pre-schoolers to do while you homeschool the older children (or just get some dinner cooked!) It works as a Montessori style tray activity, table activity, playpen activity or mat time (blanket time) activity and can be adapted in difficulty to suit a wide range of ages.

Assuming you own Duplo (or any other suitable construction toy) and a digital camera, it costs almost nothing to make and is simple to put together. Older children could be enlisted to make the models required.

Simply make a selection of small models, photograph them individually and put only the pieces needed to construct each one into separate containers. Print the photos (laminate if you want them to last) and put them with the corresponding model and that’s it! The child simply uses the blocks supplied to copy the photo. The activity is self-checking in that there will be no spare blocks left at the end if they have copied correctly.

The easiest model for a 2 year old to copy might simple be a stack of 3 or 4 square Duplo blocks. Each set given from then on can increase in difficulty by adding more blocks and changing the complexity of the designs. It may need some teaching at first for the very young children to grasp the concept, but once they understand what to do they will be off and running. After each model is created children can play with the little set of bricks and try to make something different with it. Little boys in particular love to build, however my girls have enjoyed the challenge of making the colours and shapes of the blocks match exactly.

Homeschooling activities for toddlers: Pasta play

Cleaner than water and sand – but just as much fun – pasta play is a great activity for busy toddlers. Useful for mat time and any time that you need to keep little ones happily occupied. If you have trained your toddlers to stay on a designated area for blanket time (mat time) then they will happily spend time tipping, pouring, filling, scooping, posting and otherwise manipulating pasta shapes.

All you need is a couple of bags of dry pasta, a variety of containers and a bunch of scoops and ladles and you are all set. Spread a sheet out on the floor to catch the dropped pasta and clean-up is a breeze. Simply collect up all the accessories into a container or tub of some sort, flick the pasta onto the sheet and pick it up by the four corners. If you will be using it regularly then find a container big enough to put the sheet bundle straight into (rather than tipping the pasta off the sheet) and you are all picked up in seconds. Of course, teaching little ones to help pack up is an important skill and if everything is being tossed into an open container then it is an easy matter for them to help you clean up.

Yes, they will probably have a bit of a chew as well, but it is just pasta! Keep an eye on them as always because  pasta could pose a choking hazard for toddlers but all in all, this is a very easy activity to set up and by simply changing the containers and accessories you put with it you can renew interest and keep the activity fresh.

It works well as a sensory table activity and can be adapted and set up as a Montessori tray activity for practical life posting, scooping, sweeping, pouring etc. The photo above shows pasta play set up at my sensory table in two plastic crates, however for toddlers I prefer the sheet method as they tend to spread it far and wide around the sensory table.

Homeschooling activities for toddlers: Cutting, gluing & stickers

We survived our plane trip to Melbourne despite our flight being cancelled and having to travel in the middle of the night.  All those carefully planned activities for the children (ideas here, here and here) weren’t even touched as the youngest 3 were snoozing both on the way there and on the way back! Oh well, there were plenty of times during the conference itself that the twins enjoyed their activities while having some quiet mat time during the day.

We were home just in time to finalise all our new year school plans for our moderator visit this week and to continue getting organised for our new addition as that due date is looming ever closer.

If you are looking for ideas to keep a toddler well occupied while you school older children, then stickers, glue and cutting have always been a big hit in our family.

The stickers and coloured paper are separated into separate sheet protectors so the toddler can take out just what is needed for that morning (and to stop all the stickers being used in one day!) After the stickers are stuck they draw on the paper as well and some quite interesting scenes have been created.

For a younger toddler, I set stickers out in individual zip lock bags with an interesting item to stick them on to. This is for the age where just getting the stickers off the page and onto something is quite time-consuming and absorbing in itself.

This picture shows 10 weeks worth of sticker activities. One morning a week was designated as "sticker day" and that kept the activity fresh and interesting. Card tubes, paper plates, bottles and any other interesting containers are great.

Another quick and easy to prepare activity is gluing. I filled old photo envelopes with an assortment of pre-cut paper shapes (from the scrapbooking isle at K Mart) and put each with a sheet of coloured paper. A glue stick completes the activity (I use the blue glue sticks so the toddlers can see where they are putting the glue) and away they go.

10 used photo envelopes, 10 sheets of paper and a bunch of paper shapes to glue equals 10 weeks worth of happy toddler fun during school time with the older children. Again, one morning a week is "Gluing day" to keep it fresh and interesting.


The cutting activities I used this year came from a variety of sources on the web. I googled “free printable cutting activities” and just printed away! Lots of dotted lines to cut on, pictures to cut out etc. For a younger toddler, see “Teaching toddlers to cut” for ideas on how to set up their cutting activities.

Outdoor activities: more water play ideas

How do you keep little ones entertained and playing happily outdoors for extended lengths of time? Opening the back door and simply sending several young children out is not always a very successful method. Without direction to their play it is very likely that you will be dealing with bickering, squabbles and otherwise less than useful use of their time.

Spending 5 minutes getting them started on an absorbing and appropriate activity very often makes for a harmonious time as they happily go about their play in a focussed way. This 5 minutes at the start of playtime often saves me many minutes umpiring disputes and redirecting poor choices. More ideas will follow under the heading of outdoor activities, but today it’s more water based ideas.

In the warmer weather I find it so much easier as all my children from the youngest to the oldest love water and sand based play. All water based activities require some supervision so I choose tasks to do that allow me to oversee what is going on either from a distance or close by depending on the activity. Our water table is a favourite, as are the following:

Water painting

  • Buy a couple of different sized house painting brushes from a hardware (the cheap sets are fine) and a small bucket. Fill the bucket with water, give some directions as to which outdoor areas; furniture, fences, paths, walls etc. can be painted with water and let them at it! My children, especially the younger ones, love water painting, particularly if I occasionally admire the lovely new “colours” they have painted everything.
Sprinklers
  • I know it doesn’t fit into the water saving category but if it is your watering day, set up a sprinkler on the lawn and let everyone run about in it. Old as the hills, so easy and great exercise.
Paddle Pools/sandpit shell halves
  • I’ve mentioned this before, but an inch of water or even a couple of pots and pans full of water for scooping, tipping and pouring while sitting in half of a plastic sandpit clam shell or paddle pool is good fun. Combine it with a little sand and it becomes great fun.
Sandpit
  • Point the hose into the sandpit and turn it on just a little so a trickle comes out. That’s it! Provide cars, boats or whatever else you have in your sandpit toys.
Puddle Kingdom
  • Sometimes we empty out our outdoor storage containers and put a bunch of them together on the grass. We then fill each one with a little water and again, free play! Jumping from one to another, making “houses” or whatever they fancy makes this an interesting pastime.
Water trampolining
  • We occasionally set up the sprinkler underneath or near  the trampoline for wet bouncing fun. This isn’t so good for the younger children though as it does get quite slippery. The 3 year old and up are steady enough on their feet to make this loads of wet fun.
Water slides
  • If your backyard has a slope, then a long sheet of black plastic with a little detergent and lots of water is a wonderful slide and wears those energetic youngsters out.
Water Chasey
  • Not quite our usual outdoor activity as this involves me, but when it is really hot we play water chasey with the hose. Simply put, the kids run around like crazy and I spray them with the hose, watering the garden in between.

Paddle pools and slide

  • Another one that requires adult supervision is the paddle pool properly filled up or with a small amount of water and the slide from our little plastic castle into it for the children to climb up and slide into the pool. When they’ve had enough sliding we bring the sandpit toys over and everyone sits down for a play.