No (or low) sugar snacks for kids: Morning and afternoon tea snack ideas

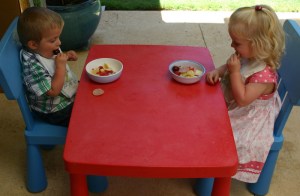
I do not remember why the children are eating cereal in their PJ's on the floor! There must have been a reason at the time!

My children have bottomless stomachs in the morning. It seems like the last bite of breakfast has only just disappeared when someone will be asking me “What’s for morning tea, Mum?” By the time I have planned breakfast, lunch and dinner meals, It’s a real stretch to think of snack ideas on top of that. They are however, very important to the short people I live with and they have failed to catch on to my preferred method of simply having an early lunch. Besides that, the general happiness level drops dramatically and seems to be inversely related to the hunger levels, particularly with the toddlers and girls in the family.

So, this brings me to today’s quest to make a list of healthy, low sugar snacks that don’t fill them up too much and take very little time and effort to prepare. I don’t mind putting in a little preparation ahead of time if they can be kept in the fridge or pantry and simply dished out as the children head outside to play. Even better if one of the older children can get them out for me as I am usually feeding a baby at this time. Otherwise, it’s got to be nothing more taxing than spreading a little peanut butter or it just won’t happen.

I would love to hear your ideas so please leave a comment. Fresh inspiration from other Mothers is always appreciated. Here’s my list so far:

  • savoury cheese crackers (recipe below)
  • celery boats (celery with peanut/nut butter and sultana sailors or cream cheese)
  • apple slices spread with peanut/nut butter and pressed into sesame (or other) seeds
  • juice pops
  • pikelets (I make a huge batch and freeze them in packs of 6. They heat up beautifully in the toaster if I’ve forgotten to defrost them. Nan’s recipe below.)
  • mini muffins (fruit based or savoury cheese and chives etc. I try to have a stash in the freezer already sorted into bags of 6 to whip out on the spot.)
  • mini cheese, pumpkin or plain  scones from bisquick mixture. (Baked ahead and frozen.)
  • banana and apricot bliss bombs (recipe below)
  • bliss balls (I haven’t tried these yet but they are on my “to do” list. They seem very healthy and it says they can be frozen.)
  • lettuce leaves spread with peanut butter, sprinkled with sultanas and rolled up. (Tastes better than it sounds!)
  • crackers with nut butter, cheese, Vegemite etc.
  • sugar free 4 ingredient banana oat bars
  • fruit salad, fruit kebabs or just plain ol’ fruit
  • veggie sticks (crudites) and dip (I love this and so do the older children but the toddlers don’t do carrot and celery sticks so well just yet! I refuse to serve 2 different snacks so this is out for now.)
  • trail mix (We can’t serve this as the toddlers can’t eat the whole nuts and certain other children’s tummies can’t handle too much dried fruit.)
  • air popped popcorn (We were given a popcorn maker as a wedding gift and at the time thought it a very strange present. It mouldered away in the back of the cupboards for many a year until we had a gang of children who loved to scoff popcorn. All of a sudden it became one of our favourite machines. Glad we kept it!)
  • plain rice cakes with avocado, Vegemite, nut butters, cream cheese, cheddar cheese etc.
  • toothpick with cheese and pineapple or olives and cheese
  • milk shakes
  • yoghurt (I use natural with fruit puree stirred through and maybe a dash of honey.)

Savoury Cheese Crackers
250gms tasty cheese
¼ cup butter
1 ½ cups sifted flour
Optional: (In dough) ¼ tspn pepper or chili powder, taco seasoning, pizza herbs, vinegar (salt and vinegar) plain or seasoning salt to sprinkle

 Cream cheese and butter in food processor.
 Add flour gradually and optional flavours.
 Pack dough into a ball (it will be crumbly)
 Divide dough into 3 parts and shape into logs about 3 cm in diameter.
 Wrap each log in waxed paper and refrigerate for at least 3 hours.
 Slice into very thin wafers, sprinkle with seasoning if using and bake at 180 degrees for 12 minutes or until golden.

Source: adapted from Recipe Zaar #108486

Banana & Apricot bliss bombs
2 soft bananas – mashed
8 dried apricots – chopped
1 cup coconut
2 tblspns ricotta/cottage cheese.
 Mix all ingredients.
 Roll into balls and coat in coconut.
 Refrigerate until firm.

Nan’s Pikelets
1 c SR flour (or plain flour plus baking powder)
½ cup soured milk (add 1 tblspn lemon juice and let sit for 15 mins)
3 tblspns sugar
1 egg
1 rounded tblspn melted butter

 Sift dry ingredients and mix wet.
 Slowly add the wet ingredients to the dry, beating with a wooden spoon as you go.
 Cook spoonfuls in buttered frypan over med heat.


Rainy day activities: Balls and stockings

Ahh, the first rains of winter have hit. Easter as usual has suddenly turned cool and I must dig out the winter clothes and have a trying on and handing down session as the children’s little goose-pimpled legs are freezing.  While I quite like the rain (especially if I am curled up somewhere warm with a good book to read) it brings with it its own challenges for a household full of energetic children. What do you do with them when it’s too wet to go outside and all “sitting and concentrating” capacity is gone?

Time for the stocking balls. We are lucky enough to have a large patio area out the back that gives us a reasonable amount of play space under cover. I gather up a bunch of old pantyhose, stockings or tights and slide a tennis ball inside one leg before tying them to the cross beams of the patio. I hang a couple at a time so several children can play at once and have them at varying heights to cater for a range of sizes. They also need to be well clear from each other and preferably out of walk ways or those toddlers will almost definitely end up with someone’s bat in the face.

We use bats from the totem tennis set, tea-ball bats and whatever else we have at the time and everyone whacks away as hard as they like. (A sturdy cardboard tube is a good option for those not so coordinated toddlers.) Boys in particular seem to like this activity, using up energy and having a good time smashing away. The stockings do tend to stretch after a while so perhaps hanging them a little higher than you actually want them would be useful and yes, the balls will eventually break through the stocking. Mine have lasted for several weeks at a time and can simply be thrown away and replaced when they wear out. An economical and easy to set up activity that will help to bring peace to my household this winter. Now, where are those stockings…

Quick food for busy families: Pantry mixes and (nearly) instant meals

With an 11 day old baby in the house, time for leisurely cooking just doesn’t exist. As part of my quest to prepare for our new baby ahead of time, I have a fully stocked freezer full of meals. As much as possible however,  I am saving them for when my wonderful husband goes back to work and I have to face the reality of homeschooling and running a household of 8 with a newborn in the mix.

My latest find to assist with menu planning and being able to throw a meal together in minutes has been pantry mixes. This is a totally new concept to me but I love them. There are so many mix recipes that can be made up in bulk ahead of time and either stored in the pantry, fridge or freezer. When you are ready to prepare the recipe, the addition of just a couple of simple ingredients in no time at all creates a freshly cooked meal or snack.

Today’s lunch (in the photo above) literally took 10 minutes and that includes getting everything out of the fridge, making the cheese scones, cutting up the fruit and cleaning up the mess. My kind of cooking! Not to mention that they are super tasty hot from the oven. As I try each new bulk mix I will blog about the successes so today here is the link for baking mix (bisquick) which takes 10 minutes to put together and sits in the fridge waiting to be made into all manner of yummy things. So far I’ve only used it for scones (biscuits) but there are numerous recipes that use it as a base. (Scone instructions under the basic mix recipe at the “baking mix” link above.)

My other new favourite is a pantry mix for brownies. In less than 5 minutes I can whip up a batch of delicious brownies and have them ready for unexpected visitors, take them for supper when I remember an hour before I am supposed to leave or just make them for the fun of it. The mix itself again takes about 10 minutes to mix up and sits in the pantry waiting for the addition of 3 wet ingredients to turn it into fresh brownies.

Another great benefit of these recipes other than the time-saving factor is that my 8 1/2 year old is quite capable of mixing them up independently. The first time through I keep an eye on proceedings and from then on he is on his own. I slide them into the oven and 20 minutes later we have hot brownies.

I have a huge list of recipes to try that I am slowly working through. Last night I used one of my pre-prepared bags of seasoned rice mix. I had already diced and browned bags of sausages, bacon and chicken and put them in the freezer and stocked up the frozen mixed vegetable supply. We were out in the afternoon and arrived home with no meal ready, a hungry baby and 5 children who needed to get through the shower. All I had to do was dump the pre-measured seasoned rice into the rice cooker, fill with water, add a bag of cooked diced meat and a cup or two of mixed frozen veg and it was  done. Dinner was ready 20 minutes later with less than 5 minutes of preparation required.

We followed it up with some chocolate pudding from our pantry which looked and tasted almost exactly like Yogo from the supermarket “only better” according to the children who raved about it. This one required about 10 minutes to actually cook it (it requires stirring) and a little while in the fridge to cool it down and set but we went off and did our family devotions while we were waiting and came back for dessert. Delicious and definitely a keeper. It could easily be done earlier in the day and served whenever you need it.

I am definitely hooked on the pantry mix idea and will be seeking to have a store of breakfast, lunch, dinner and snack foods sitting at my fingertips for days when I just don’t want to cook can’t do anything else or my older helpers want to prepare a meal to bless us all (and get the rave reviews and pats on the back that always accompany their efforts!)

Outdoor activities: Painting


I have a confession to make. As a homeschooling Mum it’s difficult to admit it, but I really don’t like to paint. That is, I like to paint, I just don’t like setting up painting for my children to do. It takes time to set up, creates heaps of mess and takes ages to pack up again, all for a few minutes of colourful fun.

In an effort to overcome this dislike and occasionally provide this apparently vital experience for my children, we have developed a method that works for us… occasionally….when I can mentally gear up for it.

I have some large packing boxes that I keep folded down flat. We set these up outside on the lawn with the top flaps folded shut to hold them together and the bottom flaps bent outwards to catch the drips. Now that the children are a little older they set up the whole experience pretty much by themselves. They cart out the boxes, taping paper on every single side, 2 per side so that each child gets several pages to do. The children pull out the paint pots and brushes and even mix up the colours from the prime colours we own. (It’s amazing how their knowledge of paint mixing, creating a variety of  shades etc. has developed when they do not have the option of prepared colours and have to mix their own.)

Off come the clothes and on go the painting shirts and we’re all set. I plop a bucket of water out on the grass with some cloths and hands are washed here, as well as the brushes once they are done. Pictures stay taped to the boxes until dry, eliminating paint splodges from all over my clothes drying rack and everyone has a ball. They even seem to enjoy the clean-up time. If they are really covered in paint I line them up and spray them down with the hose before sending everyone inside for an early shower.

The children get to paint, I get to …. not do anything much at all except supervise and everyone enjoys the process. Obviously the weather must be fine but in winter we use tablet water colours at the table. These are far less drippy and messy and I can cope with them inside far better than liquid paints. My children will not be artistically deprived or have to see counsellors to work through the fact that they never got to paint and I don’t feel guilty when I see all those arty blogs about painting!
Other posts you may like:

Outdoor activities: Hopper races and obstacle courses

We are blessed to have a great backyard. Plenty of space and very child-friendly. We still however hear the occasional moans about not wanting to go outside and having nothing to do. While that doesn’t wash in our house and the children are sent out anyway, I am finding that they are not sleeping at night as well as they should be and I suspect it is because of lack of physical exercise. In the heat they tend to gather in the shady sandpit and while it is lots of fun, doesn’t give them the exercise they need.

My usual response to the “I have nothing to do” complaint is to tell the kids to sit on a chair and think of something. I let them know that in 5 minutes I will be coming back and if they don’t have a plan will be giving them something to do. The children all know this is code for WORK so usually they will quickly re-direct themselves. If not, a corner of my garden gets some weeds pulled out or the sand around the sandpit gets swept up. Good exercise for them and great for me!

One outside activity we have done together that was enjoyed by everyone was hopper races. We set out hoses, broom handles, ropes, sports equipment, mats and a bunch of items from around the backyard and arranged them into an interesting obstacle course. The children then hopped through with their hoppers, circling some items, jumping over others, hopping backwards in some sections and weaving through other parts. They helped design the course and decide on the level of difficulty. Handicaps for the younger and slower members were decided on and the races began. Lots of hot sweaty fun was had by all and what’s more, they were totally exhausted by the end of it. Mission accomplished!

Routines with a newborn

We now have a lovely updated colour-coded routine on our whiteboard. Of course, the 8th person included in this routine is a baby that hasn’t actually been born yet so things may need some tweaking once the reality hits 🙂 It is however, a very useful exercise to look over my current routine and to plan ahead for the multiple breastfeeding sessions I will need to fit into my day and the interruptions that will invariably come with a newborn.

We will be (and have done with all our children) following a flexible  feed, wake, sleep cycle with our little one which allows me to make a rough plan of approximately where the daily feeds will fall. Of course, some days will not go as planned and we will often have to switch activities that are side by side around to fit a feed in earlier or later than planned. That is where the routine serves us and our family needs, rather than the other way around.

For anyone who is interested, I would be happy to email you a copy if you thought it would be of any help to you and your family. I have been trying to upload it here without success and am sick of fighting with the computer!

Other posts you may like:

Highchair and mat activities: Montessori style practical life tong transfer activity for toddlers: Pom-poms, fruit and bugs

Over-sized pom-poms and tea bag tongs are a great starter set for tong transfer activities. The tongs are easy to manipulate and the pom-poms do not slip out.

As I have been tweaking my routine this week in readiness for our latest bundle of joy (now 3 days overdue!) I have been setting up some new tray activities for highchair time. Having toddlers on the loose while I breastfeed (especially when there are two of them) is a recipe for disaster. These activities can be used in a highchair, on a mat, for table time or for playpen time , however because I am introducing them to young toddlers and need to keep a close eye on them to begin with , I use highchair time.

Tonging is a simple practical life activity for toddlers and is excellent for fine motor control. Try to find small tongs that are not too stiff or your little ones may not have the dexterity to manage them. Tea bag tongs are easy to squeeze, as are ice tongs. Check your local opportunity shop (secondhand shops, $2 shops etc.) for supplies. Two containers and something to tong are your only other materials and usually with a bit of imagination you can find something around the house that fits the bill.

When I set up my trays I have a category for each kind of activity so that I can quickly change them over every couple of weeks without a lot of thought. Tong transfer is one category that I use and these are some of the examples I have set up in the past.

Slightly smaller pom-poms with the same easy to manipulate tea-bag tongs take the activity to the next level of difficulty.

The easiest first experiences are soft items like oversized pom-poms, cotton wool balls, balls of wool, or anything else that will not easily slip out of the tongs. Put only a few items in the container to begin with to encourage success as toddlers may quickly tire of the concentration and control needed to manage the tongs. Our “rule” with tray activities is that they should be completed before they are packed away so I want to ensure that the toddlers can be successful right from the beginning.

Larger and longer tongs are more difficult to use. These are still easy to squeeze but their length makes them more unwieldy to handle.The fruit are plastic iceblock shapes from the $2 shop.

A small set of salad tongs and a bag of plastic bugs were all that was needed for this tray.

The reality of young toddlers and tray activities is that they will have a limited concentration span and the interest shown for each activity will vary. I try to make each tray so that they can be easily completed in around 5 minutes. This means that if you want 30 minutes of highchair time to be well occupied, you will need around 6 activities. Some will be very absorbing for the child and they will complete and repeat them over and over. They will find some very challenging and perhaps even difficult and may want to spend less time on these. Reduce the amount of material on these trays accordingly. If you see that an activity is too difficult for the child to complete successfully, simply remove it and re-introduce at a later date. The perfect activity has a bit of a challenge but not so much that the child is frustrated by their inability to complete it.

Other posts you may like:

Mega marble transfer

An introduction to sorting

Bucket of giant beads transfer

Please and thank you

Manners at times are becoming a lost art it seems. I am constantly amazed whenever we are around a large group of children how many of them simply do not think to say “please” and “thank you.” It horrifies me on rare occasions to catch my children amongst them!! Time for a clamp down and some re-training in our household!

As with most child training and behaviours, the failure of my children to use manners when it does occur can usually be traced back to my consistency in enforcing their use. When I let the standard drop, the children do too.

We begin training our children to say “please” and “thank you” as babies using baby signing. From the time they are starting solids we are saying the words for them and signing them at the same time. As they get older, we gently move their hands, helping them to copy the correct sign. At anywhere from around 8 months to 12 months we usually see the first signs being independently used by the children and from that point on will require them to do it before meeting their request.

Once they are able to sign independently, manners are always expected. If an older child forgets to say please or thank you, we may simply hold on to the requested item and make eye contact with the child. After a moment’s pause while they are wondering why we are not letting go, they realise what they need to say and say it, without us having to give a verbal reminder.

We also use a timer. After explaining once or twice what the timer is for and how we will use it, we no longer say anything at all. When a request is made without a “please” we simply grab the timer and turn it over in front of the child who immediately realises what they have forgotten to do. They may not make the same request again until the timer has run out and then it obviously must include the “please” that they forgot in the first place.

Once we consider that the training is complete and an older child is characterised by remembering their manners there may be rare occasions when they forget. For the once-off event, we may simply give them a verbal reminder. If it appears that they are slipping back into a habit of “forgetting” then we will simply tell them that they will miss out completely without the opportunity to try again. We find it interesting to note that our children NEVER forget their manners when there is chocolate involved!

Other posts you may like:

Birthday Letter tradition and memory keeping

Our gorgeous 5 on Christmas morning 2011.

Special events are always a reminder to me of how fast time is flying. In the future I will treasure memories of these occasions and I have to remind myself to take the time to make a record. We think that we will never forget important details about our children but it is amazing how much fades with time and sometimes in a very short time!

A new baby, especially your first, prompts us to ask our own parents all sorts of questions about our own birth and early years. Unless your parents were record keepers, you have probably found that the details are sketchy and if you are one of many siblings, may be very hazy indeed!

We as Mothers often think we’ll remember those funny or special moments and family times but they do fade so easily. Even now the kids ask me things about their own birth (bought on by all the talk of the impending birth of their new baby brother) and I am unsure of some of the details or even which child it was. Luckily I have it all safely recorded and we can pull out their baby albums and have a read through together, which they thoroughly enjoy.

I have made it a real priority to at least get the first year of each child’s life into their own album with their diary of their pregnancy (short notes along the way, what the siblings have said etc.) birth story, measurements, first bath, first roll-over, when they first sat, stood and walked etc. I have also tried to take photos of all these milestones along the way.

I figure they’ll be able to share their own baby years with their children and their children’s children, even if for some reason I’m not around to share it with them. I’d like to think that when I’m gone these albums will give them a link to memories they may otherwise forget.

Sometimes you just need to capture the day-to-day events. Morning tea on the sandpit edge, holes in tights and all.

Even if scrapbooking is not your thing, take a moment every now and again to make a note (on the calendar or in a diary or special book) of each child’s milestones, habits, interests, favourite sayings, achievements, funny events, likes, dislikes etc. At each child’s birthday I use these notes to write out their “reflections” for the year. All the things that made that year memorable. I use the following headings to remind me of all the things I want to include; songs & sayings, food, eating, likes & dislikes, sleeping, toys, games & activities, school & achievements, outings & events, when I grow up, fears, brothers & sisters, books, clothes & friends.

My husband also sits down and writes a letter to each child on their birthday. What a treasured possession I am sure these letters will be to our children one day. Imagine having a letter from your Dad for every year of your life. Reflections, joys, events, happenings, expression of love and as they get older he may include words of wisdom, advice, blessings and prayers etc.

This is a wonderful way to ensure that they know you love and appreciate them and everything that  makes them who they are. They will know and have a record in writing of your love and feelings about them and the special things you shared along the way.

Put it on your “to do” list today!

Routines: Room time

Amazing things can be created in room time!

At around 18 months to 2 years of age, a toddler is ready to transition to room time instead of playpen time. Having said that, my two and a bit year old twins still have playpen time rather than room time for a number of reasons – space and lack of available rooms being two!  The following are some ideas for how to go about room time. My next post will help you to transition to room time smoothly. (It may be helpful to have a quick read through these posts first: playpen time, toys and starting late, choices)

What is room time? A time each day that is set by Mum when a child plays in their room (or a designated room) for a period of time determined by Mum. Do not confuse room time with a child choosing of their own volition to spend time playing in their room. This is a time chosen by you, with toys chosen by you (or a limited choice for older children) for the length of time chosen by you.

Tips for successful room time: 

  • try to arrange the room so that you can check on the child but they can’t see you.
  • start with 10-15 minutes and work up to longer time periods over several days. Even children who have been contentedly spending an hour in their playpen need smaller time increments to start with. This is a new freedom and you want to be able to praise them for their success in staying in their room and making wise play choices. Once the transition has been made and all is running smoothly you can increase the time again.
  • get the child started on an activity they enjoy before you walk out.
  • do not plan to use this time for the first week or so. Hover nearby, check on children frequently and deal with situations before they get started. Remember, the purpose of the short time period to start with is to finish while it is going well and praise, praise, praise! Do not be tempted initially to extend the time because it is going well and leave it until a problem happens – end on a good note.
  • start when you know you will be able to be home for a few days in a row
  • for young children, consider doing it through the weekend until well established
  • have it at a similar time each day
  • set out the toys you want a toddler to use or provide a limited selection of toys for an older child to choose from – not unlimited access to everything in the room.
  • introduce packing away from first use – demo, help, then independent. Have an easy storage system such as open crates. Sort toys out. One large toy box for everything not a good idea. Toys get lost, pieces are mixed up, toys are buried and forgotten and children can’t be bothered digging through to find what they need.
  • The success of room time depends on the focus and control that you are modelling and teaching throughout the whole day. A child who has too many freedoms and will not obey you during the day will not suddenly obey you when it comes to room time. Using a gate in the doorway can be useful for little ones during the initial transition and takes away the temptation to keep coming out. However a child who is not being trained in obedience will find a way to get out if they REALLY want to, despite the barrier.

 Toys:

  • You may like to keep room time toys only for room time so that the interest level stays high. Alternatively, toys can be sorted into crates for each day of the week or changed on a monthly basis.
  • Have a system in place to put the crates/boxes etc. into. A low bookshelf or cupboard that the child can reach is ideal. A few shelves that are out of reach can also be handy for those toys that are not for general playtime but are saved only for room time or for playing with Mummy and Daddy etc.
  • Clear plastic crates allow you to see contents at a glance.
  • Remove lids and simply have open containers that slide onto shelves. Remember, the easier it is to pack away, the more likely the child will do it without a fuss.
  • Sort toys out into smaller containers of similar sort (as children get older, toys become more complicated and have more pieces – mixing sets or kits with other toys makes it difficult to access.)
  • Do not store toys in draw-string bags, cardboard boxes with lids etc. until the child is able to manage those by themselves. If they have to ask you to take a lid off for them, they will be coming out of their room to do so and/or unable to pack up without your assistance.
Transitioning from playpen time to room time:
  • Put the playpen in the bedroom to begin with.
  • Use a mat or some other kind of blanket/carpet etc under the playpen that will become the designated play area in the room once the playpen is removed.
  • Have the toys sorted out and in the same places you will put them when room time begins without the playpen.
  • Take down only one crate at a time and say every day that this crate must be packed away before another one can come out – while in playpen one crate is all they get, so include enough variety to last the entire session. This means that later there should be a controlled amount of mess – no more than the contents of one crate should ever be out at one time.
  • Pack up with the child to begin with, one kind of item at a time, in a methodical way – remember you are teaching them how to pack up for all those times later they will do it themselves. Say out loud what you are doing, “First lets put away all the cars, now lets find all the books” etc.
  • Once the child is used to helping you, do some together then leave them to finish a set amount. No consequence for not packing up is needed, they are simply not free to come out until it is done.
  • If  there is a lot to pack up, simplify the pile into perhaps one or two kinds of toys – too many items from different containers/kits will be confusing and children often end up sitting there packing away nothing at all. For example, if a box of Duplo is out, along with books and a puzzle, perhaps clean up the books and puzzles for the child and require them to do only the Duplo.

Removing the playpen:

  • Explain that they need to play on the mat or other area you have designated.
  • Remind them of the toys that they may choose from – the same system you have well established while still in the playpen.
  • Initially, continue with the crate system. As children get older and toys become more complicated, begin to slowly hand over the choice to the child eg. you choose 3 items from the shelf, I will choose the rest.
  • Pack away most of the toys in the bedroom to begin with and only have out a few options that the child can choose from. More can be added later.
  • Remove any treasures or irresistible things that shouldn’t be touched.
  • Always have a set place for items. Teach how to pack away every toy as it is re-introduced back into the bedroom or a new toy is added.

Troubleshooting:

  • Try to ensure that household traffic is not passing by the door of a child who is having room time or they will be constantly distracted and more likely to want to come out.
  • Keep activities that sound like a lot of fun away from the sight and hearing of a child in room time. If they love to paint and you use this time for the older children to paint, it is much more difficult for them to be content knowing what they are missing out on.
  • In large families where children share rooms there may not be enough room time rooms to go around. If you are homeschooling and have older children at home, they could perhaps use this time to complete school work and have their room time at a different time of day. I prefer to have everyone in room time together so I get a break therefore we use almost every room of the house. Toddler and baby nappers go in portacots in rooms other than those they sleep in. Middle ages have their own desks and toys set up in separate bedrooms, including their own sleeping room and the baby room. The eldest is the most mobile as his interested are more portable. A crate with wheels makes his Lego set moveable and books are easy to pick up and cart about. Any other project is collected before room time begins and moved to where he will be. This may be the family room or loungeroom or even outside if the weather is nice.
  • Make sure that the toys are age appropriate, interesting and provide enough stimulus to last the whole time. Older children move away from just toys and in my household are given their own desk around the age of 4. We give them a mini set of drawers stocked with all manner of craft and drawing items, scissors, glue, construction paper and all sorts of bits and pieces and they have a wonderful time creating with these every day. Construction toys are pretty much essential for boys and good books are great for all.

Having room time for everybody every day leaves me with a chunk of time every day to recharge and gives the children a much-needed break from each other. They are often refreshed and in much happier moods when they re-emerge. Those personality types who crave time alone are rested and recharged and the more sanguine children benefit from learning to be by themselves and using their time in a worthwhile fashion. The projects the older children get up to are often quite amazing and the time is rarely wasted.