Addition tray activities for hands-on maths


img_2605

After my earlier post on addition tray activities I have had some requests for a copy of the addition cards so here are your free printable vertical addition problems ready to print and laminate.


Advertisement

Preschool at our house – ready for a new baby!

IMG_0487

Here is the latest change-over for the twin’s preschool activities for homeschool time each morning. We are currently taking a school holiday break for 2 weeks, leading up to the birth of our 7th blessing.

I have found from experience that everything goes much more smoothly if we continue with school, rather than take a break at the same time as the newest arrival. Too much free time and lack of structure and supervision creates cranky kids who bicker all day and drive me crazy! I have made sure that the activities for this term do not require a lot of 1 on 1 time with Mum and the older children especially are able to work through without requiring my assistance, other than for the occasional question etc.

IMG_0486

These handwriting books are the one item in the preschool cupboard that will need my 1 on 1 attention. The twins are asking me how to write certain letters now and are keen to write their names. My opinion is that if they are going to write letters, they may as well learn how to do it properly right from the start, rather than need to re-learn later and correct bad habits. I should be able to fit in the 15 minutes or so that is needed to complete 1 page per day.

IMG_0478

I picked up some old activity books with dotted pictures. Tracing these dotted lines to make the figures is great fine motor practise. I have removed the pages from their covers so that the twins can easily grab one page at a time.

IMG_0477

I also found some old sticker books. Again, I pulled all the pages out so that they can choose one at a time. Some paper to stick them on to and a packet of textas is all that is needed for some creative fun.

IMG_0474

I have had these pattern block puzzles out before but the children do not choose to do them unless directed to do so. I have made a list of each picture with space for a sticker or stamp next to each one. After finishing a puzzle they can mark it as completed by stamping or sticking next to the corresponding name. A little added incentive!

IMG_0473

Cutting and gluing are still exceedingly popular with both children. This box has some large plain paper sheets, wrapping paper pictures, glue sticks and scissors for free creating.

IMG_0469

A carry on from last month – matching upper and lowercase alphabet letters. More work is needed on this skill so I have just changed the presentation and popped it back out again. The large jewels have capital letters on them and the ice block trays have both upper and lowercase. It is a basic matching activity.

IMG_0468

Addition and counting skills will be something we continue to work on for a while. With the rocks as the manipulatives, the children solve the simple addition sum on each peg before clipping it to the correct segment on the paper plate. Using pegs means that this also improves fine motor skills as well. The circle in the centre is the inside of a used roll of sticky tape. I just glued it onto the paper plate which provides a great place for the pegs and rocks to be stored when not in use.

IMG_0464

Three letter CVC words are going to be out for quite a while. With the same letter tiles and a new set of pictures (free printables here) the twins already know how to do this and need only a little help. Last time I had them lucky dip the tiles out of a bag but I found that they wanted to be able to see all the letters and find the one they needed so ended up tipping them all out anyway. Having them in the plate means they can see the tiles and choose the sound they are up to.


Preschool at our house; hands-on homeschooling

IMG_0374

Almost a month exactly has passed since I last updated the twins (4 1/2 years) preschool activities. Changing them out once a month takes me an hour or two at the most (without interruptions!) and with approximately a month until I need to do it again, isn’t too much of a burden. If I take the time to plan for interesting activities then I find I have a positive attitude to “school” time and of course, with something new and interesting to do, so do they. A little internet surfing and Pinterest pinning and I have more ideas than I could possibly put into practise.

The children have plenty of time during other parts of the day for play-based learning and some free choice, but school time has a little more structured. I like the activities to be hands-on where possible and try to keep in mind that we have years ahead for academic learning. Right now it is more of a priority that they learn to sit, focus, concentrate and obey my instructions than it is for them to learn a particular academic skill.

IMG_0408

This is what the school cupboard looks like this month. With the broad categories of mathematics, reading and writing in mind, we are focussing on adding small numbers, sequencing numerals to 30, identifying upper and lowercase letter names and sounds, sounding out 3 letter words, forming letters and fine motor skills.

IMG_0401

These addition strips are once of the free printables I designed to go with Mathusee Primer level. We are working on basic addition facts, this month: adding on 3 and 4.

IMG_0386

These plastic party spoons have the numerals 1 to 30 written on them. The child needs to put them in order and then post them into the right slot in the shoebox. If unsure of where to put them, they can lift up the red strip to see the numerals below.

IMG_0387

IMG_0367

This is the favourite by far. The twins dig out the buried jewels from the rice sensory box and match the uppercase letters to the lowercase letters on the trays.

These large jewels are the kind you find for displaying flowers/candles and are a very inexpensive way of creating your own Montessori moveable alphabet. A set of black letter stickers was all I needed to purchase and with the jewels came to a grand total of $4.50. The rice I had in the cupboard from my other large sensory tubs and the metal trays are a pencil tin that my daughter no longer needed.

IMG_0398

After mastering initial sounds, we have started work on 3 letter words. The bag holds the letter tiles which are lucky dipped and matched up to the correct space under the consonant-vowel-consonant  (CVC) words. There are no spare letters so the activity is self-checking. The answer could be written on the back of the cards too but I find that my little darlings like to turn them over and cheat check if I do that! The free printable CVC picture cards are available here.

IMG_0392

This salt tray has been on my to do list for ages. All you need is a tray of some sort with a brightly coloured but plain background. Rainbow stripes or large blocks of colour will work well, but avoid busy pictures and patterns. Place a thin layer of salt into the tray, provide a paint brush and let them at it. Allow plenty of time for free “painting” first and once the novelty has worn off somewhat, add some letter cards to copy. A cue tip/ear bud will work and some people suggested just using a finger but I didn’t think the salt felt very nice. My children don’t get to paint as much as they’d like so I figured the brush would make them feel like they were doing art!

IMG_0393

One drawback of the suitcase style was that my daughter closed the lid and picked it up by the handle to pack it away. Nope, not salt tight! Oh well, sweeping up mess is educational too.

IMG_0395

Starter Styles are a commercial educational toy that we purchased years ago. The older children remember them fondly and have all sat down for a fiddle at some stage or other since they came back out. The children sequence the number tiles then use them to answer questions in the book by placing them into the correct square. If their answers are right, the tiles will make a pattern when flipped over in the lid. The little books that go with them cover pre-number skills right on through to some more difficult concepts, as well-as pre-reading, reading and spelling. Not a must-have but a novel way of working on some basic skills. The logic required to work out how to place the tiles alone is quite difficult for little children.

IMG_0404


Threading is always good for fine motor skills. These blocks are numbered so it can be a sequencing activity also but as both my preschoolers are past this I won’t be worrying about whether it is in numerical order or not.

Last months preschool activities are here. The month before are here.

Coming up: The monthly overhaul of the two-year-old’s highchair activity cupboard.

What is your preschoolers’s favourite school-time activity?

Preschool at my house this week – large family homeschooling (with toddlers!)

IMG_0115 It was time for an update of the activities available for my preschoolers this week. This cupboard is only used for “school” time with Mummy once a day by the twins (4 years) and contains our more formalised school activities – number and letter work etc. (Last months activities are here.) We are making the most of the next 2 months before baby number 7 is due to work on preschool skills. Once bub arrives these activities will be changed to more play based choices and able to be used independently, rather than requiring my direct supervision. Please keep in mind that I am not suggesting all 4 year olds are ready for this level of work. I work steadily with my children, moving ahead as far as their understanding and development allows. I do not stick to teaching skills by grade or age, but rather follow each child’s development as far as they are able. This changes from child to child and the ideas here are more traditionally at pre-primary to year 1 school level. It is more important that children learn to sit and concentrate, follow instructions, learn Godly character etc. than a list of rote learning or academic skills. The twins happen to be able to cope with these activities and show an interest in them so I will go with that for now. If it becomes burdensome and onerous for them, we will take a break. IMG_0097 
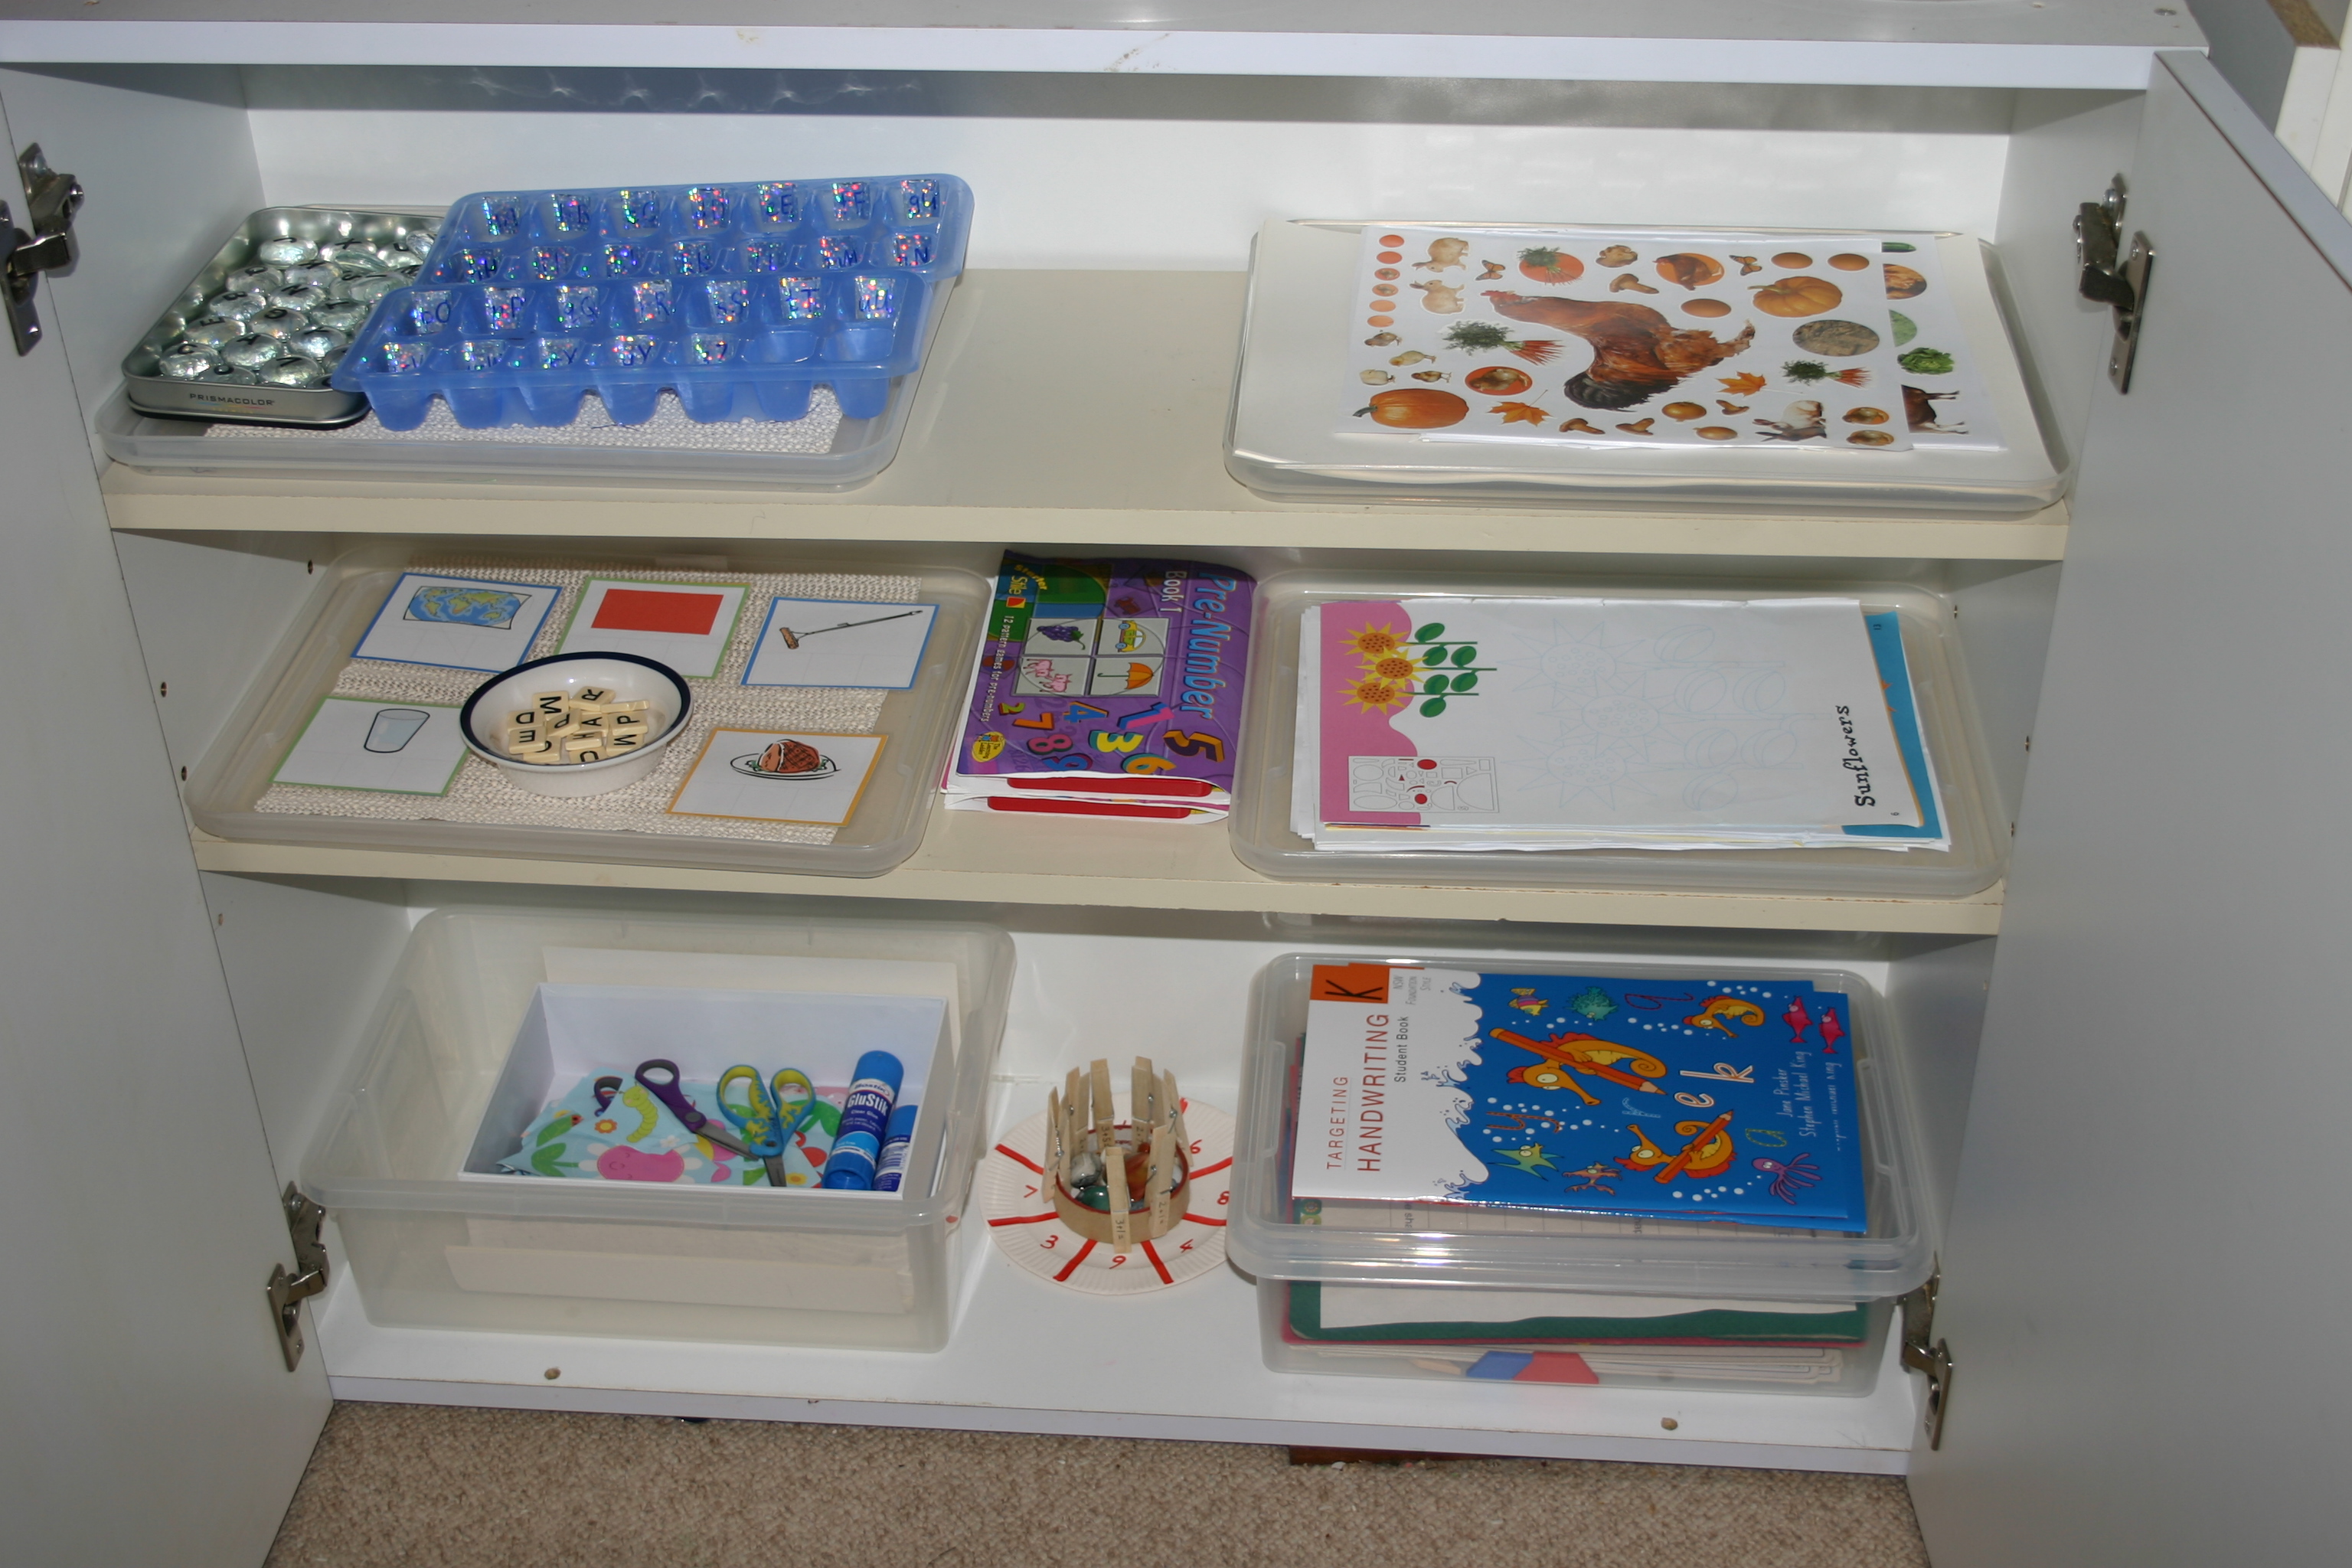
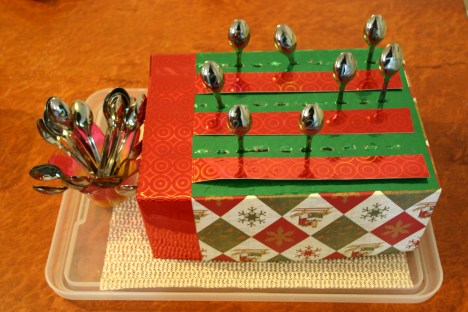
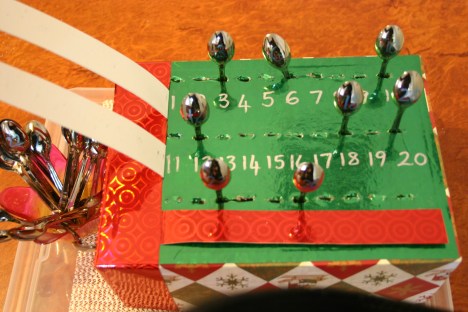
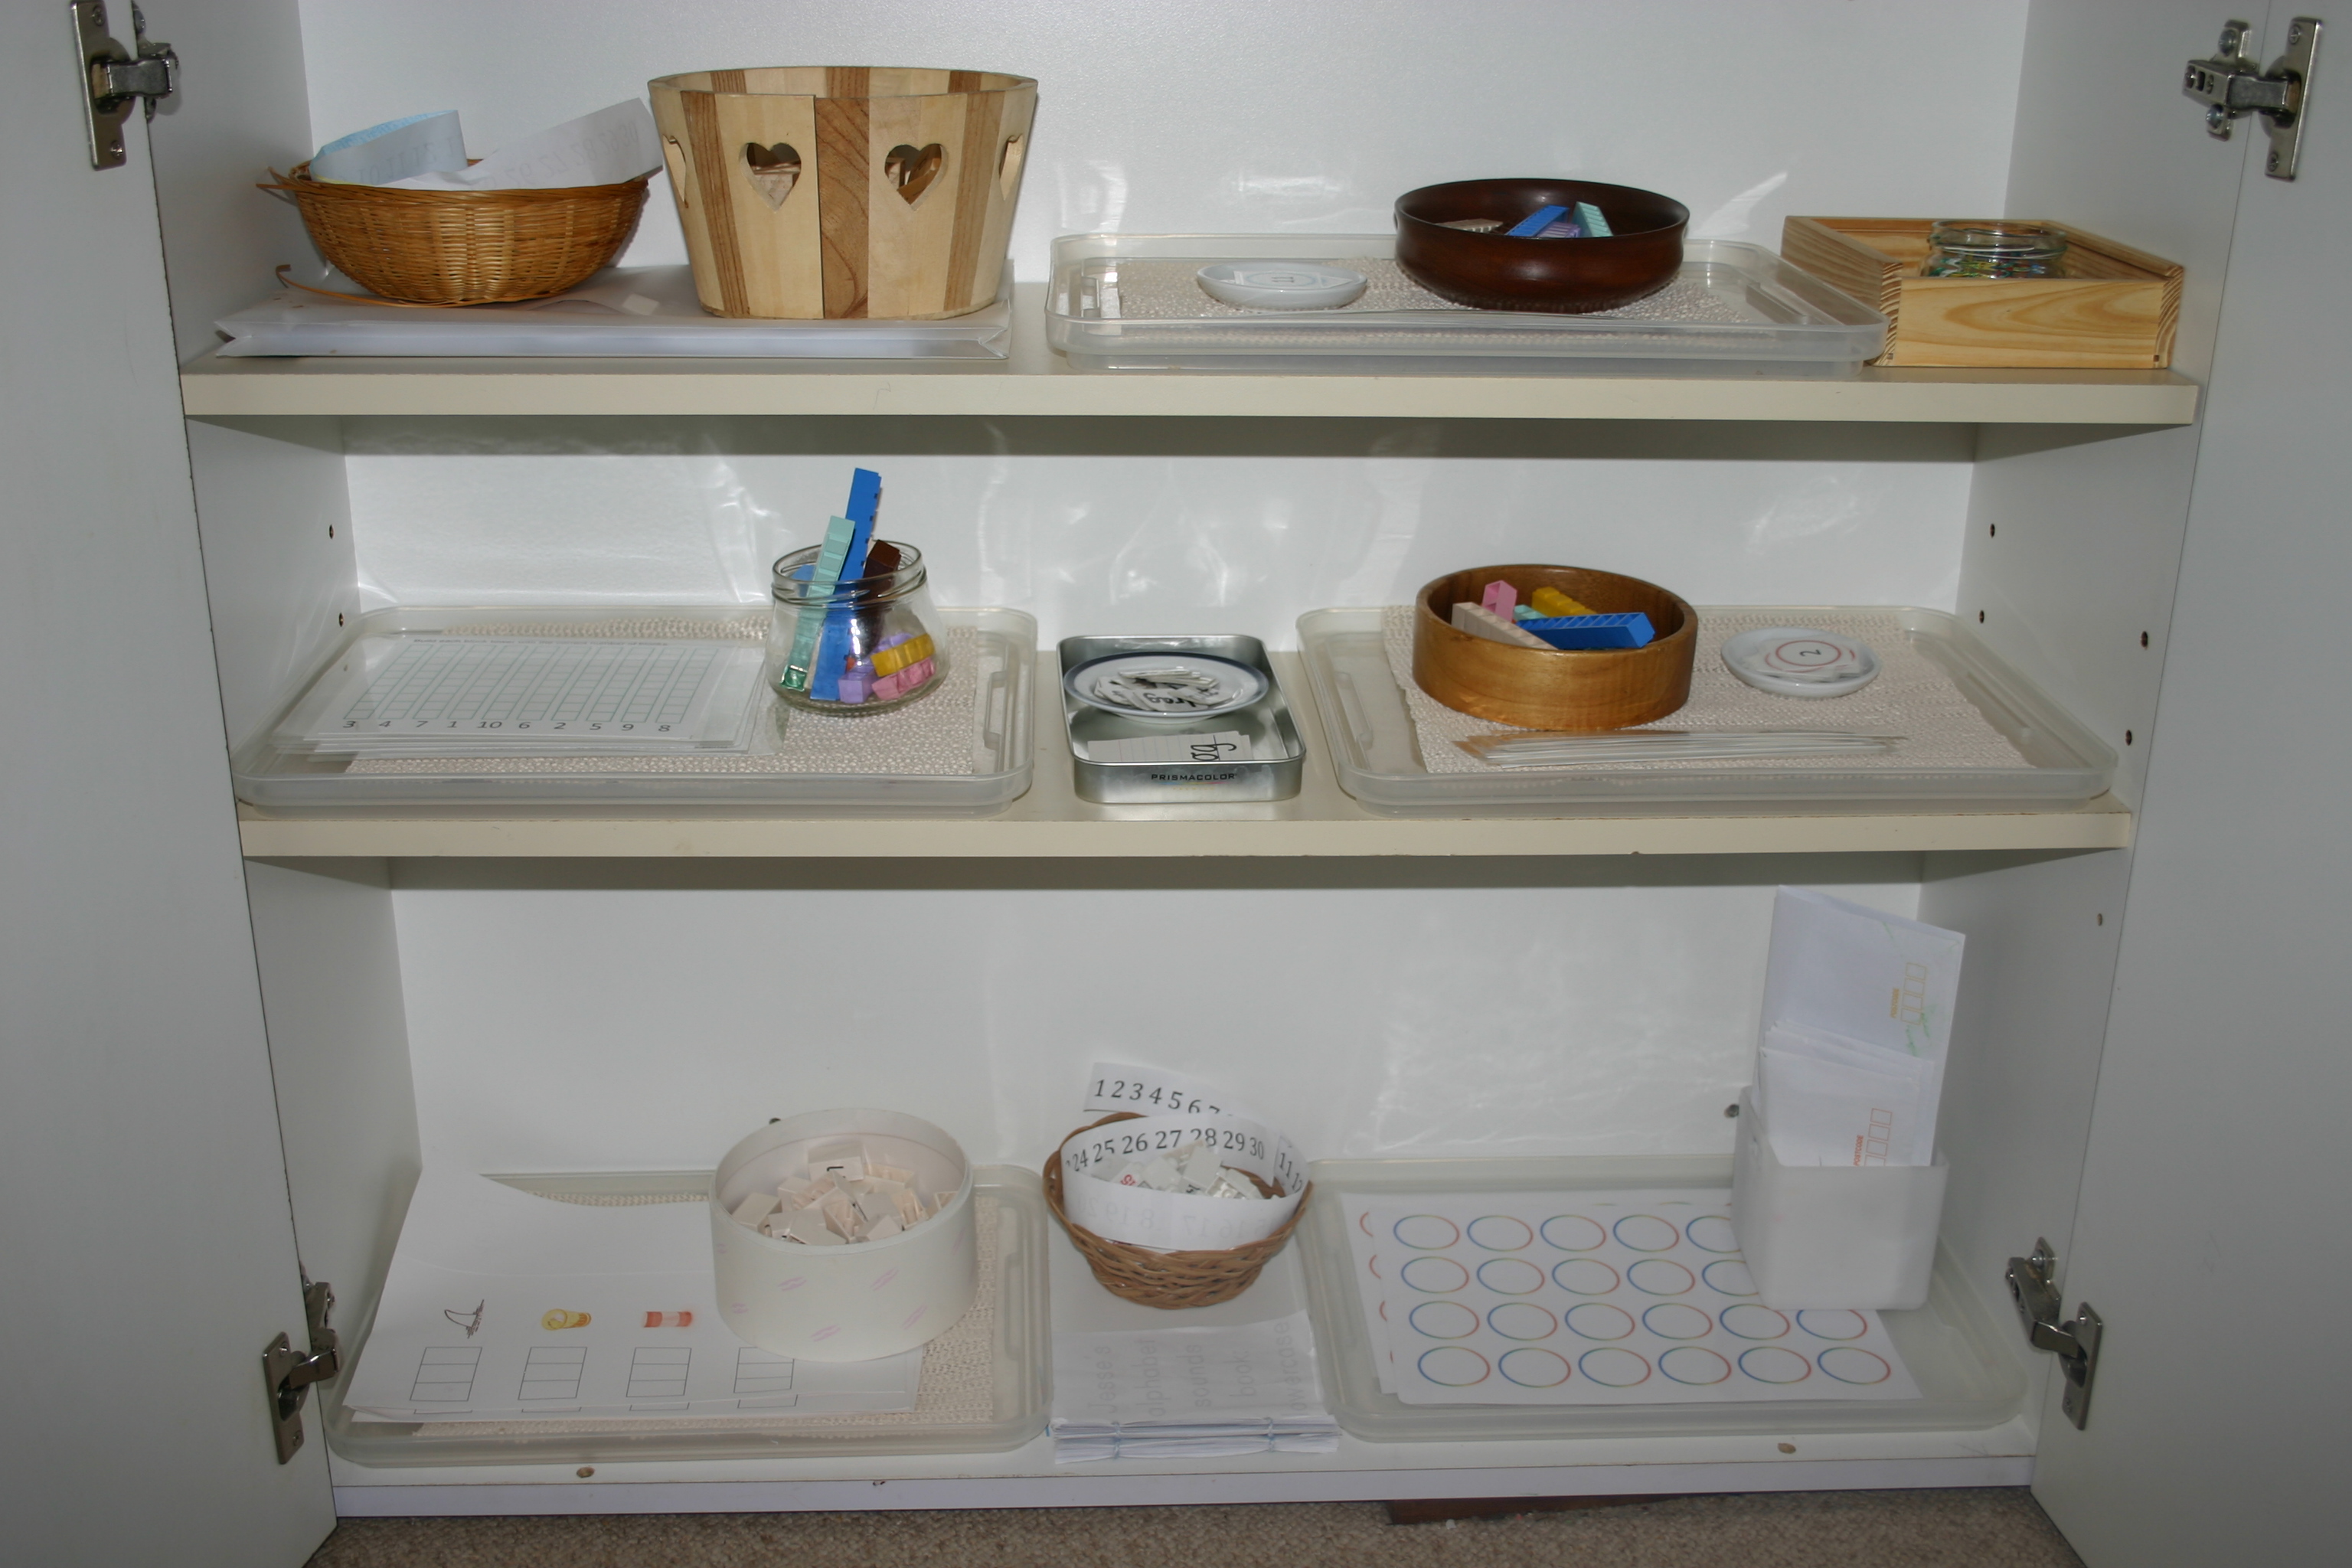
I found these plastic tiles at an op shop. I have no idea what their original use was, however they link together nicely for this number sequencing activity. Having 3 colours meant I could quickly separate out only the 1 to 10 blocks, then add the 11 to 20 and finally 21 to 30 as they were able to complete the “path” as we called it. I provided a coloured number strip to use as a guide while they were still learning the numeral sequence. IMG_0104 IMG_0099 This is the same activity using a different style of block. These came from a build-your-own 3D desk calendar I bought for $1. You could also purchase Coko bricks which are almost identical and can be used on Duplo base boards. The twins have learnt to count to 30 out loud and have fairly good one-to-one correspondence so we are now working on recognising and sequencing numerals to 30. IMG_0105 IMG_0119 We use Mathusee in the early years (moving on to Saxon math later) but as my preschoolers are not ready to do a lot of written work I used the sequence of skills from the Primer book to develop a bunch of hands-on activities. These block manipulatives also come from the Mathusee resources. In the example above, the children need to recognise the numeral and count to find the right block to place above it. Click  HERE for a FREE PRINTABLE. IMG_0120 IMG_0121 
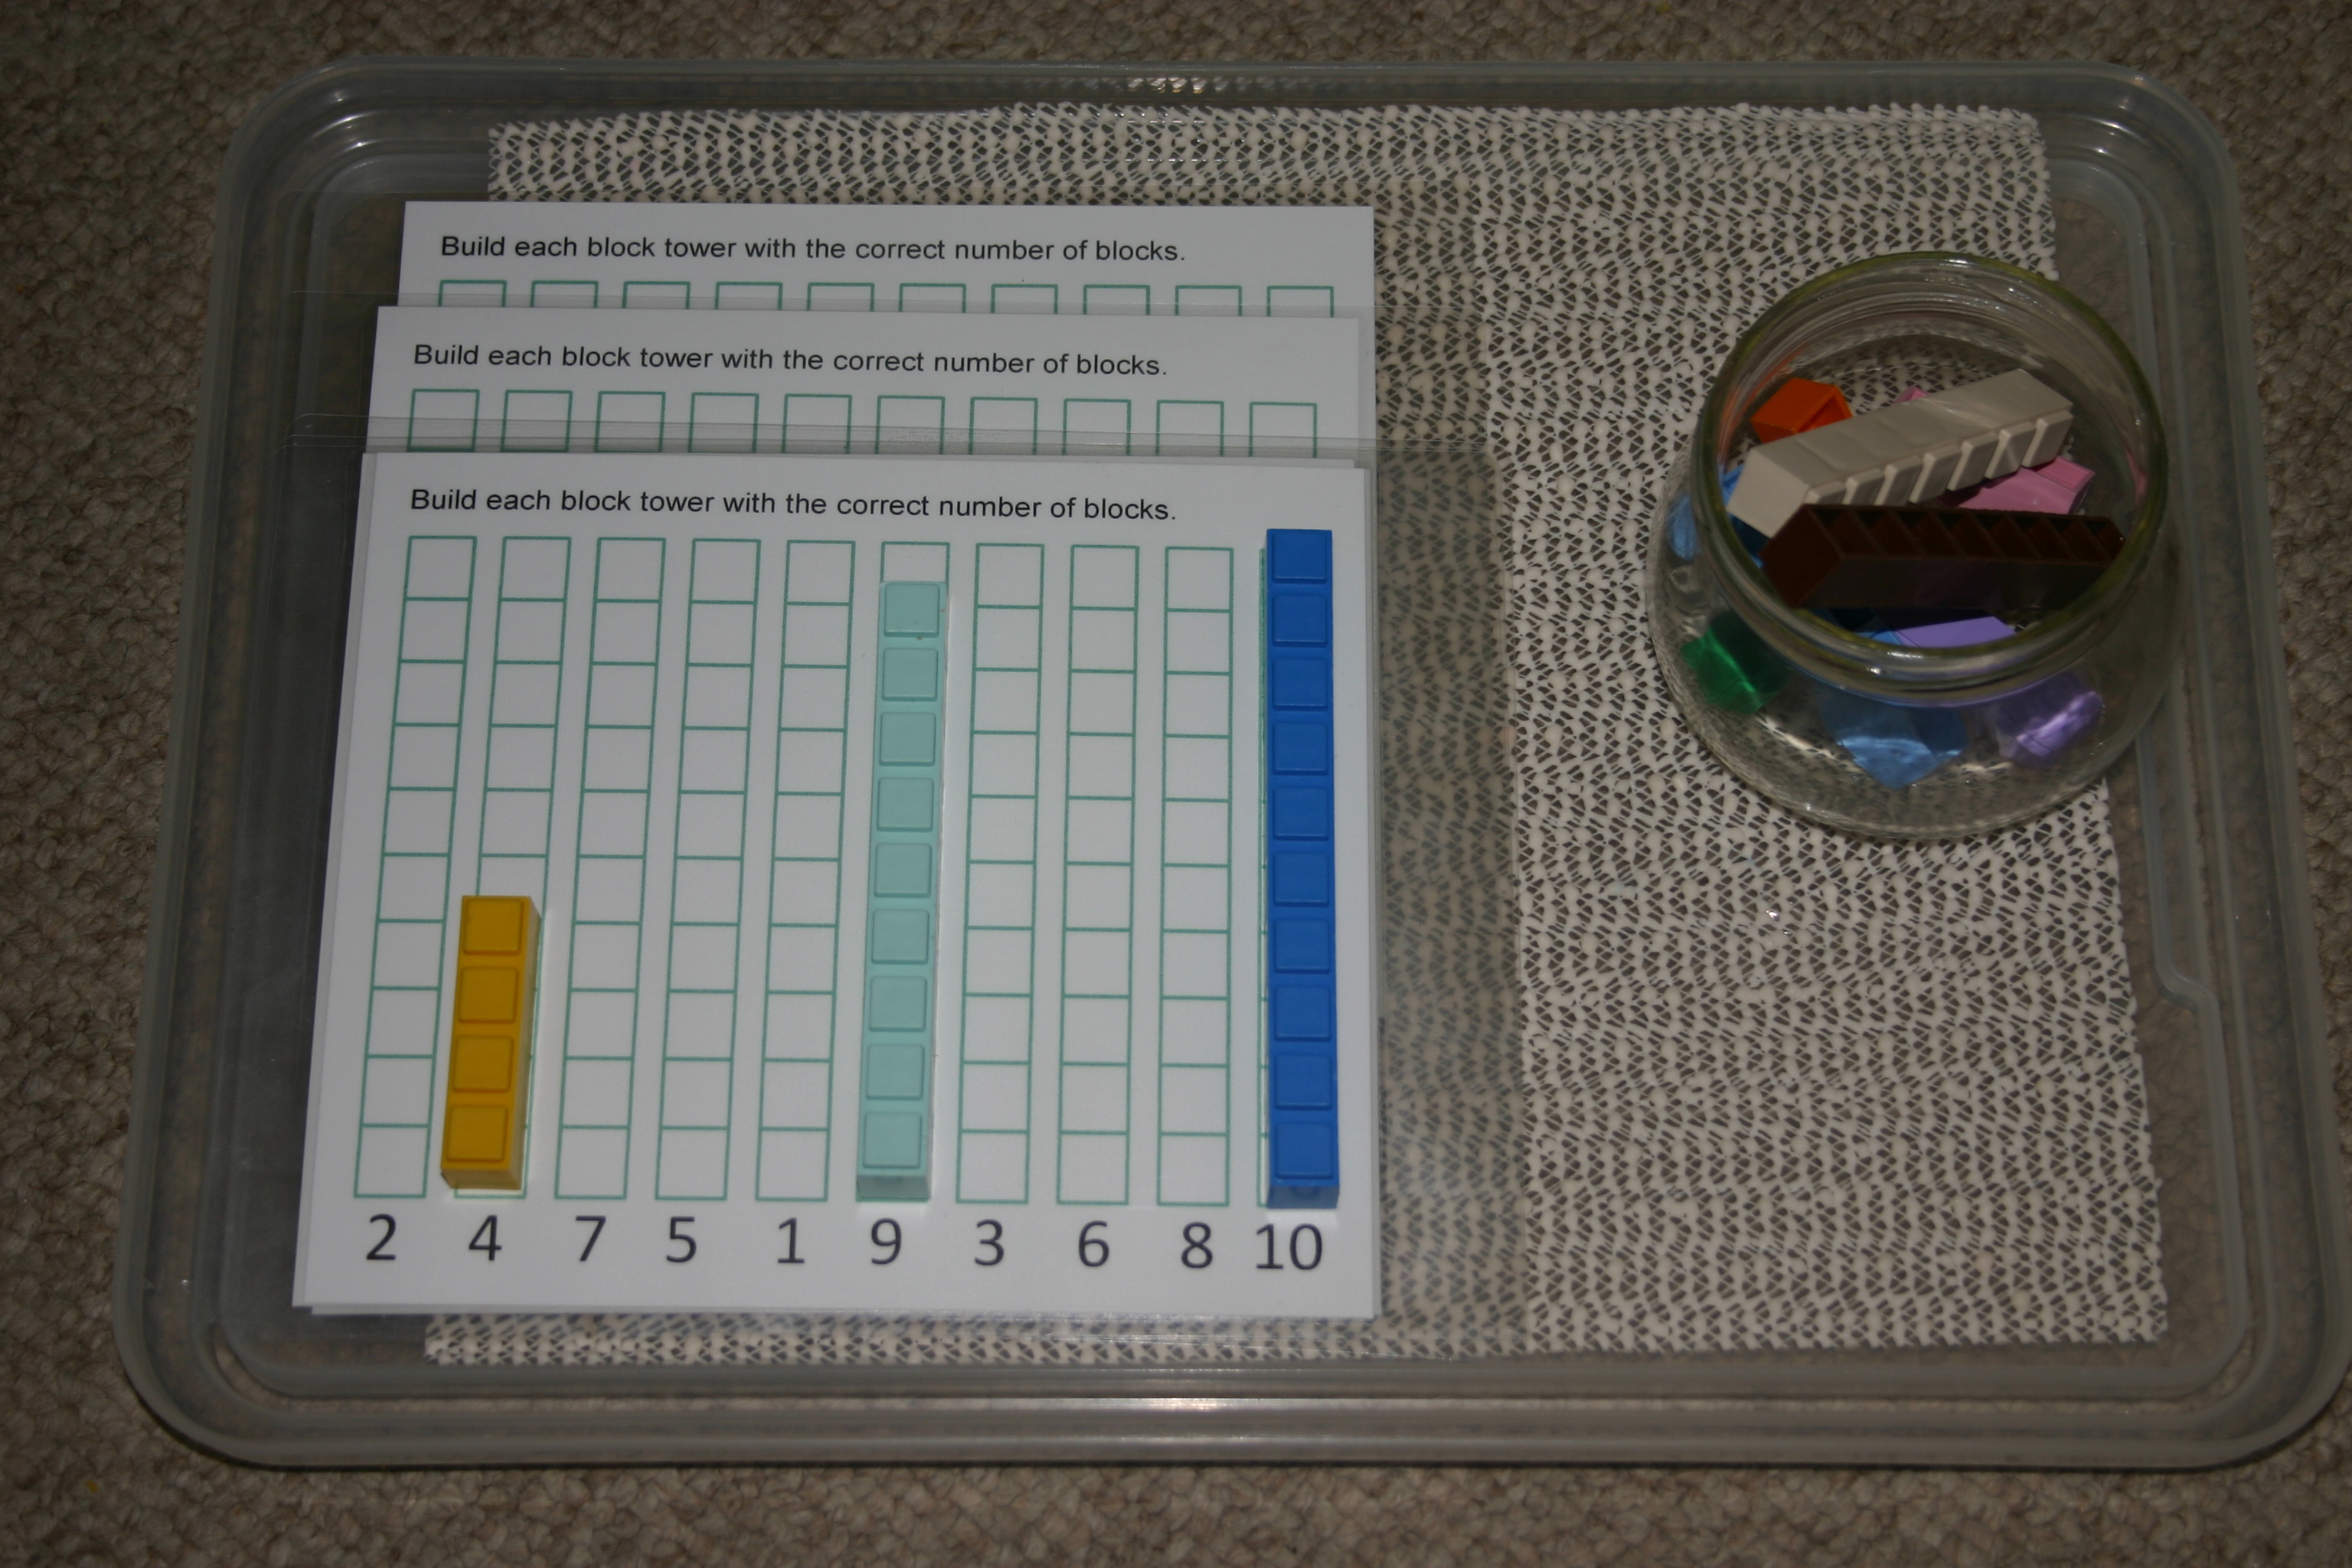
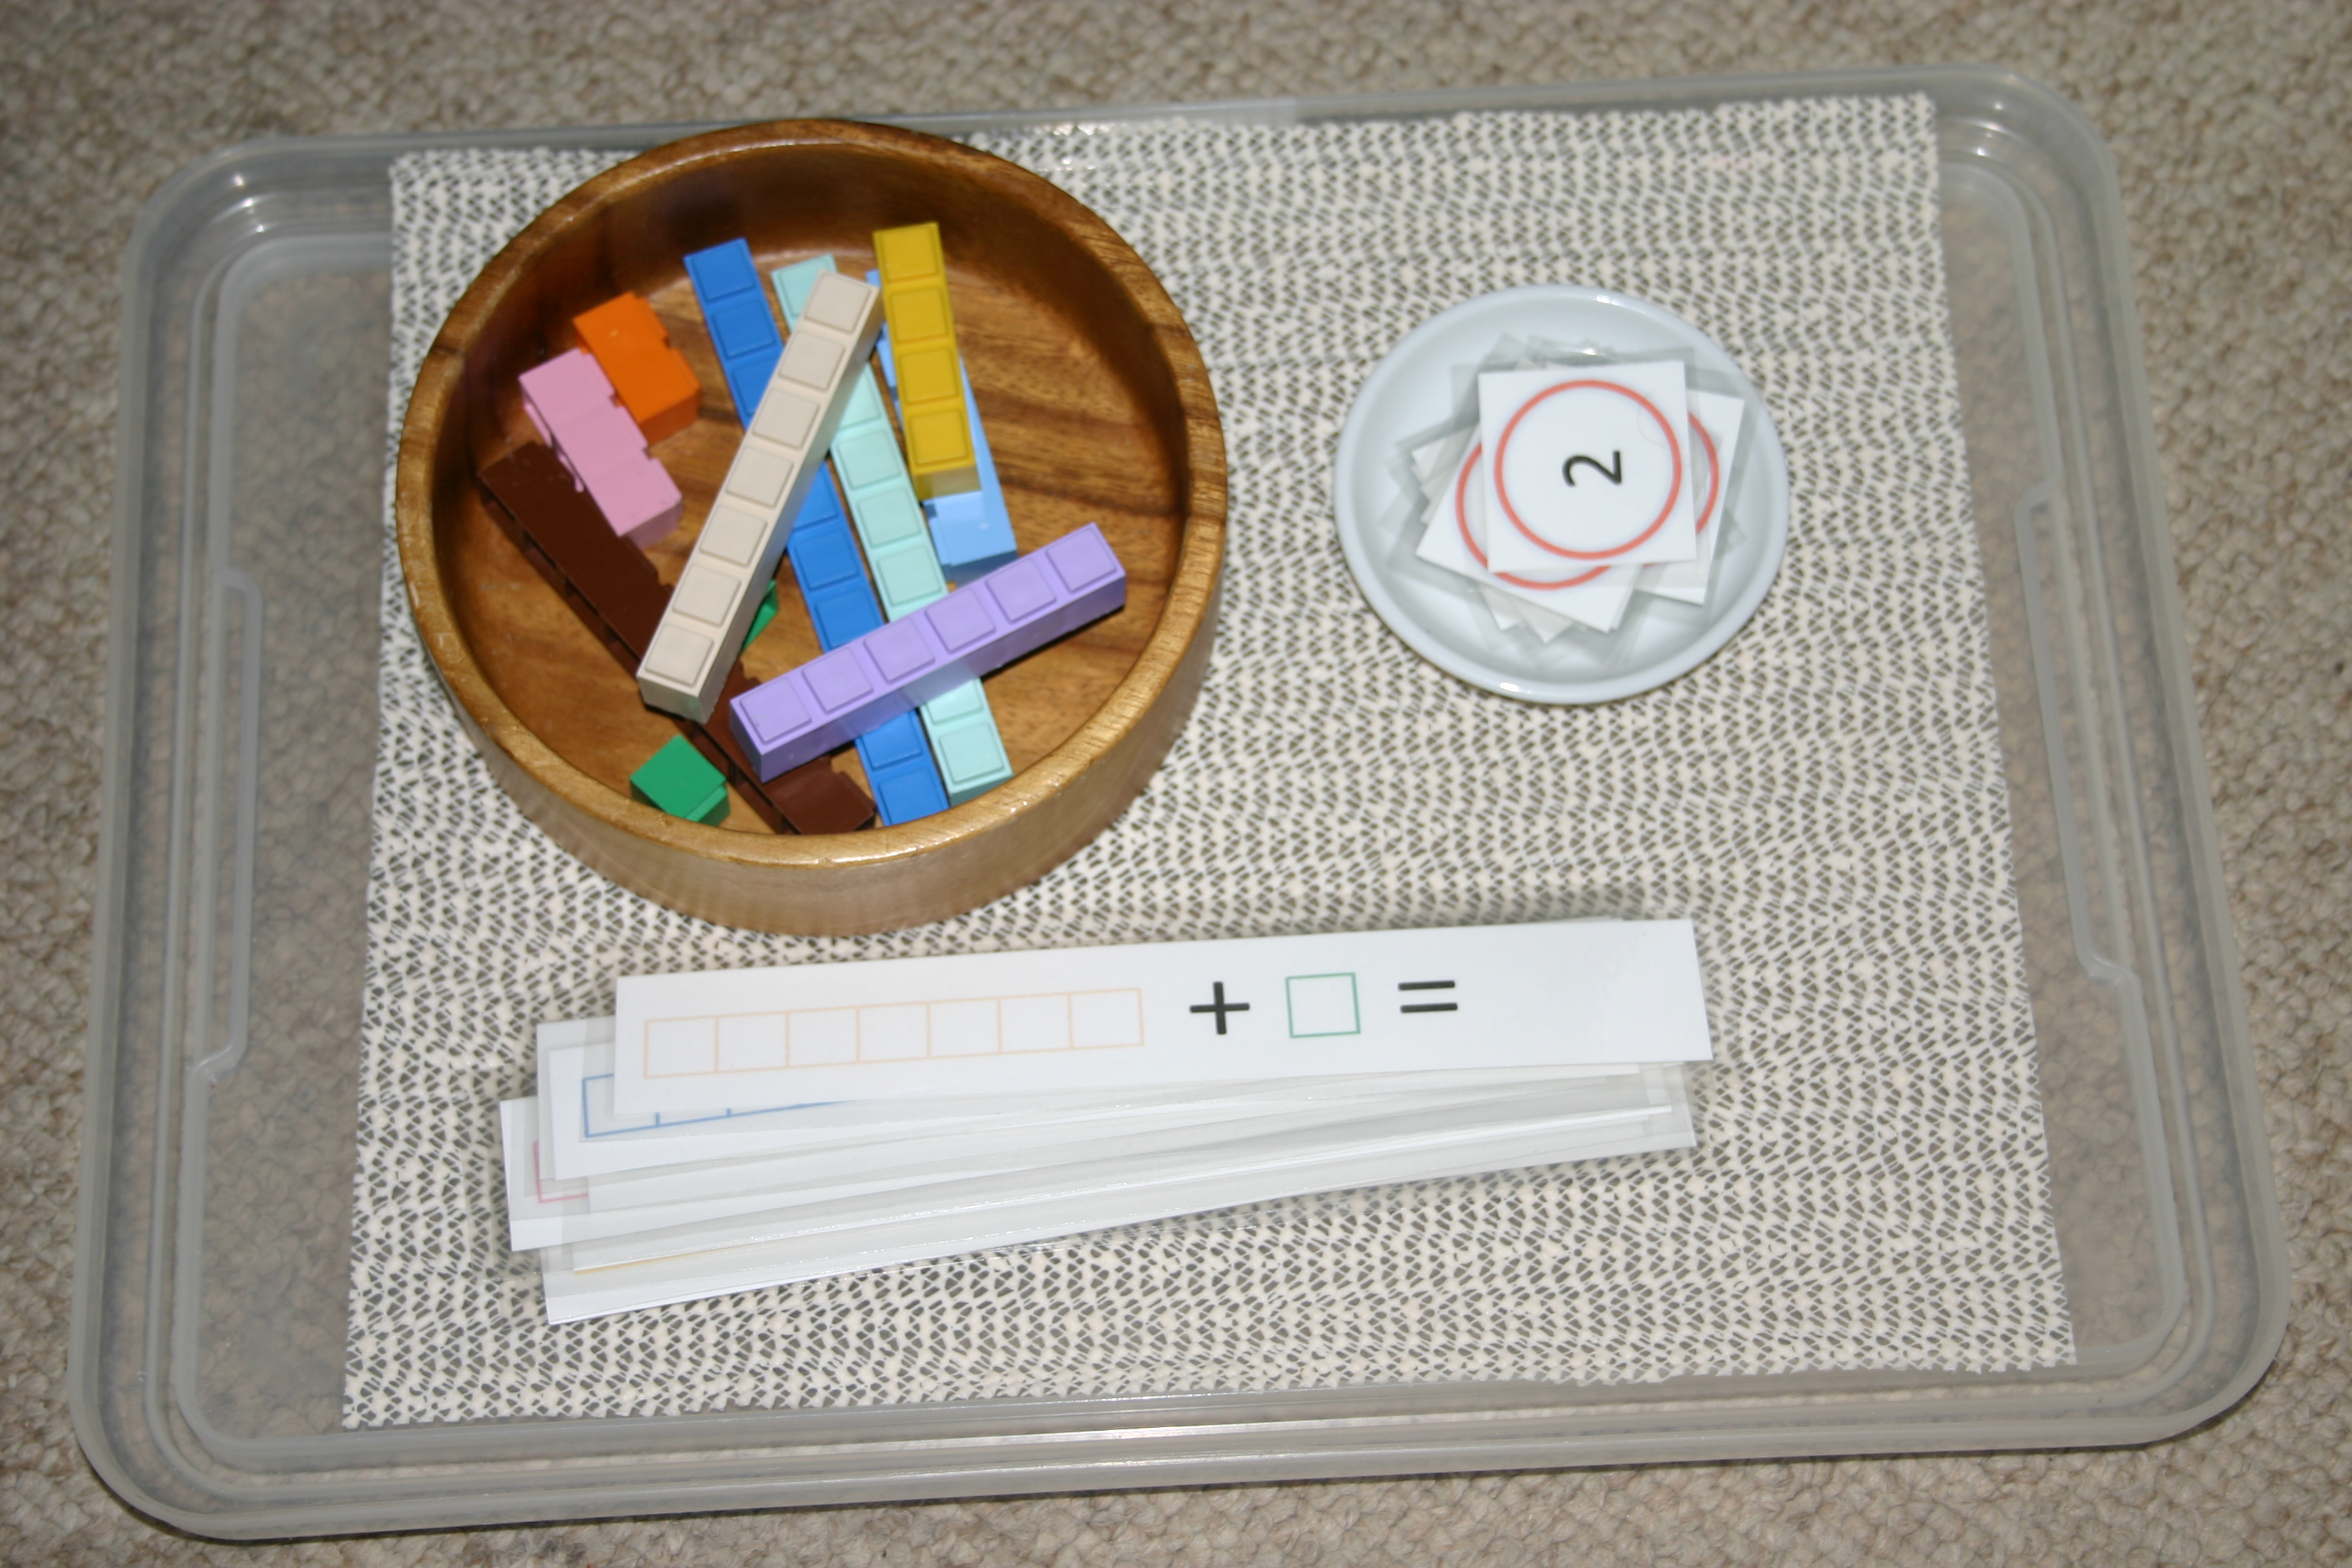
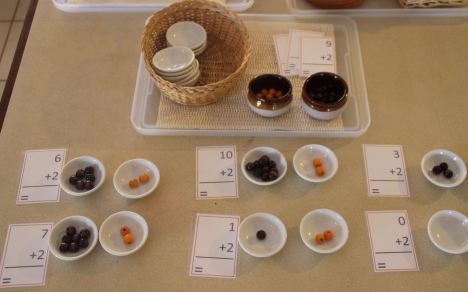
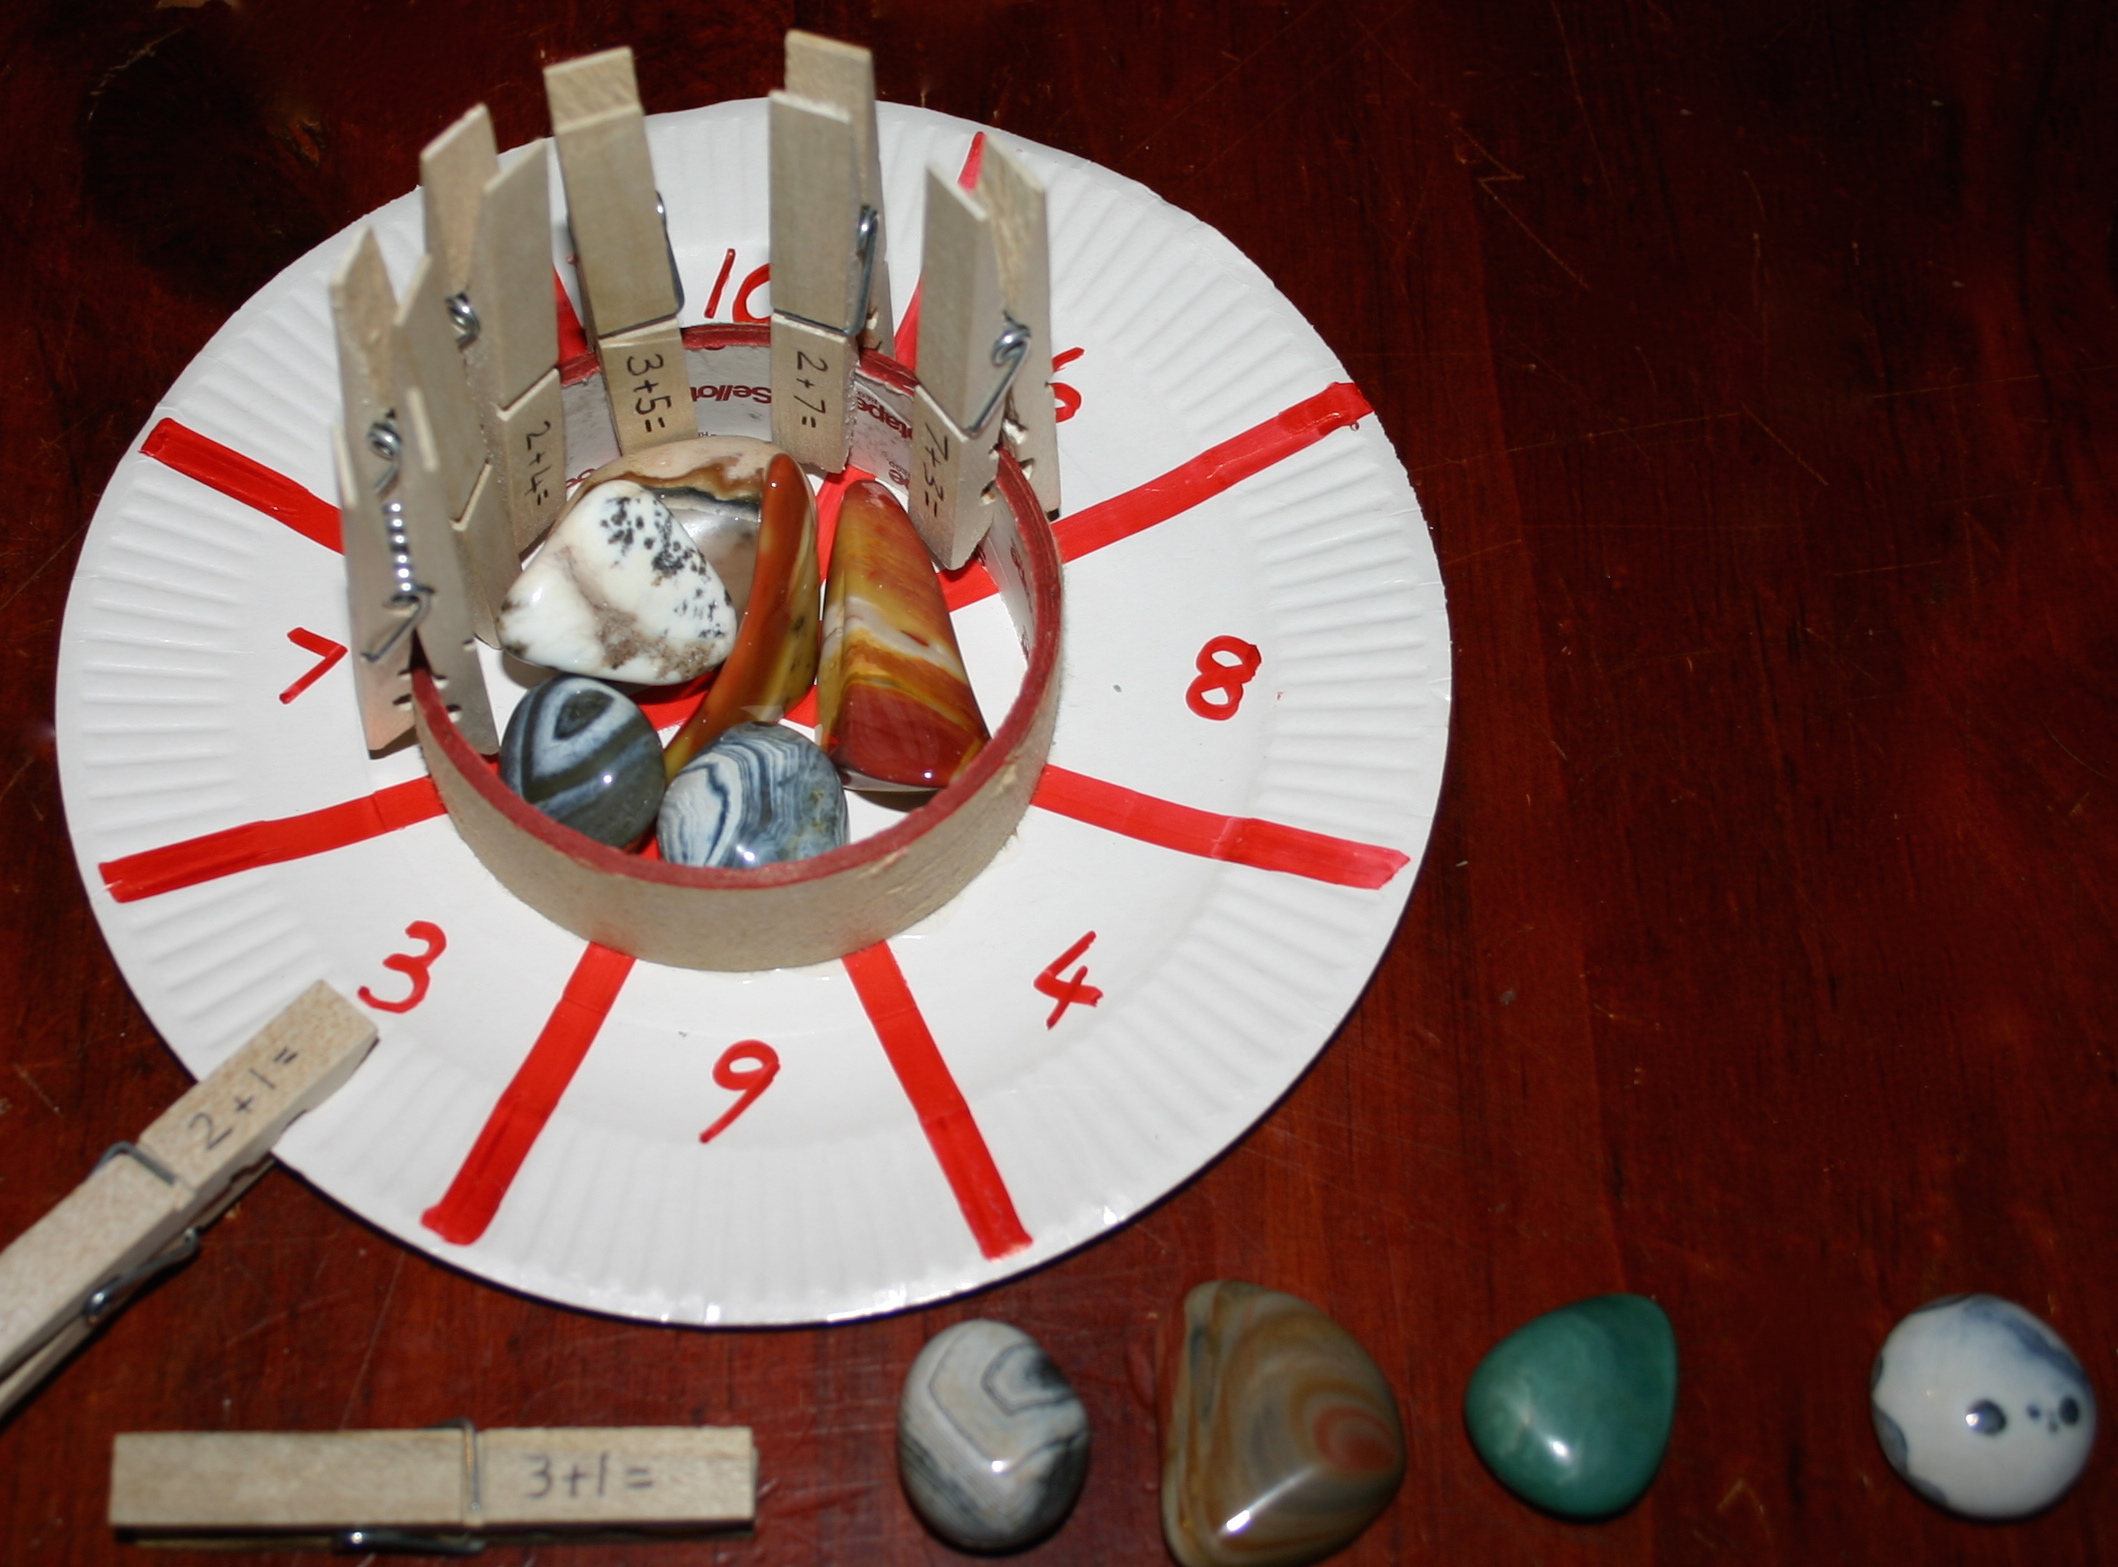
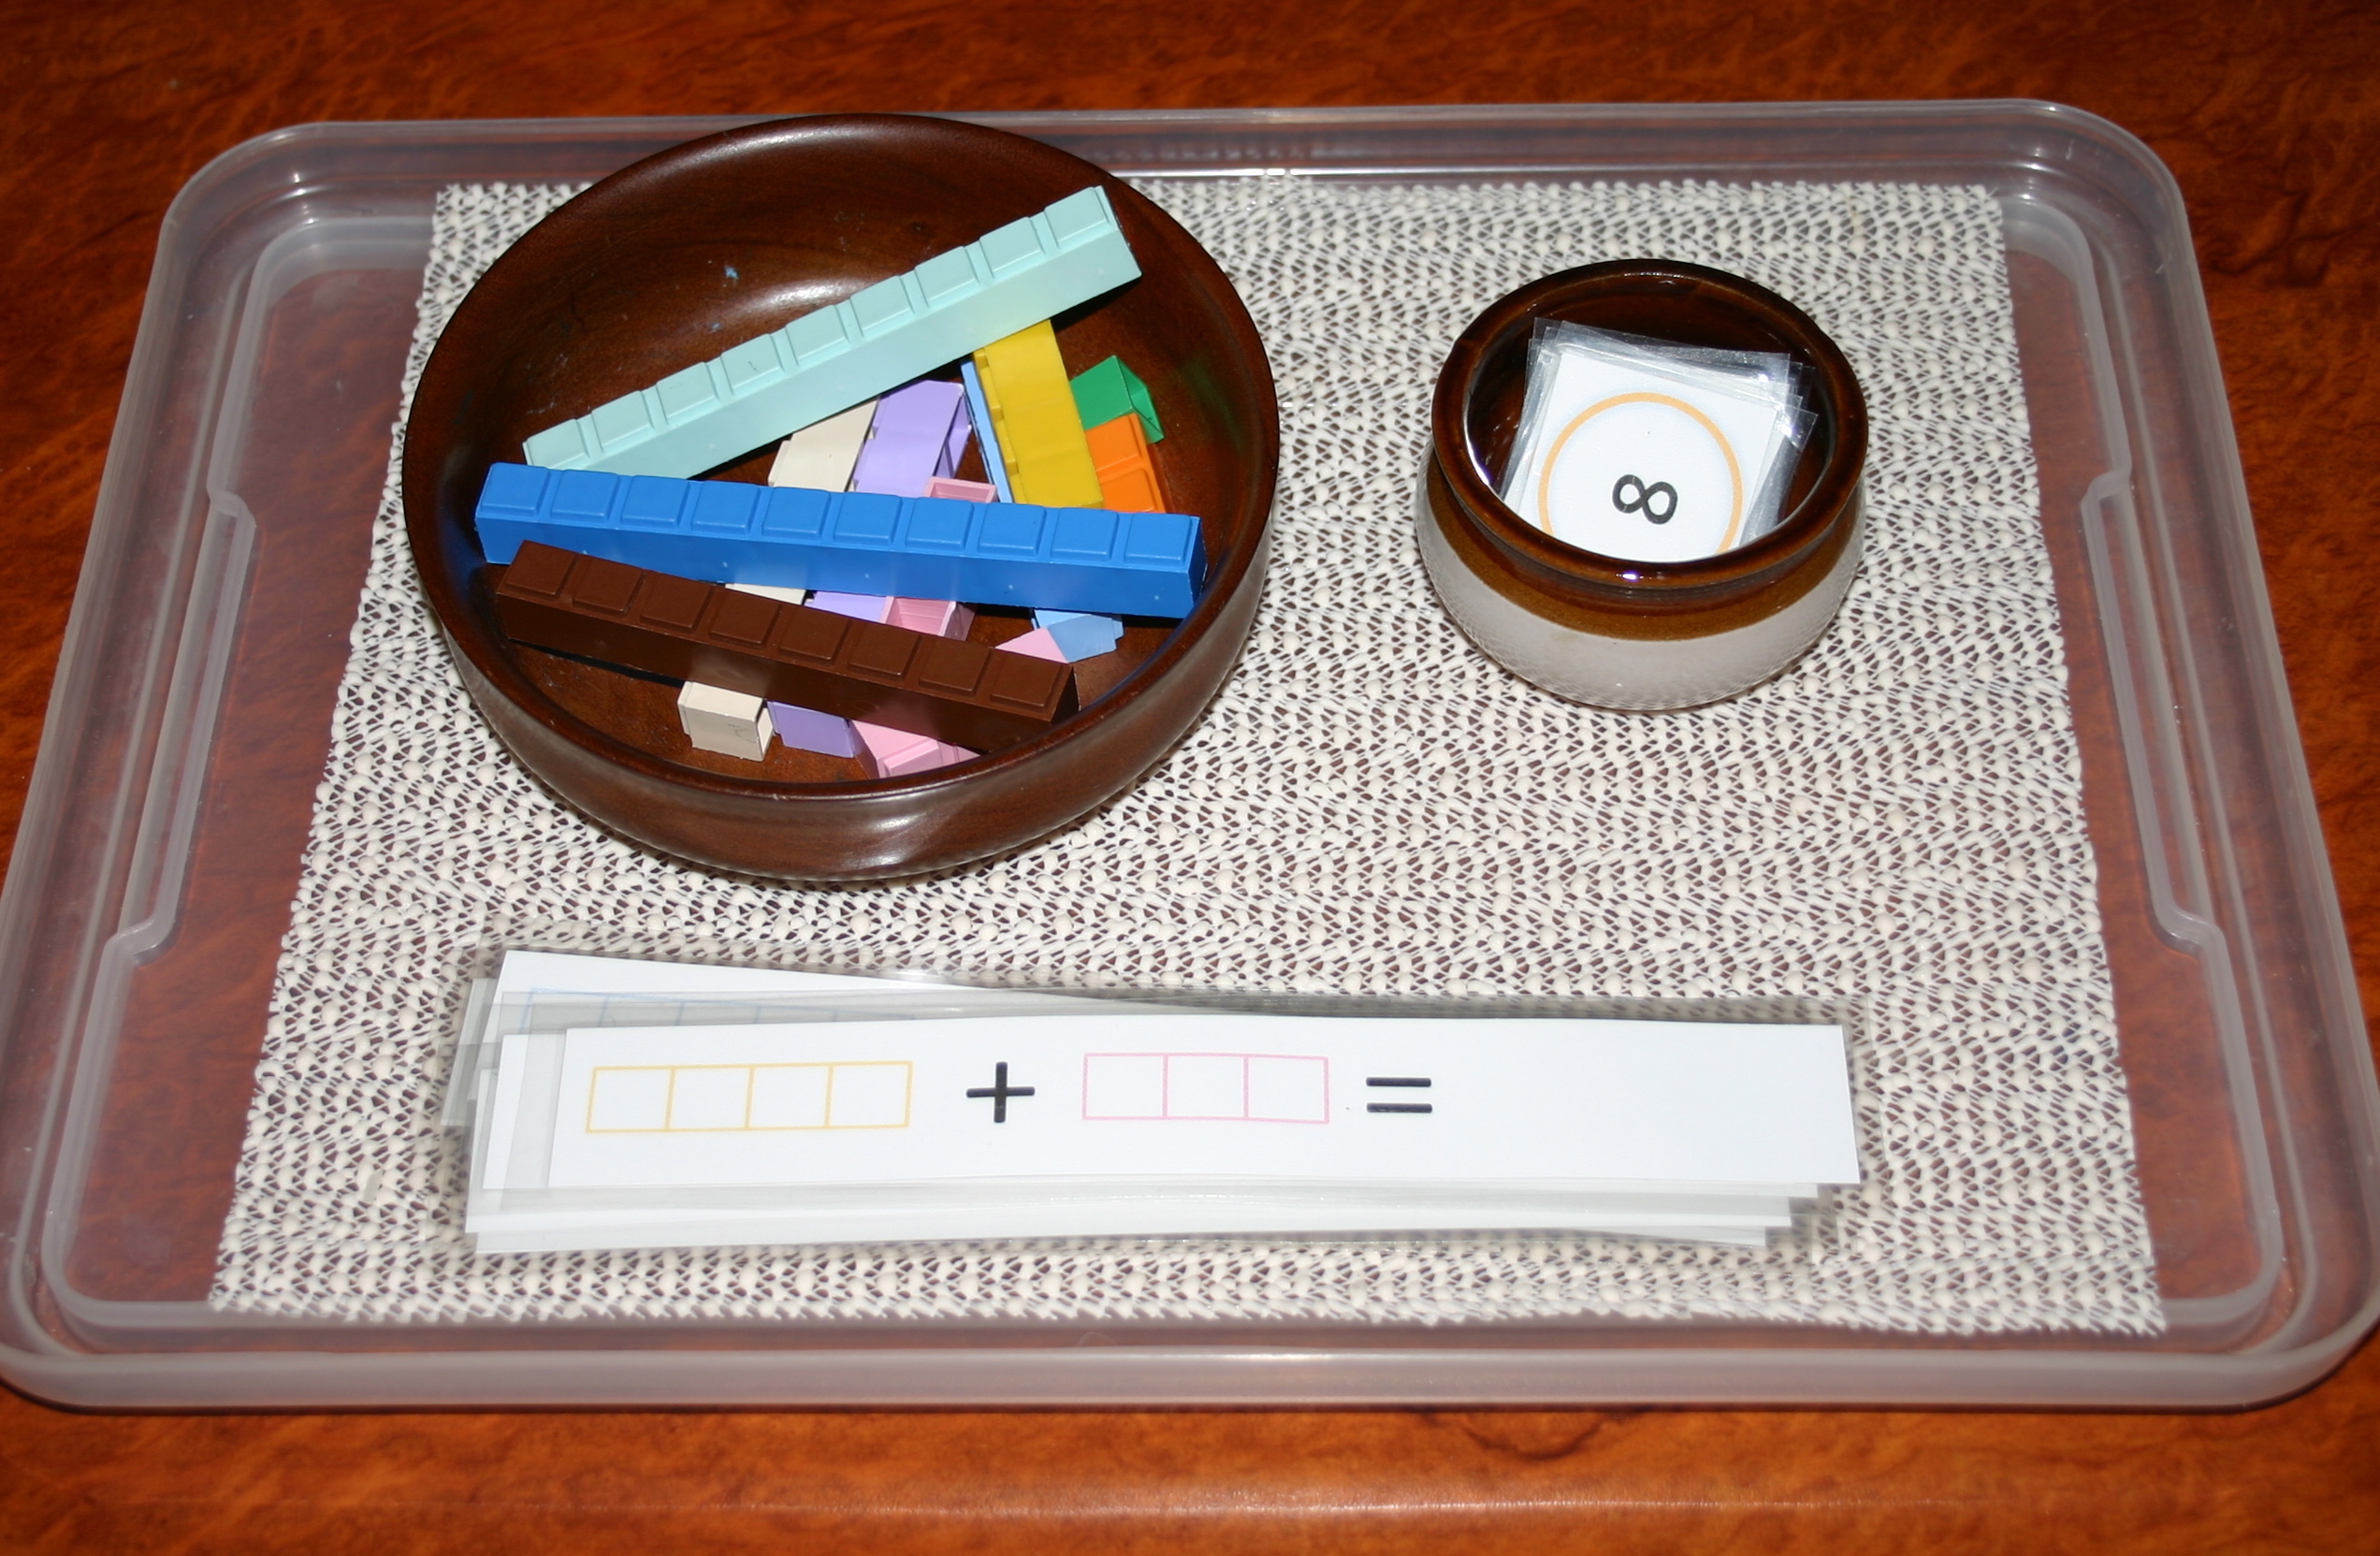
Another Mathusee based activity; basic addition facts using the manipulatives and numeral answers. The number strips I have out at the moment are plus 1 and plus 2. Learning basic addition facts now will help with more difficult mathematical skills later on. Click the links below for FREE PRINTABLES: Plus  1 Plus 2 Plus 3 Plus 4 Plus 5 Plus 6 Plus 7 Plus 8 Plus 9 Plus 10 IMG_0122 We have moved on from letter names and sounds and identifying initial sounds to 3 letter words. These are Coko bricks and each board has groups of consonant vowel consonant (CVC) words with the same endings to keep it simple. The children carefully sound out the words and find the matching bricks to make them. IMG_0123 IMG_0124 The back side of the card has the answers to make the activity self-checking. No printable for this one sorry – the pictures are not mine! IMG_0125 These alphabet sounds books were simply a book form of flashcard. We use them to review the letter names and sounds and sticker the letters they know. I found the school font I wanted to use online, enlarged it and printed them out. IMG_0126 This is an initial sounds activity. Free printable circle pictures and letters are available from this blog. I made a simple backing page to use them in a slightly different way than the original author intended. The sets are sorted into 3 or 4 initial sounds in each envelope to keep it simple and avoid having the whole alphabet mixed up together. For a FREE PRINTABLE of my circles backing page click here. IMG_0127 IMG_0128 I made these consonant-vowel-consonant (CVC) 3 letter word matching cards using pictures from cheap sticker books. The children choose a picture and find the matching word card before turning the picture over to check their answer on the back. IMG_0129 A basic counting and/or colour matching activity from an activity bag swap I posted on a while back. The concept is far too easy for the twins now but I wanted something for fine motor skills so popped this one out again. The idea is to slide the correct number of paperclips onto each foot after ordering the numerals from 1 to 5. You may also require them to match the colours at the same time.

Knock and run 12 days of nativity

advent candles and nativity

If you are like me and have neglected to get started on your 12 days of nativity knock and run, here is my “deliver it all at once” version with introductory poem and readings for a 10 piece nativity set. (10 days until Christmas if I deliver it today!)

If you have no idea what I am talking about, this is a nice outreach idea for neighbours or friends at Christmas time. You can either deliver one piece of the nativity each day (with their corresponding readings) or all at once, to be opened one per day. If you live close to the recipient I think the every day approach is more fun, especially for the children as they take turns being the stealthy deliverer who cannot be seen delivering the daily piece. This year for us however, one delivery it will be as we have a lot on and I’m sure to miss a day or 2 otherwise. 

I have included the instructions for both versions in poem form and the readings we are using this year. Feel free to print them out and tweak it to fit the set you have. Have fun introducing someone to the good news of Jesus birth.

All at once version:

Jesus came to earth to show the world God’s love

Amazing grace and forgiveness, sent from heaven above

At your door this gift you’ve found, unwrap it one per day

It will tell the Christmas story, in a special way

To remind you of the gift of God, as a baby He was born

Jesus Christ, God on earth, in a stable all forlorn

The date will tell you which to unwrap and set upon display

Isn’t it amazing; we can receive God’s love today!

One per day version:

Jesus came to earth to show the world God’s love

Amazing grace and forgiveness, sent from heaven above

At your door a gift you’ll find, unwrap it every day

It will tell the Christmas story, in a special way

To remind you of the gift of God, as a baby He was born

Jesus Christ, God on earth, in a stable all forlorn

Leave the basket out each night for us to fill for you

Don’t try to peek or find us out, it will spoil it if you do!

Mary

And the angel said to her, “Do not be afraid, Mary, for you have found favor with God. And behold, you will conceive in your womb and bear a son, and you shall call his name Jesus. He will be great and will be called the Son of the Most High. And the Lord God will give to him the throne of his father David, (Luke 1:30-32, ESV)

Mary was a young girl who trusted God and was willing to obey Him. She was given the privilege of mothering Jesus, the Son of God.

Joseph

But as he considered these things, behold, an angel of the Lord appeared to him in a dream, saying, “Joseph, son of David, do not fear to take Mary as your wife, for that which is conceived in her is from the Holy Spirit. She will bear a son, and you shall call his name Jesus, for he will save his people from their sins.” (Matthew 1:20-21, ESV)

Joseph was a man of character. God entrusted him to raise His Son.

Donkey

And Joseph also went up from Galilee, from the town of Nazareth, to Judea, to the city of David, which is called Bethlehem, because he was of the house and lineage of David, to be registered with Mary, his betrothed, who was with child. (Luke 2:4-5, ESV)

Mary may have ridden a donkey from Nazareth to Bethlehem. God was watching over her and fulfilling His divine plan.

Cow

And while they were there, the time came for her to give birth. And she gave birth to her firstborn son and wrapped him in swaddling cloths and laid him in a manger, because there was no place for them in the inn. (Luke 2:6-7, ESV)

Fulfilling the prophecies, God’s son began His life in a stable because He loved us so much.

Baby Jesus

“For God so loved the world, that he gave his only Son, that whoever believes in him should not perish but have eternal life. For God did not send his Son into the world to condemn the world, but in order that the world might be saved through him. (John 3:16-17, ESV)

Jesus left heaven to be born on earth as a baby. He grew into a man, died for our sin and rose as our Saviour.

Angel

And suddenly there was with the angel a multitude of the heavenly host praising God and saying, “Glory to God in the highest, and on earth peace among those with whom he is pleased!” (Luke 2:13-14, ESV)

An angel gave Mary the wonderful news that she was to bear God’s Son. Throughout the Christmas story angels share joyous news and praise God for His wondrous salvation gift.

Shepherd & sheep

And they went with haste and found Mary and Joseph, and the baby lying in a manger. And when they saw it, they made known the saying that had been told them concerning this child. (Luke 2:16-17, ESV)

God shared the miracle of His Son’s birth first with humble shepherds in the fields, rather than the important people of the time. The good news is for everyone.

King/wise man

Now after Jesus was born in Bethlehem of Judea in the days of Herod the king, behold, wise men from the east came to Jerusalem, saying, “Where is he who has been born king of the Jews? For we saw his star when it rose and have come to worship him.” (Matthew 2:1-2, ESV)

The wise men came to worship the newborn king. They bough Him gifts because they recognized who He really was – King of Kings and Lord of Lords

King/wise man

Come to me, all who labor and are heavy laden, and I will give you rest. Take my yoke upon you, and learn from me, for I am gentle and lowly in heart, and you will find rest for your souls. For my yoke is easy, and my burden is light.” (Matthew 11:28-30, ESV)

The wise men probably travelled on camels as they carried their loads of precious gifts and belongings. We come to Jesus loaded down with burdens but He promises to carry our burdens and give us the rest we need if we will trust in Him.

King/wise man

knowing that you were ransomed from the futile ways inherited from your forefathers, not with perishable things such as silver or gold, but with the precious blood of Christ, like that of a lamb without blemish or spot. (1 Peter 1:18-19, ESV)

The wise men bought precious gifts of gold, frankincense and myrrh, but the gift of forgiveness for our sin is the most precious of all. Jesus came to purchase our freedom from sin. He sacrificed Himself in our place so we can know God and live in peace and joy with Him forever.

Our Jesse tree symbols for advent 2013

jesse tree jewels finished IMG_8790

Christmas is fast approaching and with it, the advent season. In our family, we try to make this a special time to focus on Jesus in the lead-up to Christmas day. This year we are making a magnetic Jesse tree to count down the 25 days of December. The clear jewels that are stuck over the top of the tiny pictures have a magnifying effect that make the simple picture symbols look quite spectacular. We will read the bible reading to go with each symbol and the older children will design their own pictures, while the younger kids will colour in the ones I have already pre-drawn for them.

Jesse tree symbols 2013 jewels

If you would like to use our pictures, I have uploaded a printable version here.  (You are welcome to print the pictures out for your own use, however please do not re-post these on any other blog; feel free to link back here.) Don’t forget to check the size of your jewels and adjust the print size of the pictures accordingly. Jewels can be found at discount variety stores and are usually with the candles or artificial flowers.

The tree backing is simply strips of coloured paper glued down and laminated. If you can find a couple of complimentary scrapbooking or wrapping paper patterns that would be ideal. To glue the jewels down, we used white PVA wood glue. Just make sure that whatever you use, it dries clear or obviously your pictures will not show through well. I found round magnets and used the same glue to attach them to the back after the pictures were dry.

There are lots of suggested readings available online, but the ones I used you can print here. (I fit my readings into the 25 days of December, rather than actually following advent and there are a couple of extra readings and symbols on this list than I needed. Ignore the days of the week and just choose the ones that match the printable symbols from above or make up your own.)

If you would like to see another version of a fairly traditional Jesse tree from previous years, see here or for a different take on Jesse trees, see our names of Jesus Jesse tree symbols.

Other posts you may find helpful:

Jesus trees, lent and Easter traditions for a Christian Easter; minus the bunny.

Making those traditions happen; a “to do” list of wonderful memory making ideas

Christmas debrief and next year’s plans