Hands-on maths; multiplying, clocks & time, sequencing and skip counting.

Here are the last couple of tray activities for our hands-on maths this term. While I have changed the way we are using the trays (Yes – again!) it has worked well to have the concepts we are covering in our Math-u-see books available for hands-on practise using concrete materials. As the children work through their books they are able to stop and spend extra time on a new skill using the trays if it is not immediately grasped from the instruction DVD that goes with the written material.

img_2691

Curtain rings and flat wooden beads work well to illustrate the concept of “lots of” or “groups of” as the children learn basic multiplication skills.

img_2707

These clock and time cards printed out from the internet start with a set of just the hours, then minutes, then half hours and finally a mixture of all 3. I googled clock/time worksheets and printed them before cutting them up. There are lots of options available online.

img_2695

Learning to sequence numerals is made easy with the use of a number strip to follow. Initially the children use only the numerals 1 to 5 then up to 10, then 30 and so on. Eventually the number strip is removed as well.

img_2694

Skip-counting and money concepts can be learnt by marking each interval with paper triangles and laying out real coins. I happen to have a bunch of one and two cent coins stashed away so we use those as well, although I do make sure the children know they are no longer legal currency.

Advertisement

Hands-on maths; rounding numbers

img_2697

Free printable number strips below.

While I have a moment I thought I’d continue to post about our maths activities with free printables for each activity.

Using a number line to teach children the concept of rounding to the nearest 10, 100 or 1000 helps to make the concept a little clearer. I printed out these number strips and used a hole punch to make holes above each number. The children select a number card, poke a golf tee into the hole closest to that number and then count the holes or hops it takes to reach the nearest 10/100/1000 in each direction. The smaller the number of hops, the closer the number and therefore they know which way to round; up or down.

This skill requires a firm grasp of number order and an understanding of place value in order for a child to be successful. The printable strips start with a blank space so that they overlap slightly and can be laid out in one long number line 0 to 100, 100 to 1000 and 1000 to 10000.

For your free printable number lines and number cards click here:

number-line-for-rounding-to-10s

number-line-for-rounding-to-100s

number-line-for-rounding-to-1000s

Hands-on maths; ordinal number

img_2710

(Free printable ordinal number cards below)

For a child who has a strong grasp of numbers and number order, ordinal number is a simple concept. Applying the labels of first, second, third etc. is something that children are exposed to in their everyday life. Every child is familiar with the phrase “Me first!”

This activity tray takes the concept of ordinal number and gives children practise in using it to label the order of runners in a race, months of the year and days of the week.

For your free printable ordinal number cards and awards click here: days of the week & months of the year and here: race track & position ribbons.

For more hands-on maths ideas see my free printables for addition, subtraction, and solving for the unknown.


Hands-on maths; subtraction activity trays

img_2714

(Free printable subtraction cards below)

Today I am continuing with my hands-on maths series (addition here, solving for the unknown here) with subtraction activities for hands-on learning. This (above) is what the “activity centre” looks like on my shelves. I would love to have it all spread out on individual trays but there is just not enough room. A simple plastic box and re-purposed desk organiser do the job and the children take out the materials they wish to use for the day.

img_2711

You can use any materials you like but it is helpful if there is some way to clearly show that they have been subtracted or taken away. I have out wooden craft pictures that are turned over as they are subtracted, miniature fruit erasers that stand up and are then laid down as they are taken away, double sided 2-colour counters, Duplo blocks and some random plastic connecting pieces that clearly have 2 different sides. You can have the children physically move the pieces or put them in a separate container or some other method of showing that they are subtracted but I think it is good to be able to still see how many have been taken away as it helps with self-correction of errors.

The children choose one set of subtraction cards at a time to work on, beginning with the easier subtract 1 or 2 cards and then moving on to the more difficult combinations once they are able to do these without needing manipulatives. The aim is to have these basic maths facts committed to memory or so quickly worked out mentally that higher level mathematical skills based on them are not slowed down by having to work out the simpler steps. For your copy of my free printable subtraction cards click here: vertical-subtraction.)


Solve for the unknown – hands-on maths

img_2599

Here are the free printable cards for you to use with the solving for the unknown activities from this post.

solving-for-the-unknown-totals-of-2-3

solving-for-the-unknown-totals-of-4

solving-for-the-unknown-totals-of-5

solving-for-the-unknown-totals-of-6

solving-for-the-unknown-totals-of-7

solving-for-the-unknown-totals-of-8

solving-for-the-unknown-totals-of-9

solving-for-the-unknown-totals-of-10


Addition tray activities for hands-on maths


img_2605

After my earlier post on addition tray activities I have had some requests for a copy of the addition cards so here are your free printable vertical addition problems ready to print and laminate.


Montessori multiplication trays: Hands-on mathematics

multiplication board

Wooden peg-board (the kind you use to hang tools from in the garage) is a cheap and simple alternative to purchasing a multiplication board.

Continuing on with my mathematics tray ideas this week (introduction and addition trays here, subtraction trays here), here are some multiplication ideas for learning times tables. We made our own homemade Montessori multiplication board using pegboard wood for a cheap alternative. For another easier method using a rubber bath mat, see this post. While the Montessori multiplication boards are an excellent idea, my children found it quite tedious placing the beads into each little hole every time, preferring to use the blocks from our Math-U-See sets, MAB’s or other manipulatives instead.

Whichever way you choose to present multiplication, make it visual, tactile and concrete to begin with, before moving to abstract concepts. The following tray ideas are for children who already understand the concept of multiplication and simply need some more practise of their basic facts (their times tables) in order to commit them to memory.

times table popstick start finish game

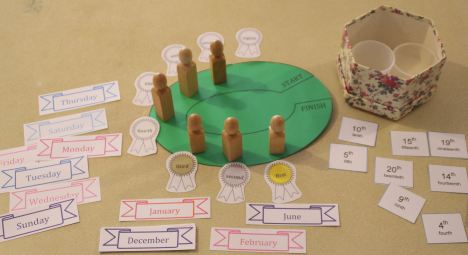
Threading beads onto pipe cleaners (bend the ends to keep the beads from slipping off) is a home-made alternative to the Montessori bead materials. They become the manipulatives, with the multiplication problems written on popsicle sticks. The popsticks are laid out, making sure that the word “start” and all the answer sides are upright. The child turns over the “start” stick and uses the bead strings to solve the problem on the other side. They find the answer to that problem on the next stick and turn it over to reveal a new sum on the other side and continue on in the same way until they reach the “finish” stick. If at any time they turn over the finish stick before they have completed all the other sticks, it indicates they have made an error along the way.

mab multiplication

Wooden MAB’s (multi-based arithmetic blocks) are the “old fashioned” mathematics manipulative that I grew up with. They can be used in place of bead chains for many math concepts. Here they are set out for learning the 10 times table (multiplying by 10’s.) The sum is on the left and the small circles show a running total, with the large circle answer at the end of the chain. A small pad is included for recording the answers.

count by 10s MABs

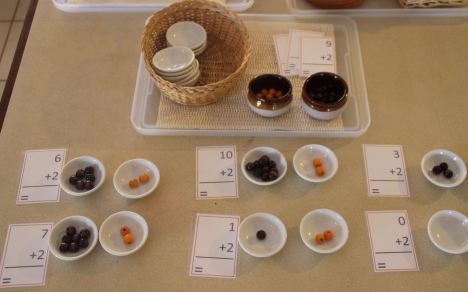
These plates are actually set up for skip counting in the photograph, however with the addition of some multiplication problems, lend themselves very well to practising times tables.

icecream lid popstick 9 times table

Popsicle sticks with answers are matched to multiplication problems on an icecream container lid.

egg carton 8 times table

Popsicle sticks with the problem are slid into slots with matching answers on the egg carton.

multiplication times table puzzle

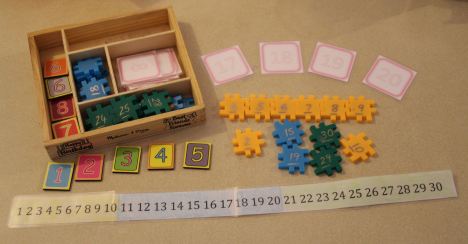
A cheap (yet difficult) puzzle was a fun way to practise. Answers are written on the back board to match the puzzle piece with the corresponding problem. The puzzle must be difficult enough that the child cannot easily cheat by just following the picture, rather than working out the sums. (Not that any of your children would ever do that!!)

white ball to iceblock tray match 1 to 10

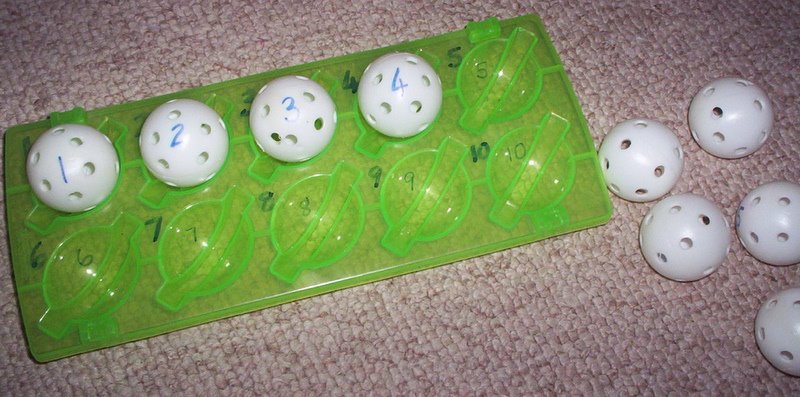
Plastic balls with problems are matched to the answers in an iceblock tray.

wood peg on cont 7 table

Pegs with problems are pegged on to the answer segment on the container, which doubles as a storage place.

mixed operation bingo

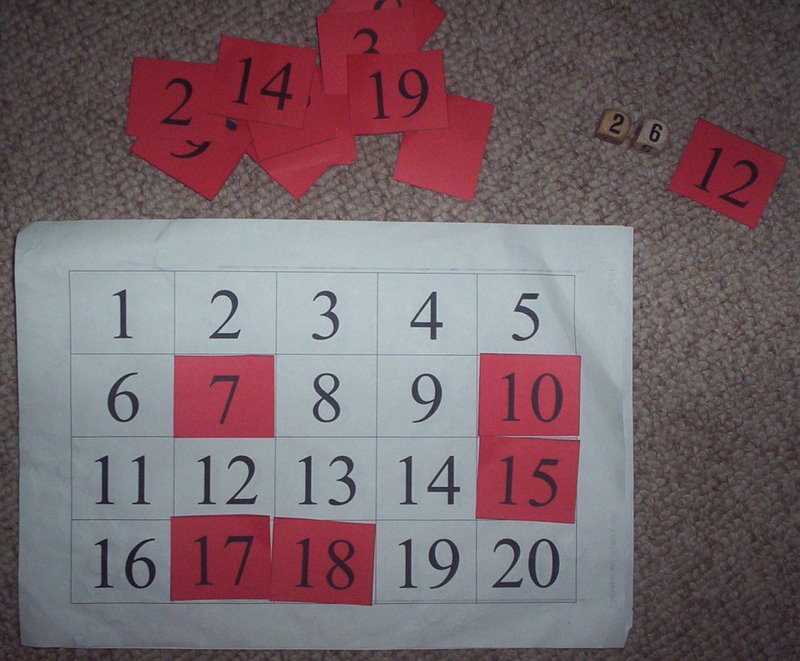
Dice are thrown (you need 3) to create any combination of addition, subtraction or multiplication problem and the answer is covered on the board. The idea is to continue until all answer squares have been covered. This is for children who already have a fairly good mastery of their basic number facts and tables.

4 times table multipication jewel cont

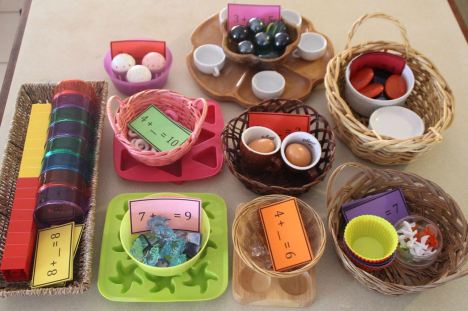
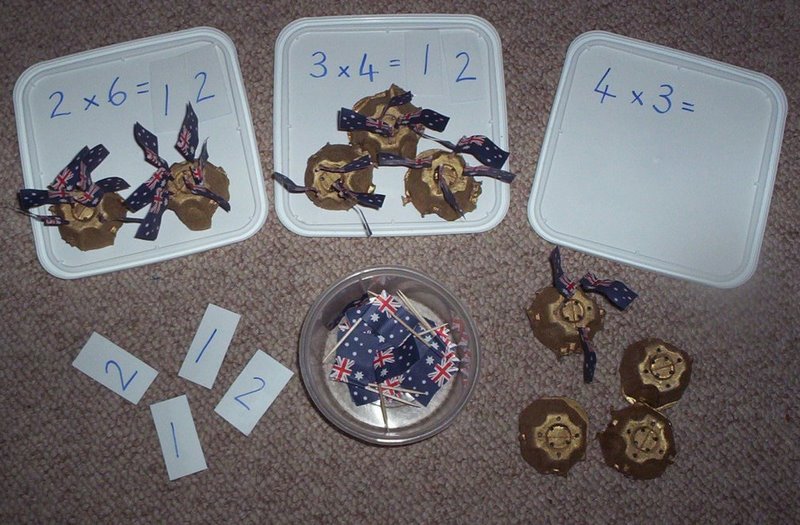
Each square container holds 4 little plastic shot glasses for practising the 4 times table. Jewels are counted into each glass and totalled to find the answers.

pattipan in box 4 times tables

A plastic lunchbox filled with pattipan answers to match problems on circle.

castle flag multiplication

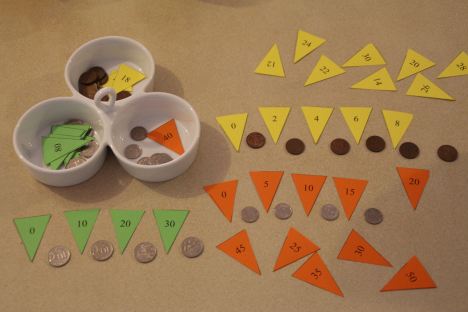
The correct number of flags are inserted into the castles, with the castles showing how many groups.

pink plate plastic pegs 6 times

Pegs are slid on to the matching answers on the paper plates. A manipulative is needed for working out the problems unless the child is able to complete them mentally.

ping pong ball egg tray 5 times table

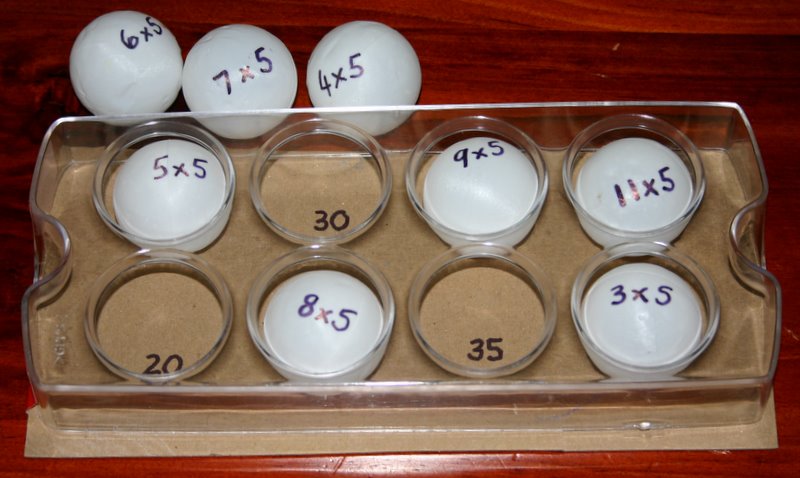
Ping pong ball problems are matched to the answers in an egg holder from the fridge.

Multiplication: Learning your times tables

Most of us will remember the days of practising our times tables over and over again until they came without a  second thought. As much as children often detest learning this skill it is nonetheless a very important mathematical foundation that will underlay so many of the more difficult maths concepts later on. If these simple multiplication equations are not mastered it will slow progress and make maths just that little bit harder.

With his in mind, here are some activities to drill the times tables that make it just a little bit more fun and will be especially helpful to those kinesthetic learners who need the hands-on experience to really lock these facts into their memories. They can be used as workjobs, shoebox tasks, Montessori style tray activities, work stations or simply as part of your every day maths programme.

This is an egg holding tray from my refrigerator with a cheap set of plastic ping-pong balls from the $2 shop. The multiplication problem is written on each ball with the answers in each circle on a piece of card taped to the back. The balls are simply matched up to the correct answer. (Children usually have no problem with 0, 1 or 10 times any number, so if there are not enough spaces I leave these equations out of the set.)

A paper plate has the answers written around the edge with multiplication problems slid into the end of plastic pegs. Children work out the sum and slide the peg on to the correct place.

The 7 times table is written onto wooden pegs with the answers on coloured contact stuck around the edge of a plastic container. Pegs are stored in the container when the activity is complete.

Small slots are cut into the top of each egg carton segment with the answers to the 8 times table written on each. Fat shaped popsticks (paddle-pops) have the sums written on each and are poked into the corresponding hole. The last segment has a larger hole to place al the sticks when the activity is complete.

Popsticks with answers are matched to the 9 times table written on an icecream container lid.

An empty container (lunchbox etc.) plus some pattipans and card circles are all that is needed for this activity. The patti-pans have the answers and the card circles have the 4 times table written on them.