Toddler busy bag exchange

IMG_8810

A good friend of mine recently hosted an activity bag exchange for young children and toddlers. Each Mum involved made 13 copies of an activity of their choice. We all got together for a chat and to exchange our bags with each other, leaving us all with 13 different activities to use with our own children. Here are the wonderful bags the ladies made. (While none of these are original ideas, they can be found in so many places across the web that I haven’t tried to give credit to sources in most cases.)

IMG_8819

Pizza factory. The children follow the order cards to custom-make each pizza according to their customer’s preferences. (Links to free printable order cards and other busy bag swap ideas here.)

IMG_8816

Popstick pattern match. Use the coloured popsticks to copy the picture patterns. Several of the cards have plain colours on the back to convert  the activity to a colour match instead.

IMG_8830

Button snake. Great for learning how to do up buttons; excellent for fine motor control. The felt pieces are pushed on and off the “snake” using the button head.

IMG_8828

Pipecleaner bracelets. Thread the cut straws onto the pipecleaners to make patterns and jewellery. You could do this as a colour matching activity if you have the right straws and pipe cleaner colours

IMG_8827

Sandpaper and wool pictures. Again with patterns to follow and copy, placing the pieces of wool onto the sandpaper to make pictures.

IMG_8826

Paper clip feet. Slide the paper clips onto the toes by colour or write a number on each foot for counting practise as well as fine motor skills. Young children can just pile the paperclips on top if it is too difficult to push them on.

IMG_8825

Tissue paper pictures. Tear pieces of tissue or crumple into balls to decorate the pictures or make you own with the blank paper and glue. Stickers and crayons are added for extra fun as well.

IMG_8824

Paint swatch pegging. Pincer grip (necessary for writing later) is exercised by opening the pegs to match them to the correct colour swatch.

IMG_8823

Shape puzzle. A simple make-your-own puzzle with foam sheet cut into geometric shapes

IMG_8821

Pop-pom push jar. Push the pompoms through 2 sizes of holes into the plastic container. (Tip: Use a drill to make the holes.)

IMG_8812

My youngest enjoyed the pompom posting and soon figured out that he could shake the small ones back out again – saving me the trouble of taking the lid on and off for him!

IMG_8818

Felt chains. Perfect timing for Christmas! While the rest of the family are producing reams of paper chain to decorate the entire house (or is that just my children?) the youngest can be practising with felt and velcro, to be made and re-made over and over again.

The last 2 bags were mine and I made sewing and threading activities and a basic gluing bag. Sorry, no photos, but check here and here for some gluing and fine-motor ideas.)

Other posts you may find helpful:

Ziploc activity bags for toddlers and preschoolers

Toddler busy boxes 

Sensory tub ideas

Advertisement

Montessori style practical life tray activities for toddlers

Today’s post is a potpourri of Montessori tray activity ideas. They cover a range of skills and fall into a number of practical life categories, but all are great for teaching your toddler to sit and concentrate for an extended period. I have spoken to a number of Mums recently about the difficulty they have in getting their toddlers to sit for any length of time at the one activity. One method that has helped me to achieve this with my toddlers is to include highchair time, table time, and mat or blanket time in our flexible routine. These are times when Mum chooses what the toddler will play with and where they will play. (See choices.)

I use my Montessori style tray activities for highchair time with my young toddlers or during table time for my older children. For those little ones who are “done” with an activity after only a minute or two, I have used a timer to extend them. I put it on for 5 minutes and let them know that I will give them a new activity to play with when the timer is done. They may choose to be finished with their current activity and just sit and wait for the next one or (and this is what usually happens very quickly) they will realise that since there will be nothing else to do until the timer finishes, they will choose to go back to the activity they have been given and work on it for a little longer. The timer I use is a visual timer so they can see how much time is left as it counts down. It also has an option to turn off the beeper so that if they have become engaged in a task the beep of the timer does not disturb their concentration. As they become more able to concentrate for an extended period, the time is lengthened accordingly and eventually the timer is no longer necessary.

The older preschoolers who have developed sufficient self control and concentration are given the freedom to choose their own tray activity, take it to a designated space, work on the task, pack it up and return it to the cupboard before choosing another activity.

If you are getting started for the first time with an 18 month to 2 year old, 5 minutes for each activity is reasonable and the entire session may only last for 15 to 20 minutes to begin with. A two year old will quickly work up to a 30 minute session, but still may need a change of activity after 5 minutes. If I was planning a half hour session of highchair time (long enough to cook dinner) I will organise the 6 activities I need to be on hand before I start. (It may be a good idea to keep them out of view to begin with to prevent their attention being diverted by another activity that looks more interesting!) As the child gets older, the complexity of the activities increases and their ability to concentrate without needing to change improves and therefore the number of activities I need to have ready becomes less. My 3 year olds will need only 1 or 2 different activities for a half hour period depending on what I have provided them with. They are also given some choice over which activity they work on.

The other benefit of having toddlers sit in a confined area to complete these tray tasks is that I can give them breakable and delicate equipment without fear that they will be accidentally damaged and also keep an eye on them with small attractive materials like coloured beads that little children are quite likely to want to pop in their mouths.

Now for some activities! Tweezer transfer activities are great for fine motor skills and require a similar grip to that used for pencil grip when writing. Transfer activities can easily lead into other beginning math skills such as sorting by colour. This duck container holds 4 colours of beads to be sorted into the 4 bowls. Younger children will have fun simply transferring them randomly and very young children may need a small spoon to transfer with, rather than the tweezers.

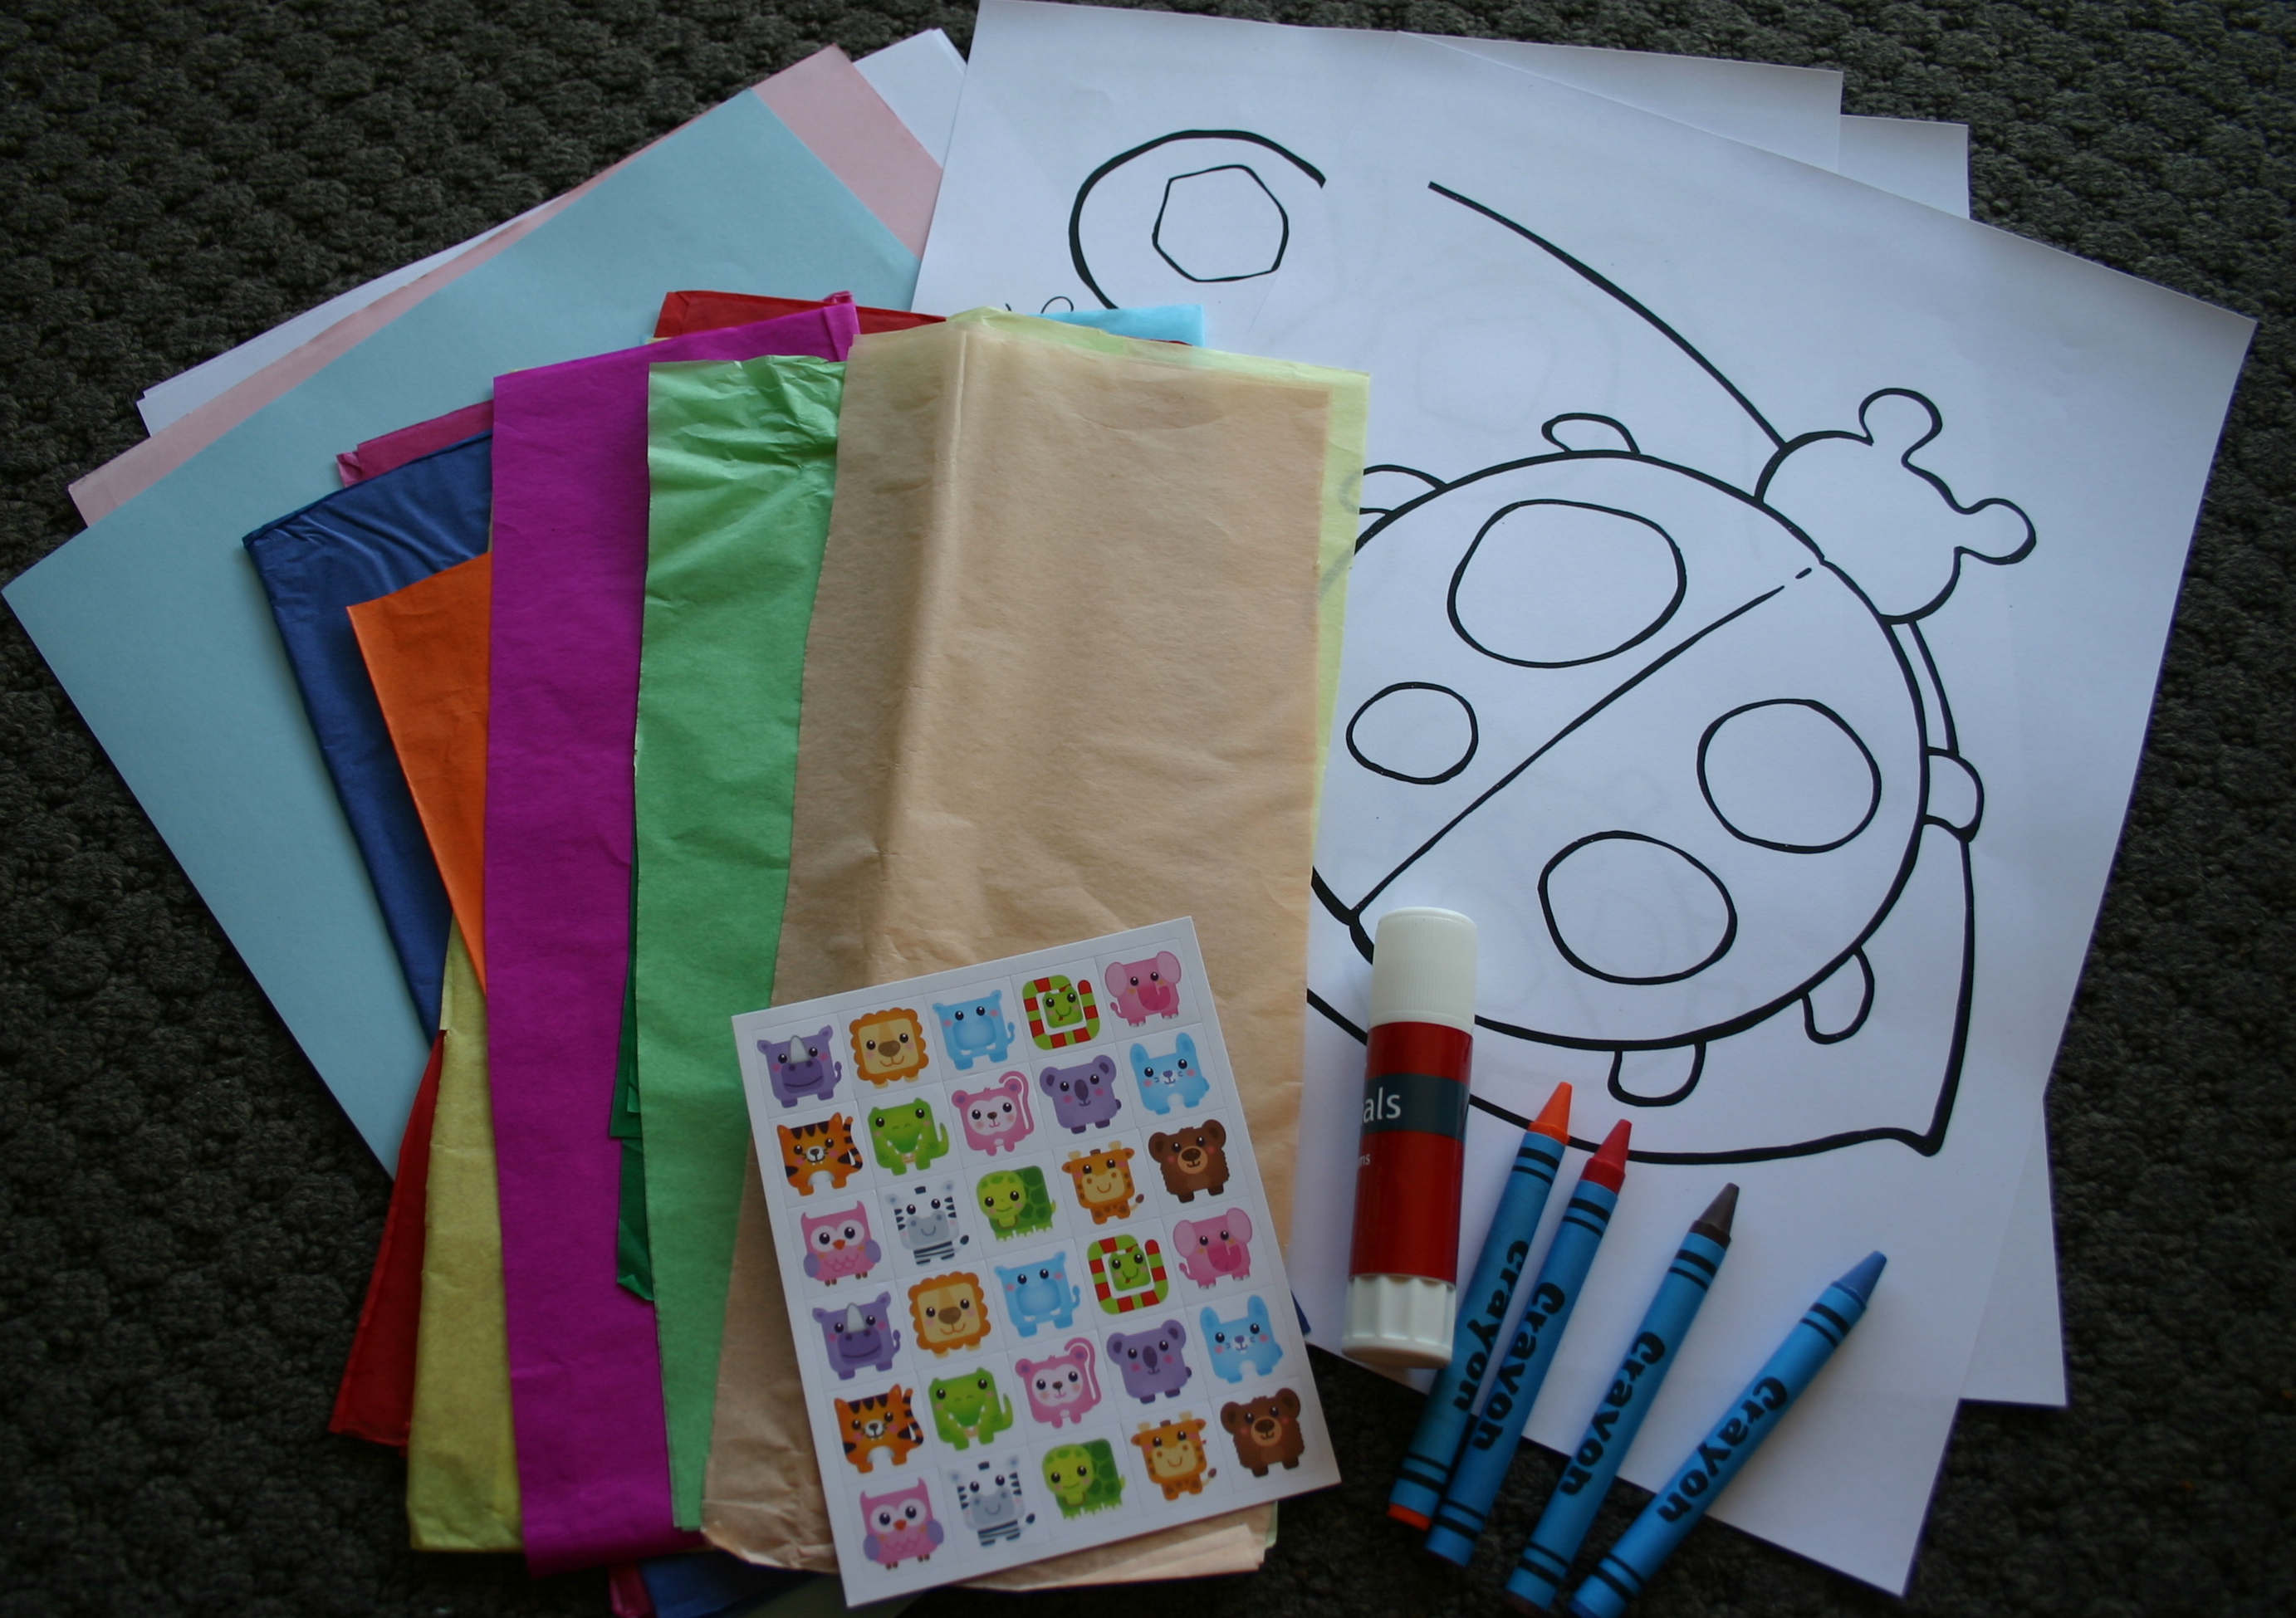
Great for even the youngest toddler, poking toothpicks into floristry oasis encourages pincer grip development. I found that the green oasis crumbled very easily so I would recommend covering it in open weave fabric to contain any dust. I have since been told that the grey oasis is much tougher and shouldn’t crumble or create dust. Foam blocks also work well. (See shape, cat and assorted pictures below.)

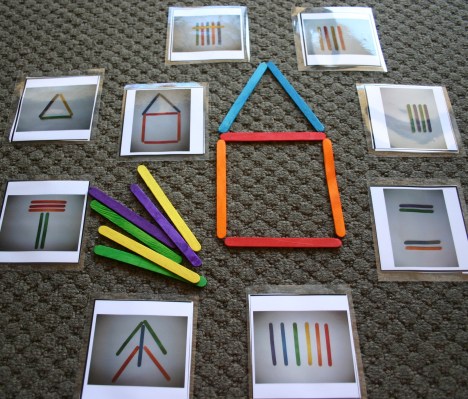
The follow-on activity was to place the toothpicks into marked holes to form simple shapes and then on to pictures.

Keep the number of dots on each picture to a minimum for little ones. Too many make it difficult to get their hand in for the next toothpick.

These pictures are drawn onto card and pinned onto styrofoam pieces cut to fit into the wooden box.

Posting coins through money-box slots. I left the bottom open so that the children can simply shake the coins out the bottom and do it again.

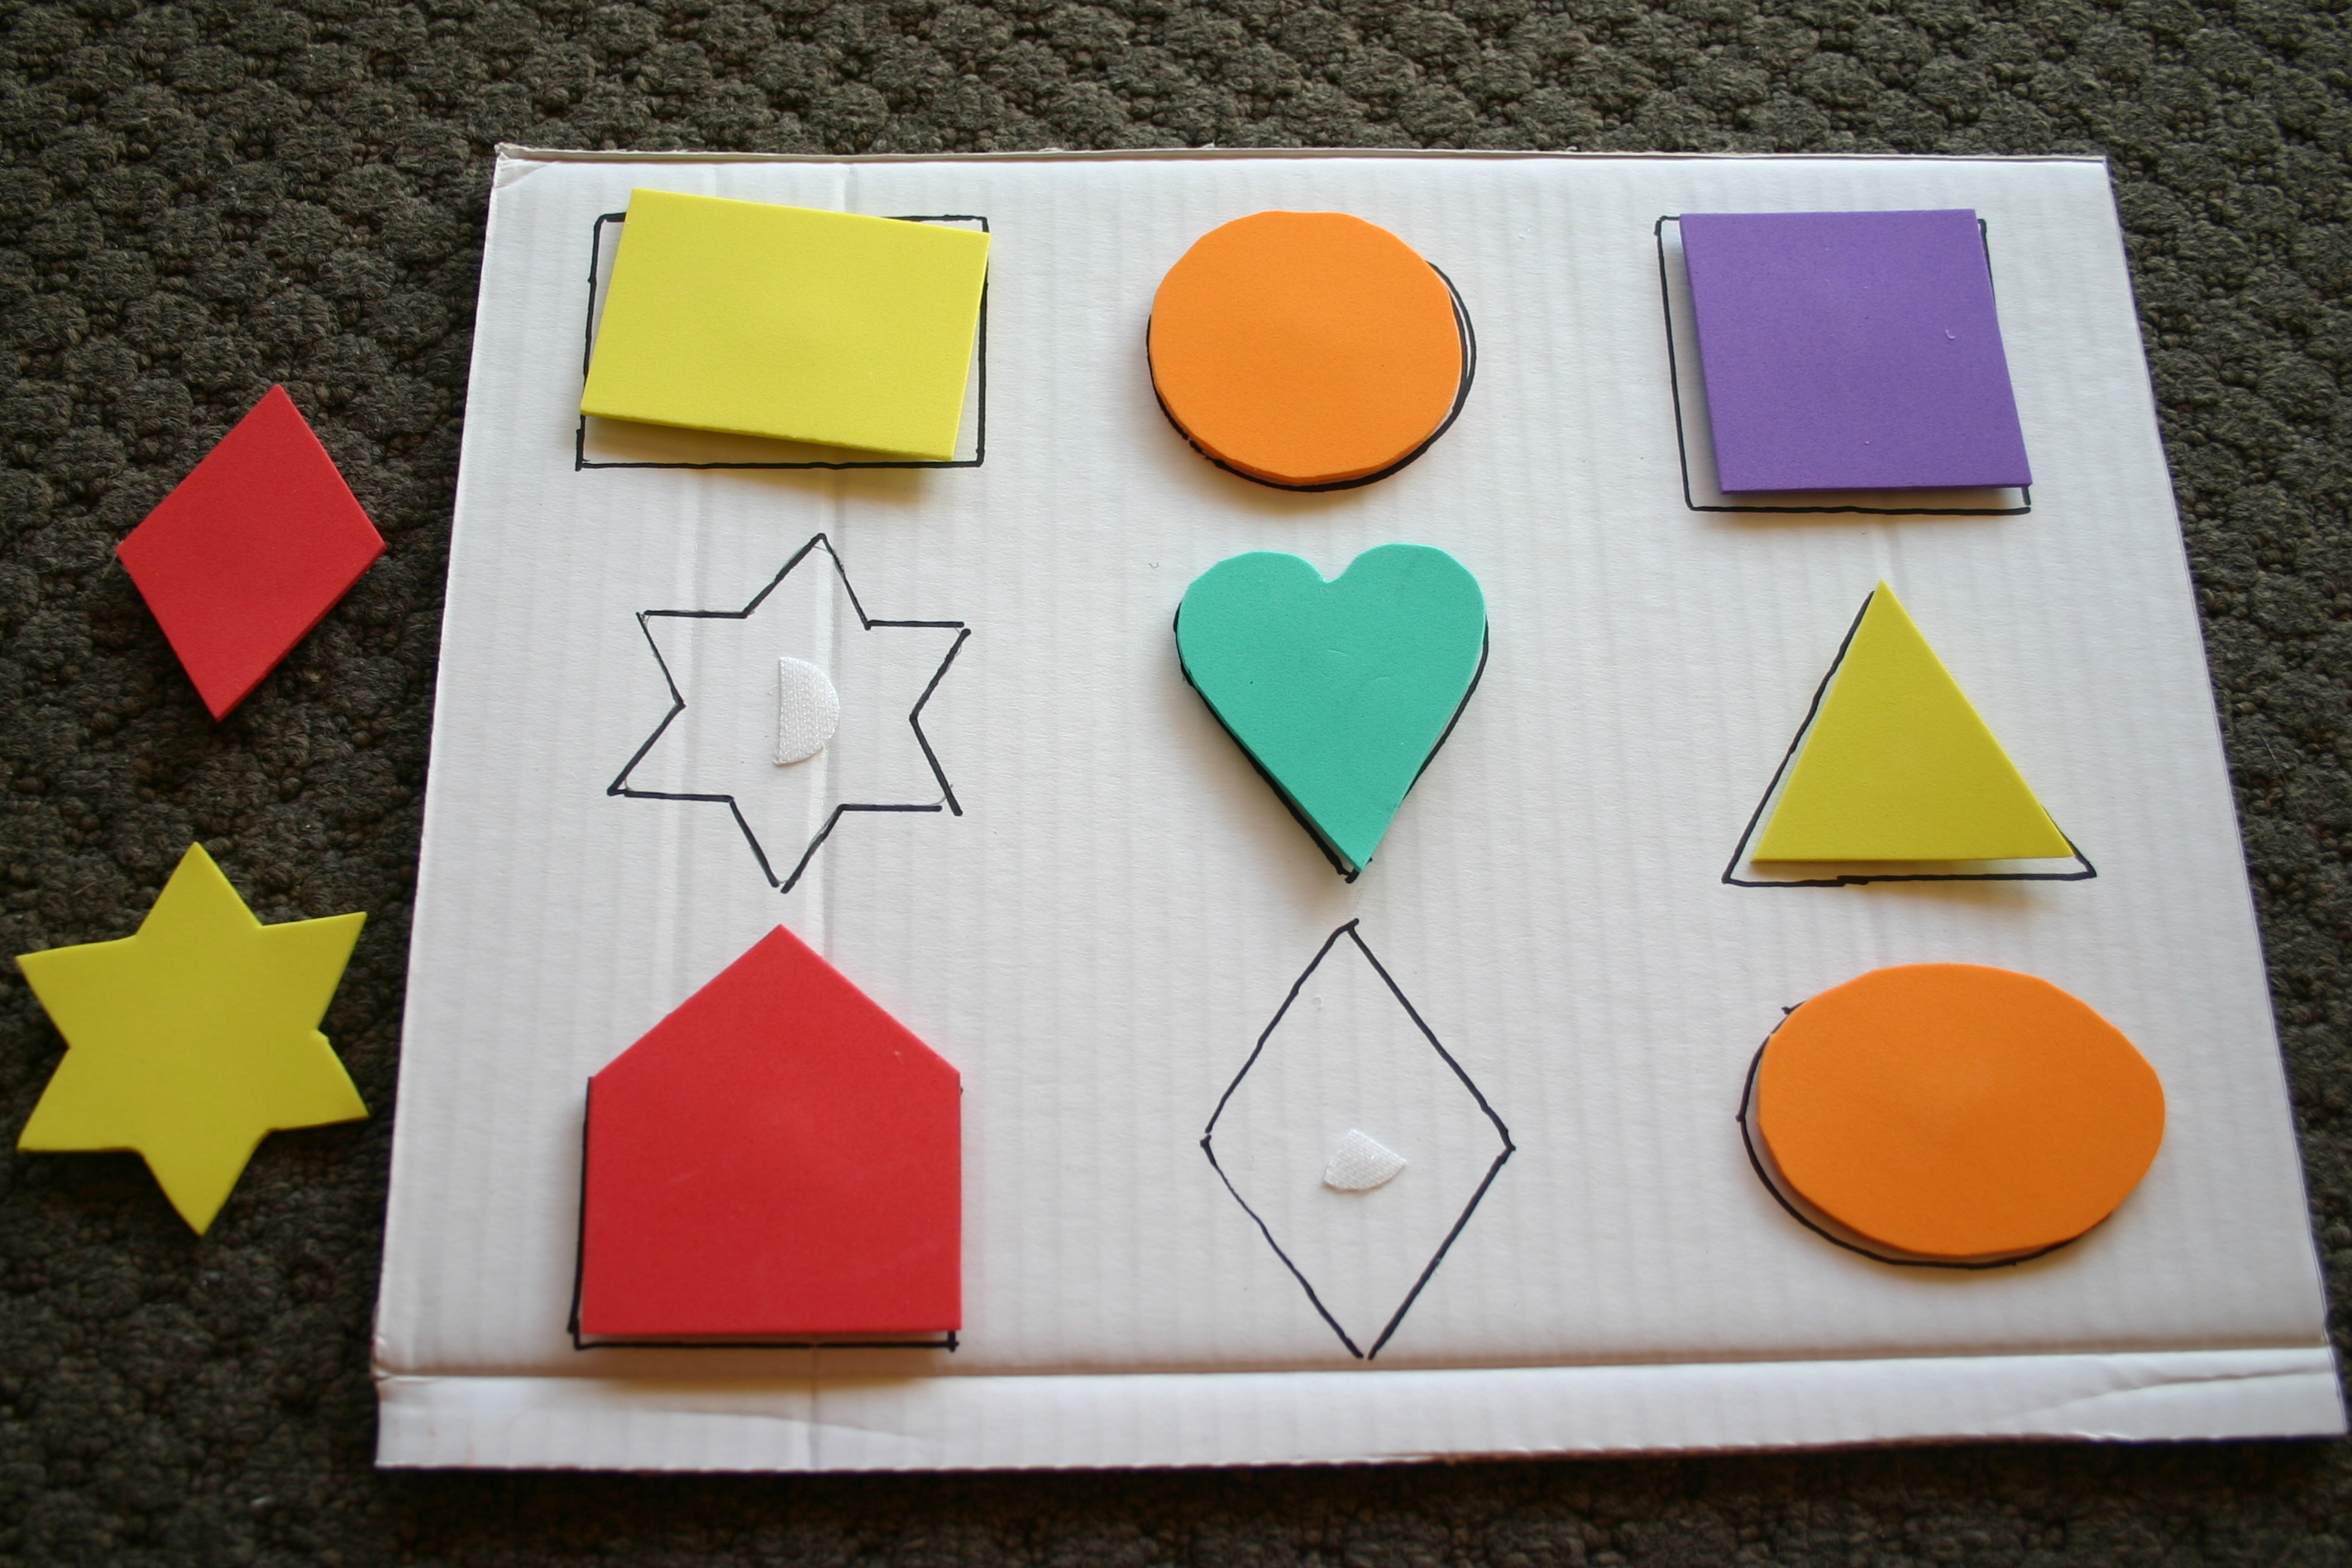
Posting wooden shapes is a good intro to shape recognition . Start with cylinders because it doesn’t matter which way the child puts it into the hole. Squares are next as they must line up but will still go in no matter which way up they are. The open slot at the front of the box allows the child to reach in and/or tip the shapes back out and for the little ones is very much part of the attraction.

Add other shapes such as triangles or a combination of shapes to increase the level of difficulty.

This magnet activity is fun. Hide lots of little items in a bowl of rice. The child moves a strong magnet around in the rice to find which items will stick. The number of spots on the tray designates how many magnetic items they need to find.

Sorting objects according to attributes is another basic mathematical concept. This beginning sorting activity has a large bowl for the large/big objects and a small bowl for the small objects. My just turned 2 year olds can usually handle this one.

Learning to set the table is a household chore for us and learned very easily by actually doing it! Little ones however find it lots of fun to practise this skill with a couple of teddies and some play food. Provide 2 place mats (plastic, fabric or just a sheet of paper) with the outline of the items on them for little ones to match each item to so that they know when they have done it “properly.”

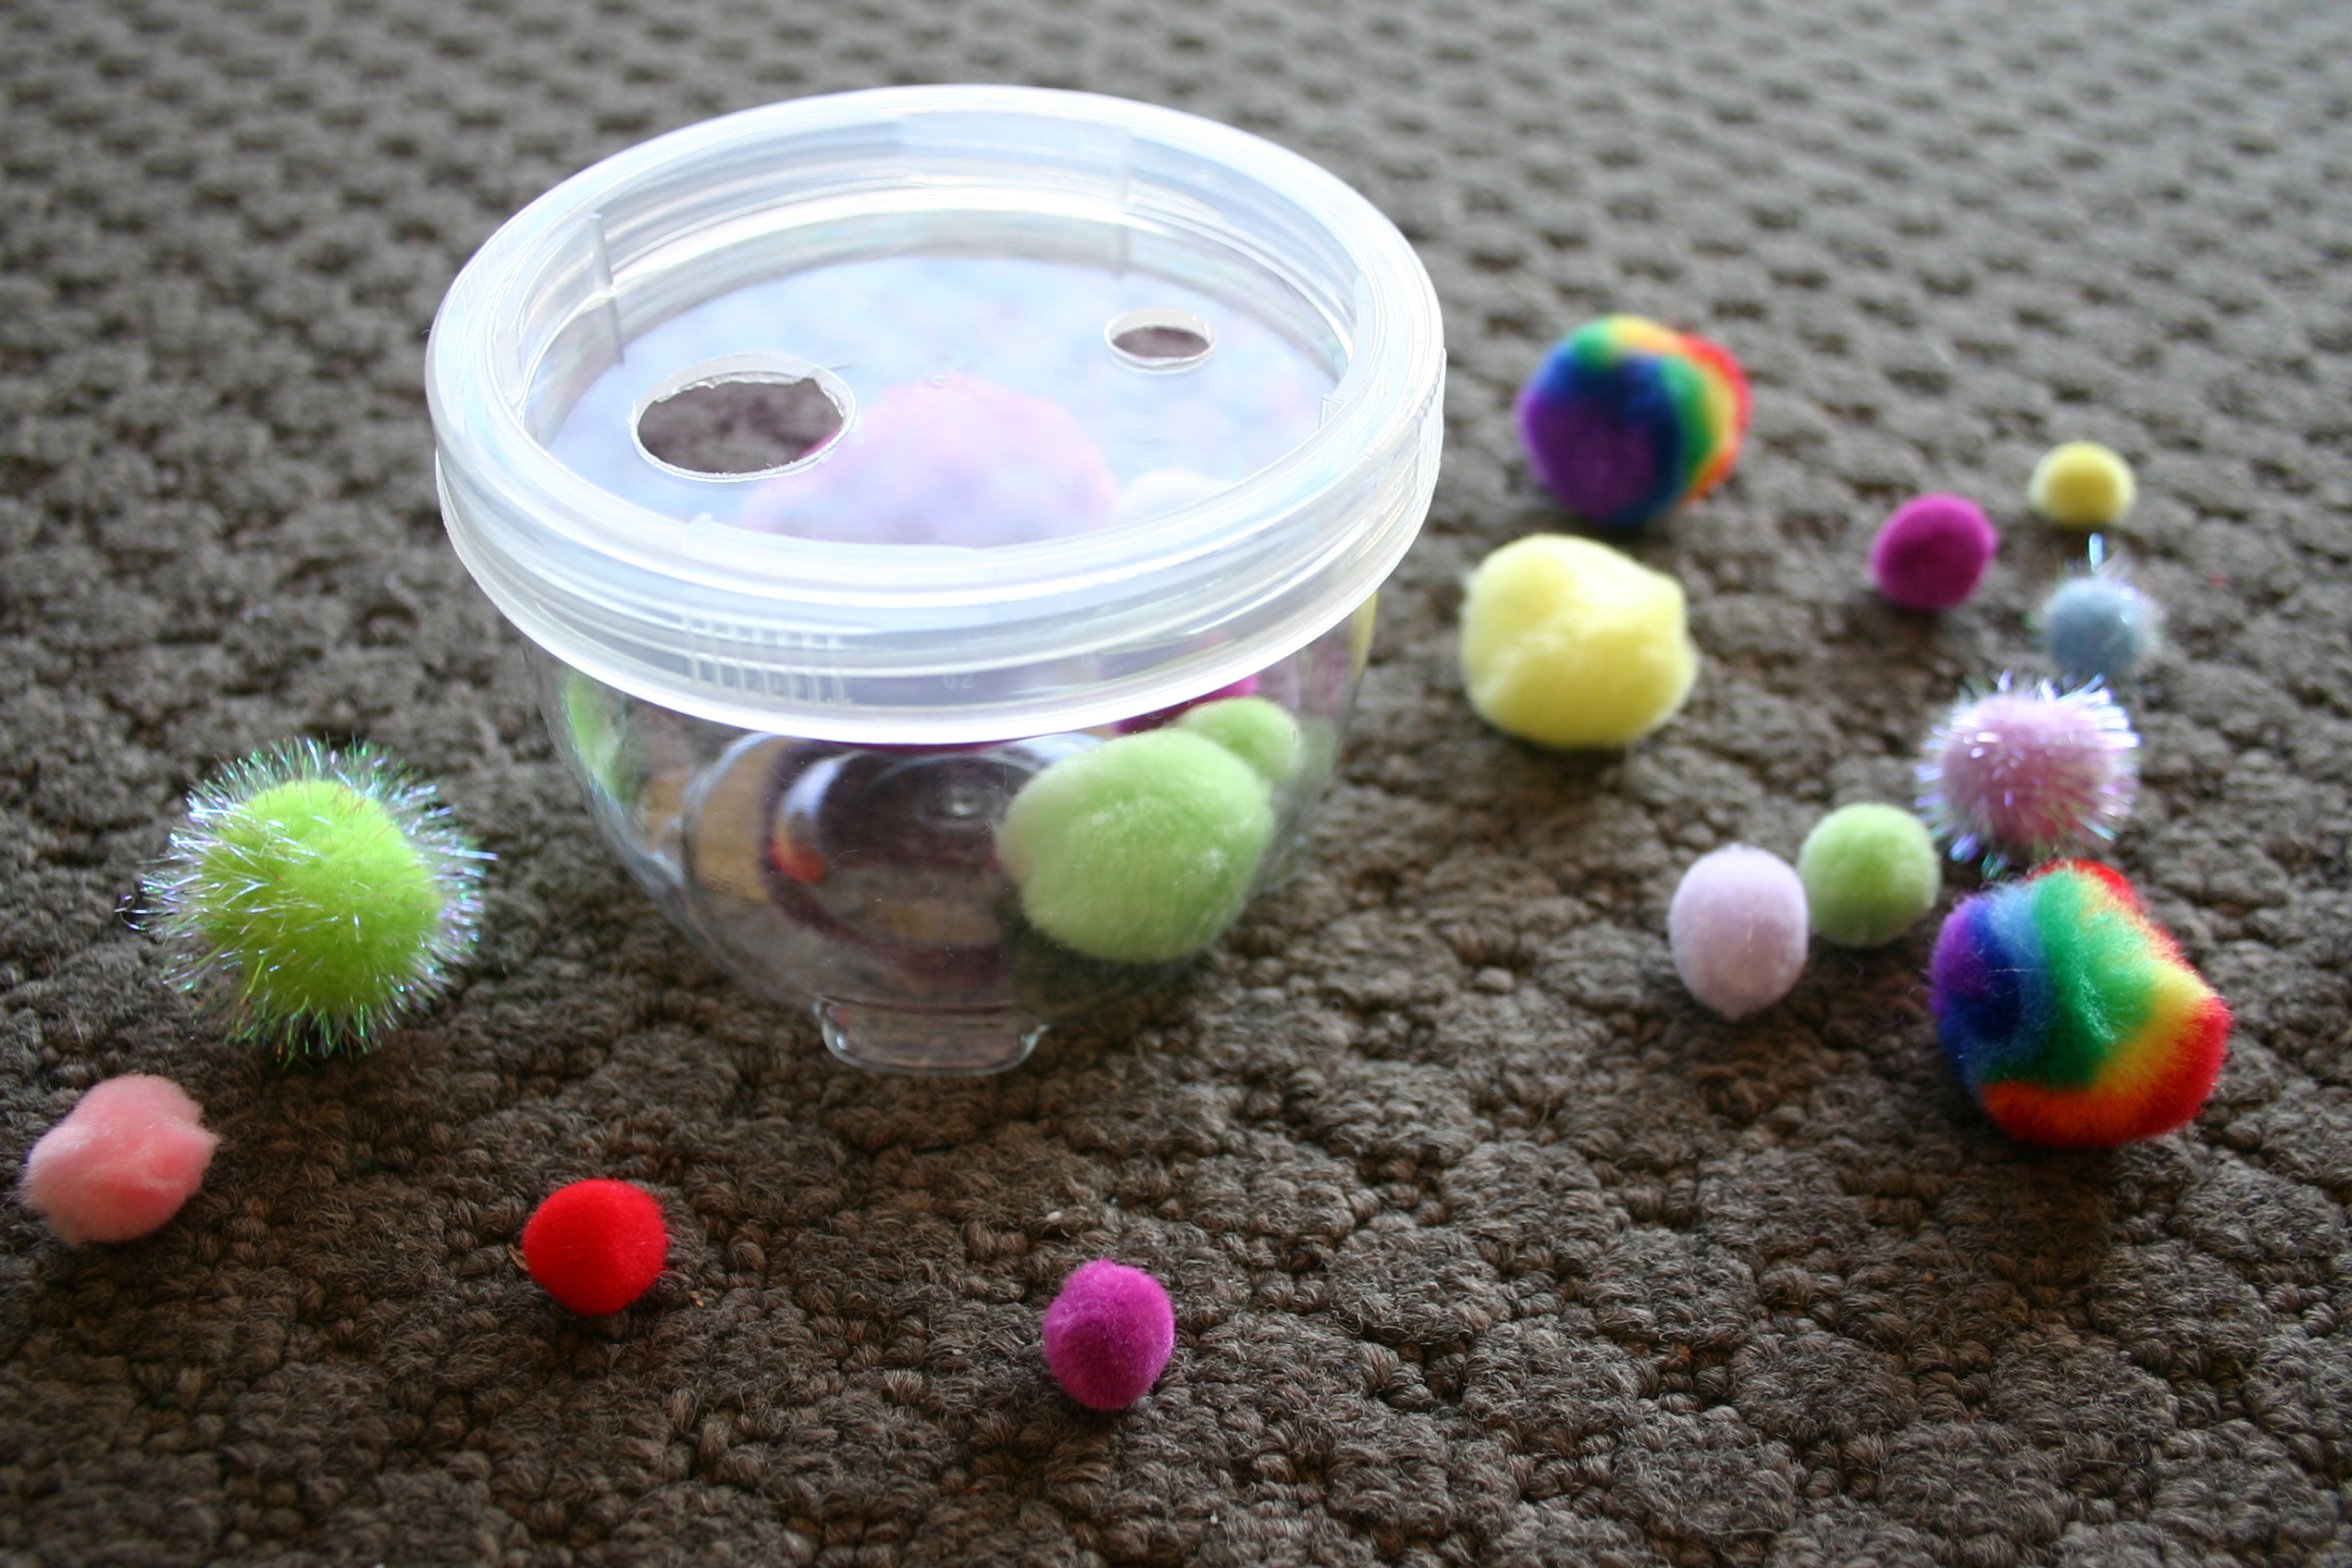
This one is for the very young. Babies do love to put things in and out of containers and if you keep changing the items and type of container, this style of activity is good for months. It is great for fine motor skills and concentration and pretty much free to make. Whip one up in just a minute or two and watch the intense concentration as they use that all important pincer grip (necessary for writing later) to grasp the end of the pasta and carefully post it into the holes. Use this activity for mat time, highchair time, table time or with straws (so they don’t eat the pasta when you are not closely supervising them) for playpen time or room time.

With all of these activities, if your child finds them too difficult and is still frustrated after you have shown them how to do it and given them some time to practice, put it away and reintroduce it in a couple of weeks or months. Many of the Montessori style activities are very developmentally based and when introduced at the right time will be stimulating and extending to a toddler, not frustrating and overly difficult.

Teaching young children to sit and concentrate for extended periods is a vital foundation for later learning and helps you as Mum to keep the house and family running as you can get your own tasks finished knowing that your little ones are happily and safely occupied with a valuable learning experience.

Teaching Toddlers to Cut

Thin card strips (about one inch) are a good first cutting experience. Parallel and diagonal lines can be added to the strips for a new challenge once random snipping has been mastered.

With older siblings to watch, the littlies are always very keen to cut. Rather than have them constantly nag me or try to grab those scissors and have a go on whatever is handy when I’m not looking, I prefer to spend some time and teach them to cut safely – under supervision! It is great for long stints of uninterrupted school time with older children while young ones are happily occupied on a purposeful and satisfying activity.

The stiffness of straws makes them easy to hold and cut. Cut straw pieces can be used for threading activities.

A good pair of child-sized scissors is important. Make sure that they have a larger hole in one side of the handle so the all of the child’s fingers can fit inside, rather than the kind that have two equal sized small handle holes. (See the pair in the photo.) I also buy proper scissors straight away, rather than safety scissors, simply because of the frustration children feel when scissors are not sharp enough to cut well. The initial paper based cutting experiences outlined here would be fine with safety scissors, but once they move on to the straws and other materials they may not be sharp enough.

Streamers are more difficult to cut because they do not stand stiffly out from the "holding hand."

Cutting strips should be about one inch wide so that the child can cut completely through the strip in one snip. Sliding scissors forward and making a second snip to cut through paper is a more difficult skill and should be introduced later. Show your child which hole is for the thumb and check that they continue to hold the scissors correctly with the blades facing away from them. Young children tend to turn their hands around, rather than the object they are cutting, which causes them to end up in all sorts of interesting and uncomfortable positions.

A new level of difficulty. Use cut beads for various craft projects later.

The first material to present is the easiest to cut – one inch strips of thin card stock. Regular paper is too thin and does not stand out stiffly from the child’s hand, flopping down and making it difficult to cut. Remind your child to keep moving their holding hand away from the scissors as they go.

Tinsel makes pretty off-cuts for craft projects. It is quite difficult to handle for beginner cutters though.

I usually set my cutting activities up in the same format (same tray with basket or two wooden bowls) so that once familiar with the task, there is no need to re-explain what to do when a new material is introduced. Scraps are caught in the empty bowl or basket and can be collected and used for art activities such as gluing or collage.

Curling ribbon is also quite difficult to cut because it curls! Add snippets to your collage or other crafty supplies.

When the first cutting experience is presented I demonstrate first, explain what they need to do, then supervise very closely for a time, until I am sure that the child has mastered holding the scissors correctly, points them away from their body, moves their holding hand while cutting, collects their scraps in the container provided and is generally using the scissors in a responsible manner. I am then able to relax my supervision a little and begin to vary the materials once interest in those already available is beginning to wane.

The photographs throughout this article are in a suggested order of difficulty. Stick with thin card strips until the skill is well mastered, moving to thin card strips with straight and diagonal lines to cut along, before introducing the other suggested materials. Moving too fast will simply result in frustration as the material proves too difficult for the child to manipulate and cut successfully. Other items (such as the animals pictured below) can be added to keep interest levels high. Following on from here, a variety of interesting papers, shapes and other materials can be presented, including those that require the child to slide the scissors along and make several cuts. Start with free cutting, straight lines, then curves and other shapes.

My toddlers love this activity. They focussed for an incredibly long time, cutting the streamers into food for the animals to eat. (The scissors should be presented on the tray with the blades facing away from the child.)

Mega Marbles: A Montessori style transfer activity

Mega Marble Transfer

This was the first Montessori inspired activity I ever made. I presented it to my now 4 year old daughter when she was a toddler and she absolutely loved it. The large ladle was easy for her to manipulate successfully and the marbles were very attractive to her. She always completed this activity several times before putting it away and it was a favourite for some time. The marbles came from a $2.00 shop, the ladle from my kitchen junk drawer and the tray and wooden bowls from a Good Sammies recycled clothing shop. All up it probably cost me $5.00 and all the materials can be re-combined and used again with other activities.  I would usually present it with the marbles in the left hand bowl to encourage left to right directionality in preparation for reading and writing.

DESCRIPTION:

The child uses the scoop provided to transfer the marbles from one bowl to the other and back again. Materials are replaced as they were found before returning the activity to the shelf.

CATEGORY/SUBJECT AREA:

Practical life

CONCEPT/SKILL:

Fine motor development

Control of ladle

EQUIPMENT & MATERIALS:

Ladle

Large marbles or alternative material to transfer

2 wooden bowls or alternative containers

Tray

Please see my articles titled “Workjobs and Learning Styles” and “Brief Montessori Overview” for more information.