Toddler busy boxes

b and J using animal busy box IMG_8561

Toddler busy boxes are part of our flexible daily routine. They help me to homeschool  older children or get some chores done while my toddlers and preschoolers are well occupied on a worthwhile task.

busy box cupboard IMG_8556Our busy boxes (and ziploc bag activities, tot school, workjobs, shoebox tasks, preschool or Montessori style tray activities) are only available at certain times in the day to keep them fresh and interesting and to stop them getting spread throughout the house. We use them during school time in the morning and for table activities while I am getting dinner on the table in the evening. That way I do not need to change them too often because the children’s interest stays high and I can also keep some degree of supervision over the messier trays to avoid major pack up sessions afterwards.

They are also excellent to use for buddy time when an older child is assigned to play with a younger sibling. This is useful for example when the younger children have already finished playpen or room time and I just need an extra 20 minutes or so to finish working with one of the older children to complete their school activities. Turning toddlers loose to wander unattended throughout the house is bound to end in trouble, so some time with an older sister or brother gives the older children a break from their school work and builds good sibling relationships at the same time. The older children enjoy the responsibility because they do not get asked to do it all the time or for very long periods of time. It also gives them an excuse to play with all those attractive tubs as well!

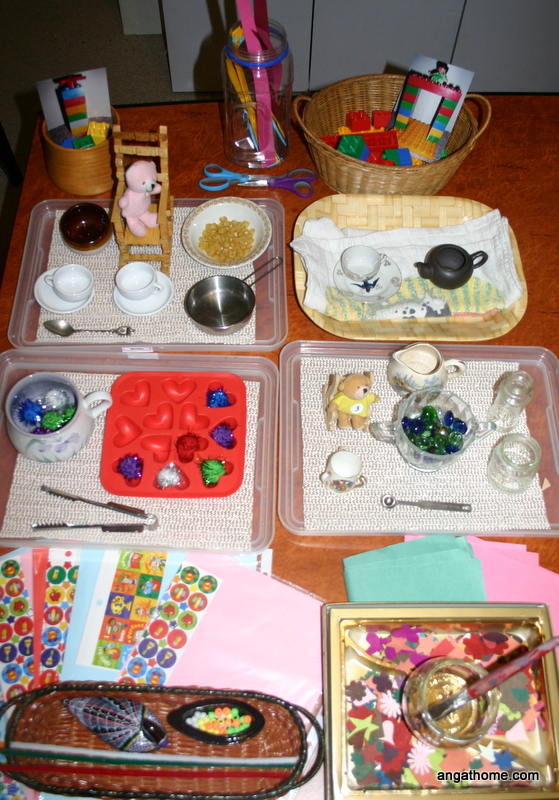
This set of busy boxes is for my 3 year old twins, but many could be adapted to suit toddlers and older babies too. There are heaps of ideas on my other posts for the younger age group.blocks and animals IMG_8554
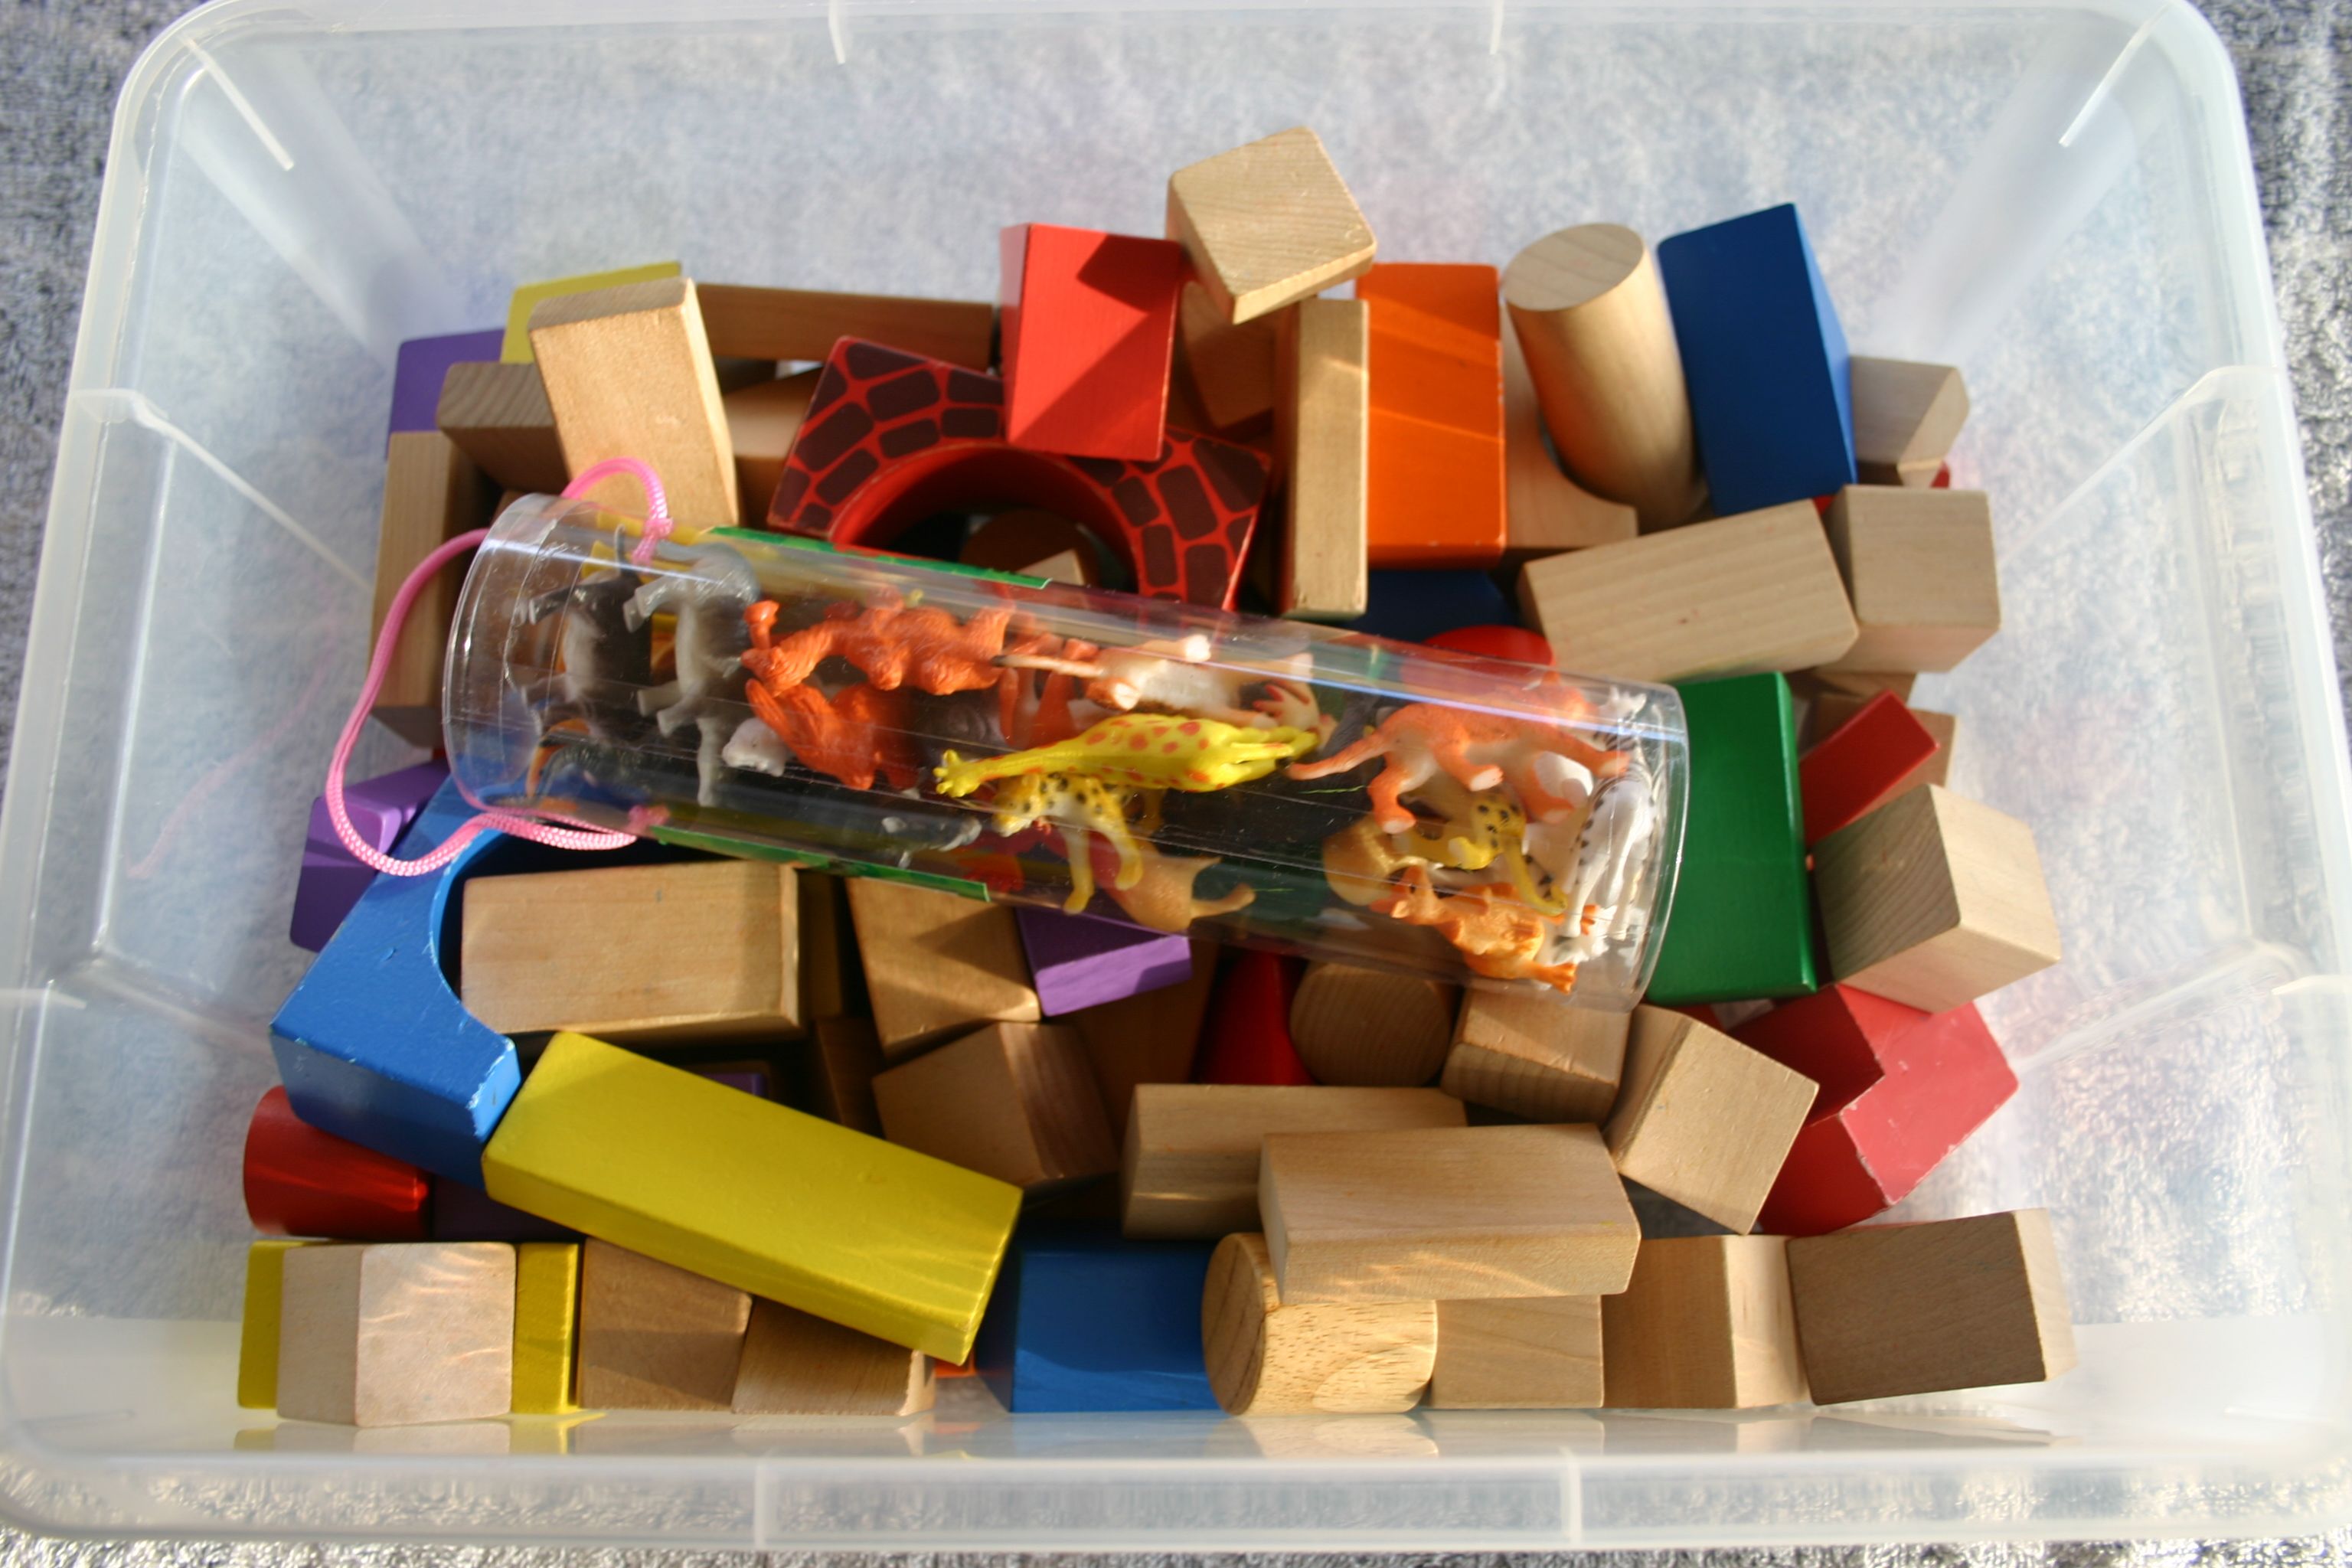
Plastic animals and wooden blocks for building corals, zoos, farms and houses. Jenga blocks work well too.

counting Duplo blocks IMG_8550

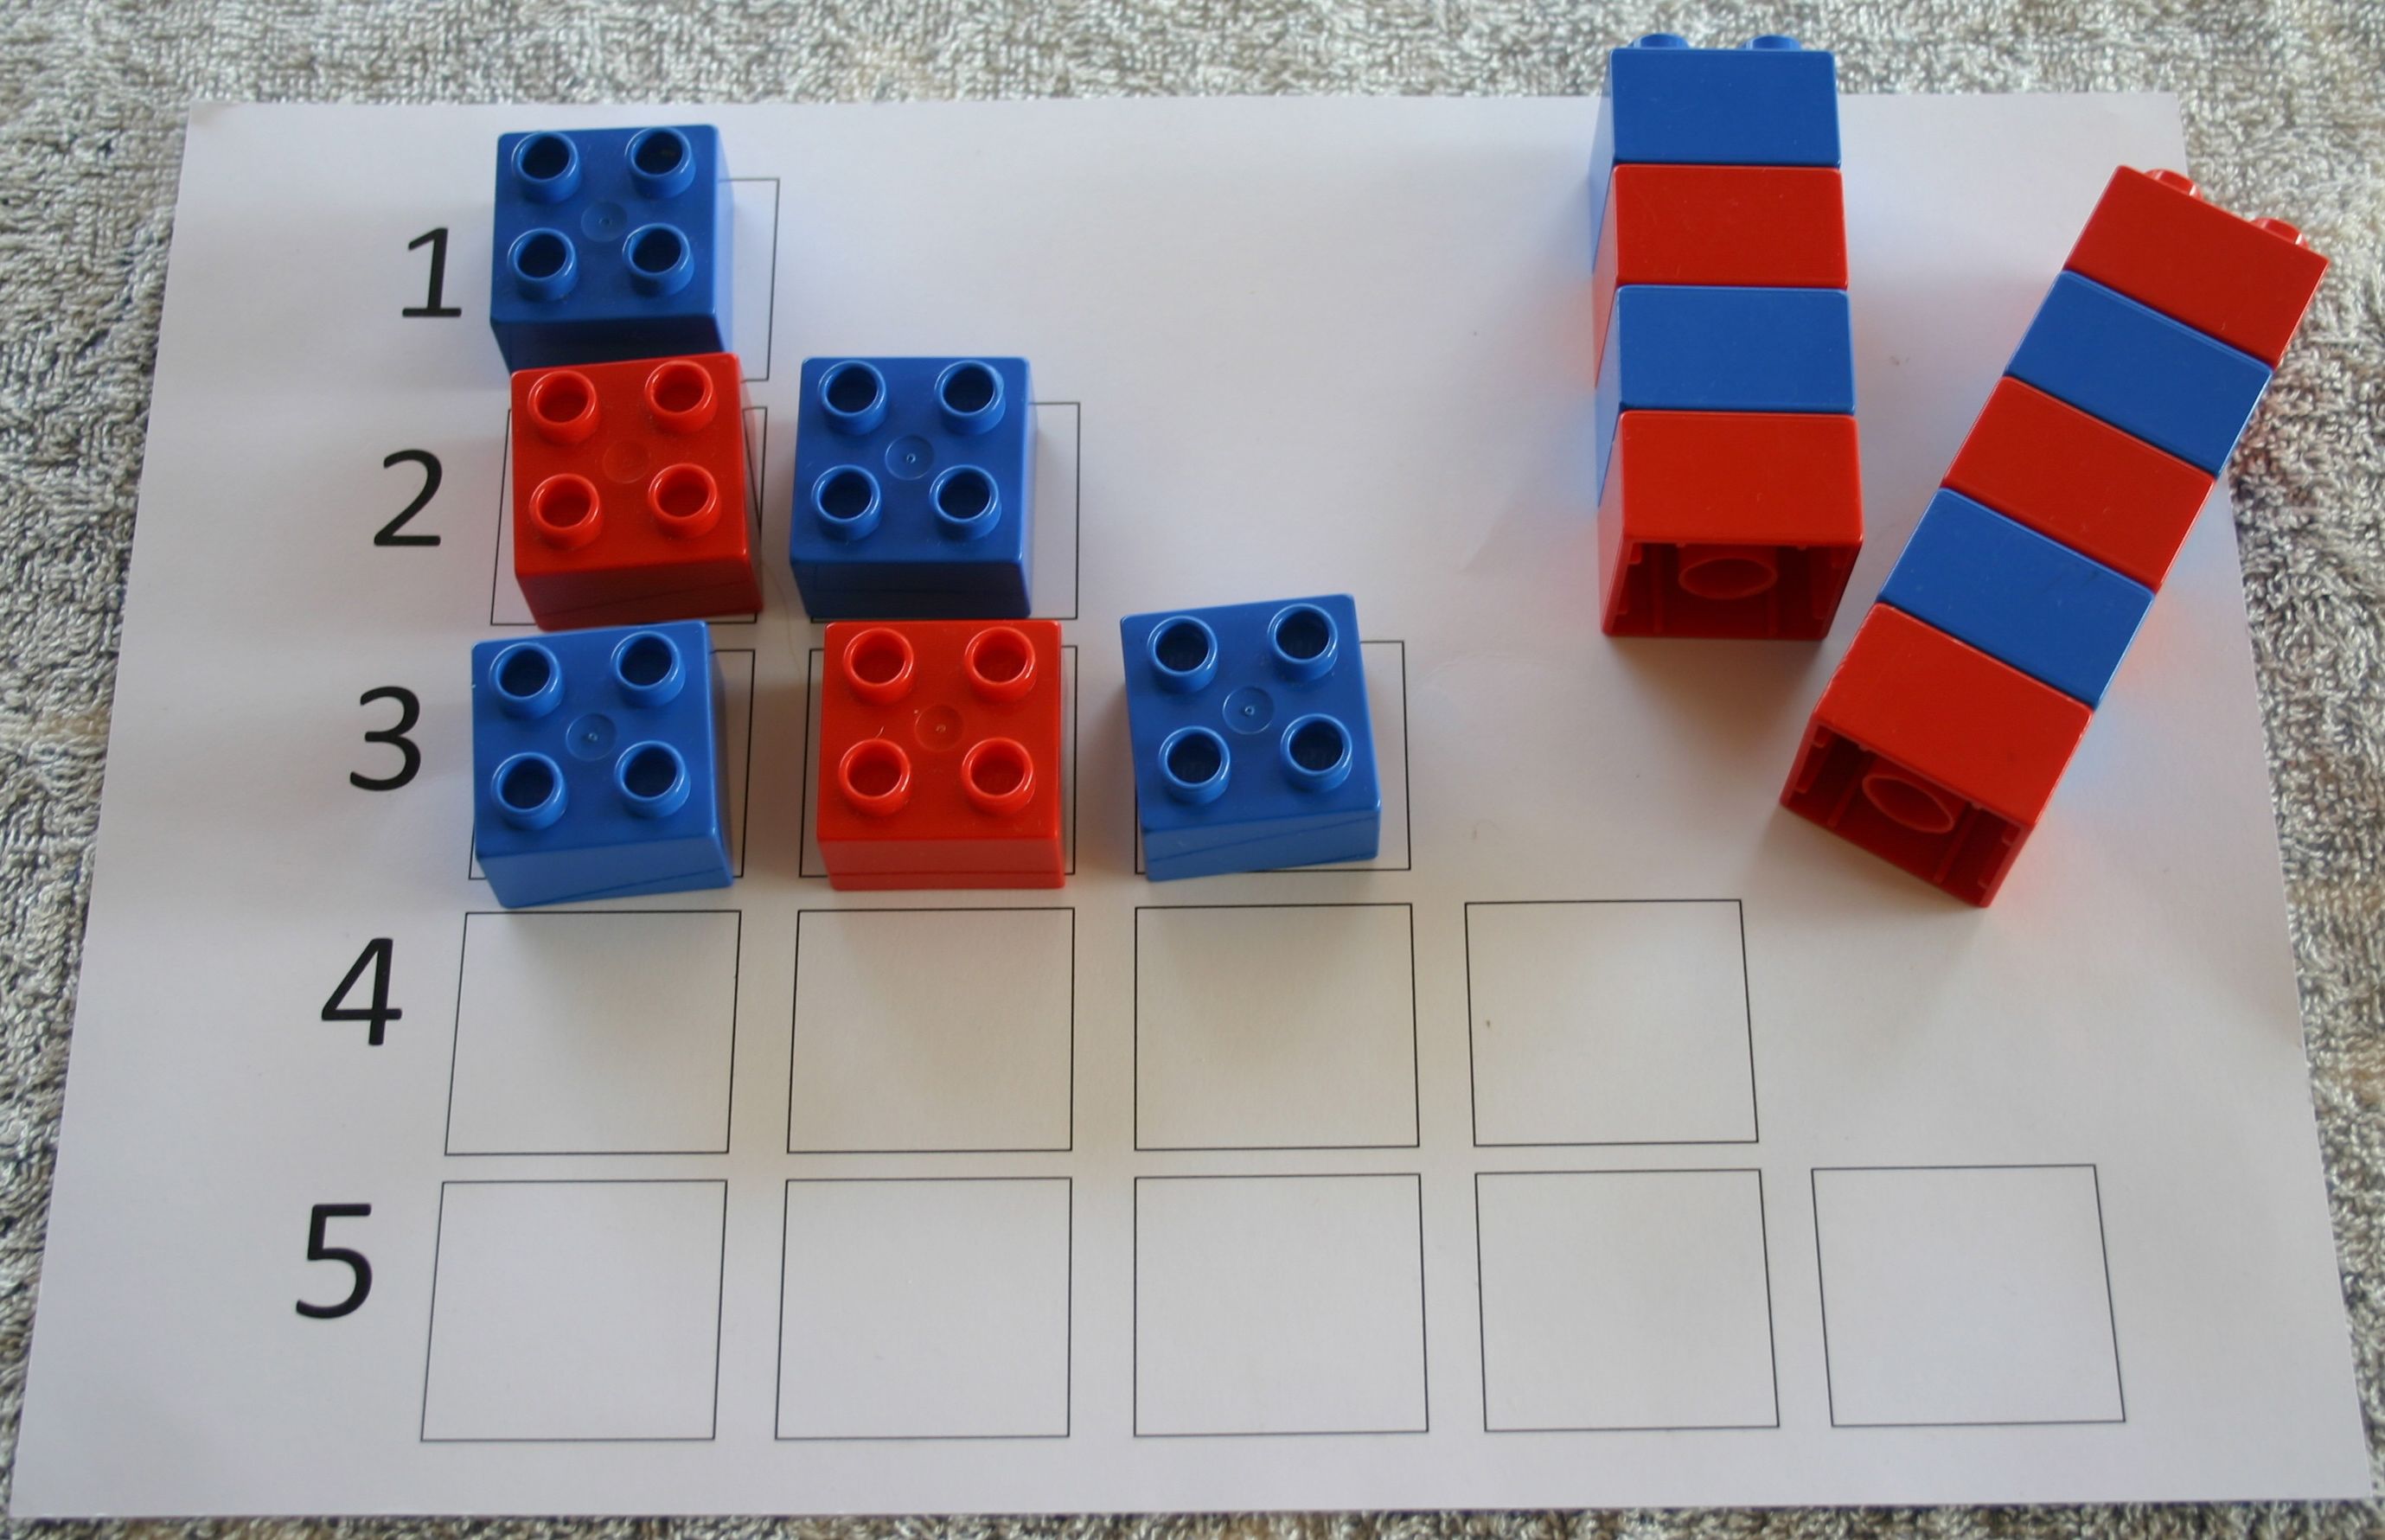
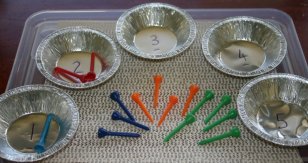
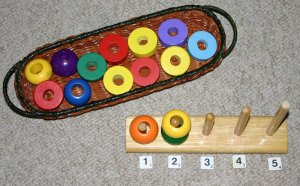
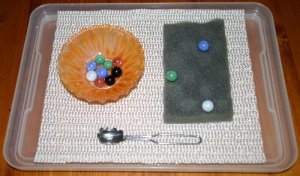
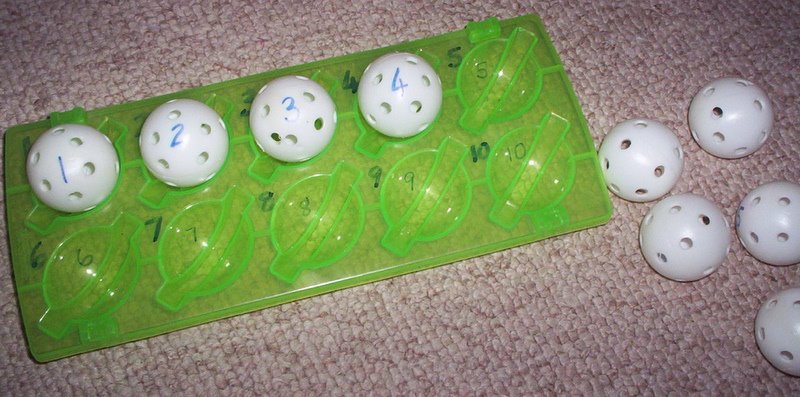
The 3 year olds have been learning how to recognise the numerals 1 to 5 and count small items. Combining building with Duplo as well makes this counting tray attractive, particularly to boys.geoboards IMG_8547
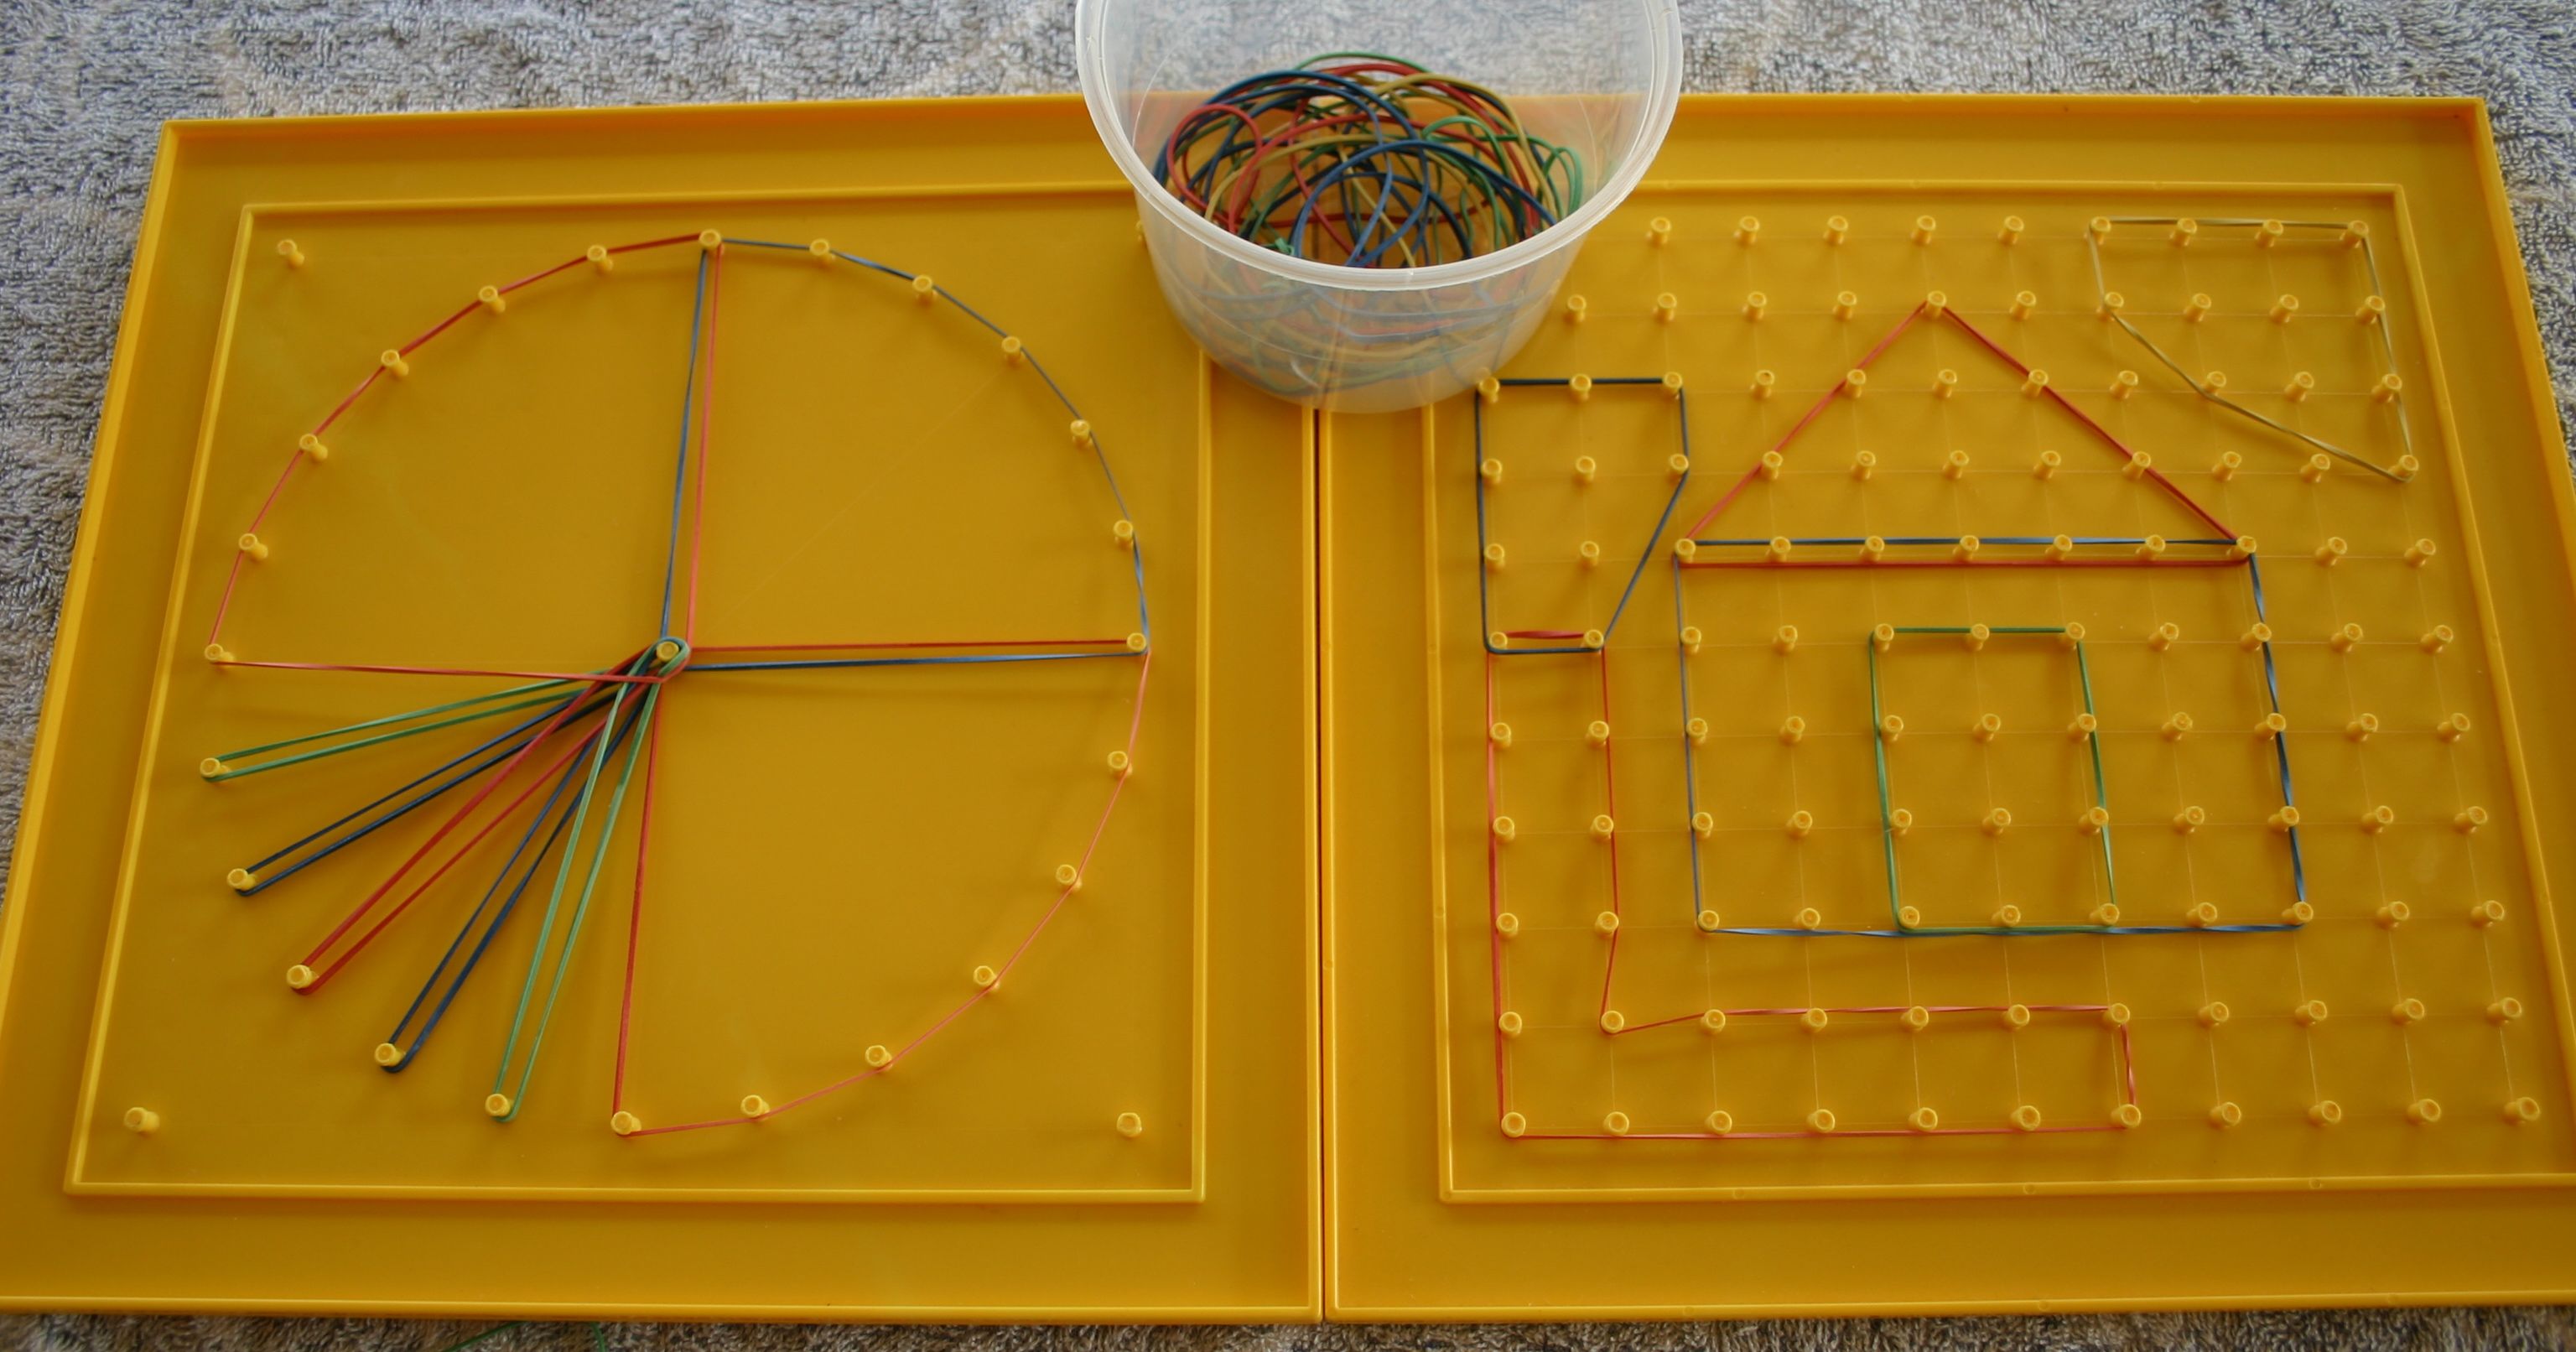
Geoboards are a commercially produced mathematics tool. Great for exploring geometric shapes, perimeter, fractions or just for making pictures with elastic bands.dry erase board IMG_8546Personal dry erase boards (whiteboards) with pens and an eraser. sewing cards IMG_8543
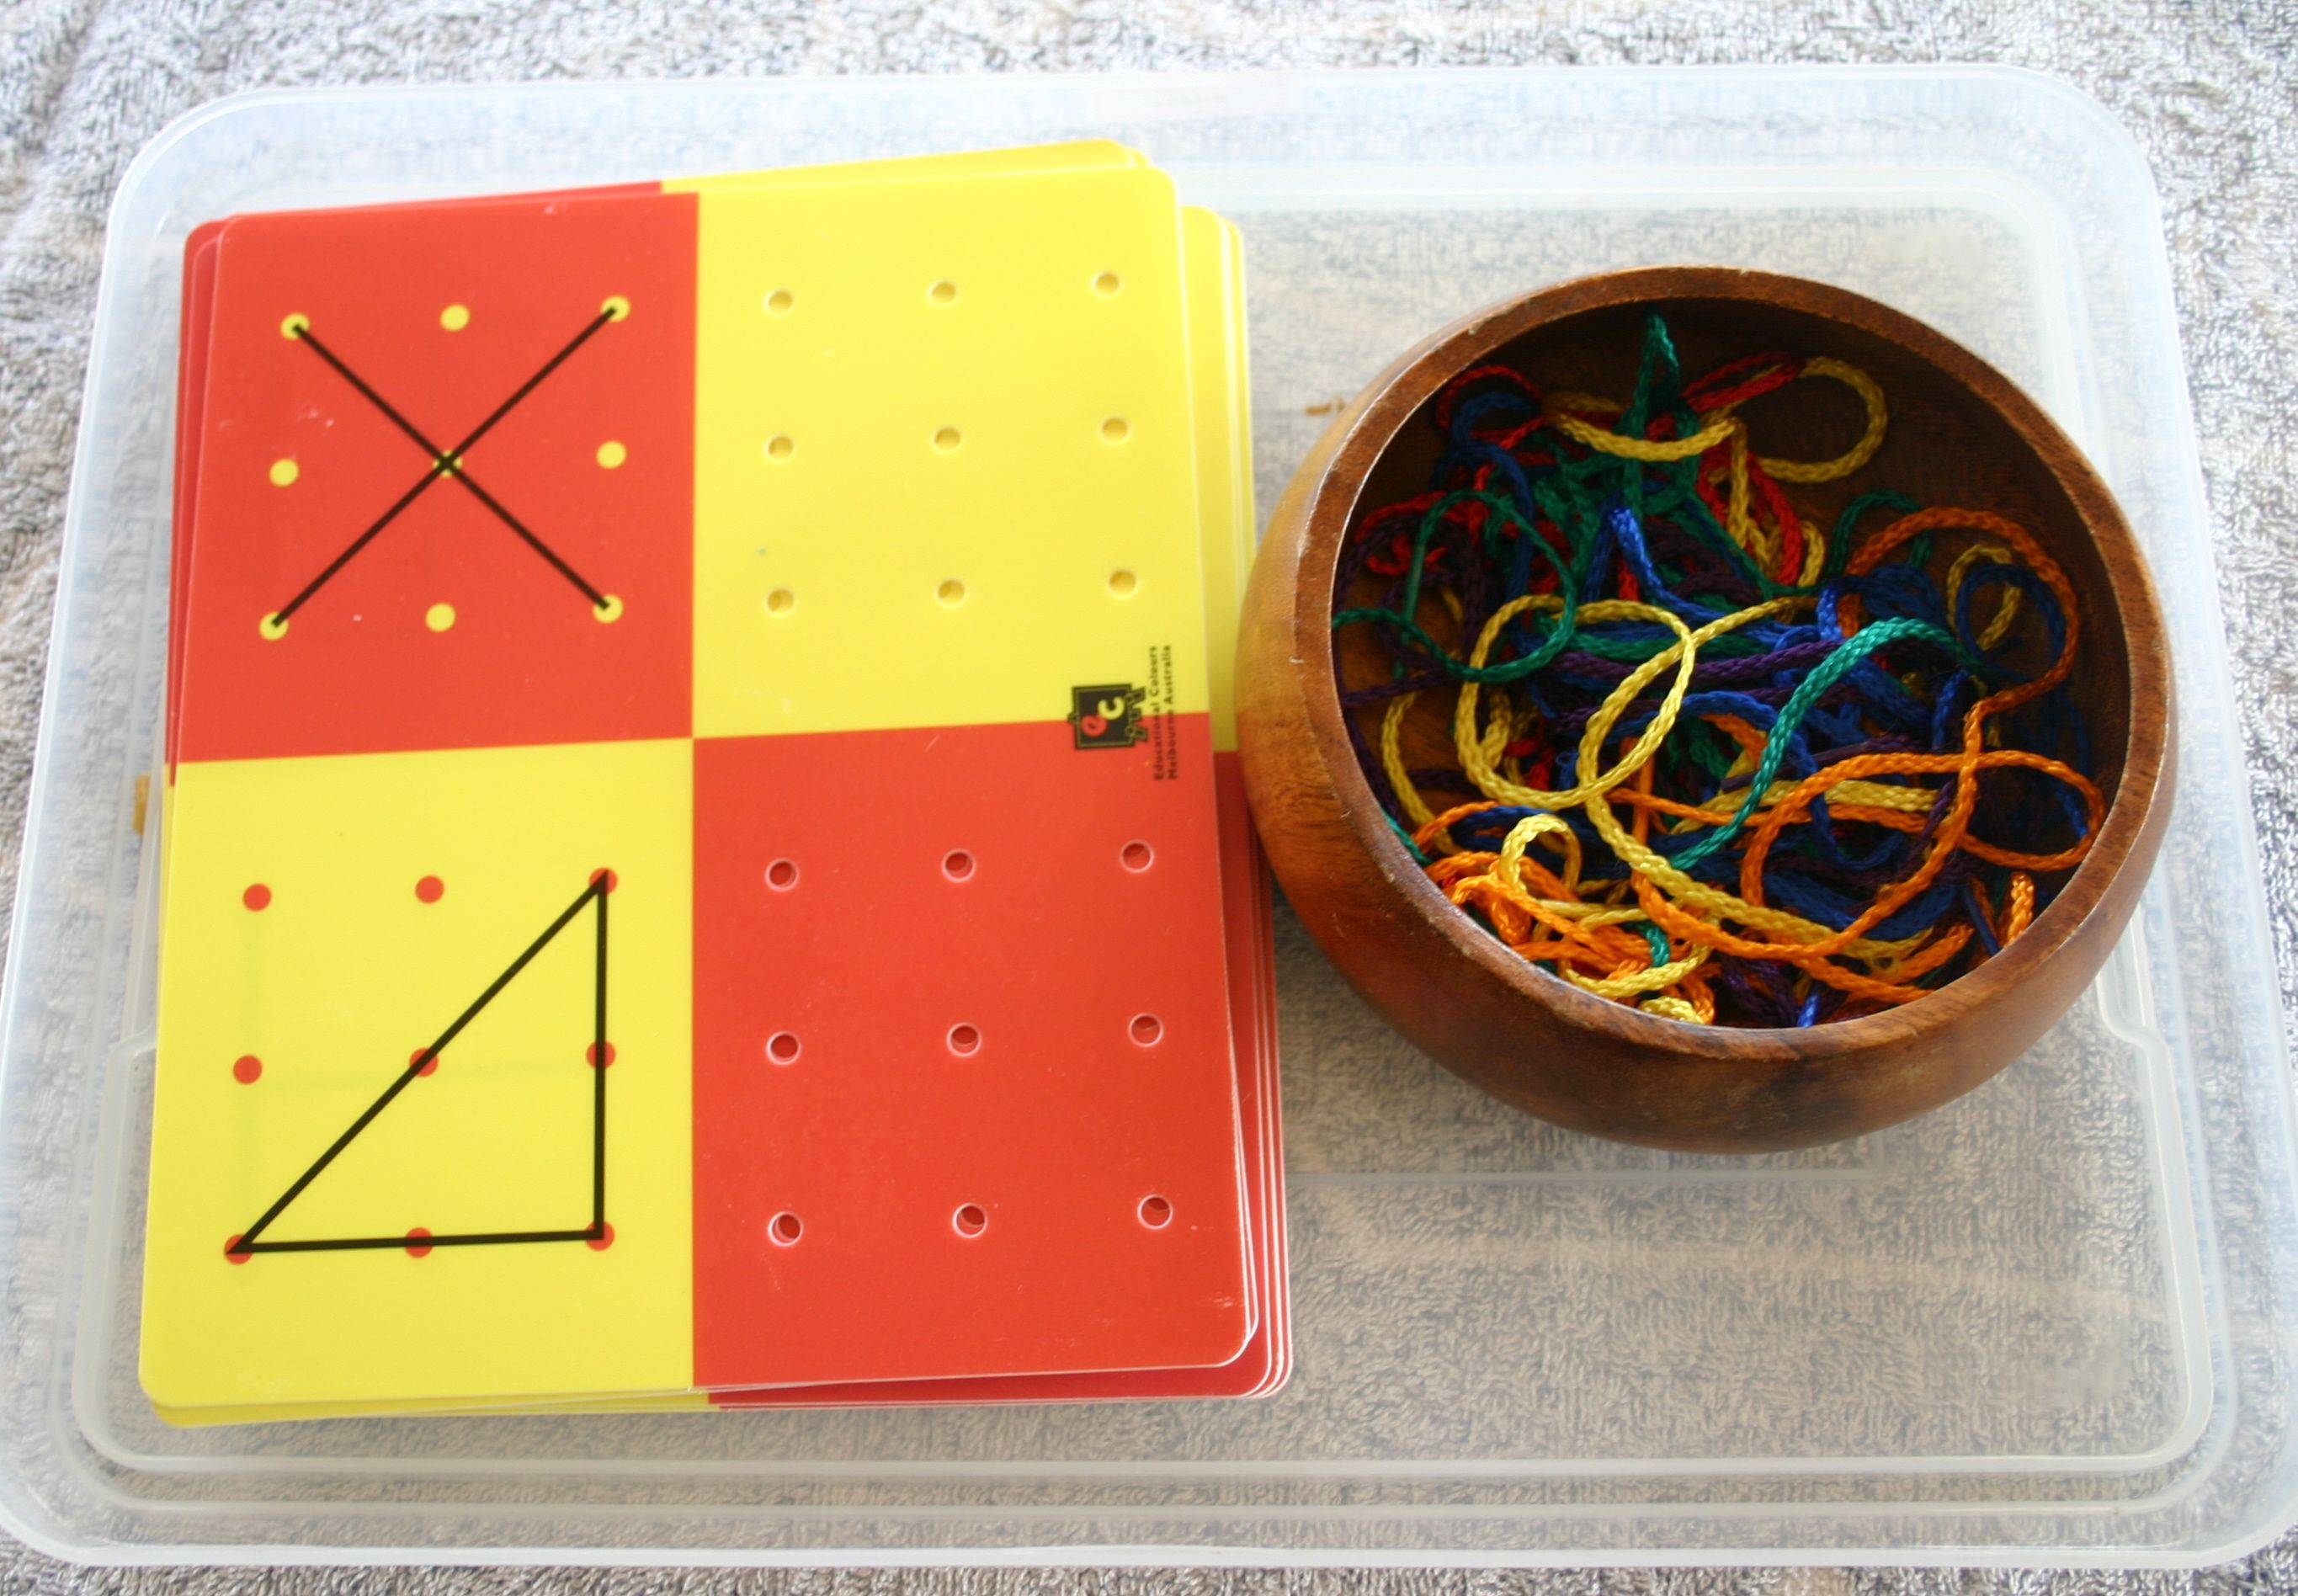
Sewing and lacing cards. These have a shape drawn for the children to copy. There are plenty of sewing and lacing shapes around to buy or make your own by punching holes around a cardboard picture using a hole punch.button sorting IMG_8542
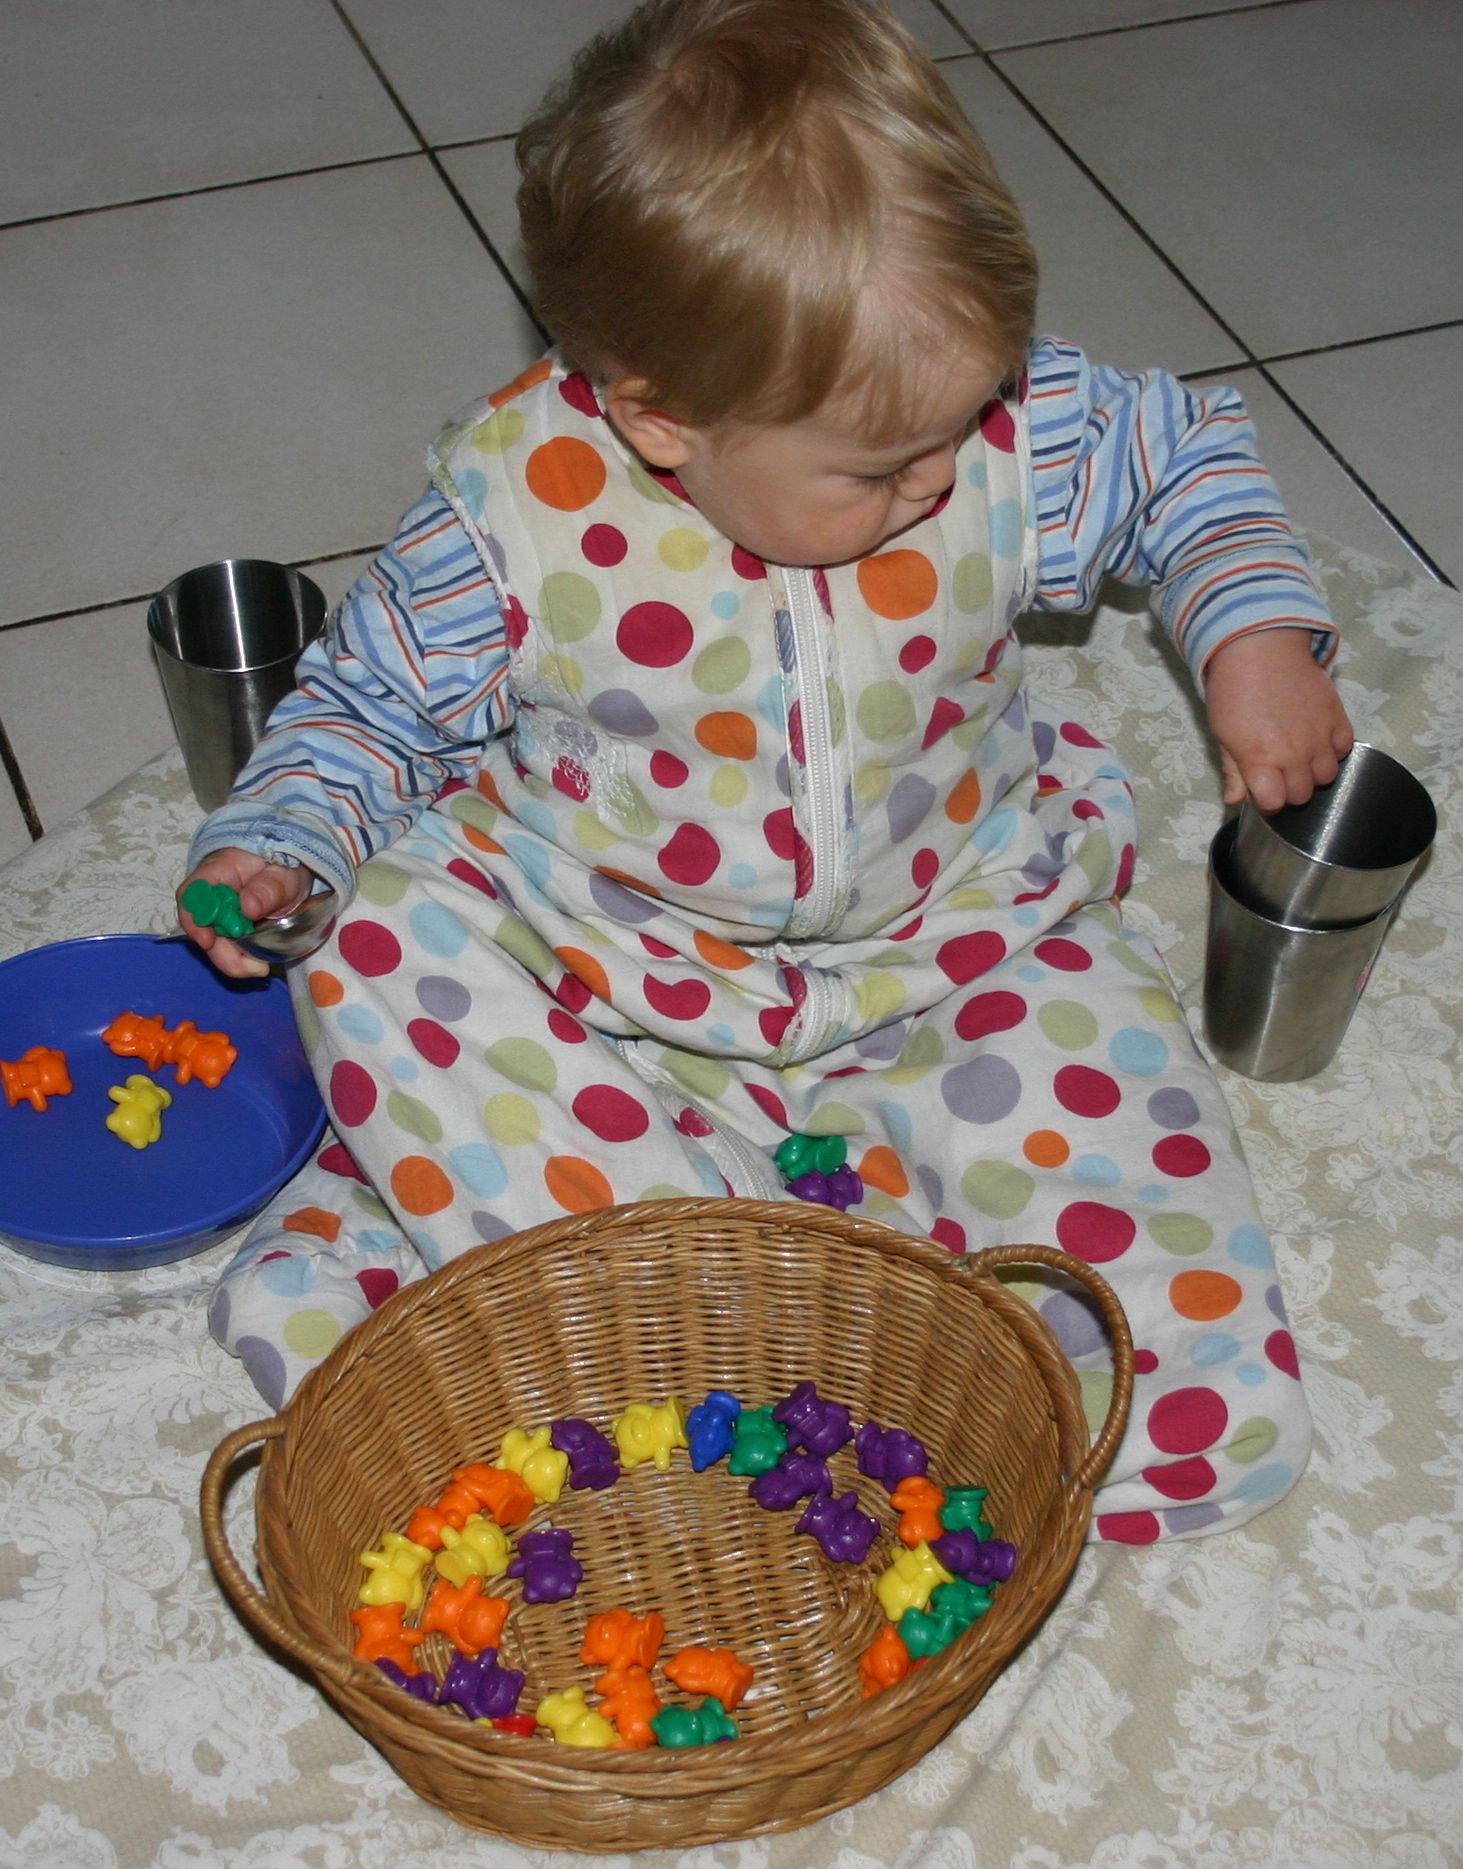
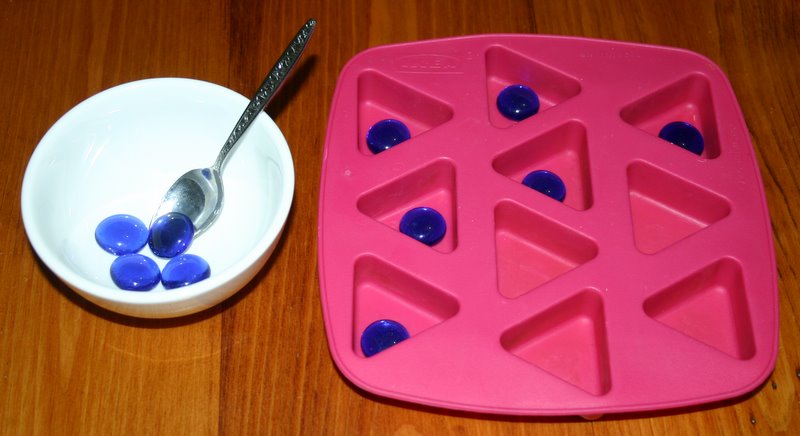
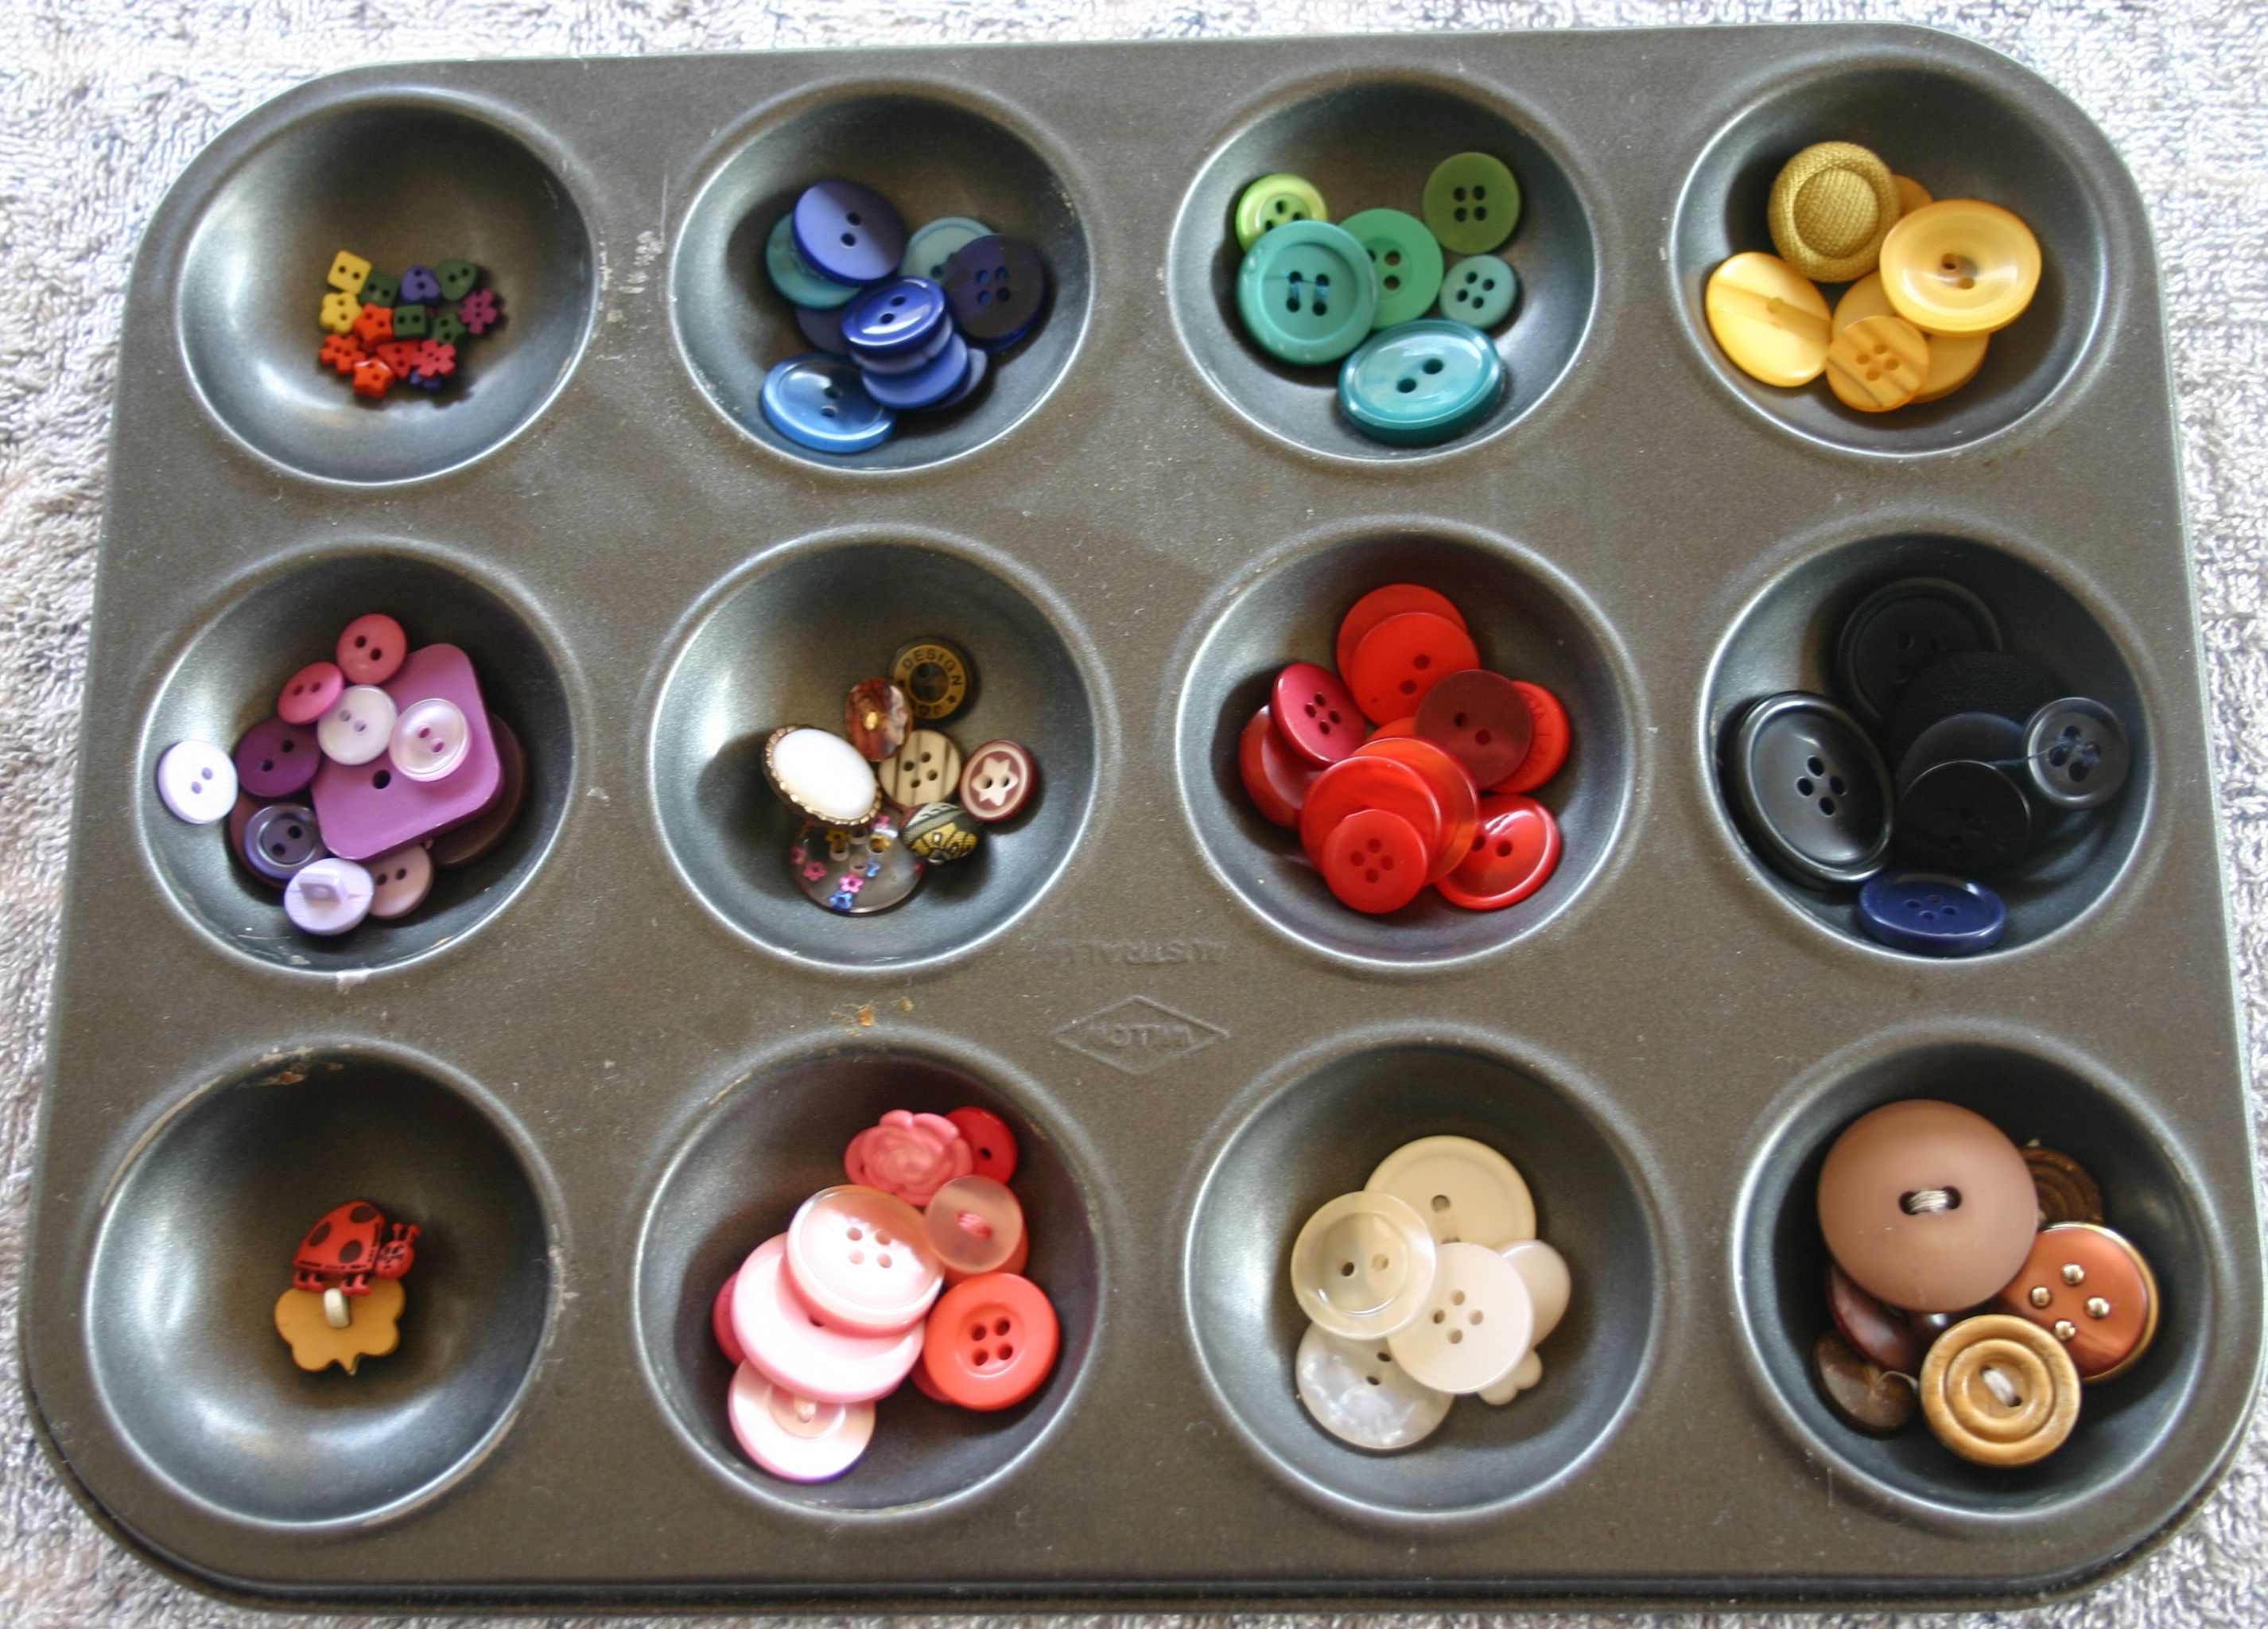
Sorting buttons into muffin trays is a hit with all ages. There is just something about handling all those different shapes and textures. The twins haven’t even gotten their hands on these yet – the 6, 8 and 10 year olds have been monopolizing them! cutting box IMG_8540
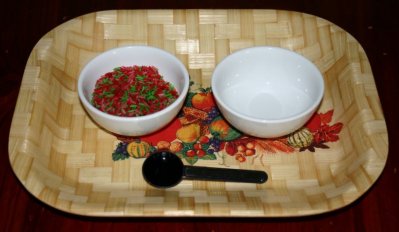
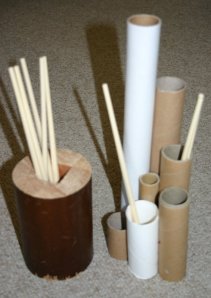
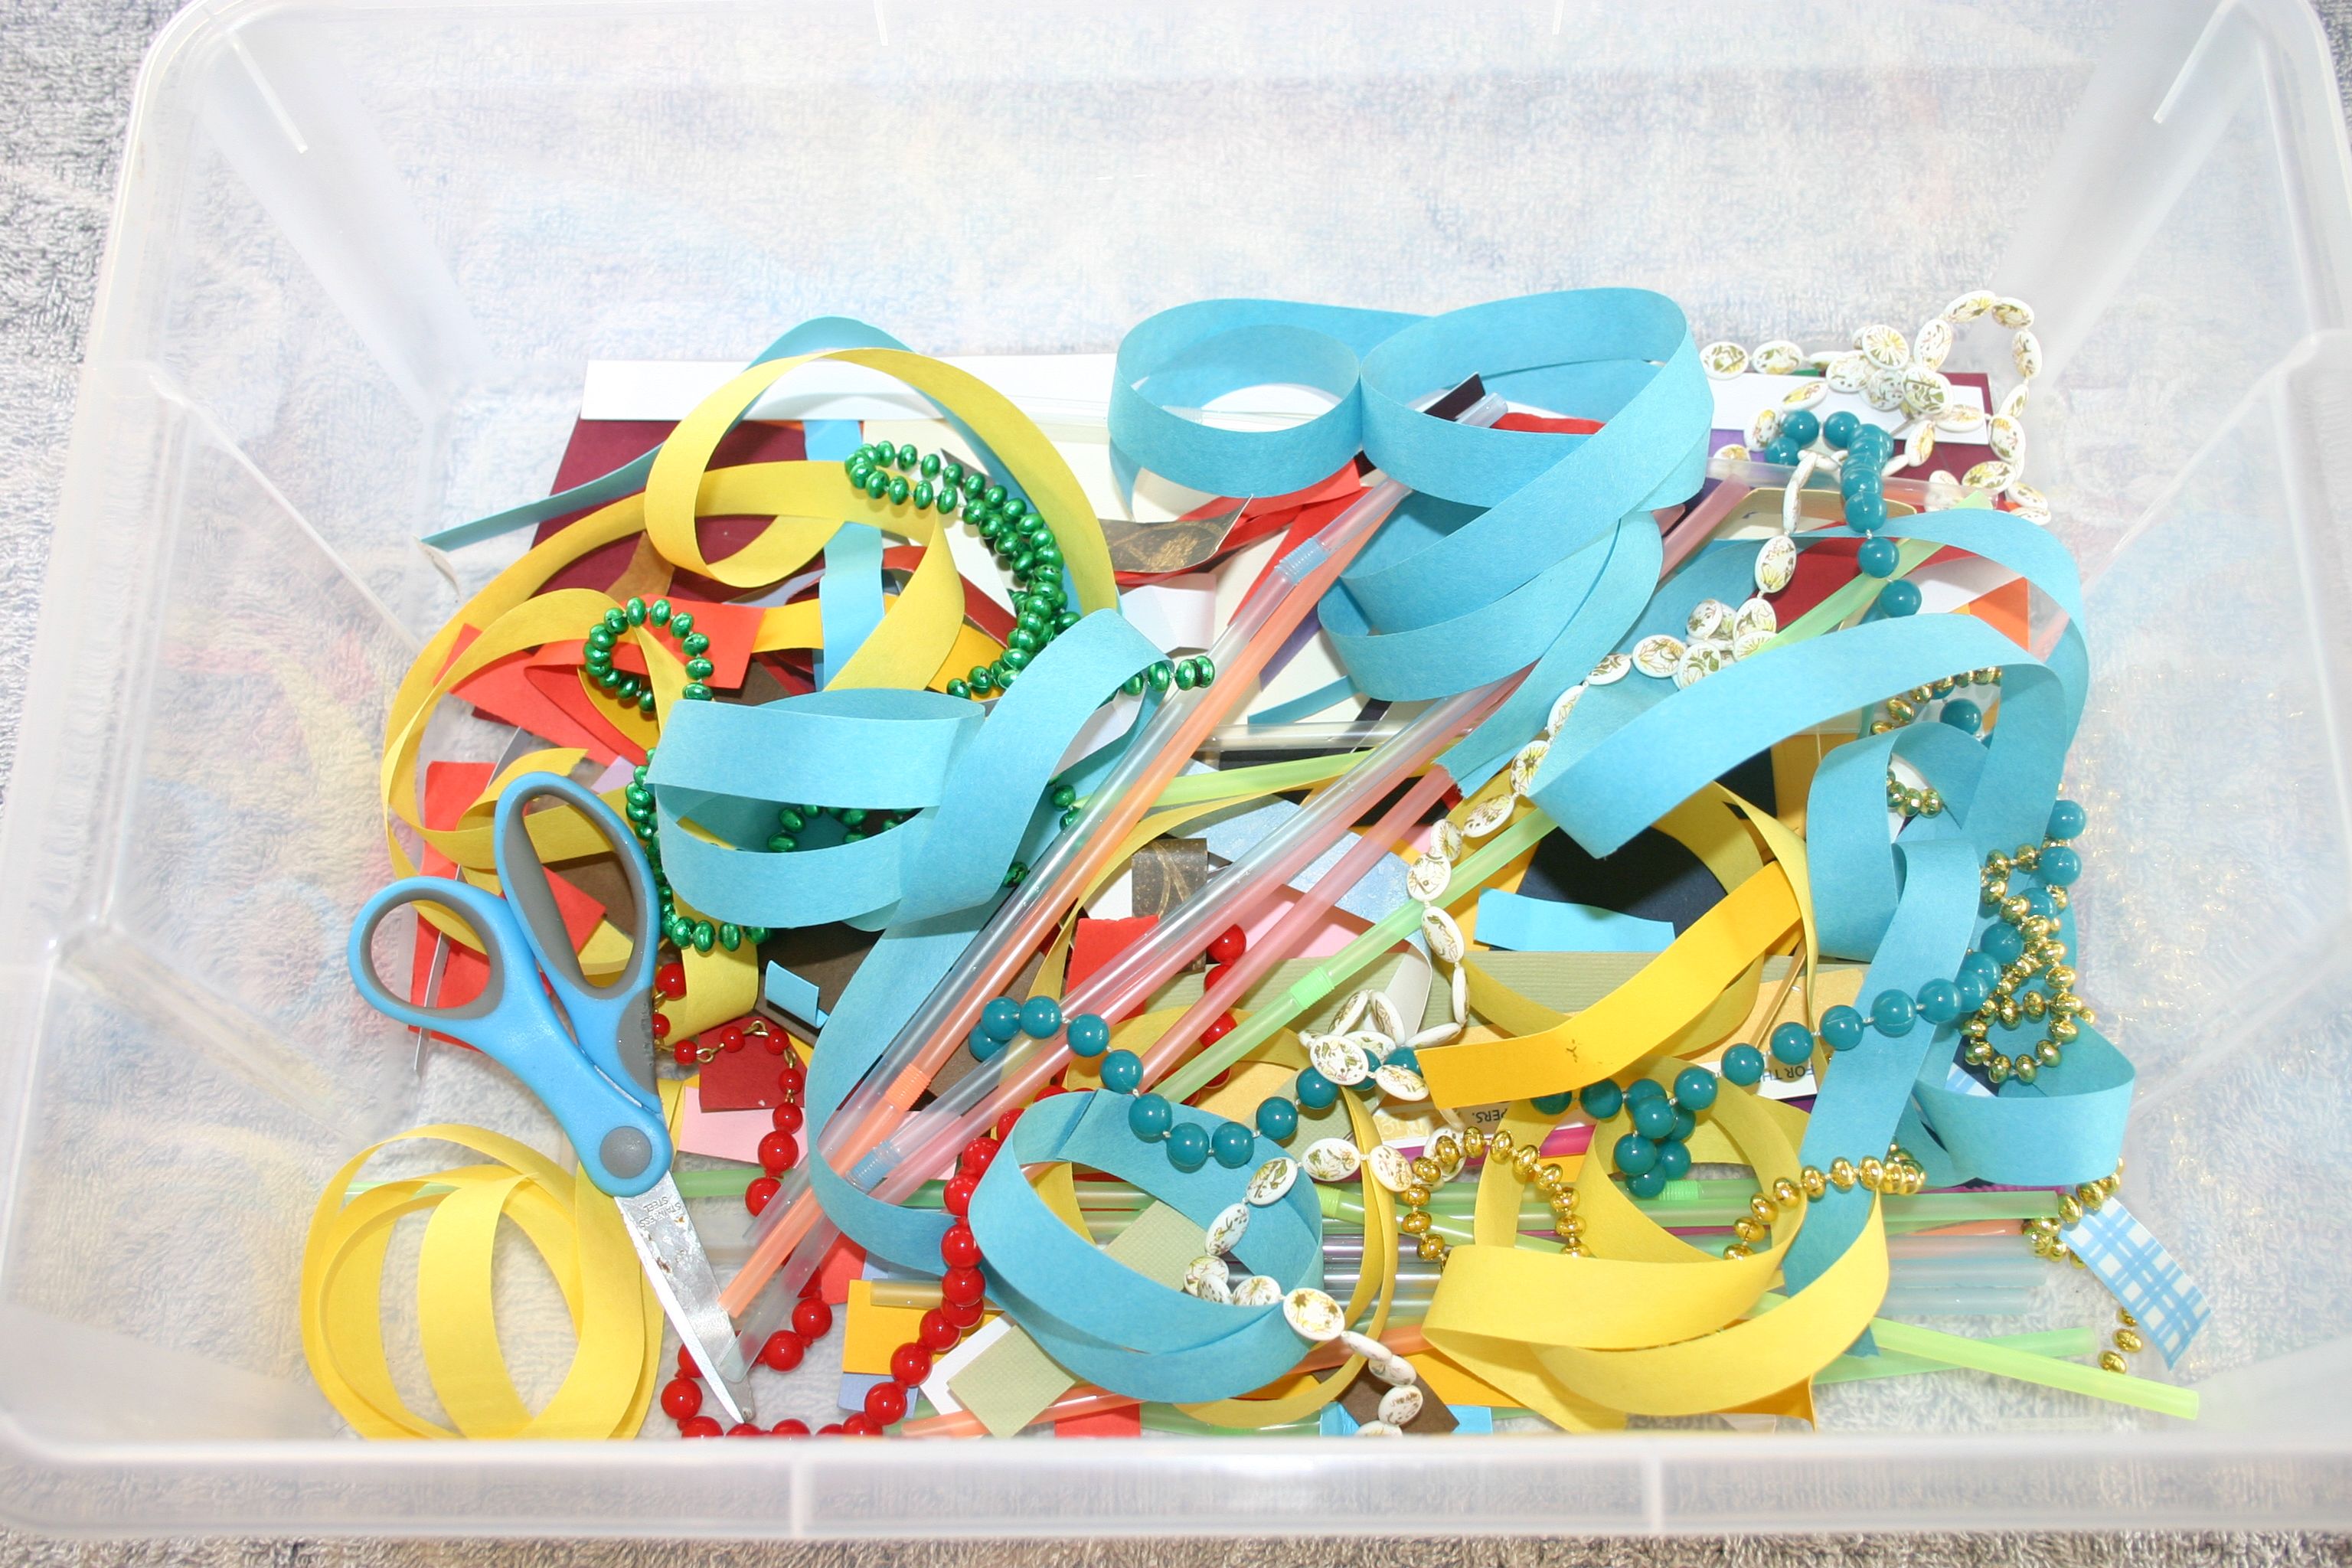
Teaching toddlers to cut provides them with an absorbing activity that is great for their fine motor skills. The twins have had experience with all the materials in this box so this is just an assortment to chop up any old way they like. Paper streamers, card strips, beads, straws and other oddments such as tinsel or curling ribbon could be included. We let the bits fall back into the box and they can eventually be used for collage later on. The cutting box with free printable patterns I prepared a little while back was too advanced for them so I have put it away to use later on. wood puzzle IMG_8536
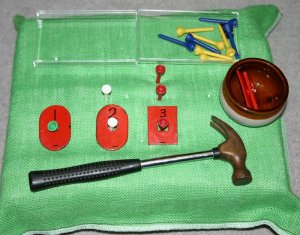
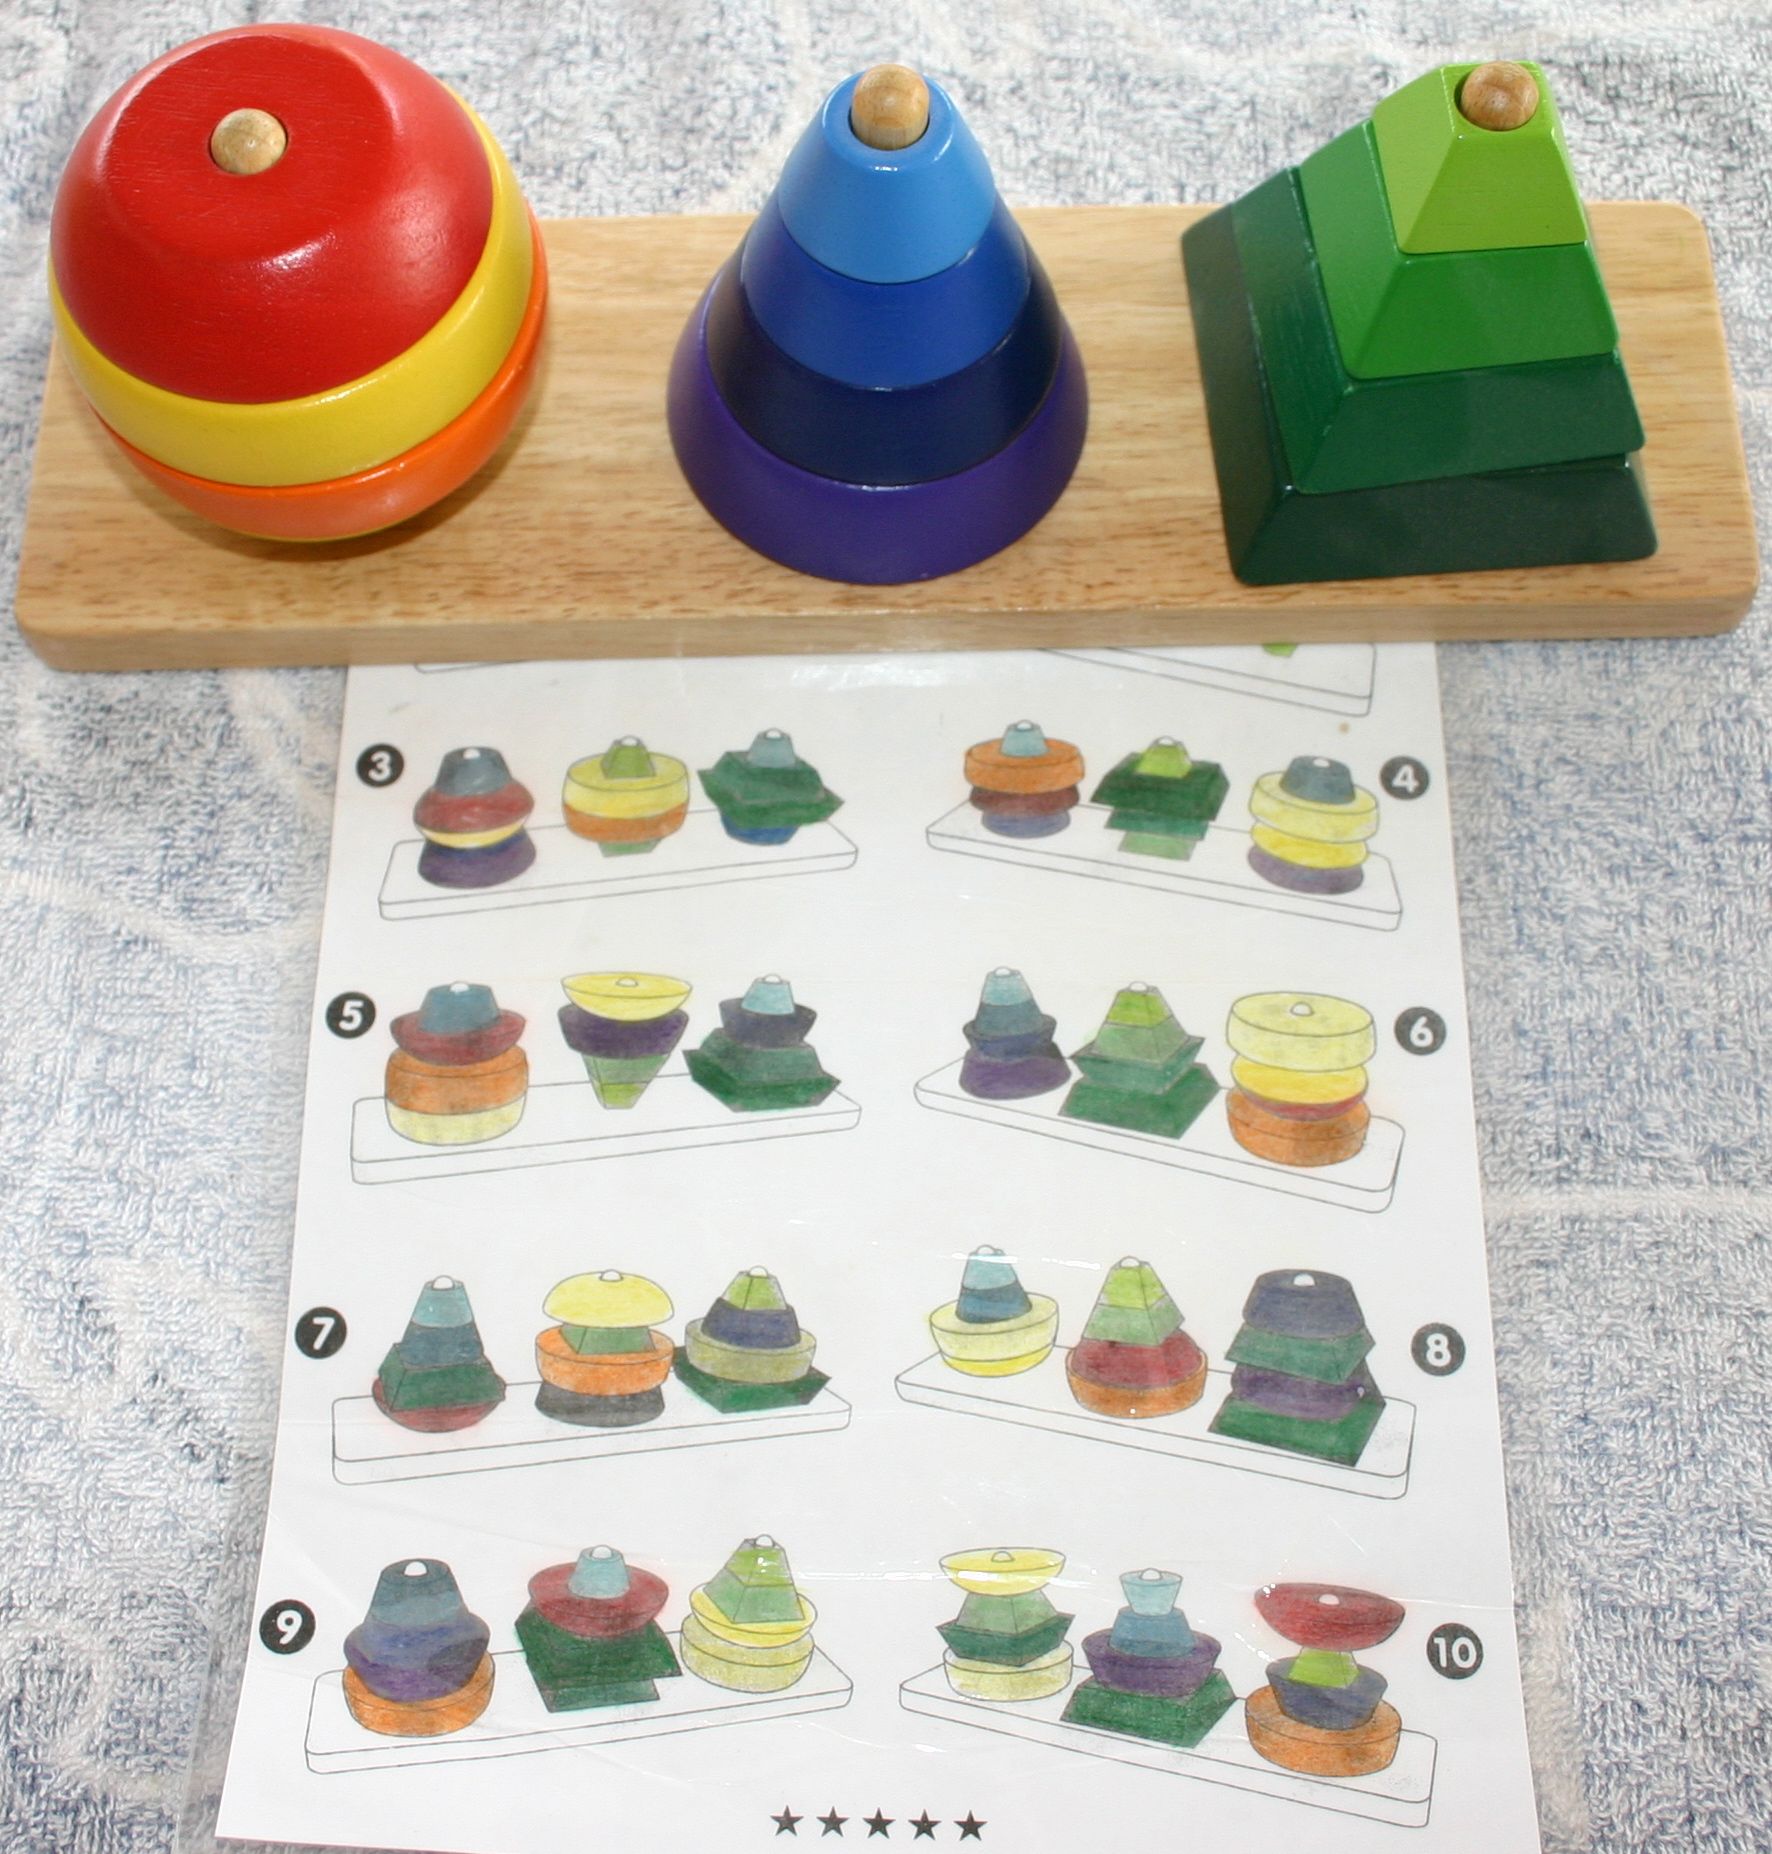
A collection of good quality wooden puzzles is a good investment. This one came with a variety of patterns for the children to copy, making it much more  long-lasting.gluing IMG_8534
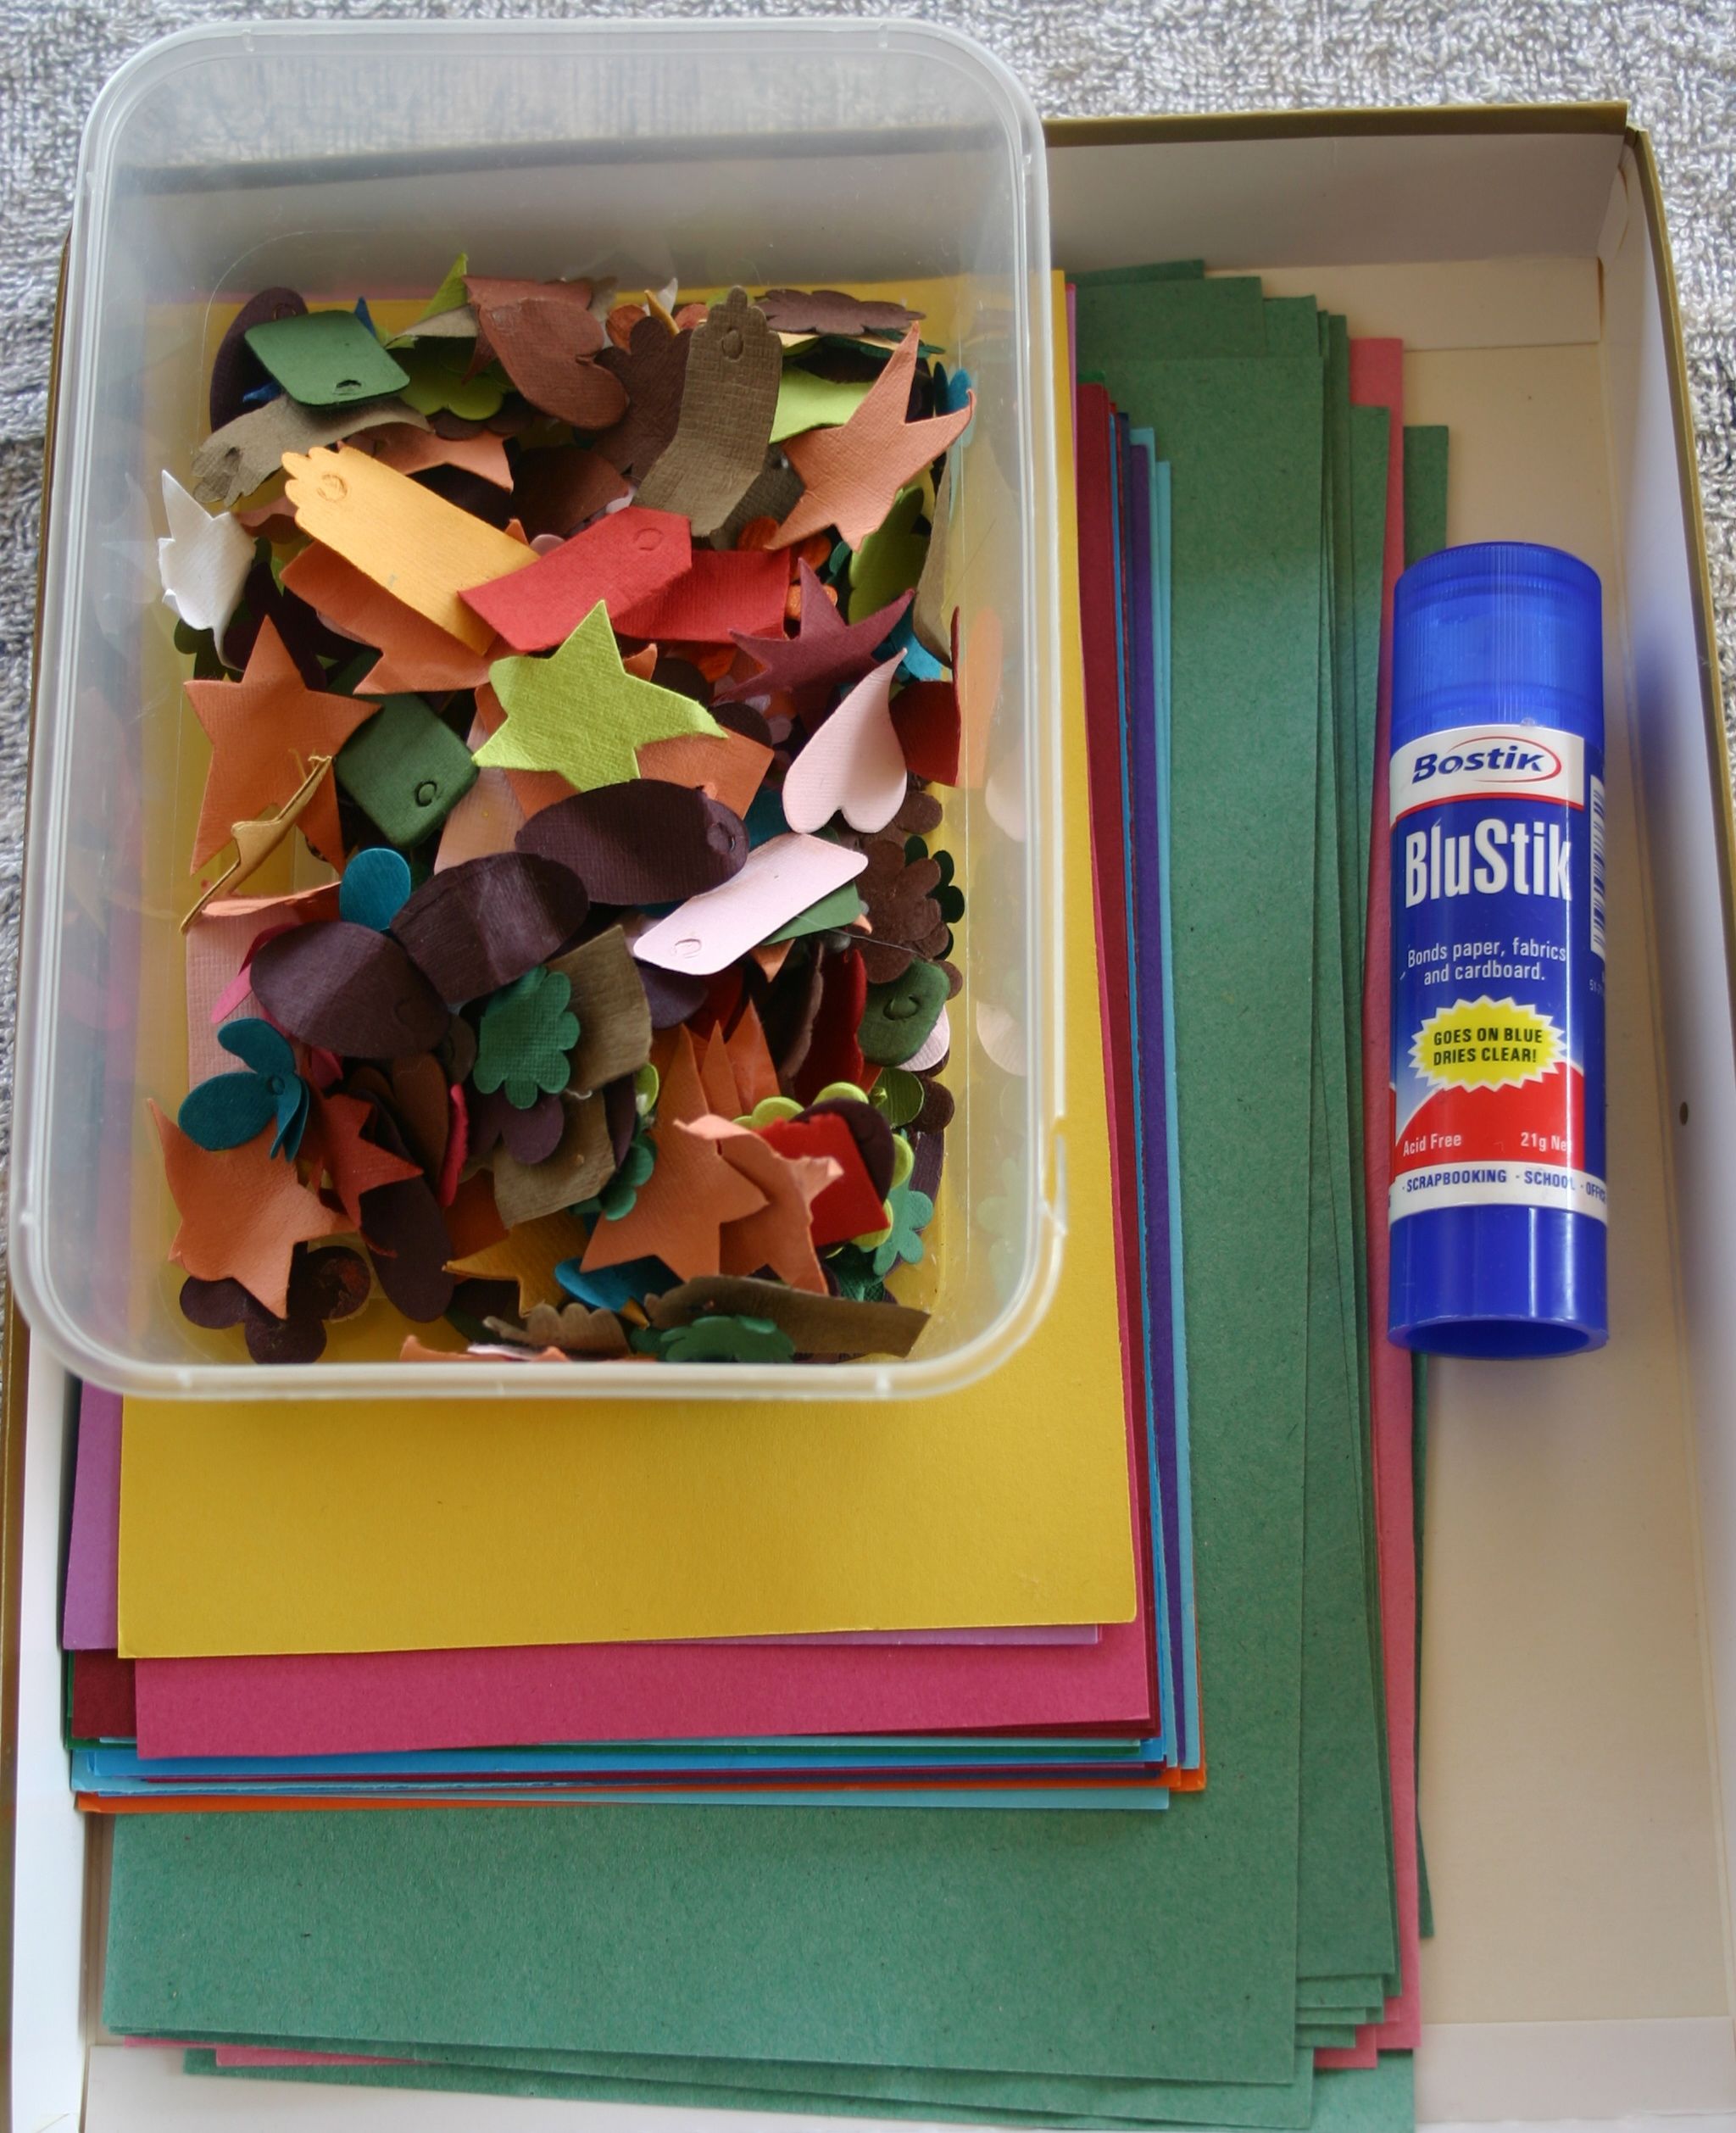
Teaching toddlers to glue is another open-ended activity that they will love. Using a glue stick makes it a lot less messy to begin with. A selection of coloured card pieces and diecut shapes from a Kmart scrapbooking assortment pack made this very easy to prepare.rice box IMG_8531
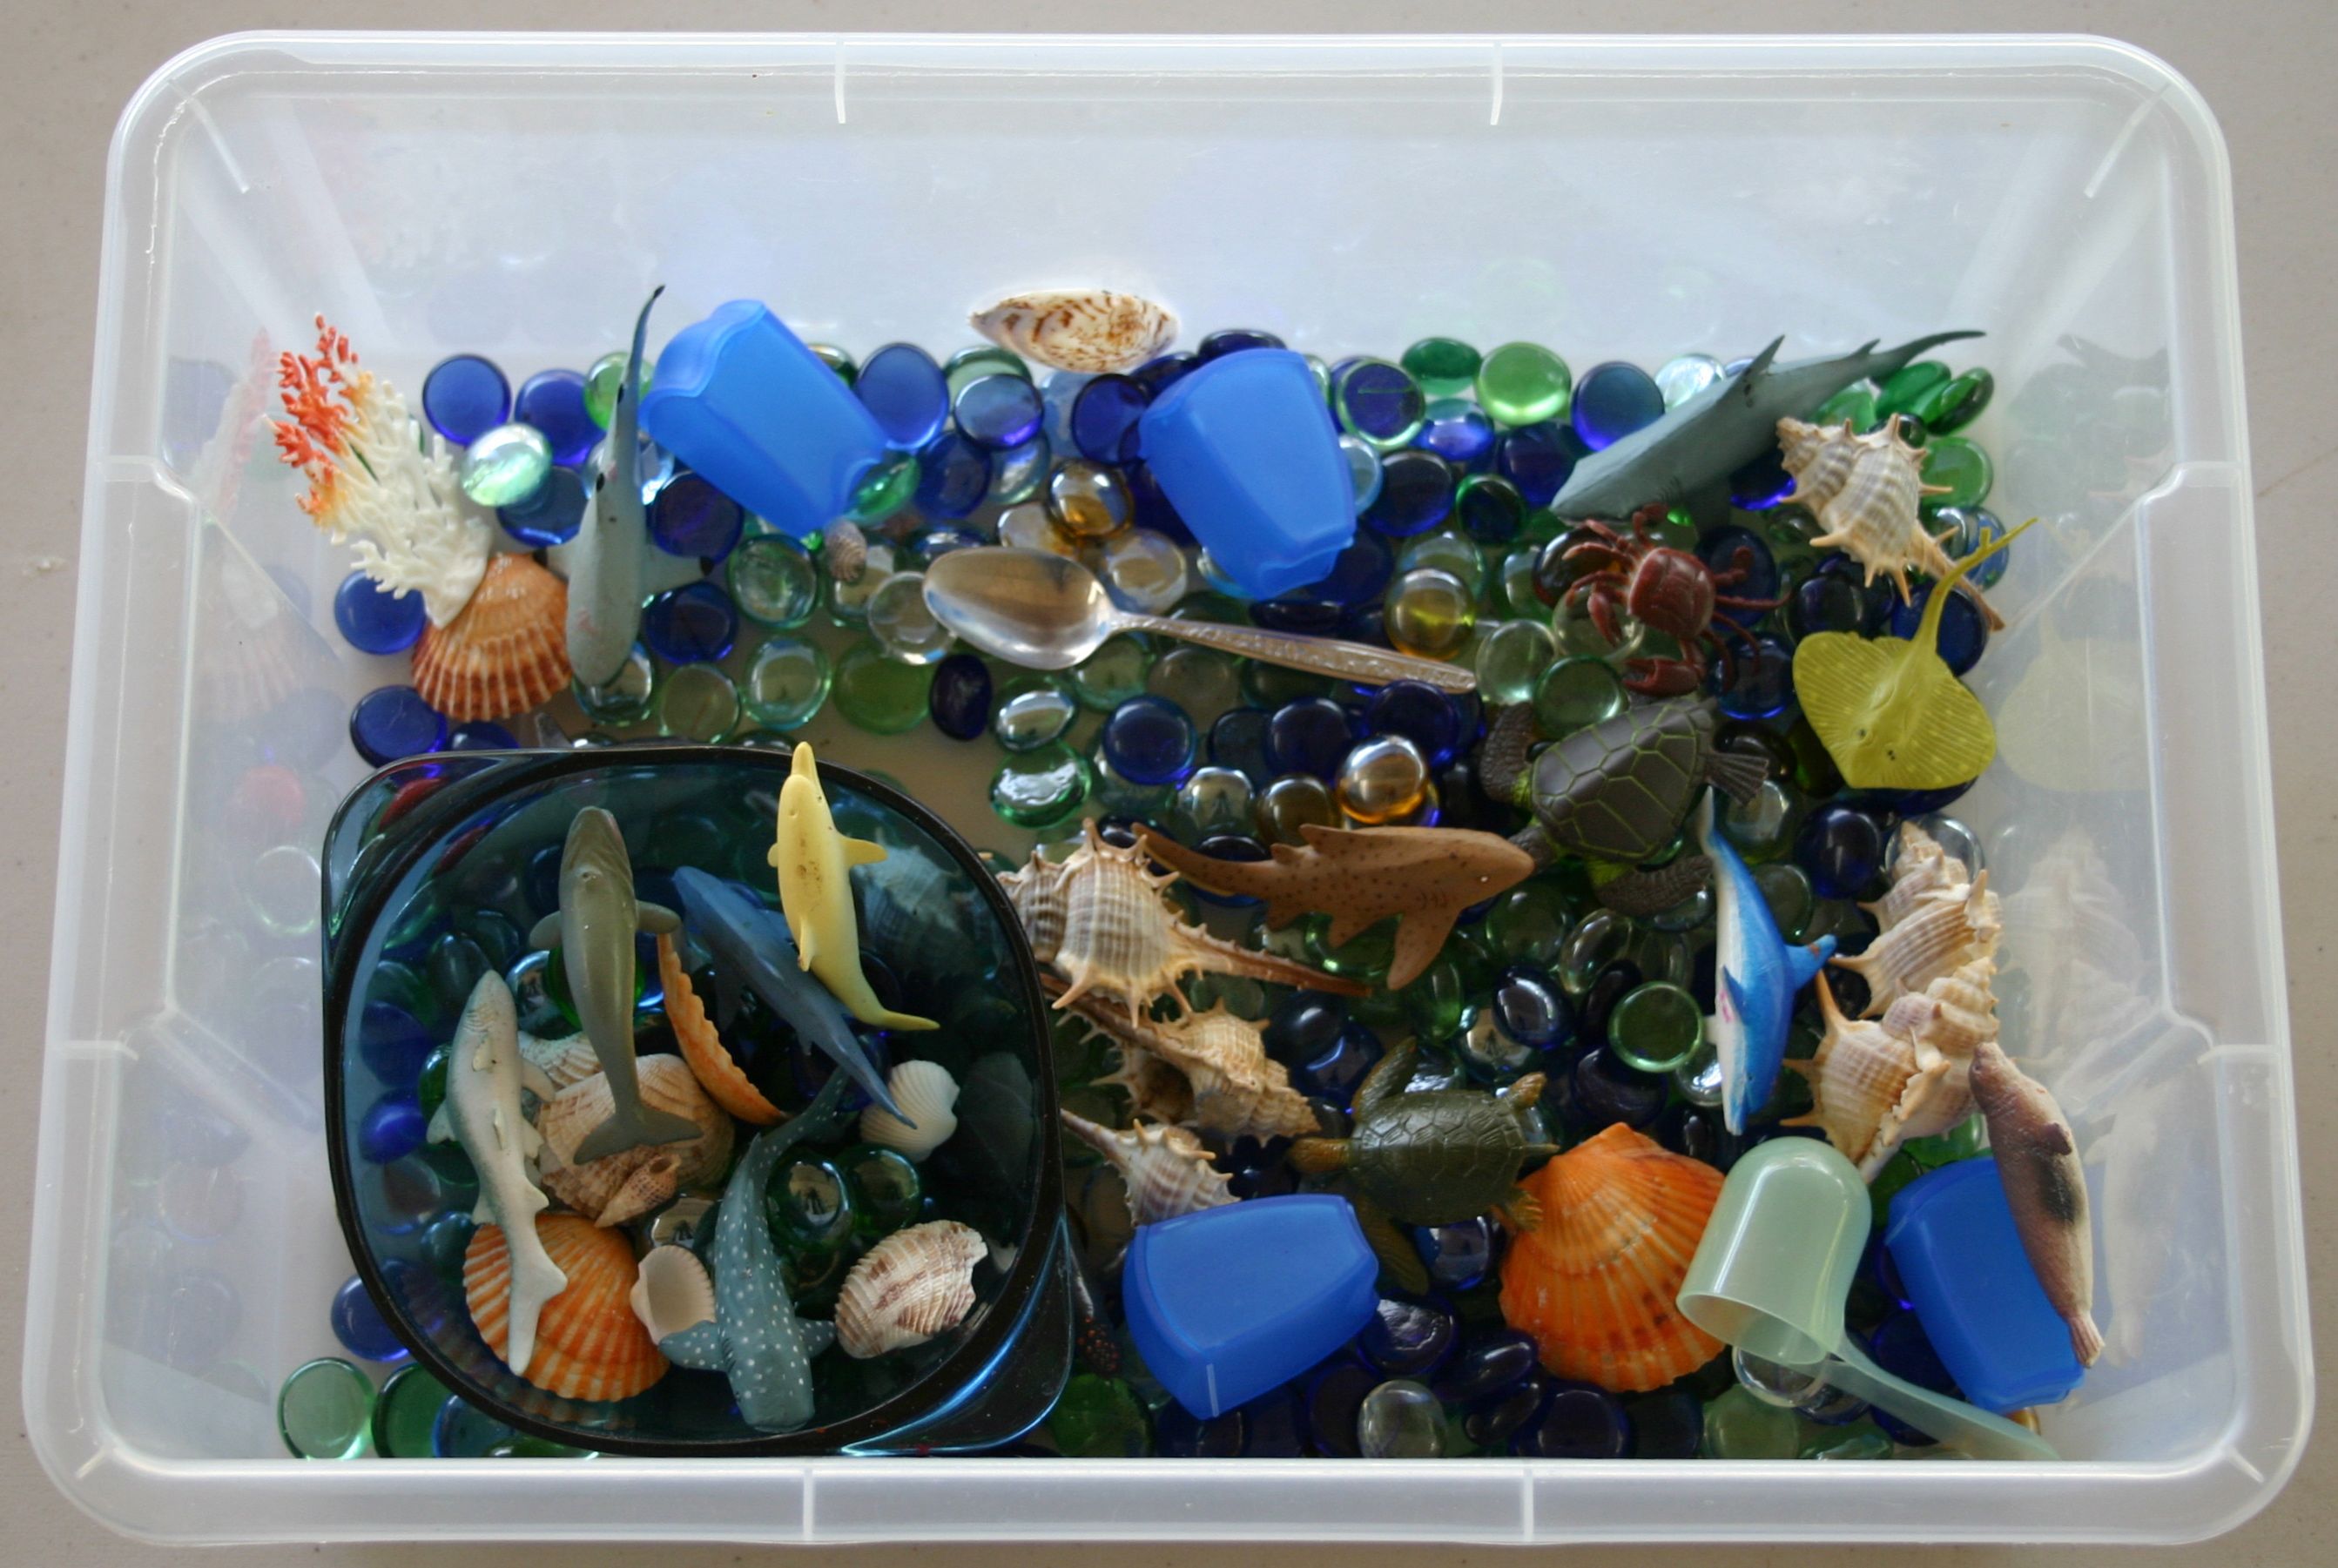
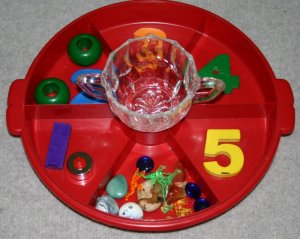
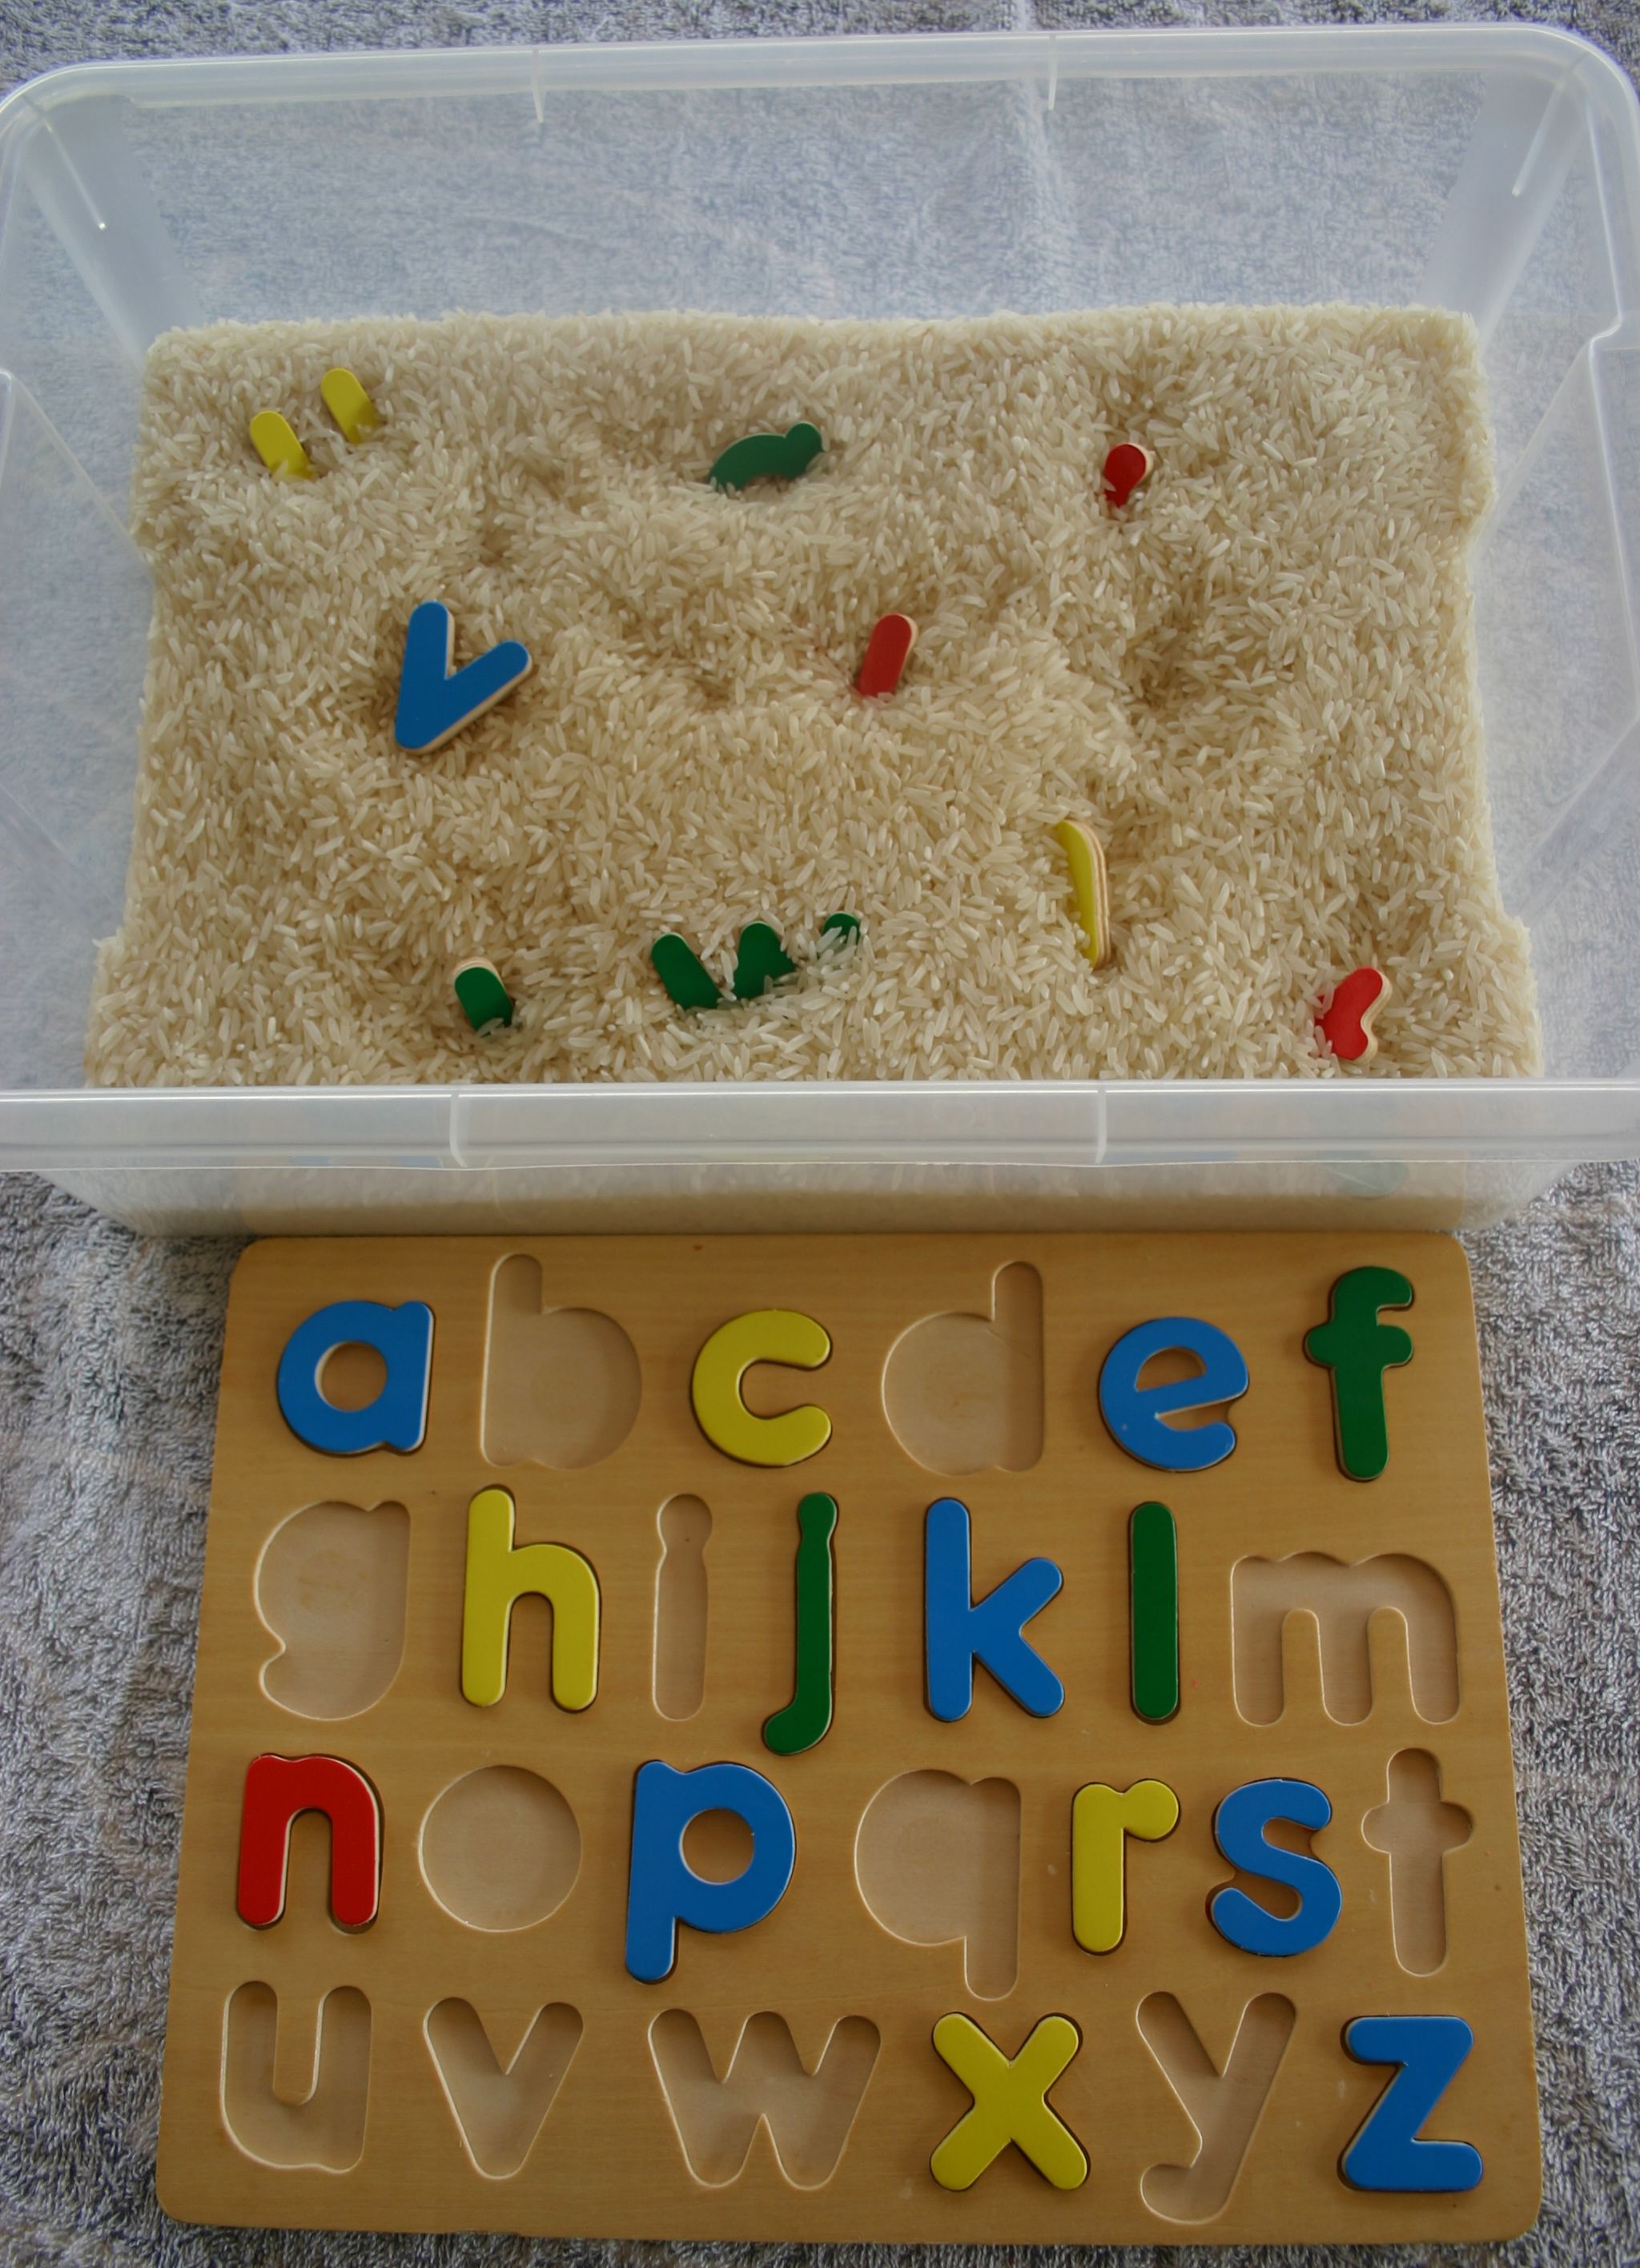
Sensory tubs have so many applications. Finding puzzles pieces hidden in rice is pictured above. See here for many more ideas.do a dot IMG_8530
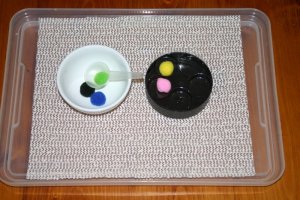
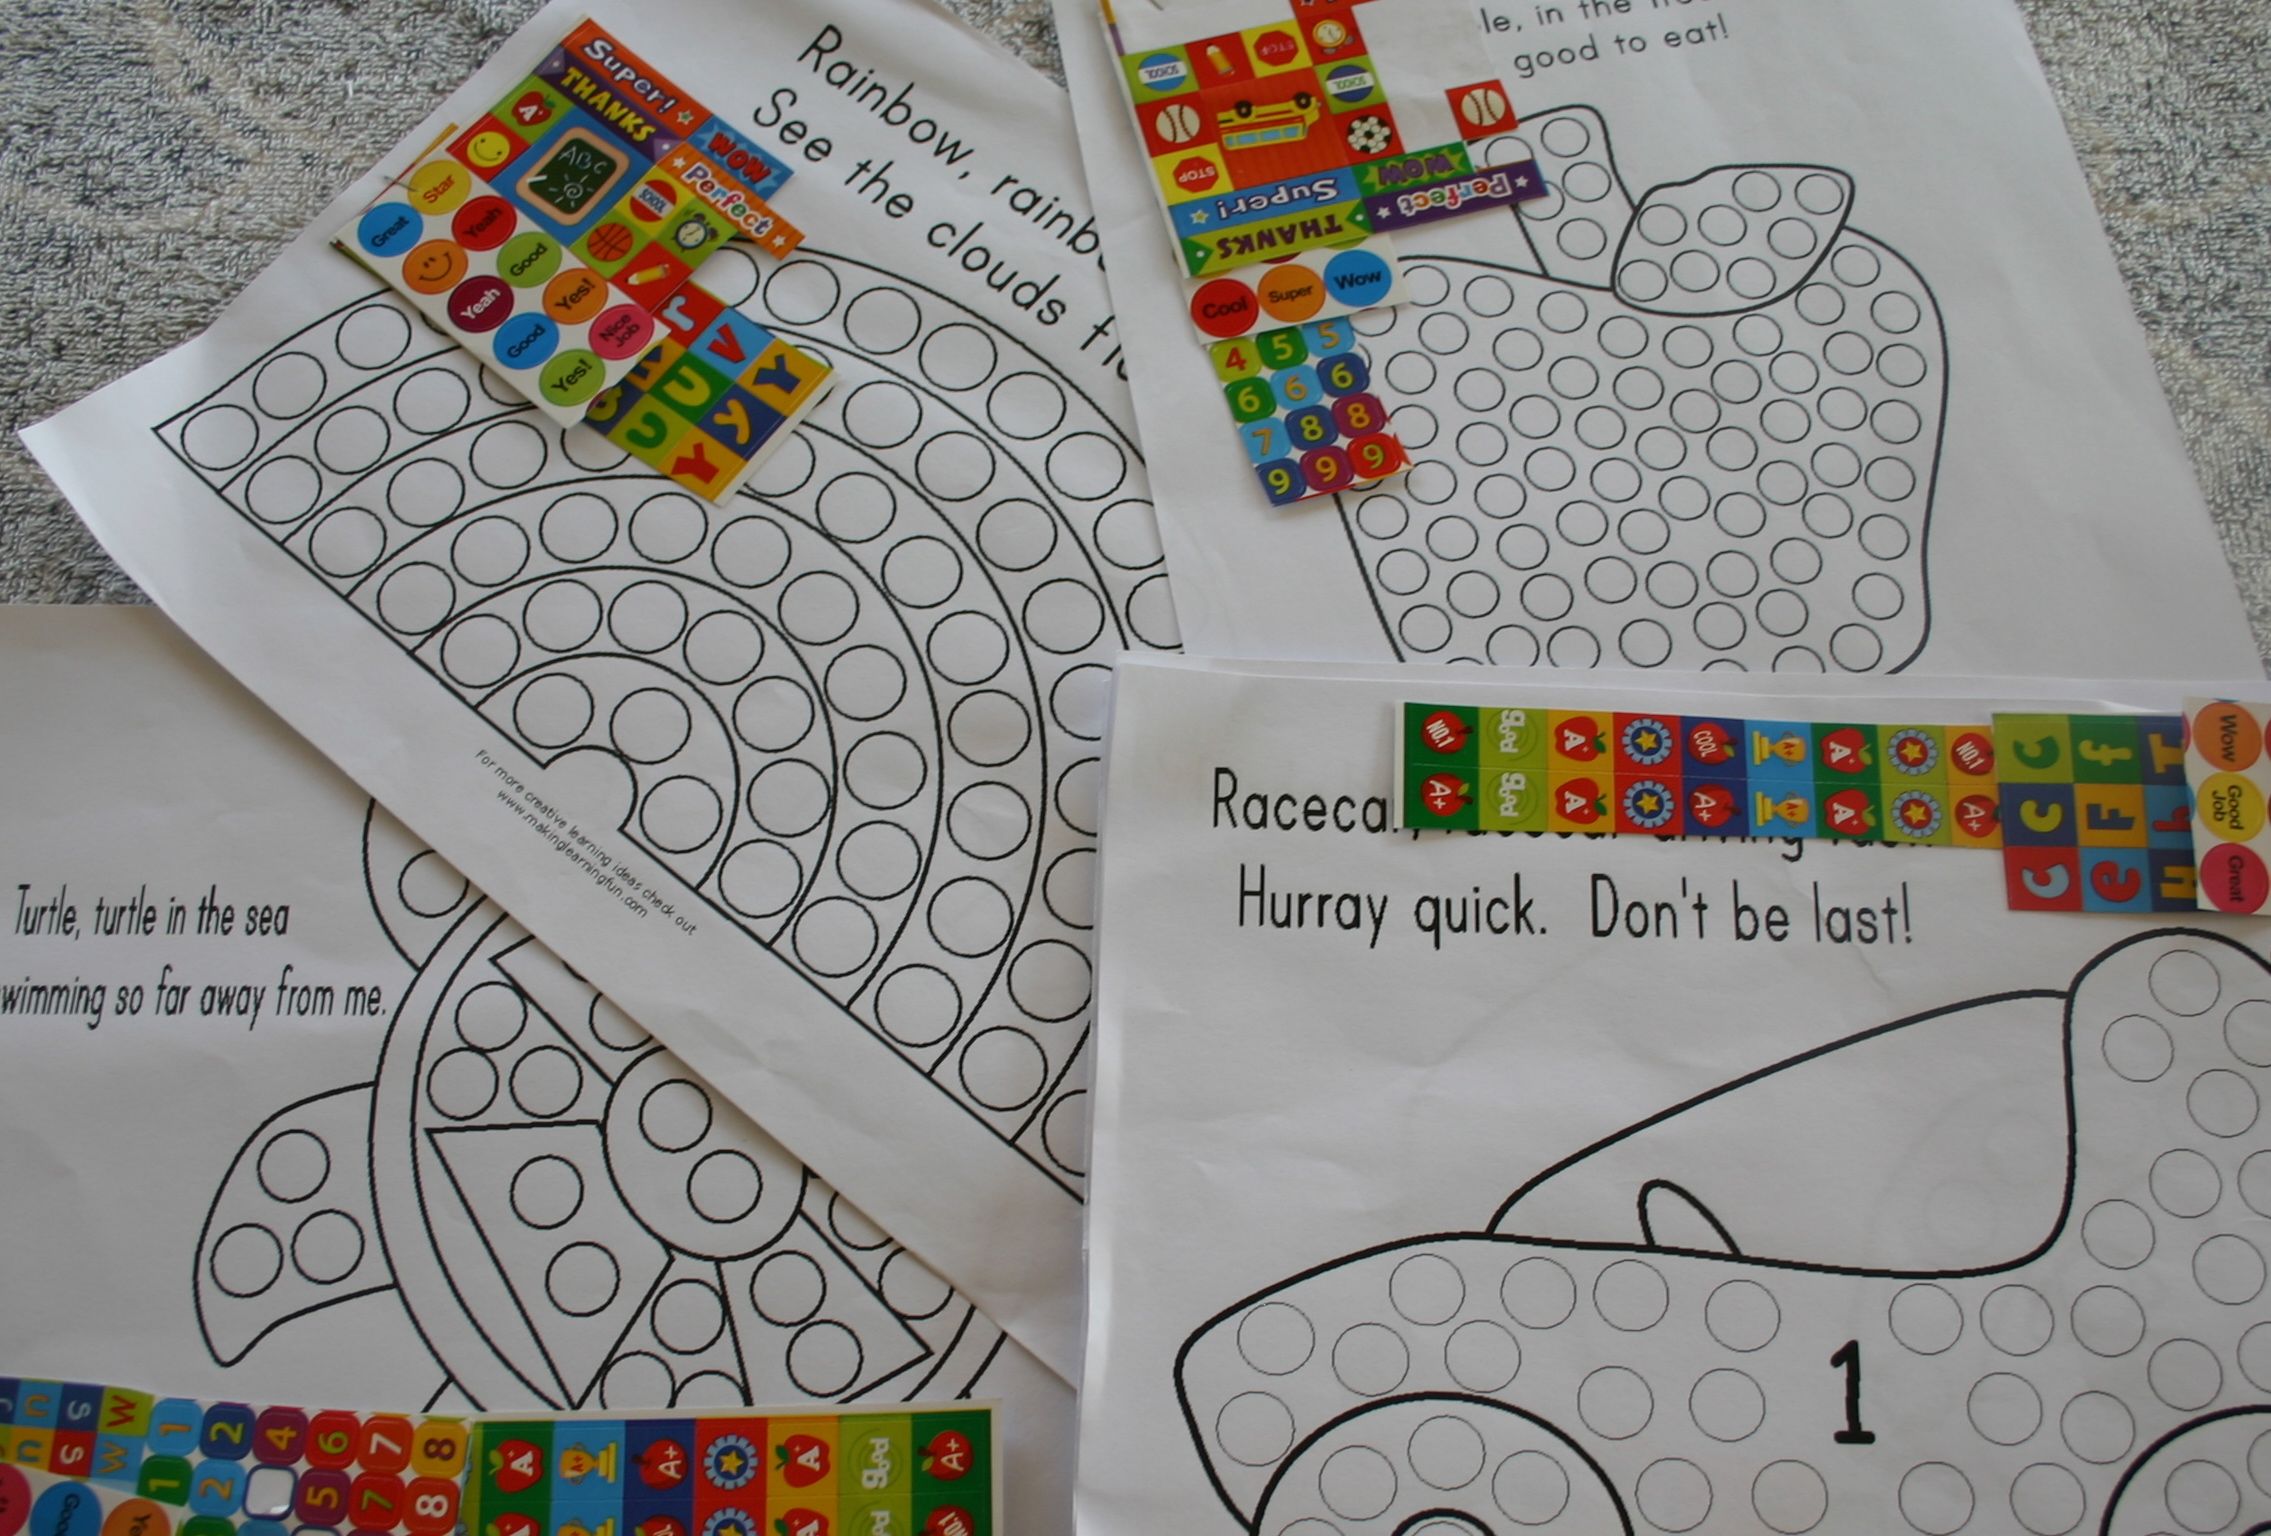
Do-a-dot pictures are great for fine motor skills. Bingo dot markers can be used to dot inside the circles or provide small stickers to peel and stick into the dots.  There are tonnes of free printable do-a-dot pictures around if you do a quick google search. teddies IMG_8528
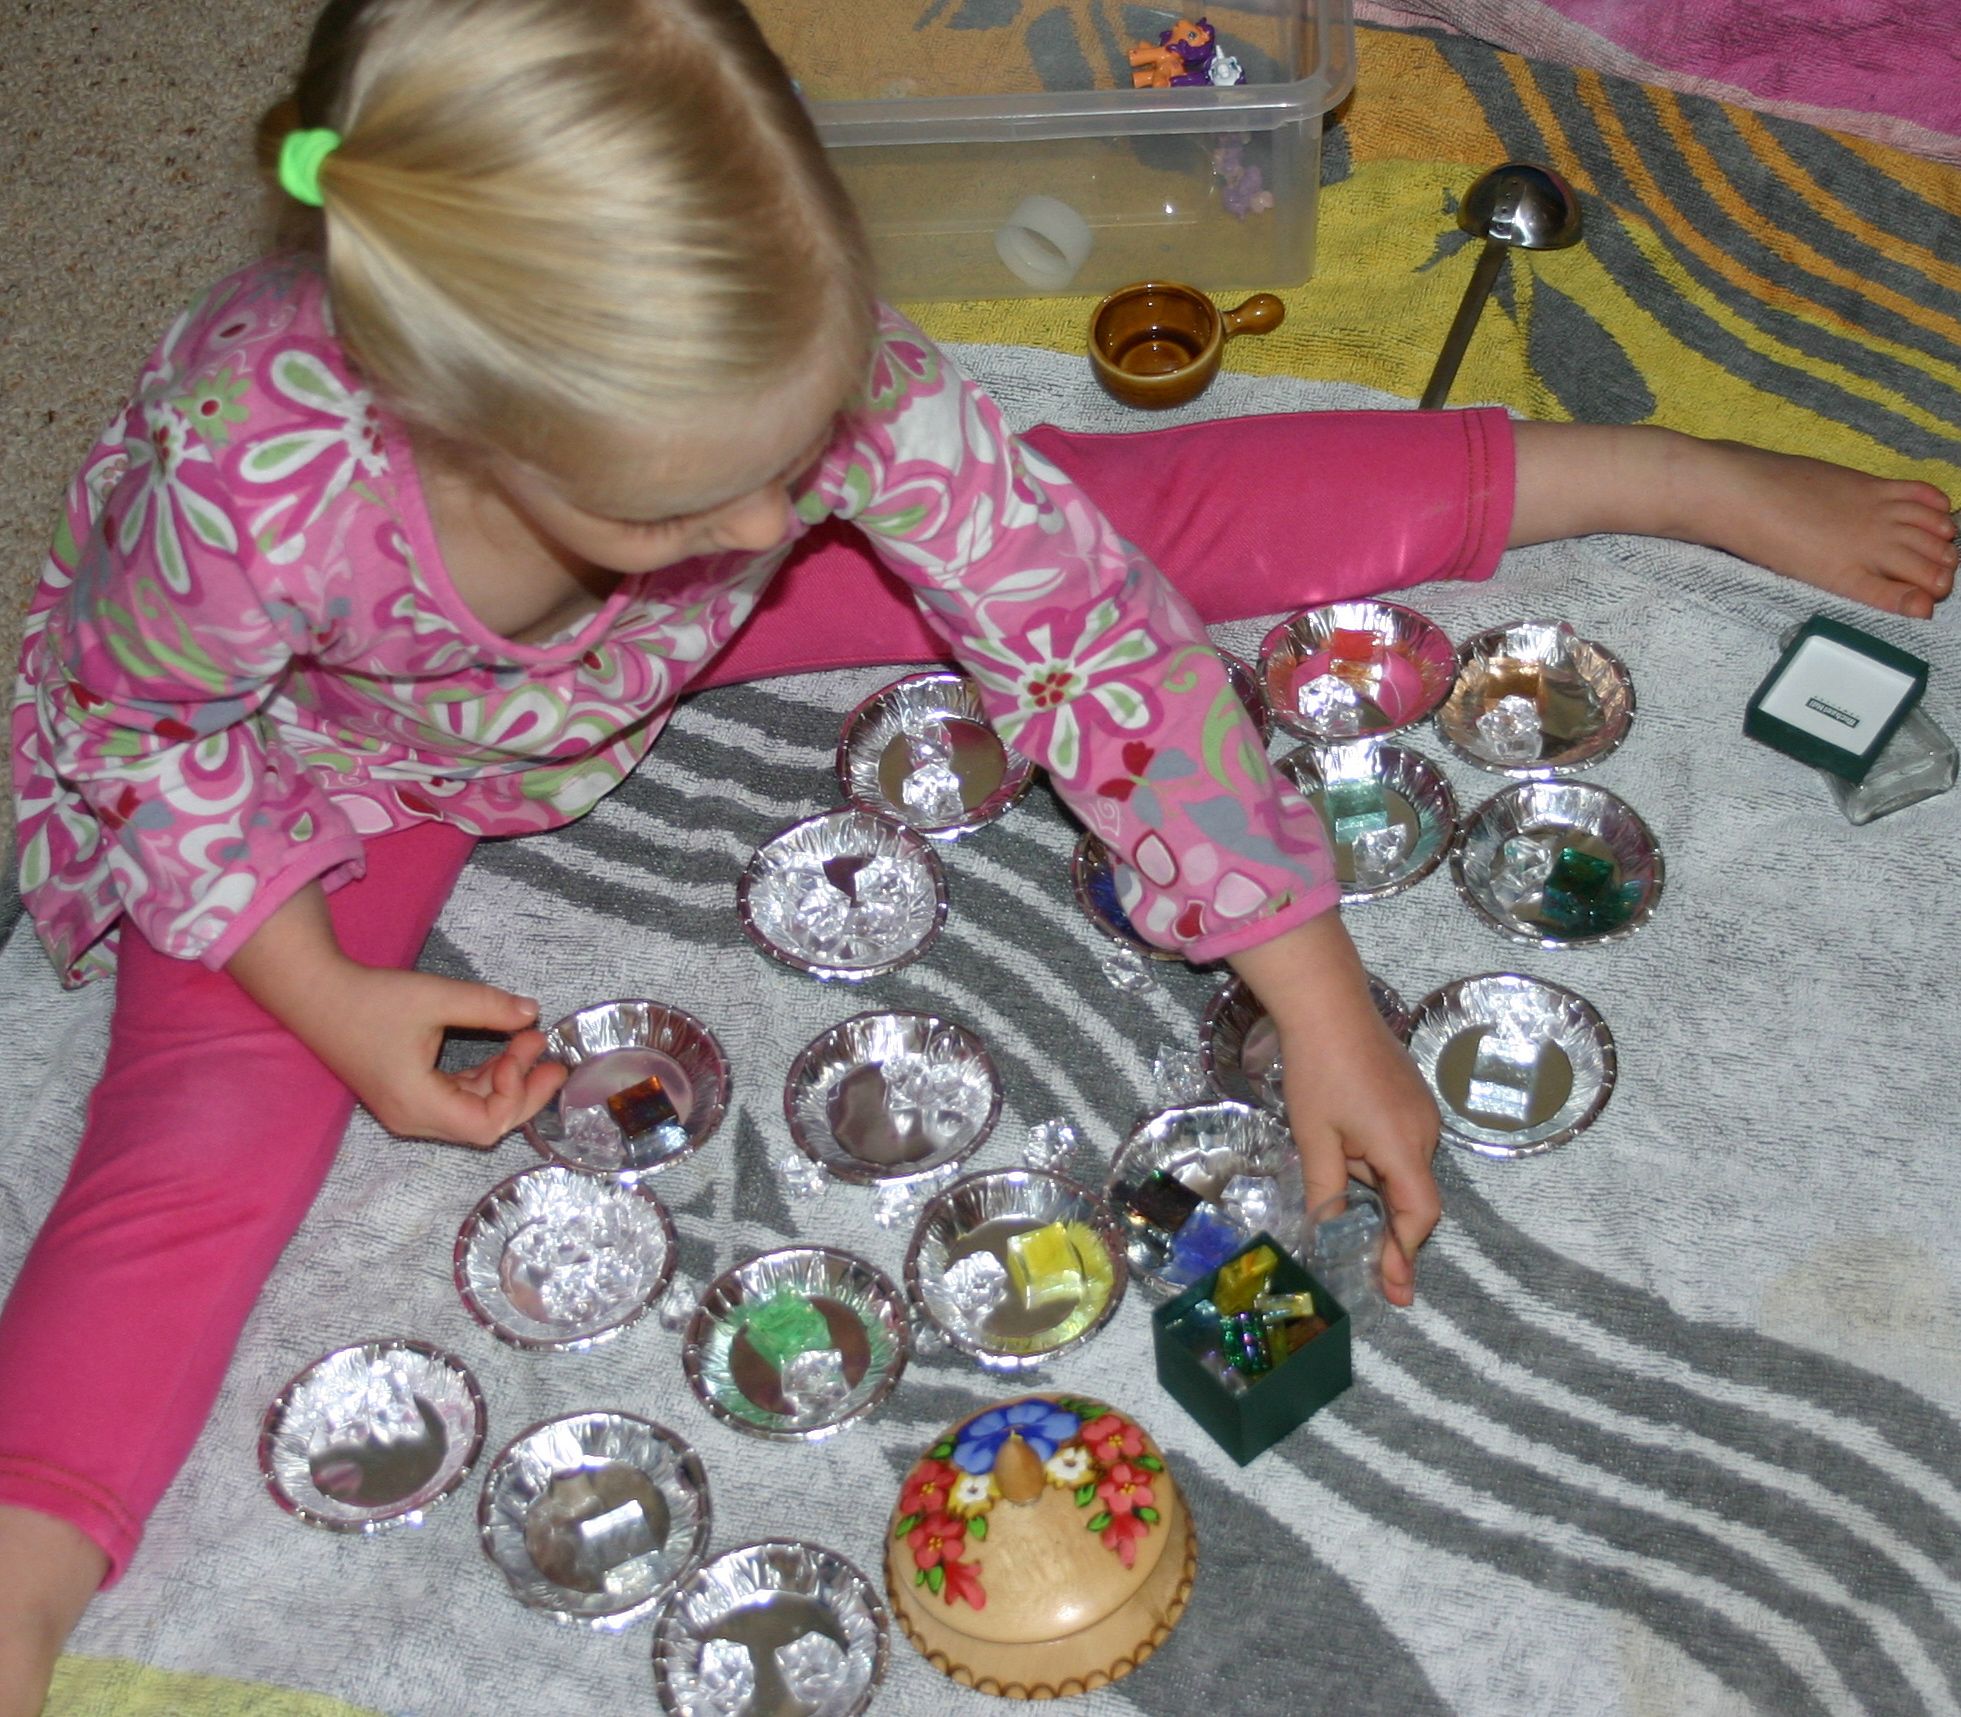
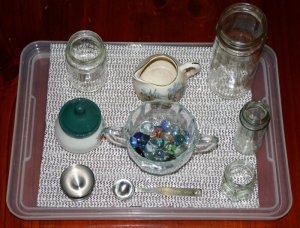
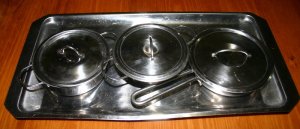
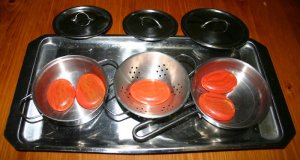
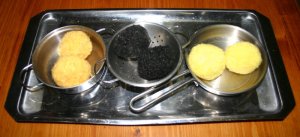
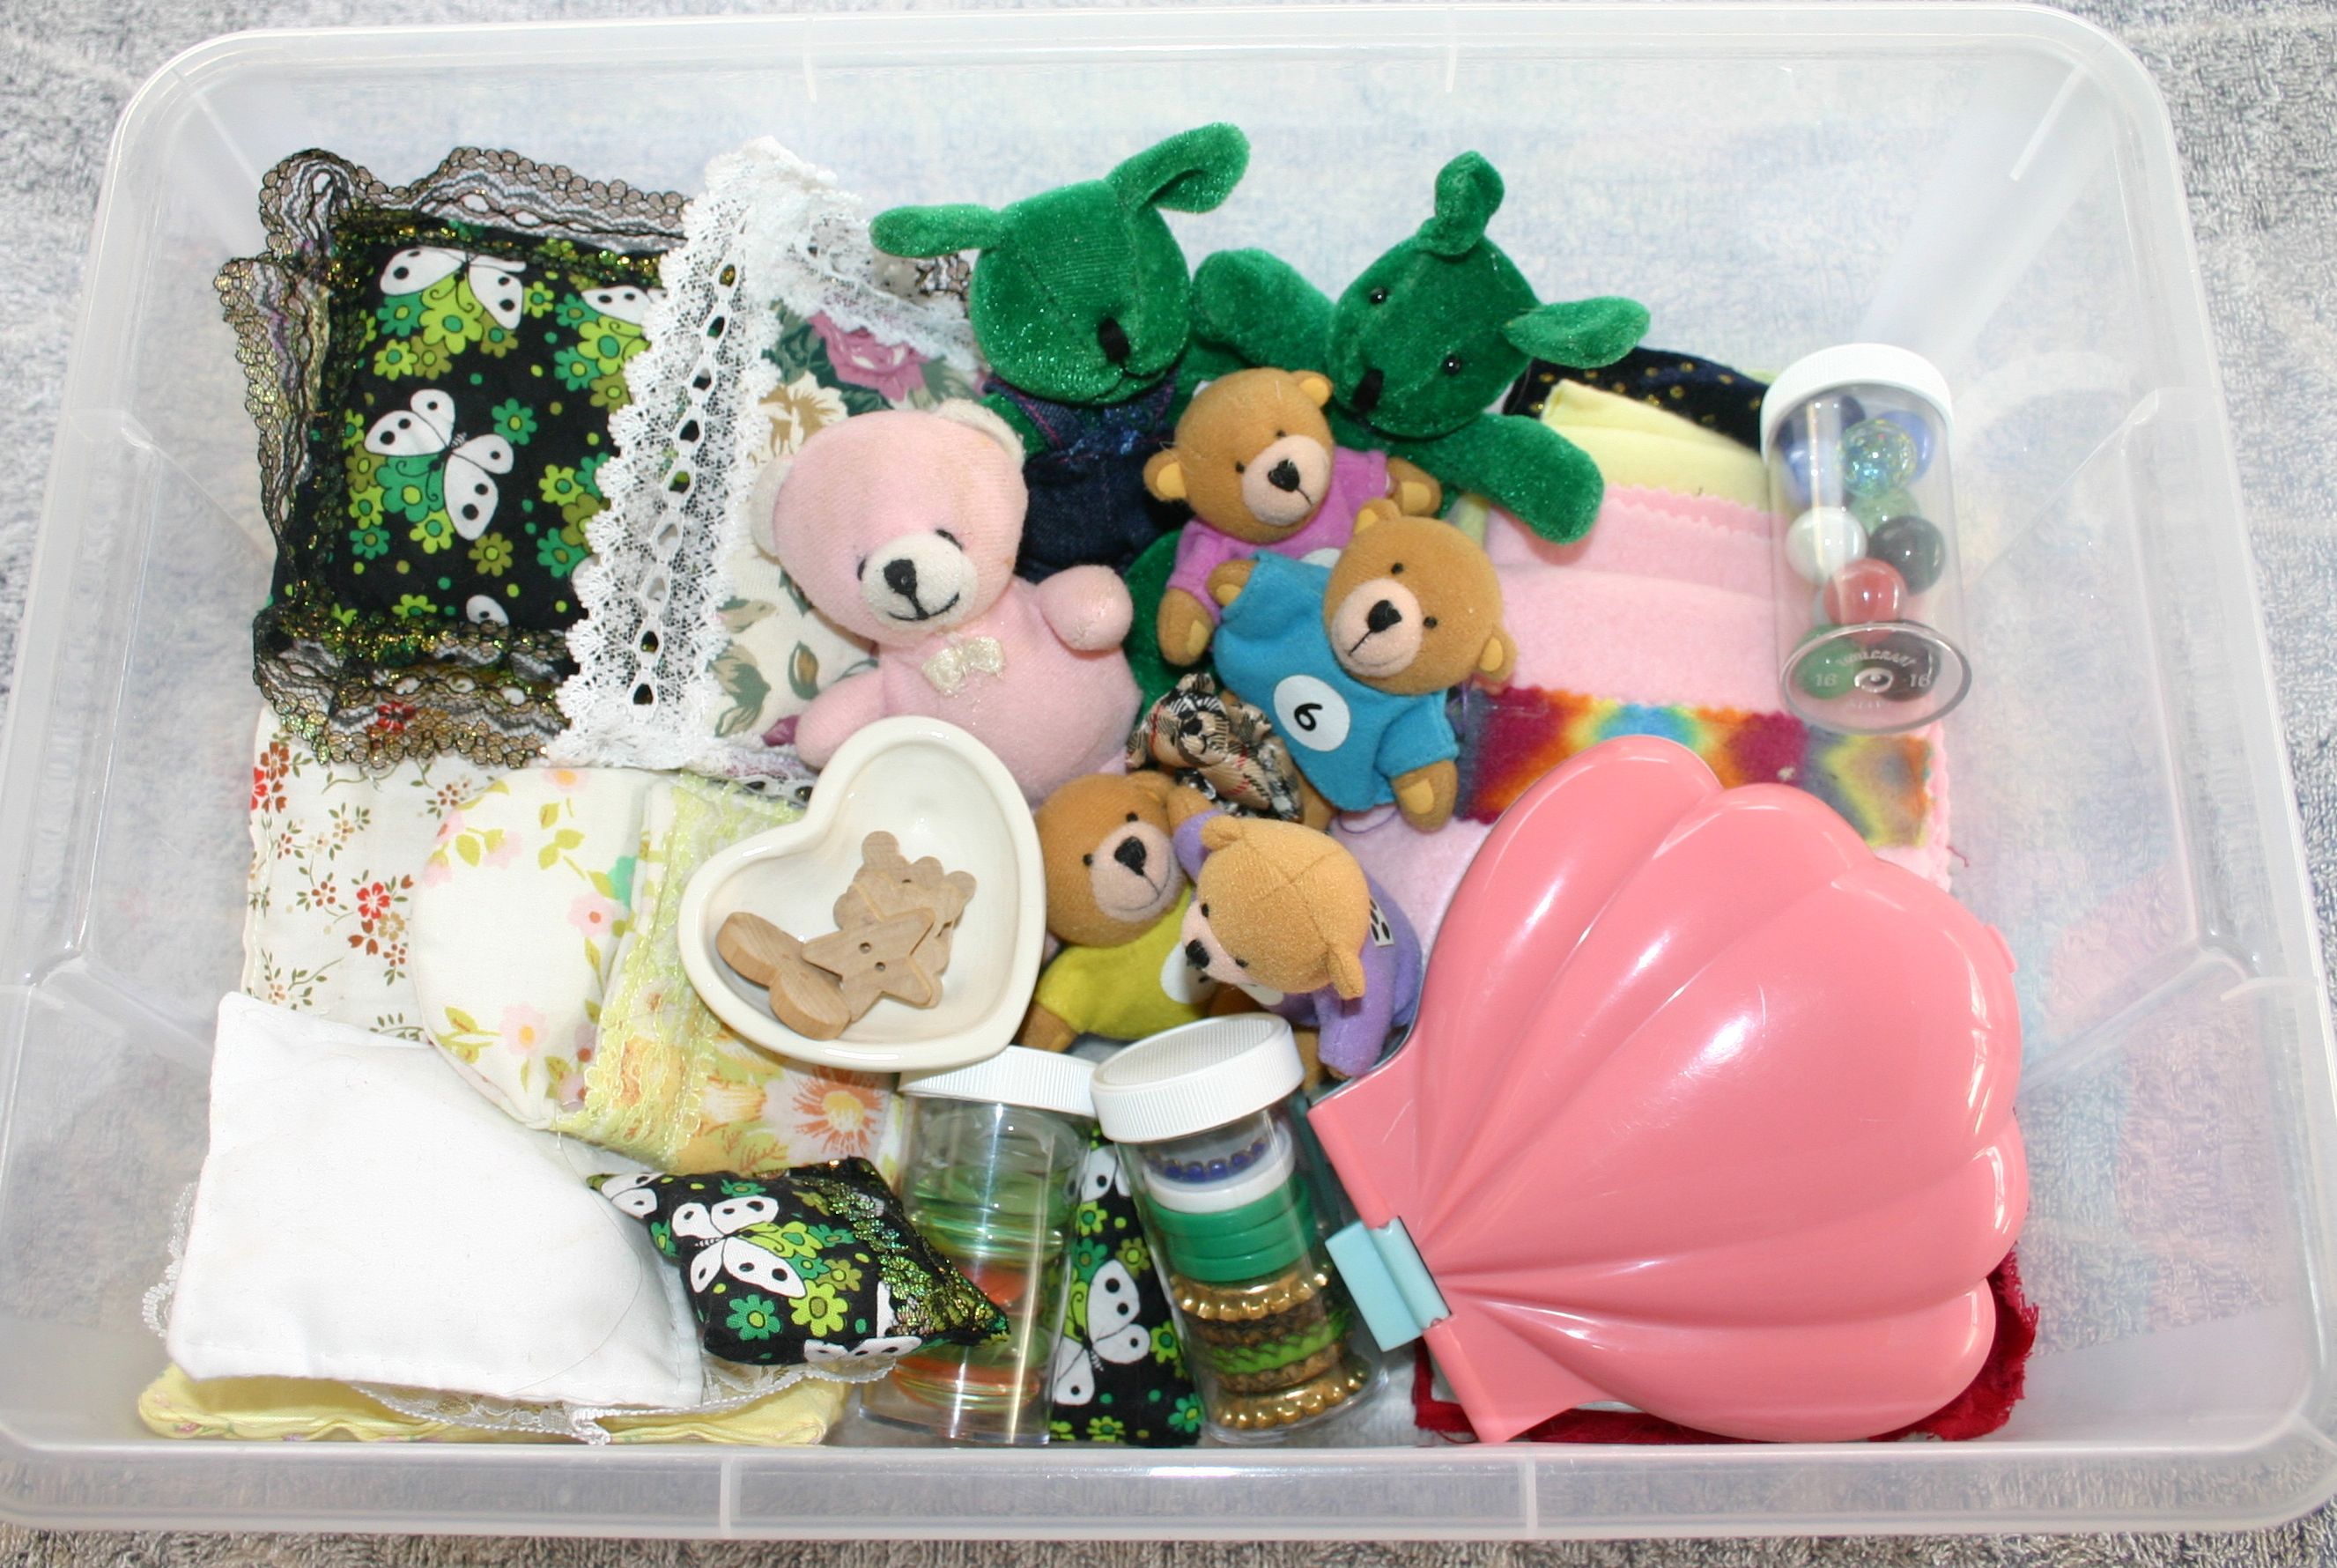
Imaginative cooking and doll/teddy play is always a hit. Small teddies, mini pillows, sheets and blankets, along with marbles, jewels and wooden button food makes an interesting selection. Bottle top plates and an old polly pocket toy as well as some screw-top jars finish it off.beads IMG_8526
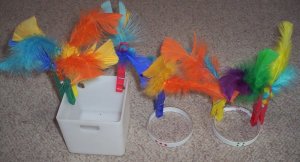
Pony beads and pipecleaners are great for threading and can be made into bracelets or tipped off and re-used next time. dinosaurs IMG_8523Our dinosaur tub includes play dough, plastic dinosaurs, popsicle sticks and popstick fences, a rolling-pin and plastic knife and some artificial leaves for plants and trees. The green bowl has been used to make a pond, cave and home for them as well.

Make sure you choose activities that are age appropriate, can be used independently, include attractive materials, are easily accessible, and easy to pack away. Being able to throw everything back into a robust plastic tub makes it easy for children to keep the activities together and tidy up after themselves.

The key to using these kinds of activities with your young children successfully though is training. No amount of pretty materials will keep a fidgety toddler with the attention span of a flea sitting in one spot for any length of time on a day-to-day basis. As soon as the novelty wears off they will be up and off again.

Take the time to train your children to stay in a designated area. (See mat time/blanket time and highchair time.) Introducing young babies to playpen time that transitions to room time later on is an excellent way to begin (see starting late) and the highchair and table make excellent places to sit a child with an engaging activity while you are nearby. Some children will naturally sit still for longer than others, but all can be trained to do so for a reasonable length of time.

If you are too busy to train your children to sit and concentrate then you are too busy!! Give up some of those good things you do and take on the better thing of training your children. They will need these focussing and concentrating skills in later life, especially at school and your home and others will be blessed by a self-controlled toddler.

For a list of toddler table activities, see here. For preschool ideas see here. For many more ideas for children of all ages, have a look around! For some more sensory tubs, try here.

Montessori multiplication trays: Hands-on mathematics

multiplication board

Wooden peg-board (the kind you use to hang tools from in the garage) is a cheap and simple alternative to purchasing a multiplication board.

Continuing on with my mathematics tray ideas this week (introduction and addition trays here, subtraction trays here), here are some multiplication ideas for learning times tables. We made our own homemade Montessori multiplication board using pegboard wood for a cheap alternative. For another easier method using a rubber bath mat, see this post. While the Montessori multiplication boards are an excellent idea, my children found it quite tedious placing the beads into each little hole every time, preferring to use the blocks from our Math-U-See sets, MAB’s or other manipulatives instead.

Whichever way you choose to present multiplication, make it visual, tactile and concrete to begin with, before moving to abstract concepts. The following tray ideas are for children who already understand the concept of multiplication and simply need some more practise of their basic facts (their times tables) in order to commit them to memory.

times table popstick start finish game

Threading beads onto pipe cleaners (bend the ends to keep the beads from slipping off) is a home-made alternative to the Montessori bead materials. They become the manipulatives, with the multiplication problems written on popsicle sticks. The popsticks are laid out, making sure that the word “start” and all the answer sides are upright. The child turns over the “start” stick and uses the bead strings to solve the problem on the other side. They find the answer to that problem on the next stick and turn it over to reveal a new sum on the other side and continue on in the same way until they reach the “finish” stick. If at any time they turn over the finish stick before they have completed all the other sticks, it indicates they have made an error along the way.

mab multiplication

Wooden MAB’s (multi-based arithmetic blocks) are the “old fashioned” mathematics manipulative that I grew up with. They can be used in place of bead chains for many math concepts. Here they are set out for learning the 10 times table (multiplying by 10’s.) The sum is on the left and the small circles show a running total, with the large circle answer at the end of the chain. A small pad is included for recording the answers.

count by 10s MABs

These plates are actually set up for skip counting in the photograph, however with the addition of some multiplication problems, lend themselves very well to practising times tables.

icecream lid popstick 9 times table

Popsicle sticks with answers are matched to multiplication problems on an icecream container lid.

egg carton 8 times table

Popsicle sticks with the problem are slid into slots with matching answers on the egg carton.

multiplication times table puzzle

A cheap (yet difficult) puzzle was a fun way to practise. Answers are written on the back board to match the puzzle piece with the corresponding problem. The puzzle must be difficult enough that the child cannot easily cheat by just following the picture, rather than working out the sums. (Not that any of your children would ever do that!!)

white ball to iceblock tray match 1 to 10

Plastic balls with problems are matched to the answers in an iceblock tray.

wood peg on cont 7 table

Pegs with problems are pegged on to the answer segment on the container, which doubles as a storage place.

mixed operation bingo

Dice are thrown (you need 3) to create any combination of addition, subtraction or multiplication problem and the answer is covered on the board. The idea is to continue until all answer squares have been covered. This is for children who already have a fairly good mastery of their basic number facts and tables.

4 times table multipication jewel cont

Each square container holds 4 little plastic shot glasses for practising the 4 times table. Jewels are counted into each glass and totalled to find the answers.

pattipan in box 4 times tables

A plastic lunchbox filled with pattipan answers to match problems on circle.

castle flag multiplication

The correct number of flags are inserted into the castles, with the castles showing how many groups.

pink plate plastic pegs 6 times

Pegs are slid on to the matching answers on the paper plates. A manipulative is needed for working out the problems unless the child is able to complete them mentally.

ping pong ball egg tray 5 times table

Ping pong ball problems are matched to the answers in an egg holder from the fridge.

Montessori addition trays: hands-on mathematics

add tray C using IMG_8374A strong foundation in basic mathematical skills will set children up for later success. Too many children learn how to complete math problems by following a formula or method that they simply do not understand. They pass the tests, but when the difficulty of the problems increases, or they are presented in a different format than the one they are used to, the child flounders.

Teaching children using concrete materials (items that can be seen and handled) before moving to abstract concepts (problems worked out on paper) is absolutely vital to make sure they understand the connection between the methods they are using and how and why they work.

The Montessori method for mathematics is brilliant, especially for young children. It is very systematic and progresses from skill to skill in small steps, with each stage building on the one before to ensure understanding and mastery is gained before moving to the next step in the ladder. Concepts that are not covered in your standard state school math book are intentionally introduced and explained in a way that can easily be grasped by even very young children.

Many children seem to simply absorb these small skills along the way, almost accidentally, but the children who struggle with maths are usually the ones who never intuitively grasped the shortcuts, mental methods and other little tricks and understandings that their more successful peers just seemed to somehow “get” without direct instruction.

One of the foundational skills that later math problems build on is adding, subtracting, multiplying and dividing small numbers. Many children will make mistakes when solving a more advanced problem, simply because they make a basic error with one of these simple calculations. Spending time in the early years ensuring that children master their basic maths facts is a must for success and speed later on.

Here is a Montessori addition tray and some other Montessori inspired ideas for teaching young children to add small numbers, mastering their addition facts as they complete them.adding tray jewels IMG_8361
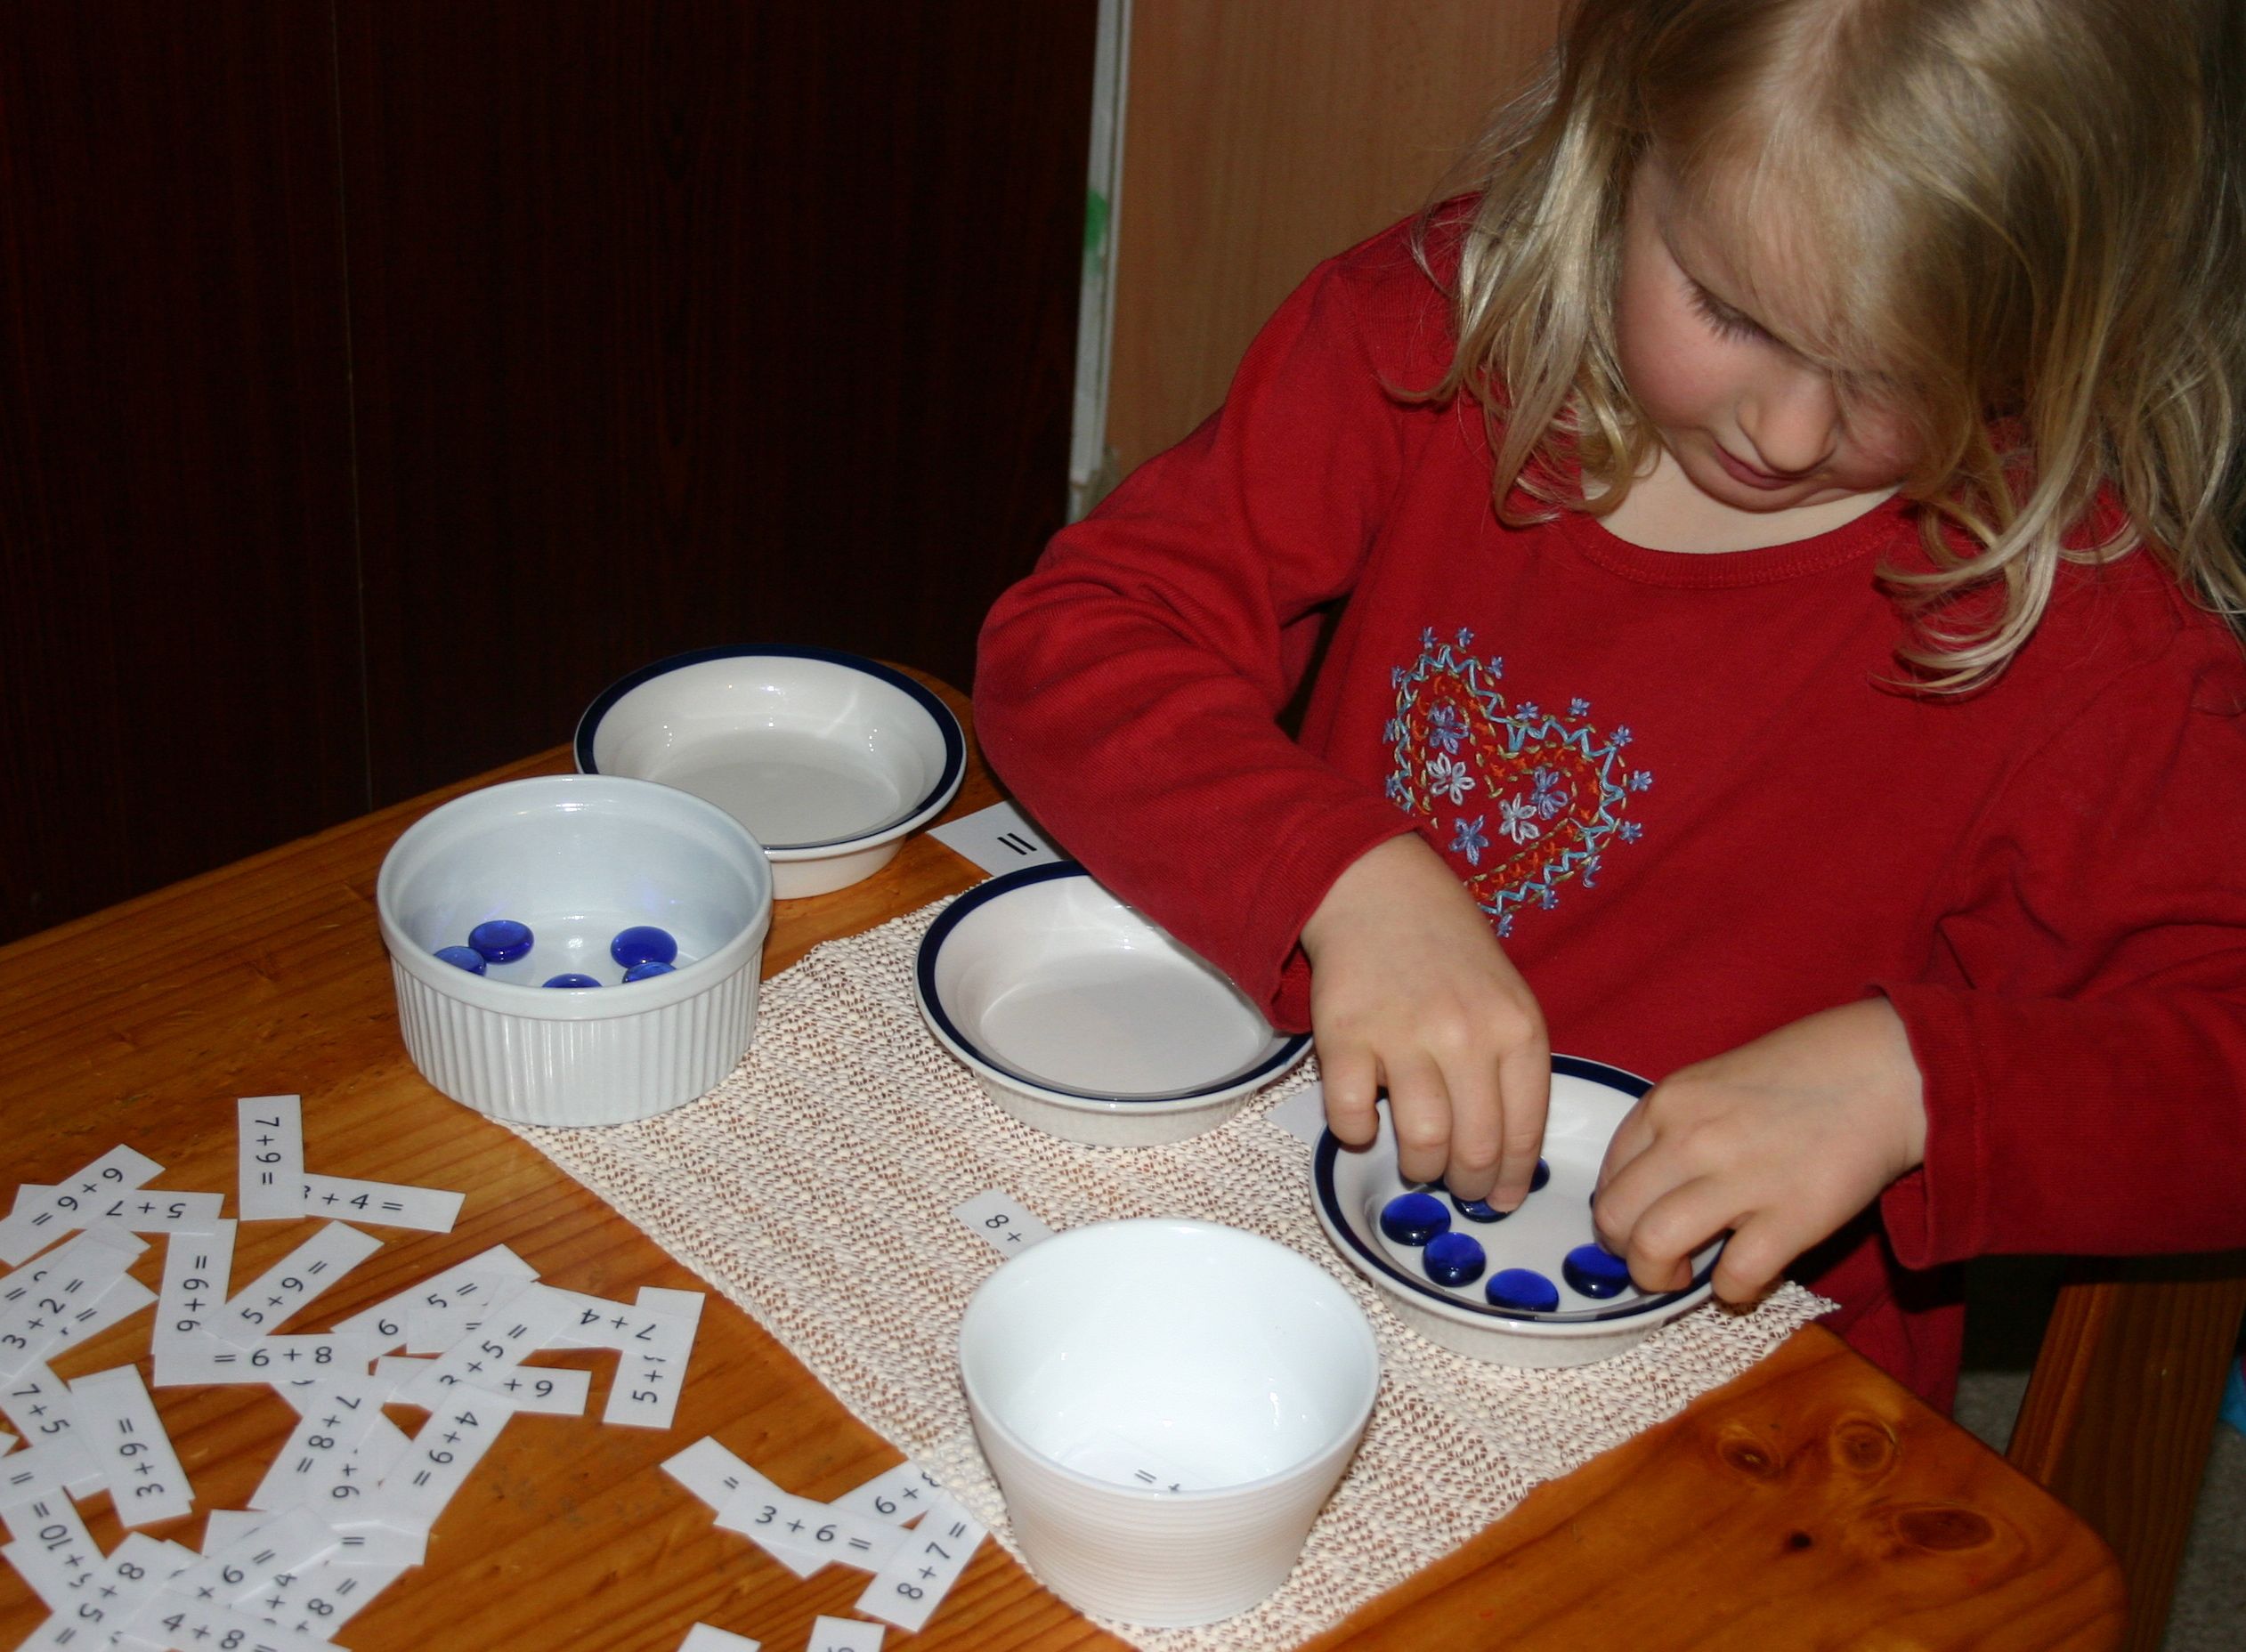
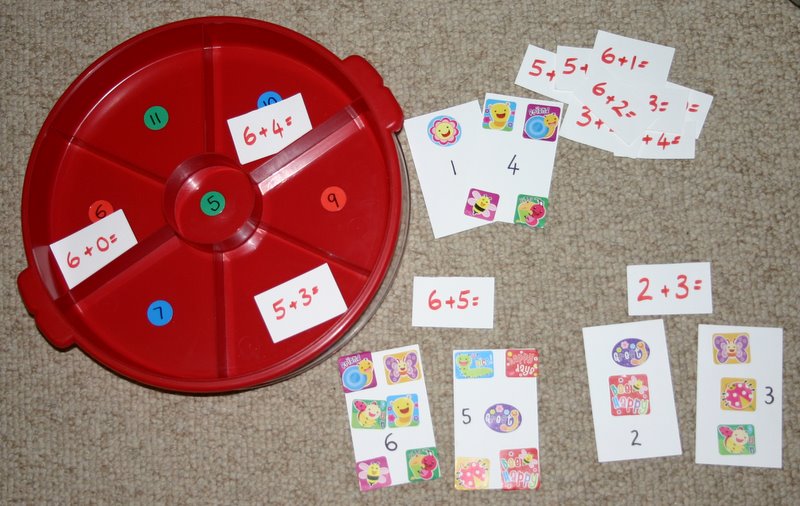
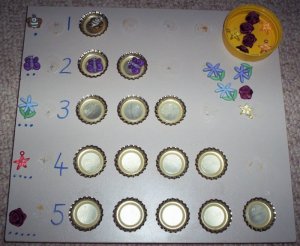
This is how our addition tray looks on the shelf. Only one child at a time is using it, so it is set up in such a way as to mark their individual progress. Every week or so I “test” their mastery of the addition facts and those problems that they are able to solve mentally (without thinking time) are placed into the screw-top container. They are pulled out for occasional review, but no longer need daily practise. This provides some intrinsic motivation as they see the pile in the dish growing smaller and smaller and the container getting fuller and fuller. They love it when we exclaim over how many they know now.

Initially, I split the facts into sets; plus 1, plus 2, plus 3  and so on and only have 1 set out at a time.  Once they know the sets fairly well individually, we combine the lot, taking out the ones they have mastered and working on what is left. Obviously, learning all the plus 0, plus, 1 plus 2 and plus 10 facts is very easy, so starting with these gives the child a boost of confidence as they quickly plow through the first sets, filling that jar almost immediately.

adding tray set out IMG_8362The activity is set out in the child’s workspace like this. The correct number of jewels are counted into the first and second dish, before both sets are scooped together into the final dish for them to find the answer by counting. It provides a very clear visual display of what happens when you add two numbers together.

Because some children will take a long time to recall all of the addition facts, I give them lots of different kinds of materials to count and present the problems in different ways. Here are some of the Montessori inspired, hands-on workjobs  that I have used with both my own children as we homeschool and in a classroom situation when I was a teacher.

peg & pompom paper plate addition to 10
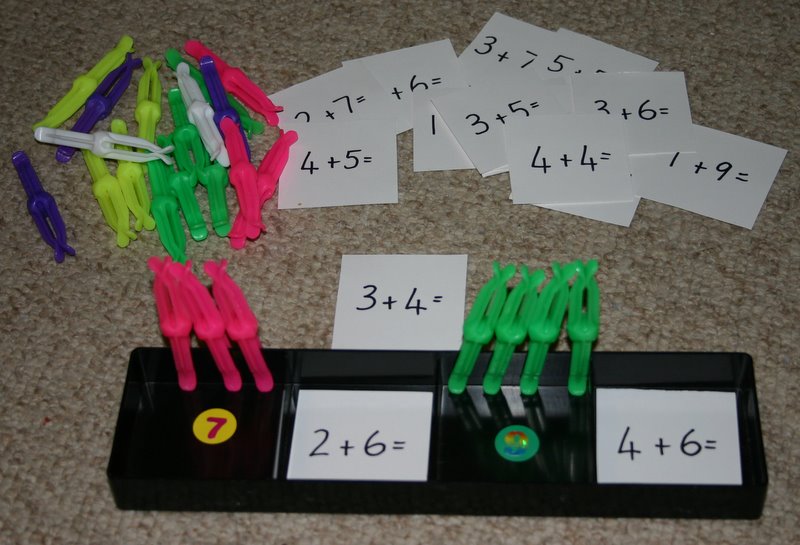
These pegs are labelled with the addition facts and the pompoms serve as the counting material. Once the child has found the answer, the peg is clipped onto the correct segment of the paper plate. It is self-checking as there is only one peg for each segment – any double-ups means that they need to redo those pegs to discover the correct answer. The holder for the pegs is the centre from a used roll of masking tape.cutlery noodle addition
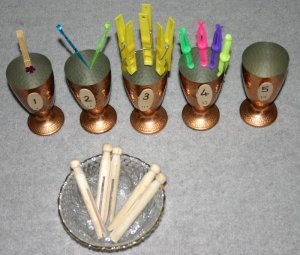
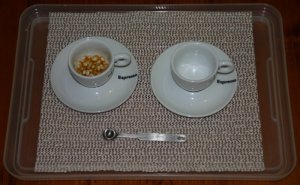
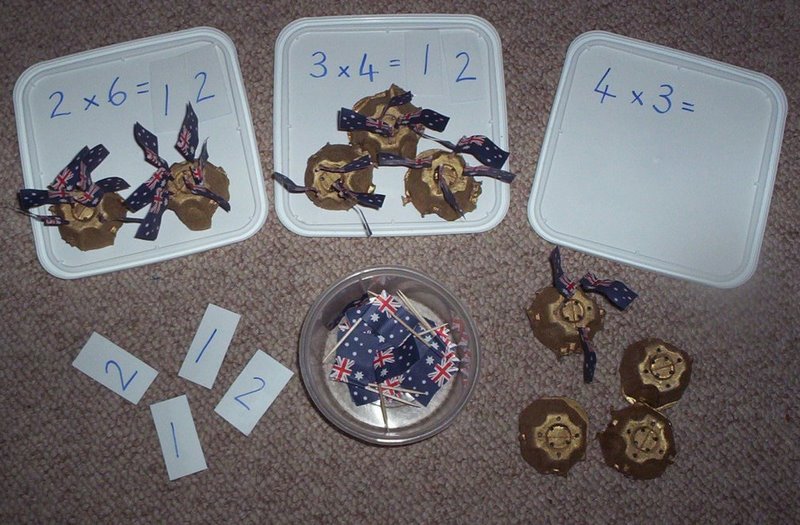
This was a favourite with my children. As always, making up a funny story to go with the activity turned it into something really fun. Those greedy restaurant patrons were at it again and the children had to figure out who’s cutlery was whose and put it into the correct cup. Only one knife, spoon and fork should be in each cup, so again, any double-up means that the child needs to redo the problem. The noodles serve as the counting material.sticker addition red sort trayThis activity is very quick to make. The sticker cards are the manipulatives with problems written onto card strips. Once solved, each strip is placed into the segmented dip tray in top of it’s answer. peg addition black 4 hole trayNumber stickers on the base of the 4 segment tray determine where each problem card is placed. The pegs are slipped onto the sides to count and solve the problem.gold & silver start additionThe silver stars have the problem and the gold stars hold the answers. The child counts the jewels to solve the addition sum and matches the silver star to it’s mate.

Presenting attractive materials and a variety of experiences will make learning these basic skills enjoyable for your child and set them up for success in the future.

Other posts you may find useful:

Montessori tray activities for toddlers

Montessori counting trays 1 to 5

Homeschooling with toddlers and preschoolers

Teaching children to read – where to begin?


Sensory tub ideas for toddlers and preschoolers

sensory tub A teddies IMG_8196

Sensory tubs are great for mat time (blanket time) or as a table activity and are excellent for when you need to school older children, cook dinner, or during any other time when you need your little ones well occupied and absorbed in a worthwhile activity.

They are quick and easy to put together, cheap or free (depending on what you already have lying around the house) and can be used daily as part of your flexible routine for babies, toddlers, preschoolers and even older children. Obviously the materials you present will change according to the age of the child who will be playing with them, with safety always a factor for little ones who may put small items in their mouths.

There is no limit to what you can put into your tubs. Ideally the materials will be open-ended; that is they can be combined and used in a variety of ways.sensory tub trains IMG_8187

Younger toddlers do not have a well-developed imagination and therefore need more hands-on options, rather than pretend play materials. For example, in the trains tub above, I included a variety of scoops and containers to fill, transfer, tip and pour as well as the trains themselves. A young toddler may examine the trains before setting them aside in favour of transferring the stones from container to container. The older children may go straight for the trains and set up a complicated rail system with rocks delineating the tracks and the containers used as sheds for the trains. Another may decide to serve dinner on the silver pie tins or set up a picnic for the trains.

sensory tub trains JIMG_8193

I find that the tubs themselves are not large enough for the children to play within. They like to sort through, put aside what they are not using and generally spread out, so I use a blanket or sheet for them to play on. When play time is finished, the corners of the sheet are lifted up and all the materials can be quickly tipped straight back into the tub without a tedious pack-up session.

sensory box horses jewels IMG_8183

The older girls were practically drooling over this jewel and miniature pony tub as I was putting it together – usually a sure sign it will be well-loved by the younger children as well! Again, a variety of scoops, containers, bottles and boxes with sparkly jewel squares and pebbles. (The kind used in vases or to fill bowls – from the discount shop.)

sensory box sea IMG_8185

Blue and green gem stones, plastic sea animals, shells, bowl, spoons, scoops and empty pill boxes. This tub covers opening and closing skills, spooning, scooping, tipping, pouring (all transferring skills) and could be extended to sorting and categorizing as well as the pretend play options.

sensory tub S jewwels IMG_8192

My youngest daughter used the pony and jewel tub this morning for the first time. She carefully removed all the ponies and put them back in the box before making a picnic for her teddy bear and the 12 disciples (!) with the containers and jewels. The older girls (6 and 8) have already asked to use it later and tell me they plan to set the jewels up as food for the ponies. The beauty of open-ended, attractive materials is that they will appeal to a variety of ages. My 15 month old can barely restrain himself and wants to dive straight in whenever he sees these tubs out. Unfortunately the pieces are just too small for him to use safely.

sensory tubs A teddies IMG_8194

This is the 15 month old’s sensory “tub” this week. He loved it and used the scoop (a large measuring spoon) to transfer from the large basket to the small bowl, filled and stacked the metal cups and filled and tipped out the basket numerous times. Provide a container or two and something to put in and dump right back out again and it will always be a hit with anywhere from an 8 month to a 2-year-old. 12 to 18  month olds particularly love to fill and dump.

For a stack of ideas to fill your sensory tubs,see this post. Many of the other ideas I have posted as table activities, highchair activities or mat time activities would all work in a sensory tub. See pasta play and teddy food play as examples.

Homeschooling with toddlers and preschoolers

Twin's tot school activities

Whether you like to call them Montessori tray activities, tot school, preschool, workboxes, workjobs, shoebox tasks or Ziploc bag activities, providing younger siblings with engaging, educational and worthwhile tasks to do while you homeschool older siblings is vital for a smooth day with well occupied children.

While you can get some schooling done while little ones are napping, I prefer to get the bulk of our formal schooling completed as early in the day as possible when the children (and I) are freshest. Last year we had around an hour while the younger ones were in room time (playpen time for littlies) and we could also use mat time (or blanket time.) Now that we have older children though, this is not long enough to complete all of their workload and the twins are turning 3 so a new era has dawned!

The twins will be “starting school” with the big kids. They will now be included in our morning circle time, followed by table activities before they go off to room time. The list of possible table activity ideas is almost endless but our “school” trays will be more Montessori in style.

As I have done in the past, I have chosen a list of categories for each tray and put one example of each category out on the shelf. When it comes time to update the trays in a couple of weeks as interest declines, I will simply swap out the materials but keep the type of activity the same. (See starting out.) This term our trays are gluing, cutting, stickers and drawing, tong transfer, spooning/teddy play, scooping/teddy play, threading. Duplo copying and water pouring. 

The best thing about this year’s preparation is that in the past I have taken photographs of all our tray activities along the way. This meant that I could simply hand the older children a couple each and ask them to go and get everything in the photo and assemble the activity. I pointed out that this was an opportunity to bless their little brother and sister. They quite enjoyed doing it, especially as I gave them latitude to change the activities a little with different pretty pots and equipment to suit their own tastes. In about an hour we had a whole term worth of trays set up and ready to go. (Plus the extra half hour to put away all the mess that the children created as they were collecting the gear but I wont mention that!)

Teaching toddlers to count: 1 to 5 workjobs and Montessori style tray activities

Here are some more counting activities for toddlers and preschoolers who are learning to count from 1 to 5. If your child has learnt the number order by rote (ie. can count out loud to 5) and is beginning to develop one-to-one correspondence (matching one verbal number to each object being counted) then they are ready to start simple hands-on counting activities like these. You may even like to set out only the numbers 1 to 3 to begin with. If you are new to teaching toddlers how to count, it might be helpful to read this post first.

I ask the children to order the pie tins from 1 to 5 and sort out the golf tees by colour before counting each group and placing them into the correct pie tin. Use a number strip for young children to follow until they know the number order without help.

Kinesthetic learners (and all young children) love the hands-on style of these activities and despite the fact that  this group is far from my favourite set of tray activities, I included them to show you how a quick search around the house will furnish you with plenty of materials to set up your own.

This is one of the first counting activities I introduce. The shapes are sorted by type, matched to the example at the start of the row and counted into the bottle tops. Beginners will often just fill up the bottle tops without having any idea of the numbers, but I simply have them read the number and count the objects as we take them out and pack them away.

Unfortunately this workjob doesn’t photograph well but the shiny silver contact paper and blue jewels are very attractive to little ones. The box comes from a packet of plastic food wrap. The jewels are placed into plastic shot glasses which are numbered from 1 to 5.

I bought these secondhand metal goblets for our pretend play home corner because they are unbreakable. Pegs of many varieties slide nicely over the thin sides. Placing dots under the numerals means that children who do not recognise their numbers can count how many dots there are until they can recall the numeral name.

All my young ones have enjoyed hammering golf tees and other items into these polystyrene foam blocks covered with loose weave hessian-like fabric. The red washers come from a set of many shapes and sizes raided from Grandad’s shed with the numerals marked on them in permanent marker.

Chip and dip trays are handy for many different activities.These wooden numbers came from a baby puzzle toy and the items are an eclectic assortment from my Montessori materials drawers.

Pegging is good for fine motor development. The child counts the number of feathers on each peg and matches the peg to the correct number of dots on the card circles left from used sticky tape rolls. The box is just the storage for the feathers and rolls.

These beads and frame are a commercially produced toy that I picked up secondhand for a couple of dollars. Keep an eye out for this kind of material at op shops and swap-meets. The tiles are from an old game I bought for $2 at a secondhand store. I threw out the game and just kept the tiles.

Another commercially produced toy picked up for a couple of dollars with baby food jar lids for the numbers.

Scooping tray activities for toddlers and preschoolers

Scooping is one of the easiest Montessori style tray activities for toddlers and can be introduced at the same time as they are perfecting their spooning skills during meal times – giving them a little extra practise when spills are not so difficult to clean up!

Start with large, non-slippery objects that fit easily into a scoop (see mega marbles) and move to more fiddly materials like the popcorn or rice examples below. All you need is two containers (one to  to scoop from and one to scoop into), something to scoop with (spoon, scoop, ladle, etc.) and something to scoop (pompoms, noodles, rice, jewels, marbles, beads, dried beans, pasta etc.)

Have a look through your art and craft supplies, kitchen cupboards and junk drawers and you will be surprised at what you can put together in just a few minutes.

These pompoms are scooped into a plastic chocolate container insert with depressions in it. The scoop comes from a washing powder container.

This is a piece of packing foam that has indentations all over it; perfect for filling with marbles. The scoop is a pasta spoon from a child’s cooking set.

Dry popcorn kernels in espresso coffee cups with a 1/2 teaspoon measuring spoon.

Montessori trays are traditionally presented with the material to be scooped on the left hand side to help with left to right directionality for later reading and writing skills.

Green split peas are scooped from bowl to bowl.

Coloured rice is a very attractive scooping material.

When my toddlers were older and no longer finding simple scooping activities very interesting, I gave them this tray with a variety of containers to scoop, pour and tip with. They loved it.

Activities to make for babies and young toddlers

Trying to find interesting activities to keep older babies and young toddlers interested and focussed for any length of time can be a battle, but it is one that is worth persevering with. If you spend the time training your young children to sit, focus and concentrate and extend this time as they grow, you will be teaching them the self-control that is vital for all learning later. Not to mention the fact that you can go out to a friend’s house, to a restaurant, a school assembly or any other public event and take your child along, with the peace of mind of knowing that you will be able to enjoy some uninterrupted time in an adult situation. Toddlers need to be taught hand, voice and body control and this can begin at a very young age.

Here are a few ideas for home-made or readily available activities you can give to an older baby or young toddler during times where they are required to stay in a set boundary and play with the toys you have supplied (e.g. mat time (blanket time), room time, playpen time, highchair time and table time.)

Even quite young babies will enjoy pulling these dolly pegs out of the holes in the tissue box and carefully inserting them back in again. If they are pushed all the way in, the hole on the bottom of the box allows the child to pull the peg out from underneath. Posting and small spaces activities are great for developing fine motor control.

Stacking and unstacking objects is fascinating for toddlers. I was given these melamine plates for Christmas and my twins used them over and over again.

Cooking like Mummy is always popular. Go through your play food and cooking equipment and make up little sets. Don’t forget your kitchen junk drawer, pots and pans and any other smaller kitchen equipment that toddlers can safely use. Add small dolls and teddies for toddlers to feed.

My plastics are stored in a crate which I can plop out on the floor for little ones to unload and sort through. Stacking and unstacking, trying on lids and just exploring it’s contents is very absorbing. Perhaps you have a suitable cupboard that you can designate for young children to access while you are working in the kitchen.

I had trouble finding reasonably priced magnets that very young children could easily grasp. The flat, flexible style of magnet are not good for babies because they have trouble getting them off and end up peeling the edges back. I went to a $2 shop and bought 4 wooden jigsaw puzzles and a packet of strong round magnets. I glued the magnets on the back of the puzzle pieces and got a great, economical set of animals for the fridge, whiteboard, or metal biscuit try.

This very large bottle is a great posting container. Pegs, popsticks or any other thin object can be pushed through the lid hole and pulled back out through the open slot in the front. The edges are taped where they were cut to cover the sharp edges. I originally saw this used as a water pouring activity with a funnel in the spout and a large flat tray underneath to catch spills. The children were scooping the water out from the large front hole and tipping it back into the funnel at the top.

These oversized popsticks are placed into slots in the lid of the icecream container and can be pulled out and pushed back in.

A set of plastic chopsticks has been used in many different ways over the years in my house. Another small spaces activity; poking them into the holes in the side of this tissue box

I glued a bunch of cardboard tubes together for the little ones to put the chopsticks in and out of.

This quoits set amused the babies for quite a while as they took the rings on and off.

This Velcro fruit makes a great ripping sound as you pull it apart and stick it back together. Include the wooden knife for older toddlers to practise their early cutting skills.

I used some polystyrene foam covered in wide weaved fabric (burlap I think?) for this early hammering activity. (The foam has a tendency to crumble with use and I didn’t want any of the young children being able to get it into their mouths.) Golf tees and a selection of washers to bang into the foam have been well used by all of our children.

Teaching toddlers and preschoolers to glue


There is a lot to be said for a beautifully organised and sorted collage tray. All those colourful pieces just waiting to be used in so many creative ways are so attractive to toddlers and preschoolers; in fact children of all ages.
One of the easiest ways to keep collage materials sorted and ready for gluing  is a party dip platter like the one in the photo above. The compartments hold a number of different materials for children to choose from and the lid slots on over the top and seals with a turn to stop all those bits and pieces ending up on the floor.

This tray was $4 at a recycled boutique  (Good Sammy’s) so keep your eye out in second-hand stores and swap-meets or perhaps even Grandma’s plastics cupboard. I use the centre space for a jar that is filled with glue and re-sealed with it’s own lid once the activity is finished. If you include items like pasta, fabric and shells, make sure you include white glue (PVA) or children will be continually frustrated with pieces falling off their craft. Glue sticks are less messy but really only useful with paper and cardboard.
I personally am attracted to the organised collage style, however after an activity day at our local park a couple of years ago I had my eyes opened to the world of what I like to think of as “bargain bin” style gluing. You know the clearance bins they have in the shopping centres with a jumble of odds and ends for bargain basement prices? The ones that scream at you to have a search through because you just might find the bargain of the century lurking underneath the pile. The collage they put out at the park day worked just like this for the children. It was simply a box of assorted stuff in one giant jumble. You should have seen them hunting through it like treasure seekers. They scrabbled happily through, exclaiming with delight when something new and sparkly was discovered.

They seemed to have a bizzare attraction to the jumbled assortment of goodies and enjoyed the gluing just as much as when presented with my neatly sorted dip tray. Consequently, we now have both. When the dip tray gets jumbled and messy, I simply tip it all into a small crate with a lid and re-fill the compartments in the dip tray with new materials. That way both collections are continually changing.

For toddlers who are just beginning to learn how to glue (see cutting, gluing and stickers here), try adding a small drop of paint to the glue to colour it and make it easier for them to see where they have spread the glue. Focus on training them how to use the materials, as well as how to:

  • put a plastic tablecloth, gluing mat, placemat or newspaper on the table before they begin.
  • wear a painting shirt, smock or apron.
  • wash the brushes after use and return to their place to dry.
  • sort unused materials back into the correct compartments (a skill in itself.)
  • place wet pictures and crafts in an appropriate place to dry.
  • return the tray to the cupboard or shelf.
  • spray and wipe their workspace (Provide a spray bottle and cloth or sponge for this purpose.)
  • wash themselves up before removing their painting shirt.
  • hang their painting shirt up to dry.

Montessori style toddler activities: transferring and one to one correspondence

Egg cartons are a cheap and readily accessible option with clear depressions for each object. A large object to transfer such as these stones or wooden eggs will keep a toddler well occupied.

One-to-one correspondence is an important foundational maths skill. Here are some ideas I have used with my older babies, toddlers and into preschool years.

What is it?

  • Saying one number to one object as you count (therefore the “one to one” correspondence.)
  • Children often begin learning to count by saying numbers out loud while pointing or touching objects, without those numbers actually matching up with the objects being counted.
  • Children also count the same object more than once or skip objects entirely.

    These super sized marbles are a favourite material in our house, even for the older children. They fit perfectly into this mini-muffin tray.

    Making activities:
  • One to one correspondence activities should be self-correcting; there are exactly the correct number of objects for the receptacle. Any left over or running out before all the spaces are filled signals to the child that there has been an error.
  • Start with large, non-slippery objects that fit easily into a scoop or are transferred by hand and move on to activities that require greater fine motor control.
  • Even older babies can experiment with one-to-one correspondence. Babies love to put things in containers and tip them out again. A freezer popsicle tray is fabulously enthralling for a child at this stage. They work especially well if no more than one object can fit in each segment, but this is not essential.

Popsicle tray and wooden dolly pegs. It’s surprising how something this simple can hold a young child’s attention.

A basic activity for babies.

Extending activities:

  • Keep interest by changing the way objects are transferred; by hand, with  spoons, scoops, tongs then tweezers.
  • Change the material to be transferred; stones, pompoms, pegs, jewels, plastic animals or anything else you can think of. Keep in mind the age of the child and be wary of choking hazards.
  • Change the receptacle used; bowls, baskets, tins, containers, iceblock trays, egg cartons, jars or any other container with a definite number of depressions.

Pompoms come in many different shapes and sizes and are a safe material for little ones. The worst mine have ever done is suck on them or pull them apart.

Using their hands to transfer large, easily grasped objects is a great beginning for babies.

This tray came out of our fridge. It is meant to hold eggs but to my knowledge has never actually done so!

Be careful with jewels. They are very attractive but also feel nice to suck and babies and toddlers do tend to out them in their mouths.

For older children using small objects that require greater fine motor control adds a little more challenge. Combining one-to-one practice with beginning counting is the next step.