Preschool at our house: Workbox system for 5 year olds

IMG_1612

Here is the latest workbox style arrangement for our 5 year old preschoolers which will allow them to get the direct instruction from me that they need as they learn basic reading and writing skills, while at the same time having some degree of independence in their other work. I have always invested some time in one-on-one teaching at this age because helping each child to become a proficient reader is one of the keys to independent learning and self-educating later on (one of my goals for all my children.) The children have access to plenty of creative play opportunities and lots of great hands-on learning tools at other times in the day but this morning period is slightly more “bookish” as we step into more formalised learning.

pp schedule

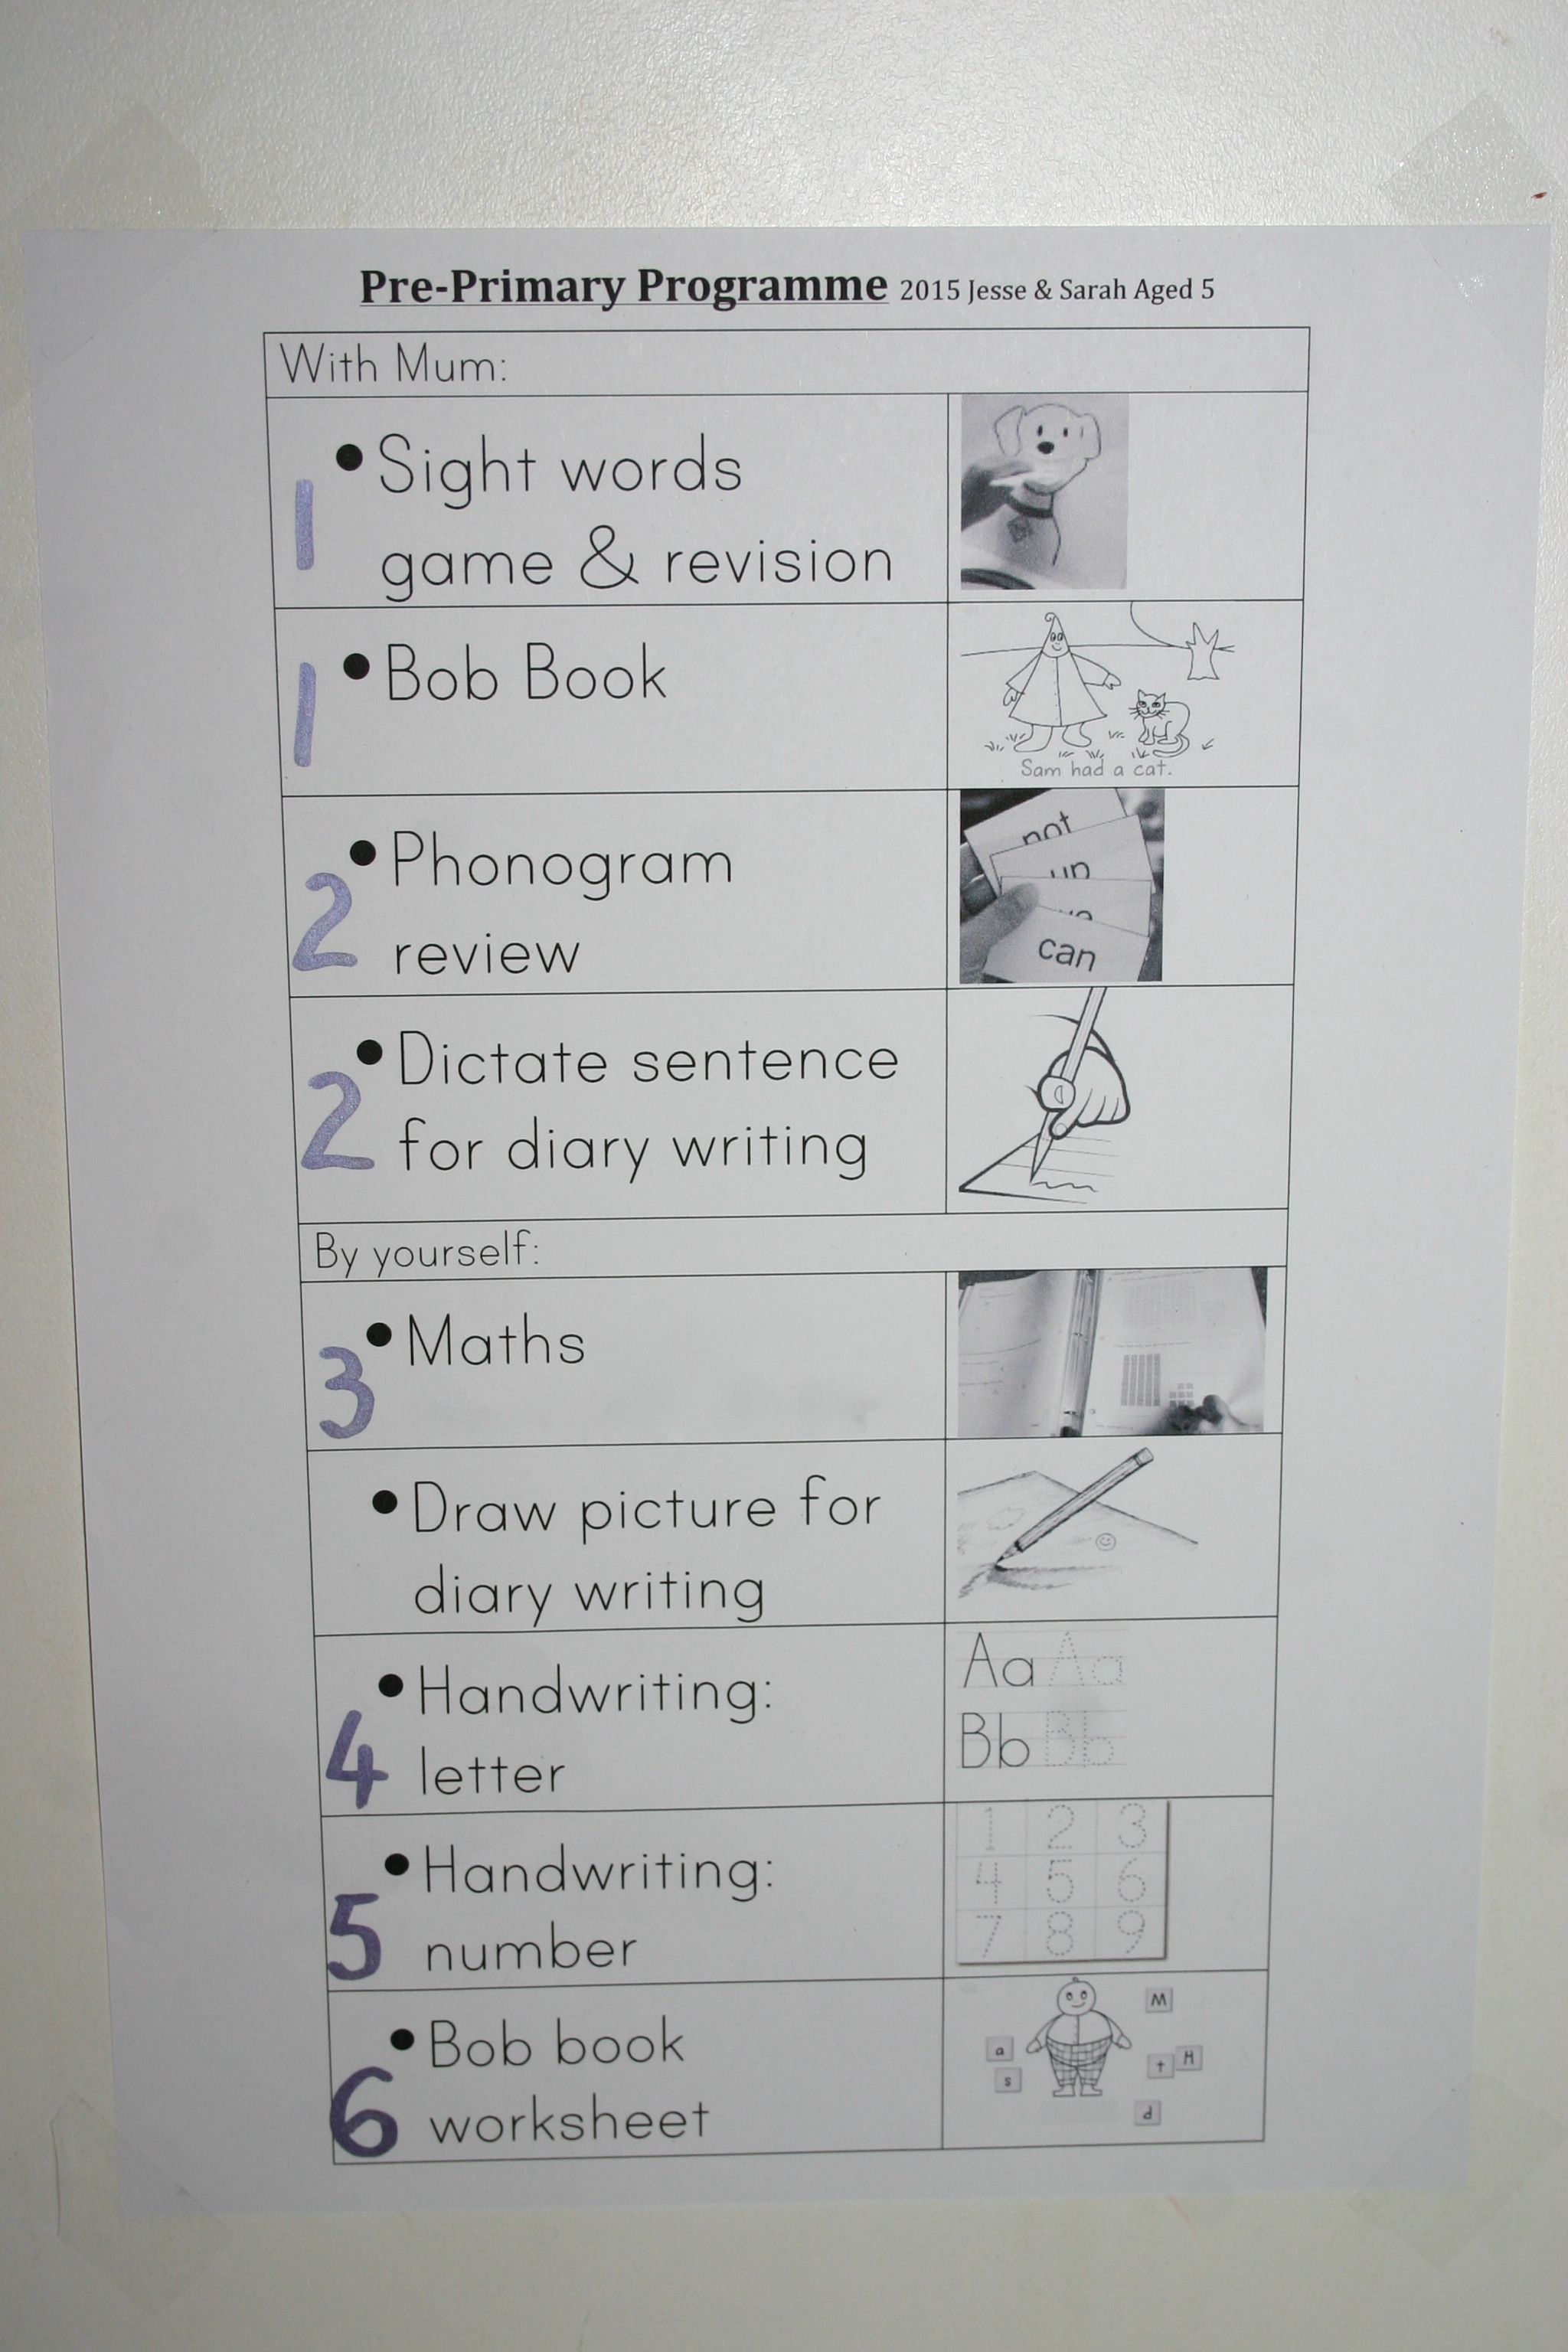
My older girls (7 and 9) both work from a written schedule for several reasons; they know exactly what to do, when to do it and how much they need to do before they are done for the day. My 11 year old son also works from a schedule, but is free to decide the “when” for himself, having shown responsibility in managing his time in the past. The twins (5 years) have a pictorial schedule to gently ease them into a more independent role in the future but don’t really need it because their boxes are numbered and they are under my direction anyway. (It’s more so that I can keep track of what they are supposed to be doing!)

I researched workbox homeschooling several years ago and most of the examples I found on the web involved nightly or at least weekly changing of the contents. I knew that wasn’t going to work for me so I devised a simple system that only needed to be changed out about once a month. (See details here.) There will be some items in the boxes that needs to be updated more regularly (Sight words as they are learnt for example) but this will require minimal effort as the sets of words etc. that I need are all ready to go.

Some advice that I always give beginner homeschoolers, especially those with a large family, is to set their homeschool up so that  it will continue to run without them as much as is possible. Life intrudes; an unexpected visitor, an unscheduled phone call, the baby is sick and on and on. Set things up so that you are not required to be “teaching” directly all the time or the pace may be too hard to keep up. With only one or two children you may be able to do it but not with the number of blessings we have!

So.. what’s in the boxes?

IMG_1614

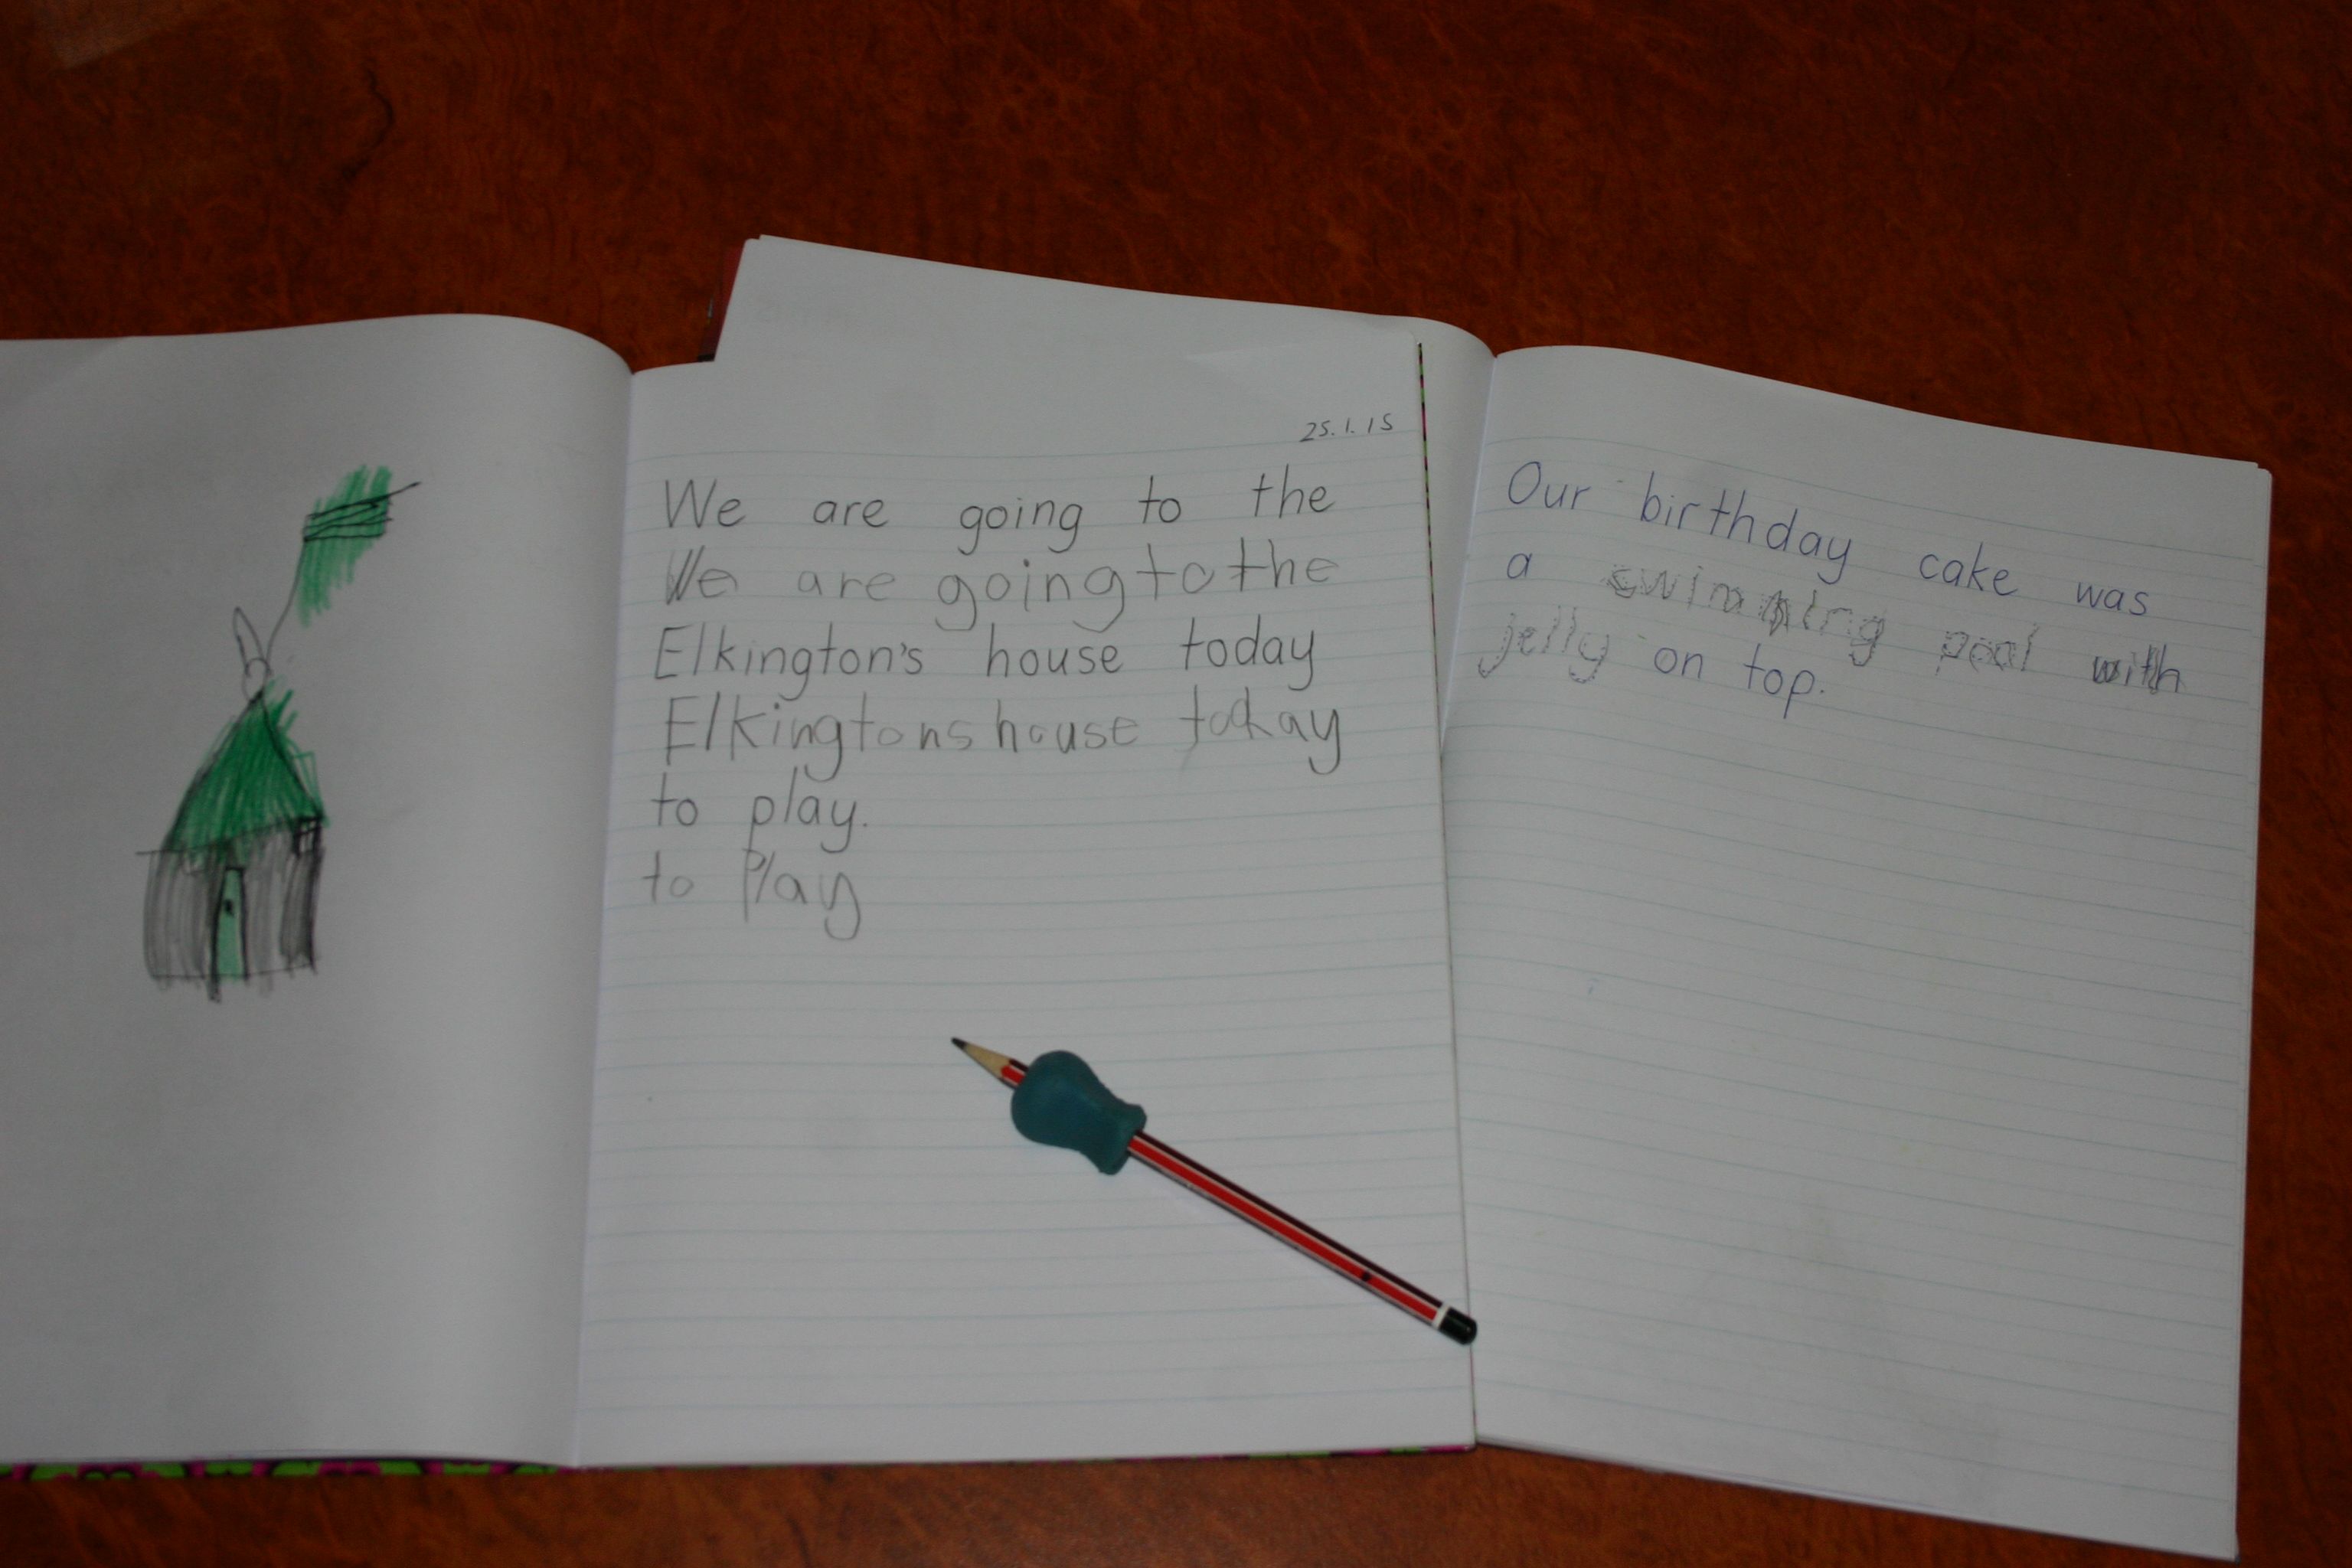
Daily diary writing (See full explanation here.)

IMG_1616

Bob Books and a file folder game to practise sight words. As the child chooses a word it is read and fed to Mugs the dog through the hole in his mouth. (See this post for how to teach children to read and this one for some info on beginner readers.)

IMG_1617

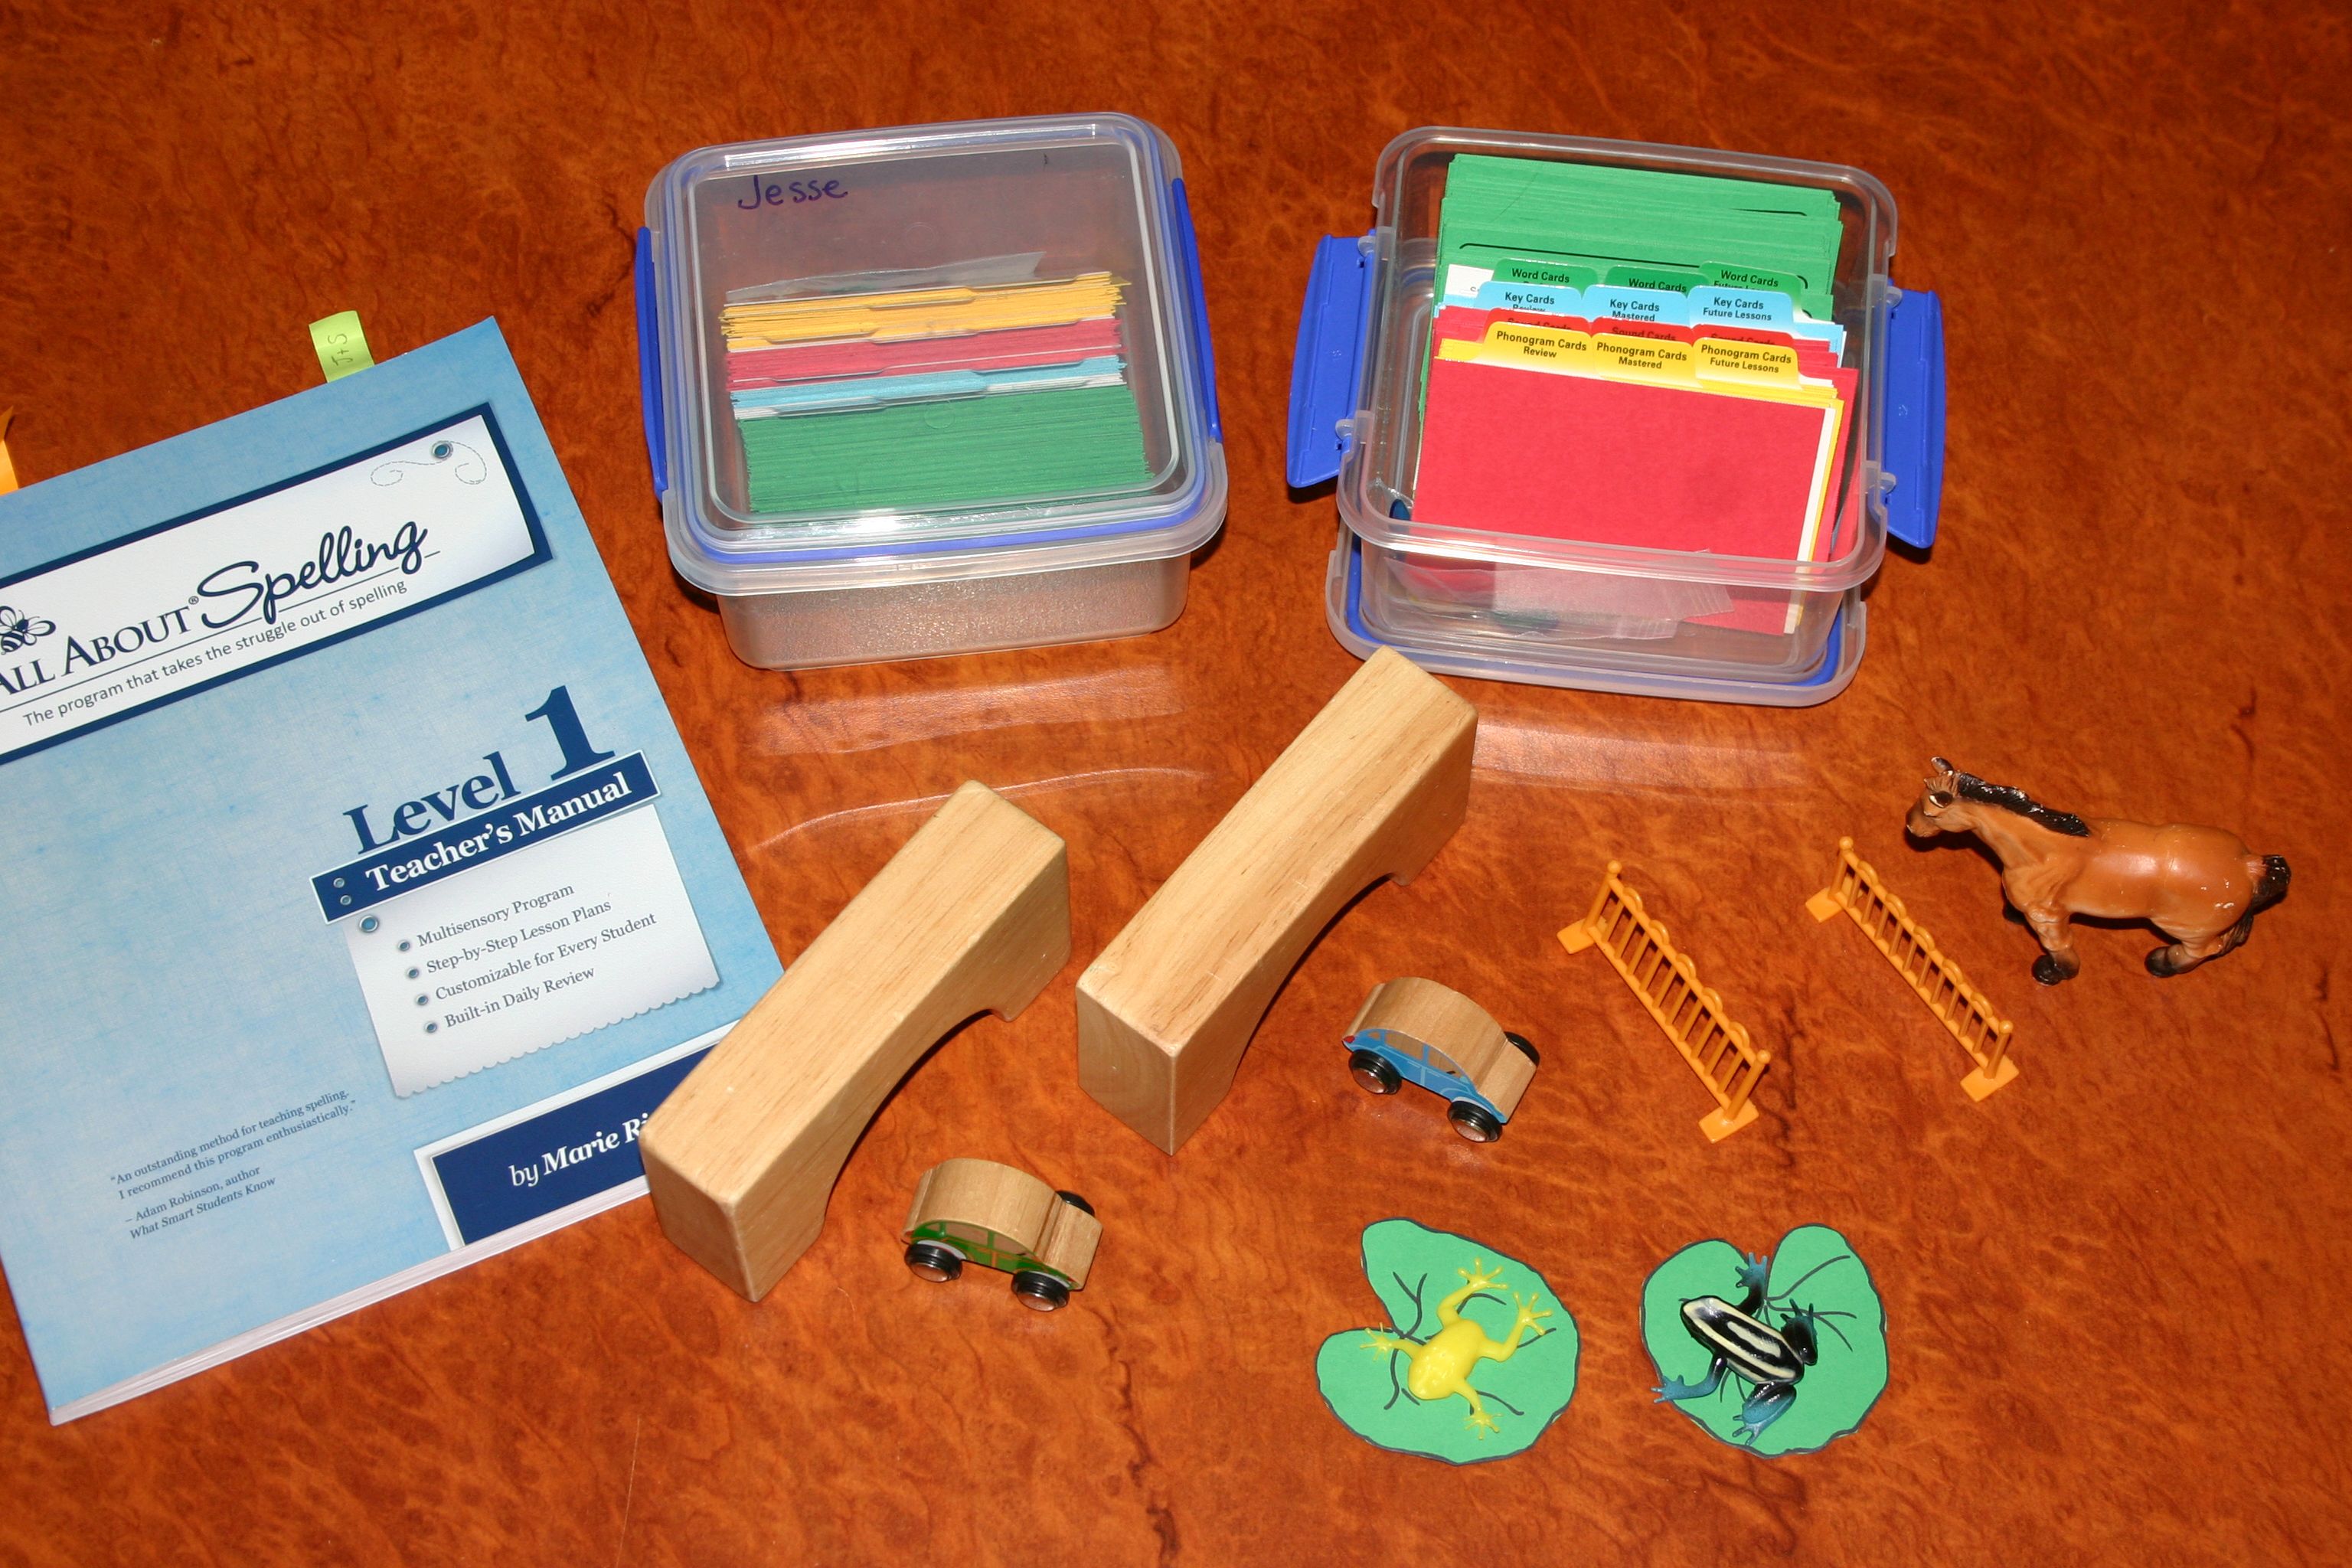
Segmenting words game based on All About Spelling level 1. I am using this programme as a rough guide at this stage. We will get into it more next year but for now our activities are loosely base around the progression in this book which is very thorough. We are using the flip boxes to review the single sounds we already know before moving on to more complex phonograms.

IMG_1618

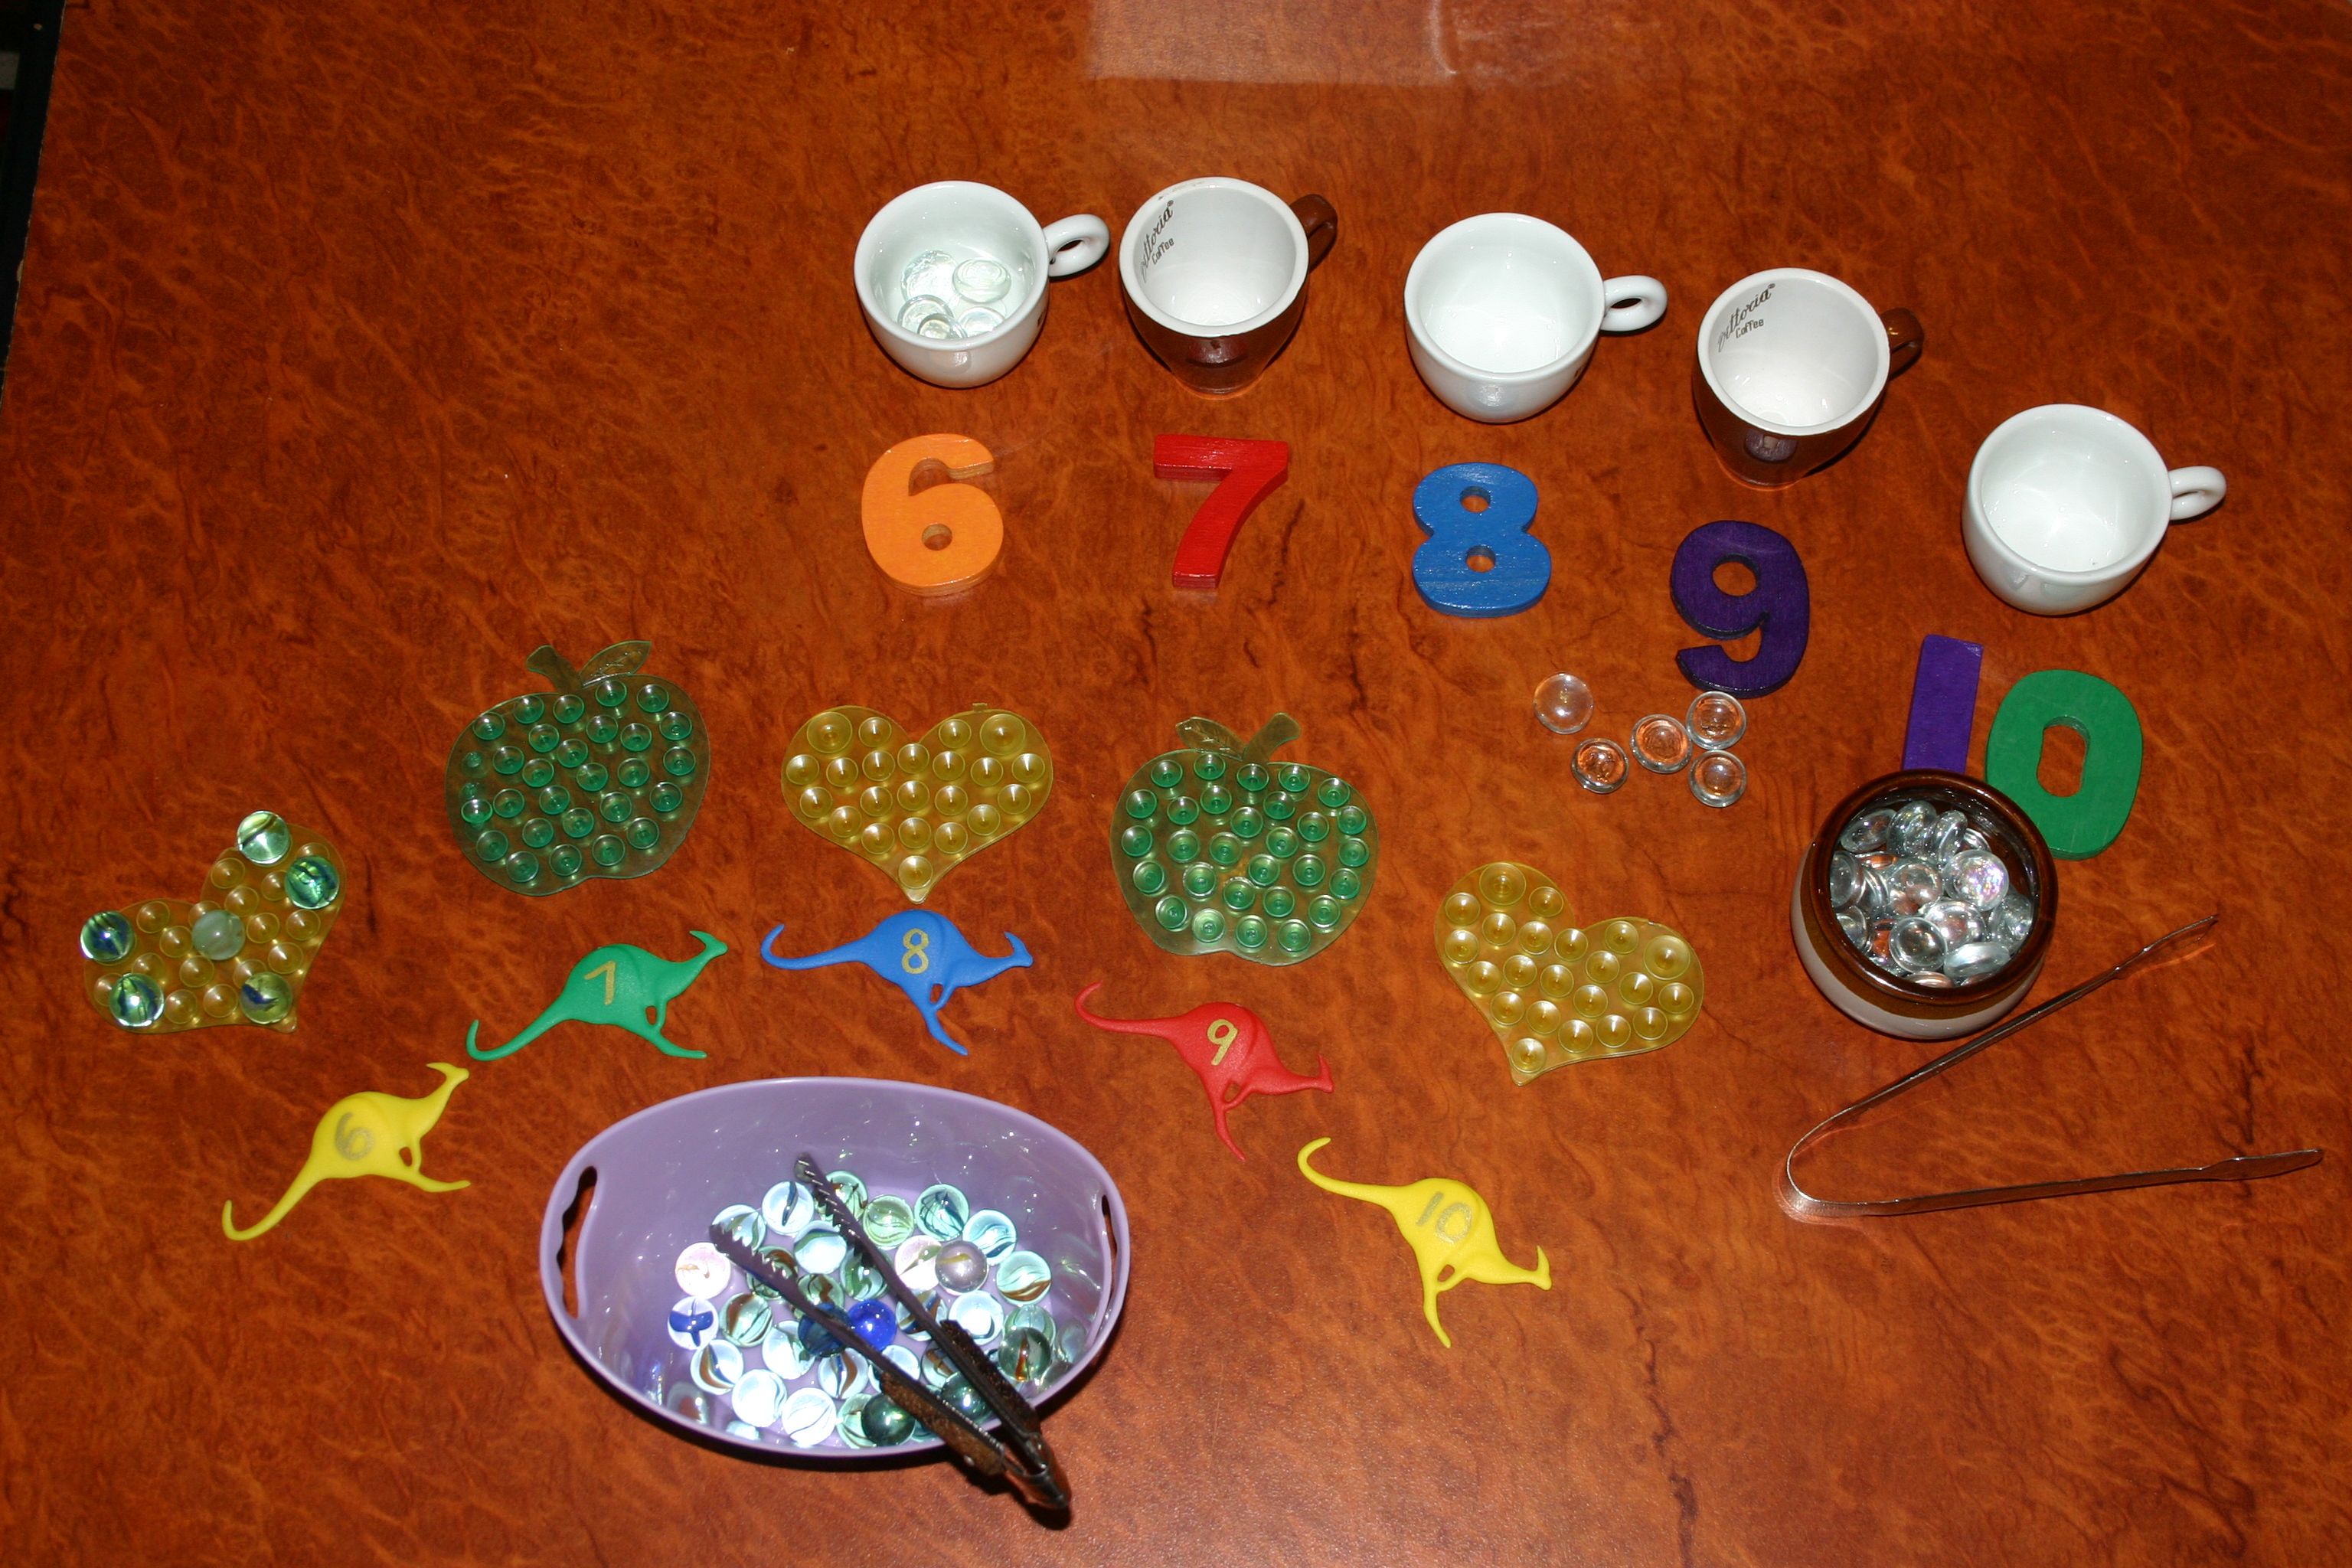
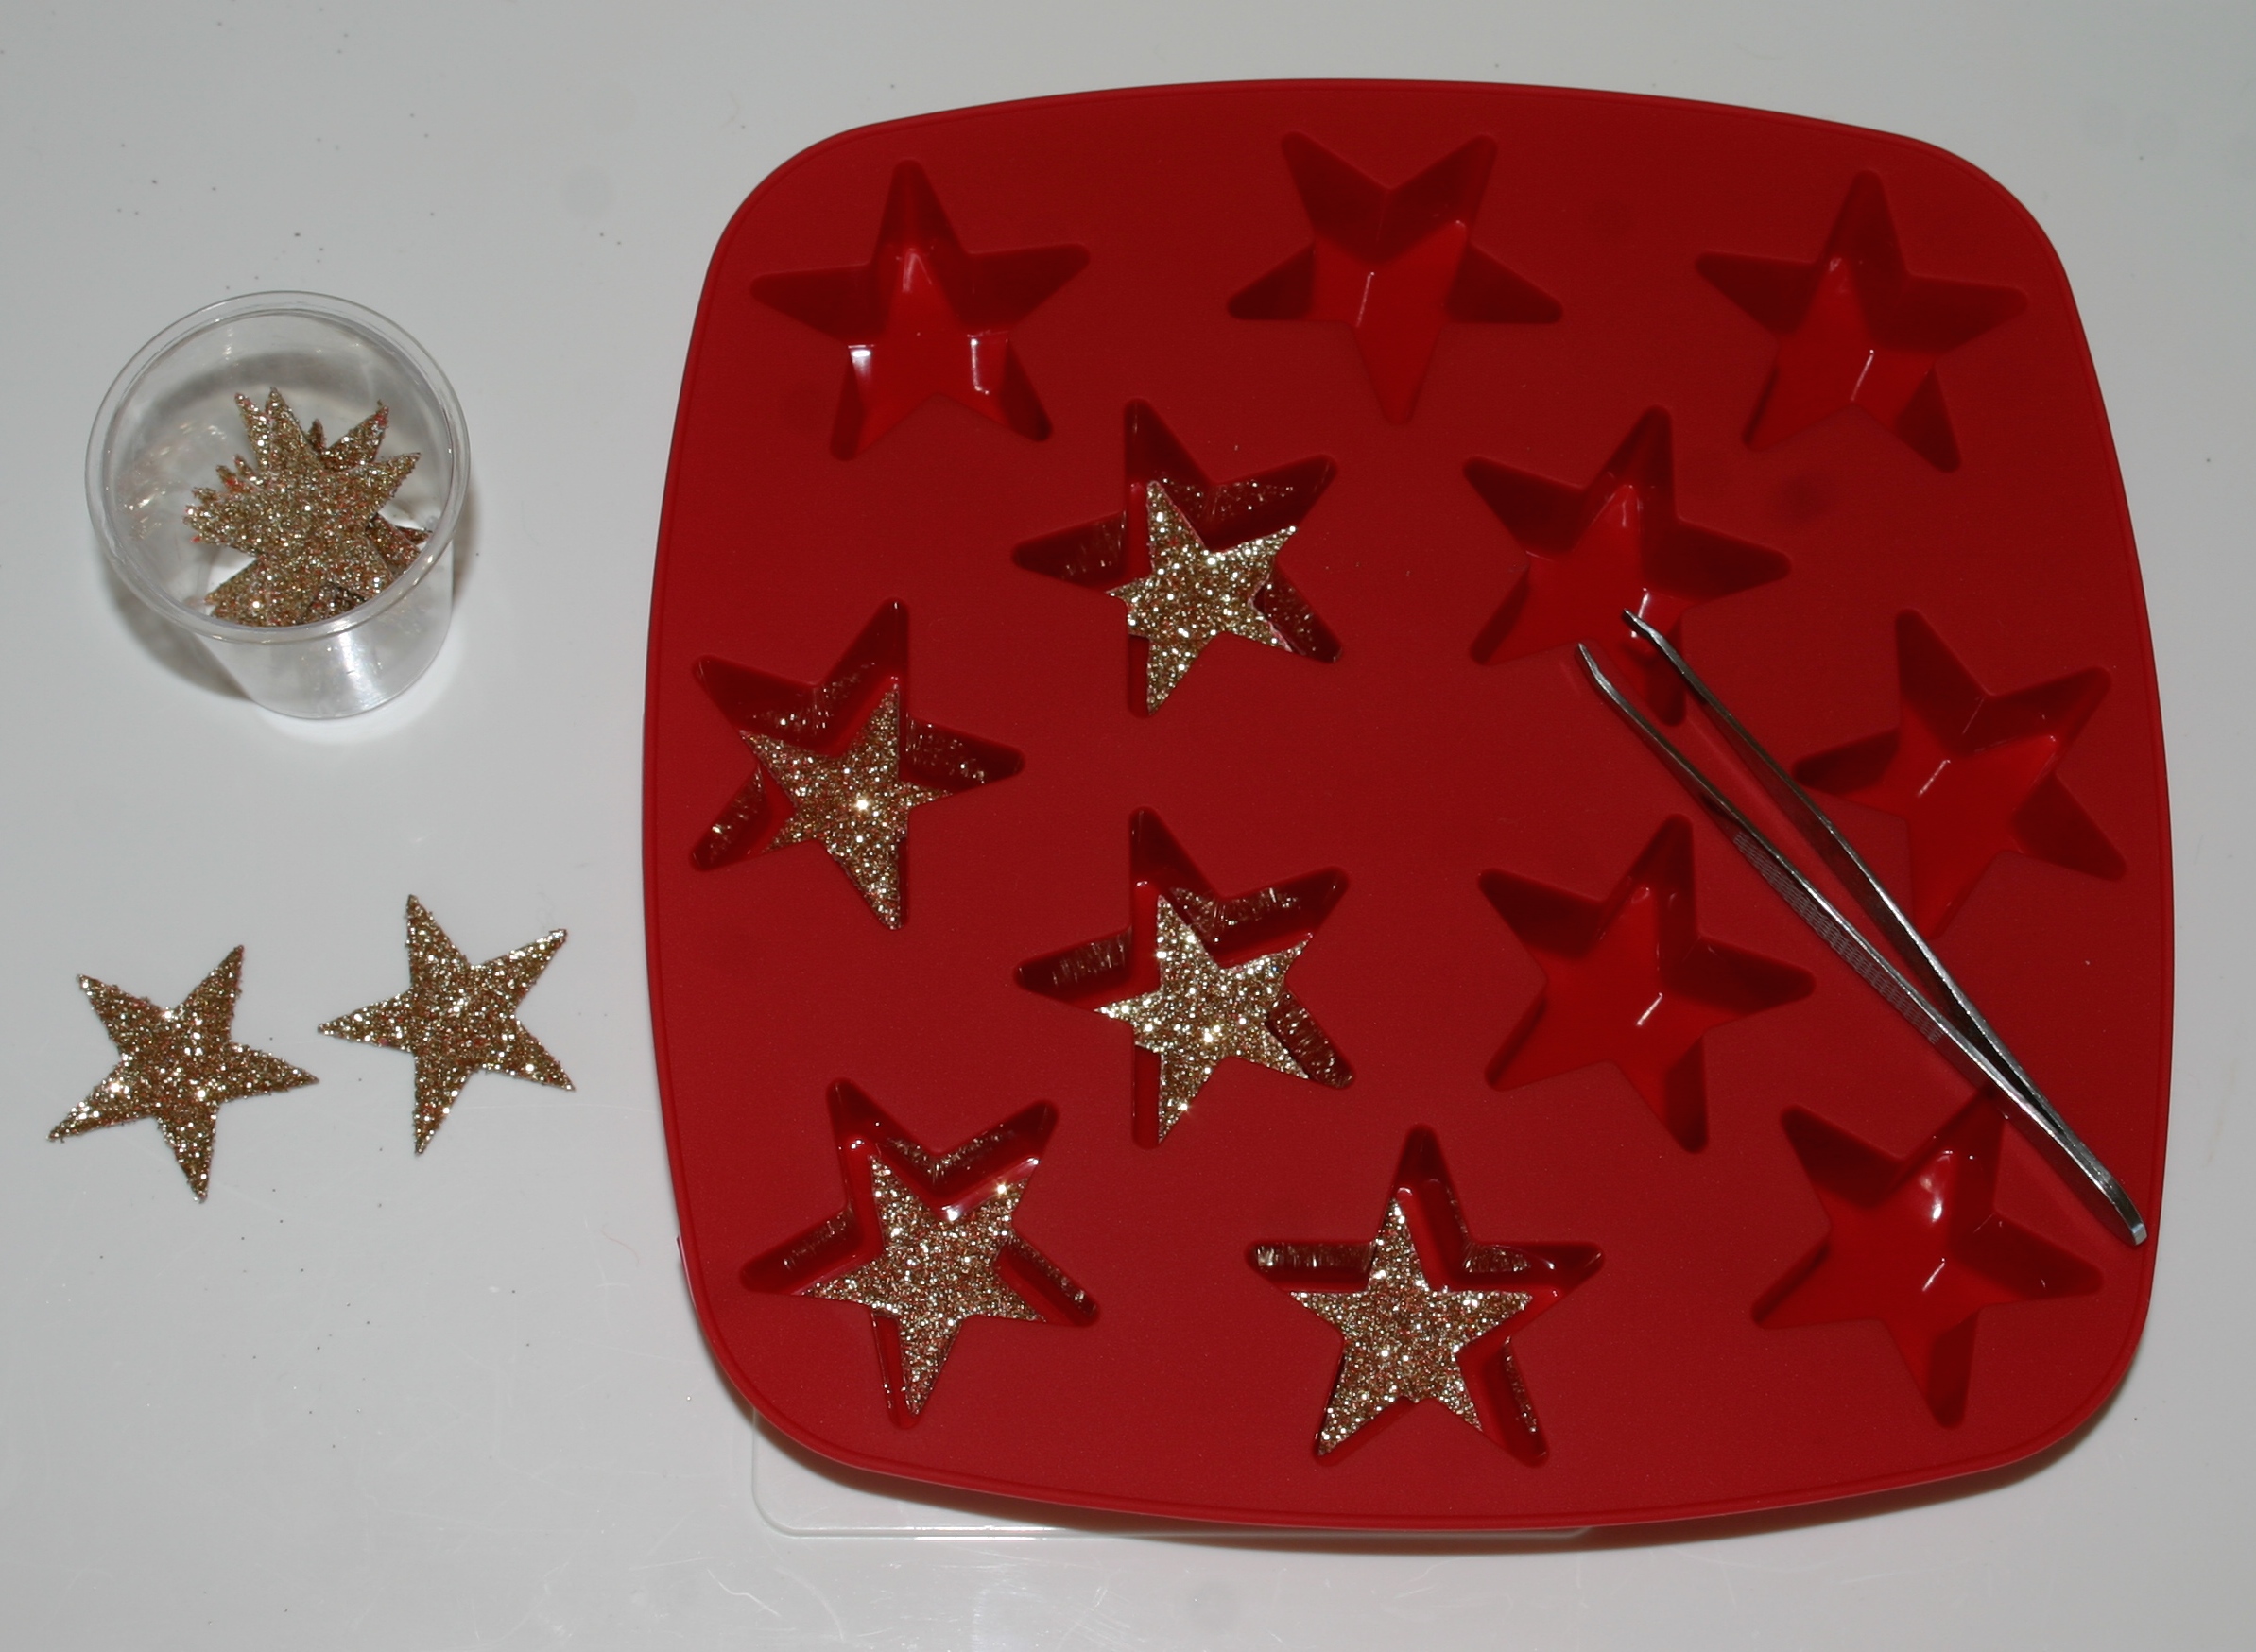
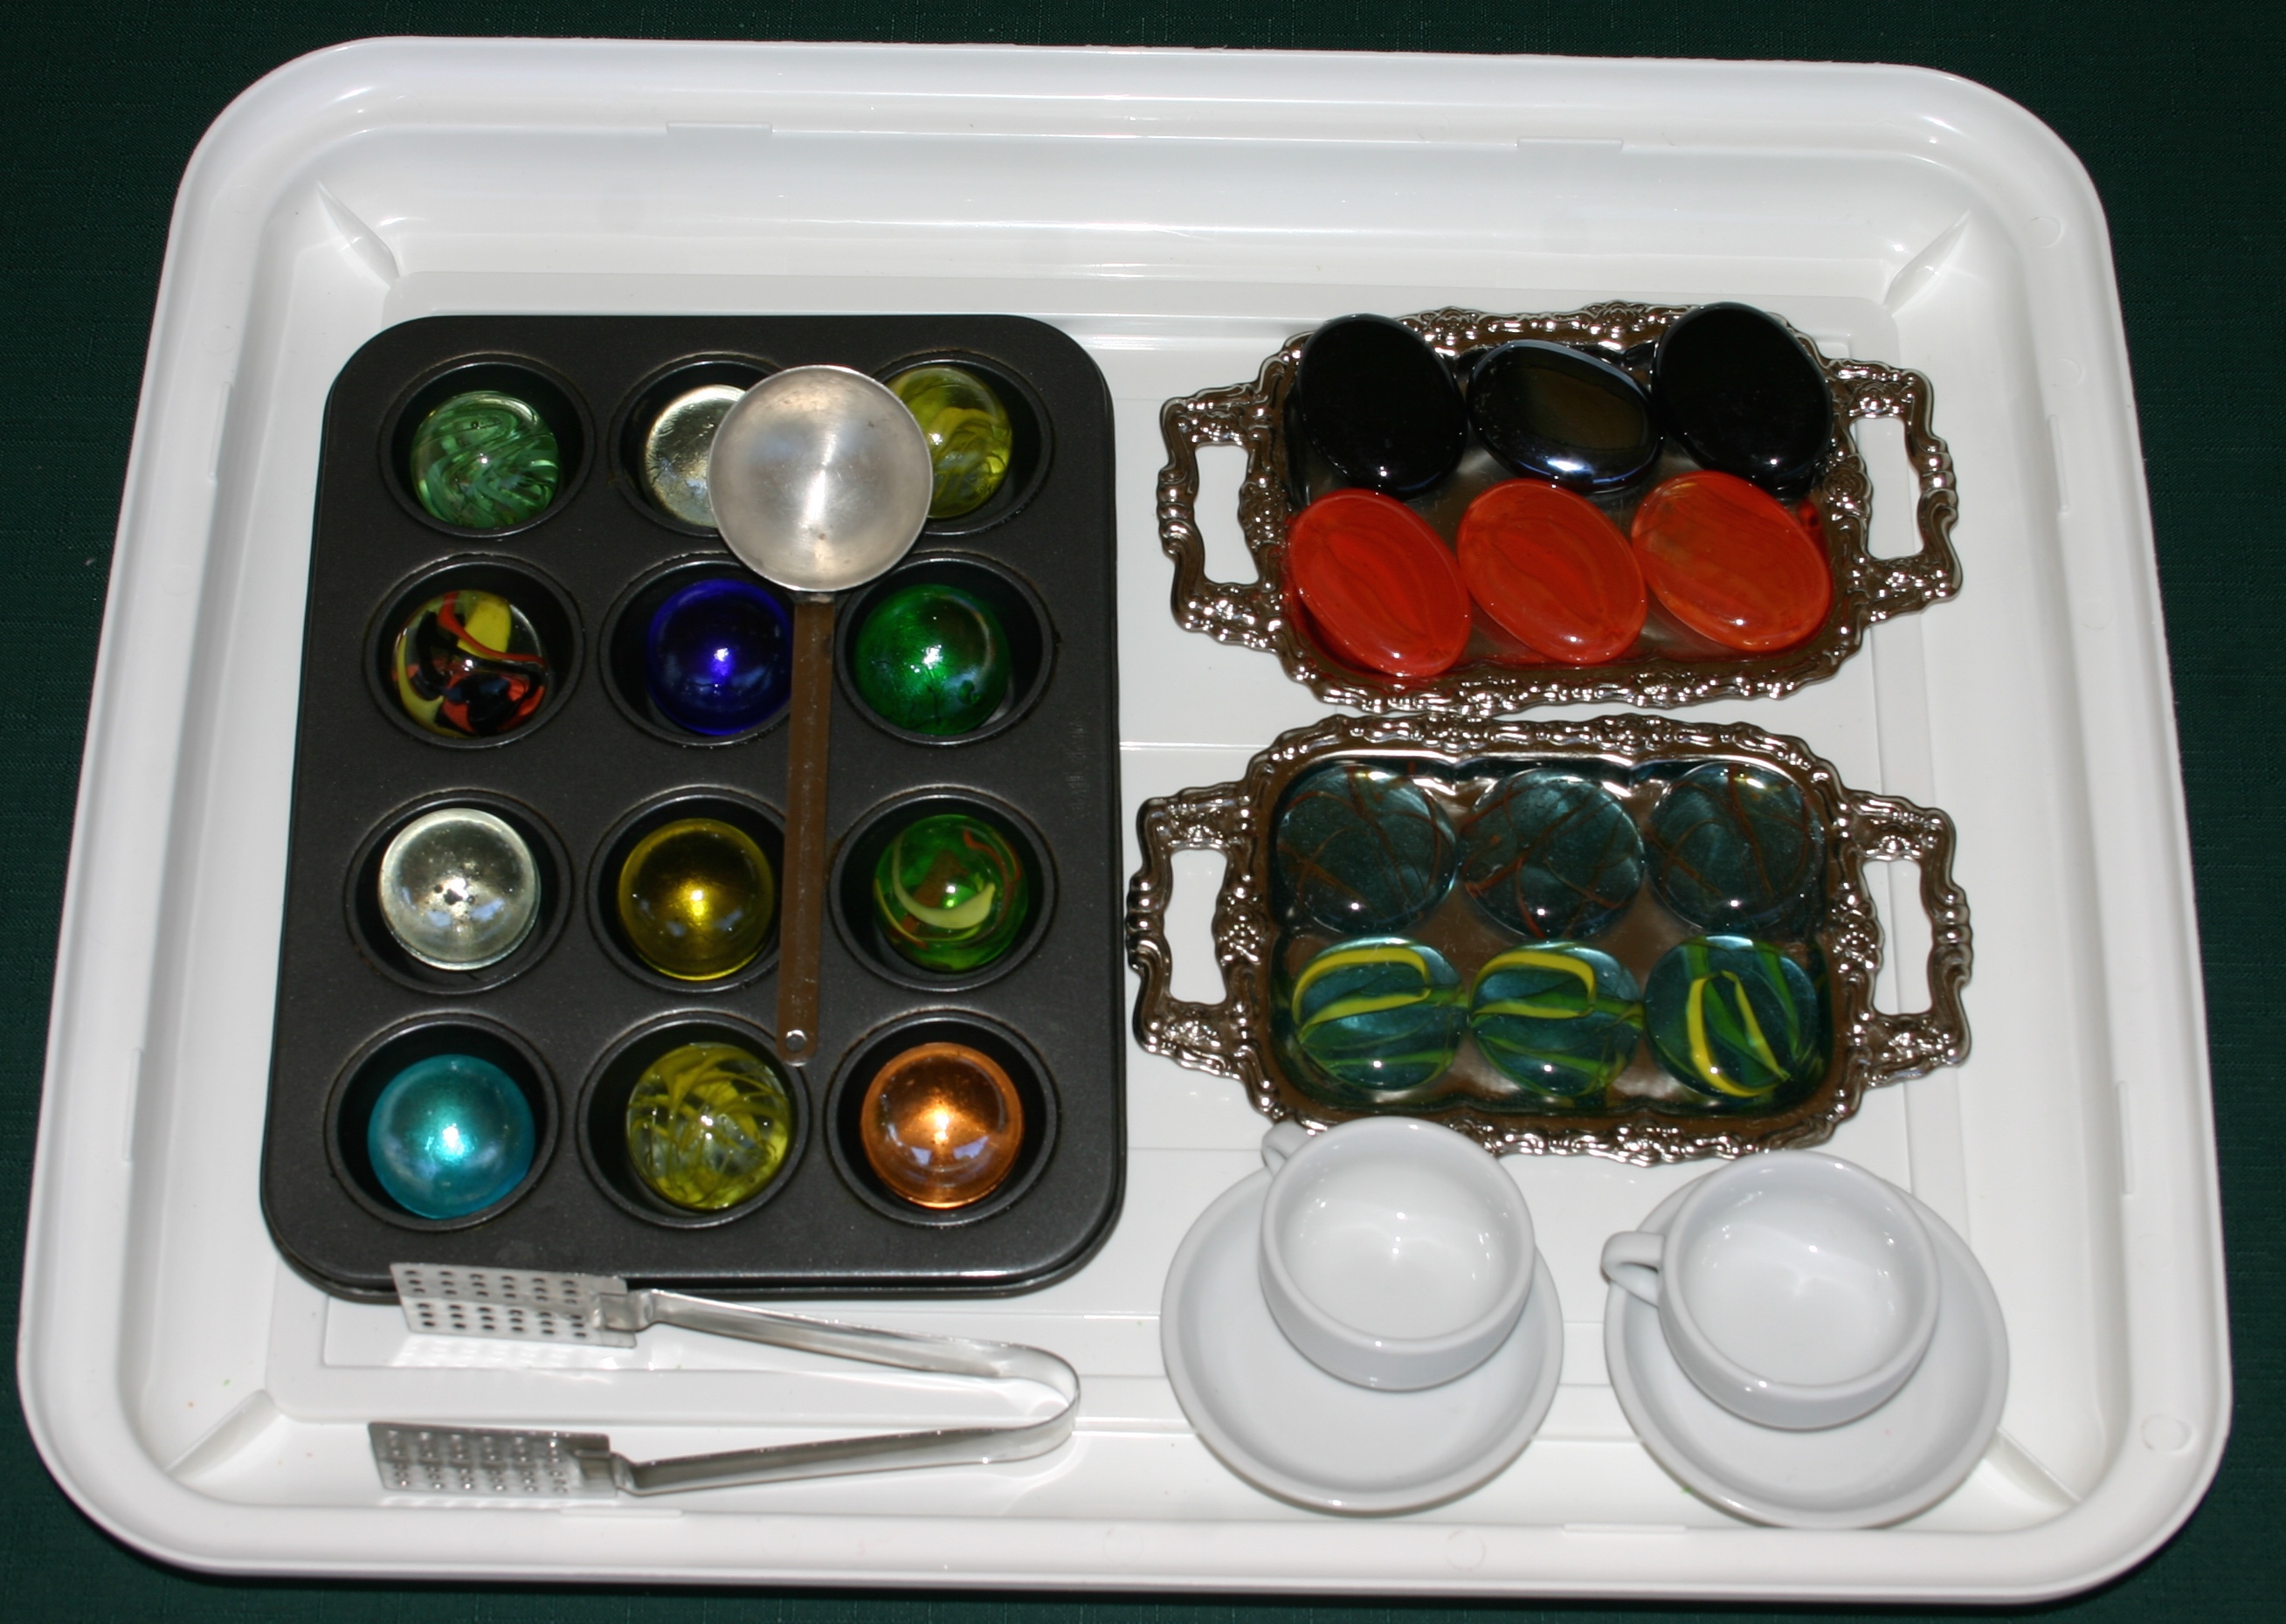
Montessori style counting activity tray. Developing one-to-one correspondence is crucial before any real maths skills can be developed and these simple counting activities give heaps of practise while also working on fine motor skills. In the top activity the expresso cups are set out with the numbers in order from 6 to 10 and the child uses the tongs to add the correct number of sugar lumps to each cup. In the second activity the small tongs are used to transfer the correct number of marbles to the suckers on these soap holding shapes – the kind that suction onto your sink to stop the soap slipping away.

IMG_1619

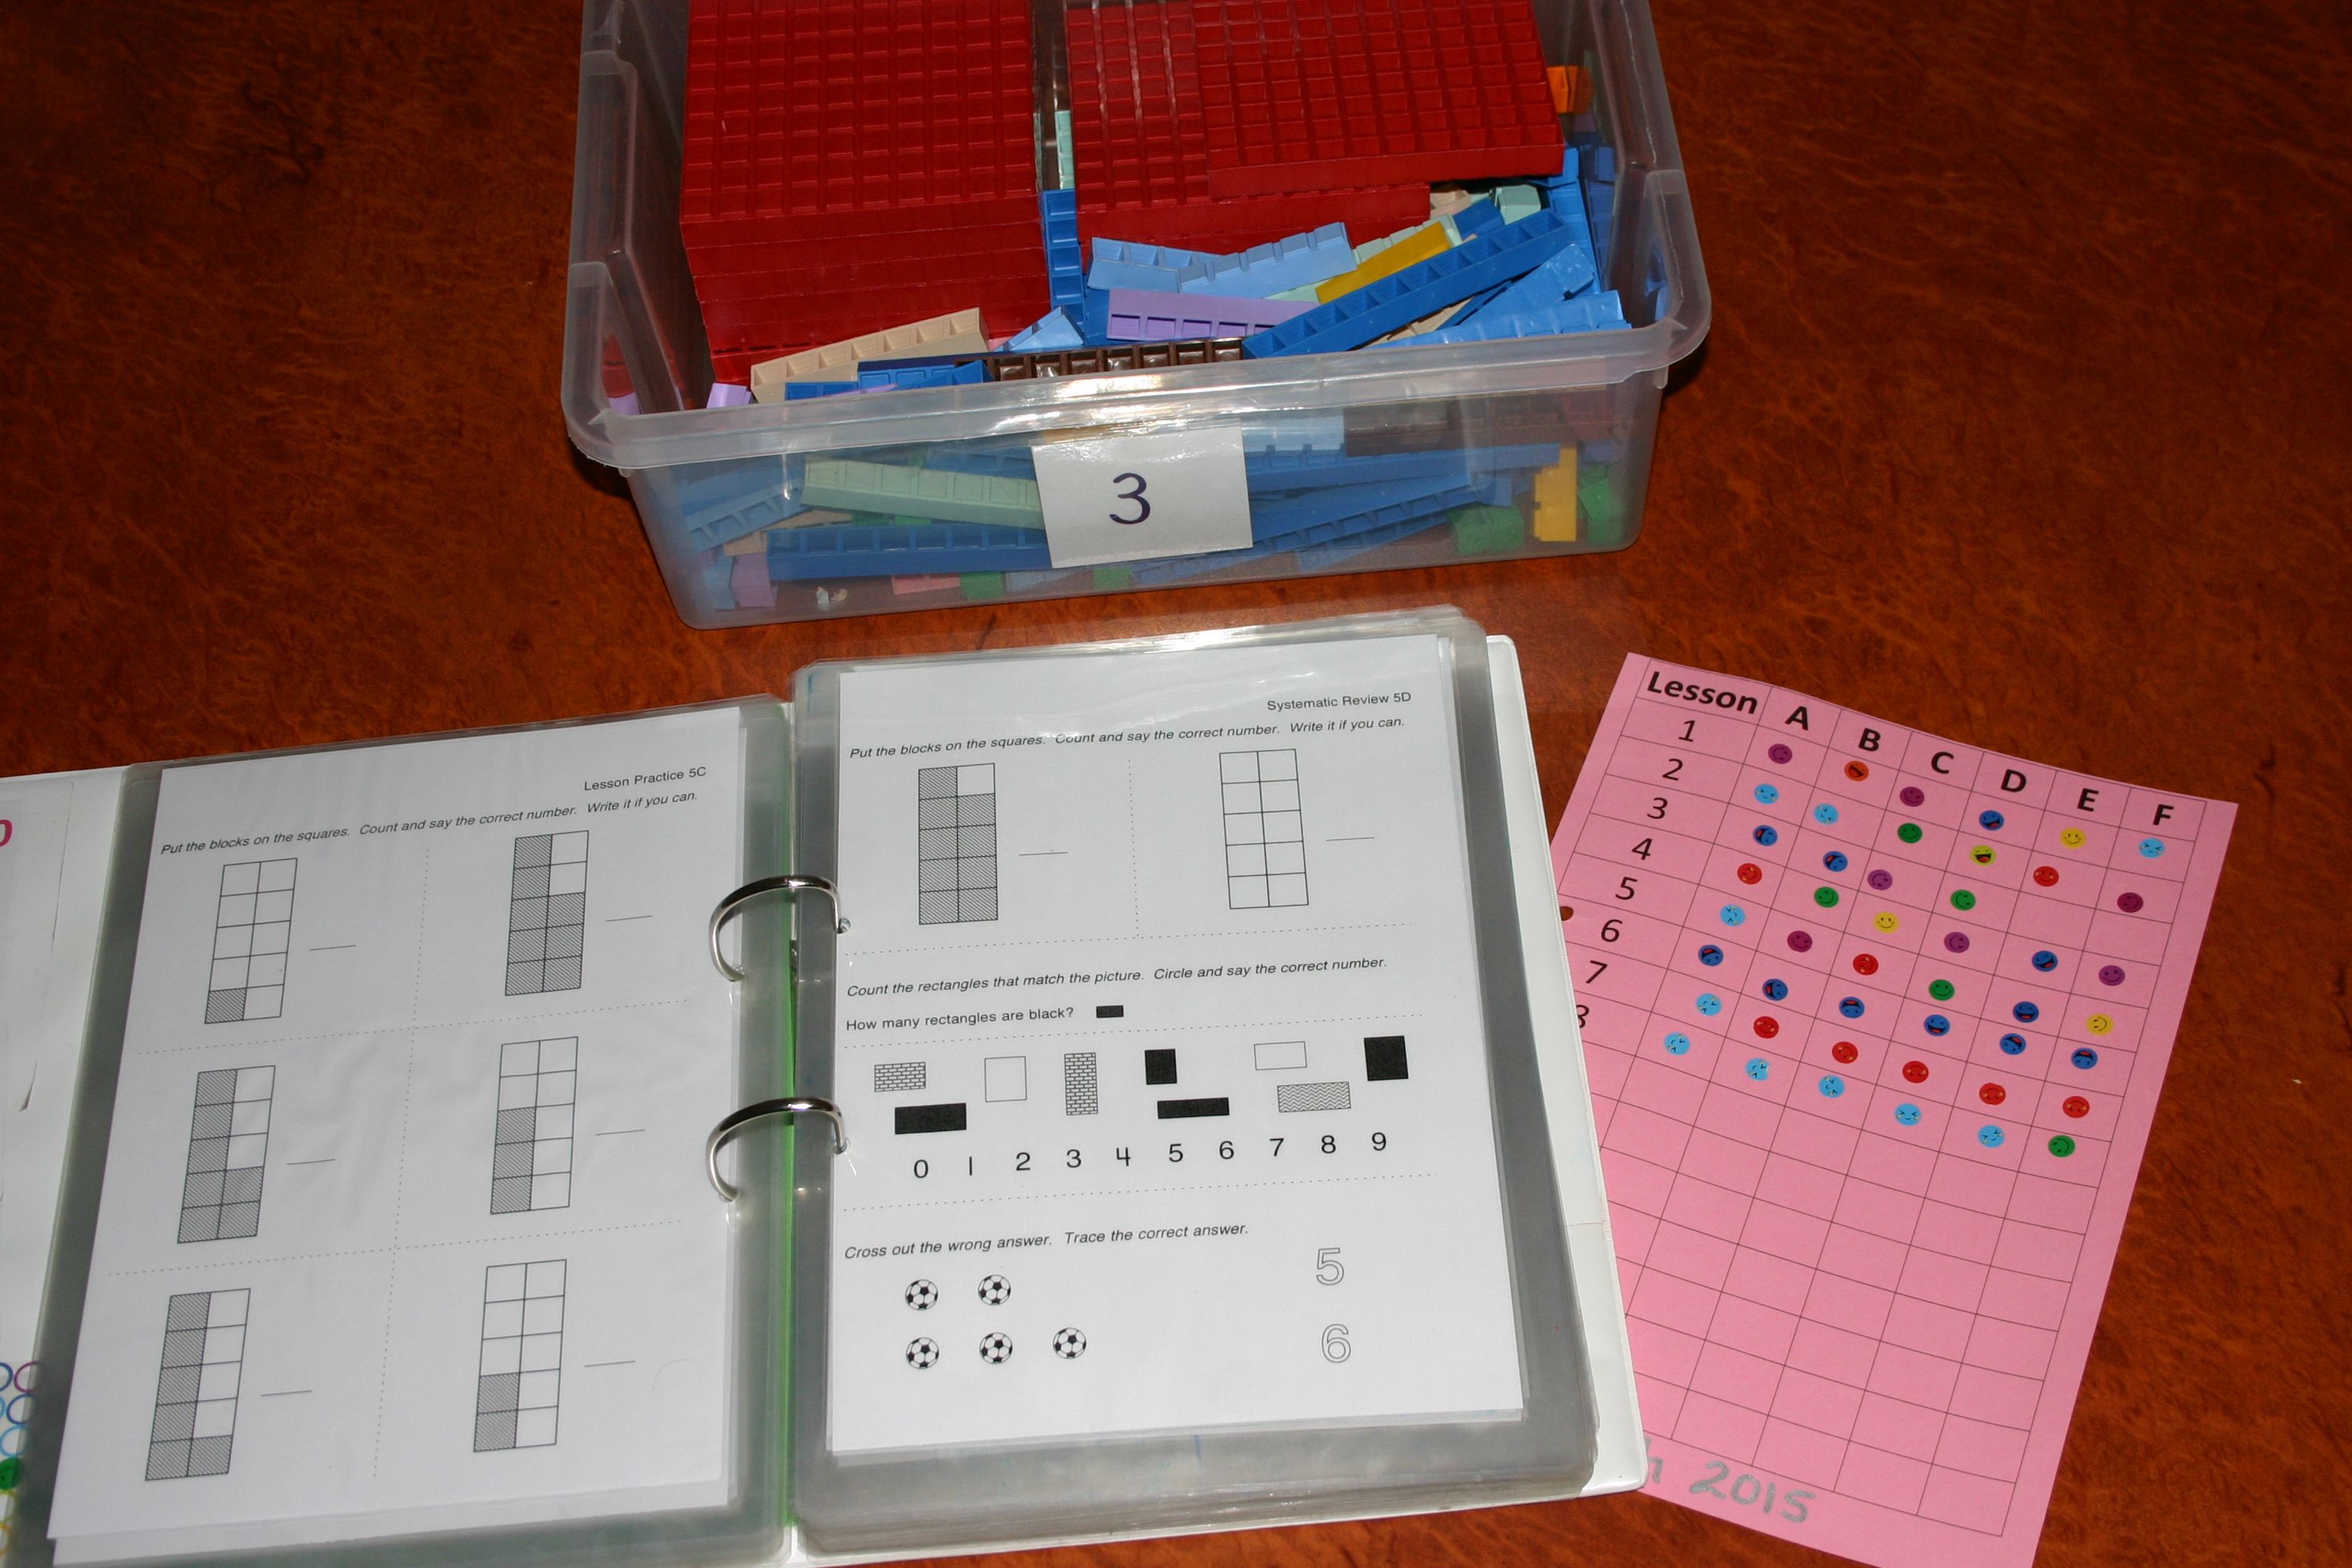
We use Math-u-see for the first couple of years and Primer is the first book in the series. I cover all of the concepts with  hands-on tray activities first and once they are well mastered the children can work through the book as a bridge to the bookwork they will be doing the following year. We also have the Dive CD’s which have videos for each lesson in the student books so some added “teacher” instruction is given as well to help fill any small gaps that may still be there.

IMG_1620

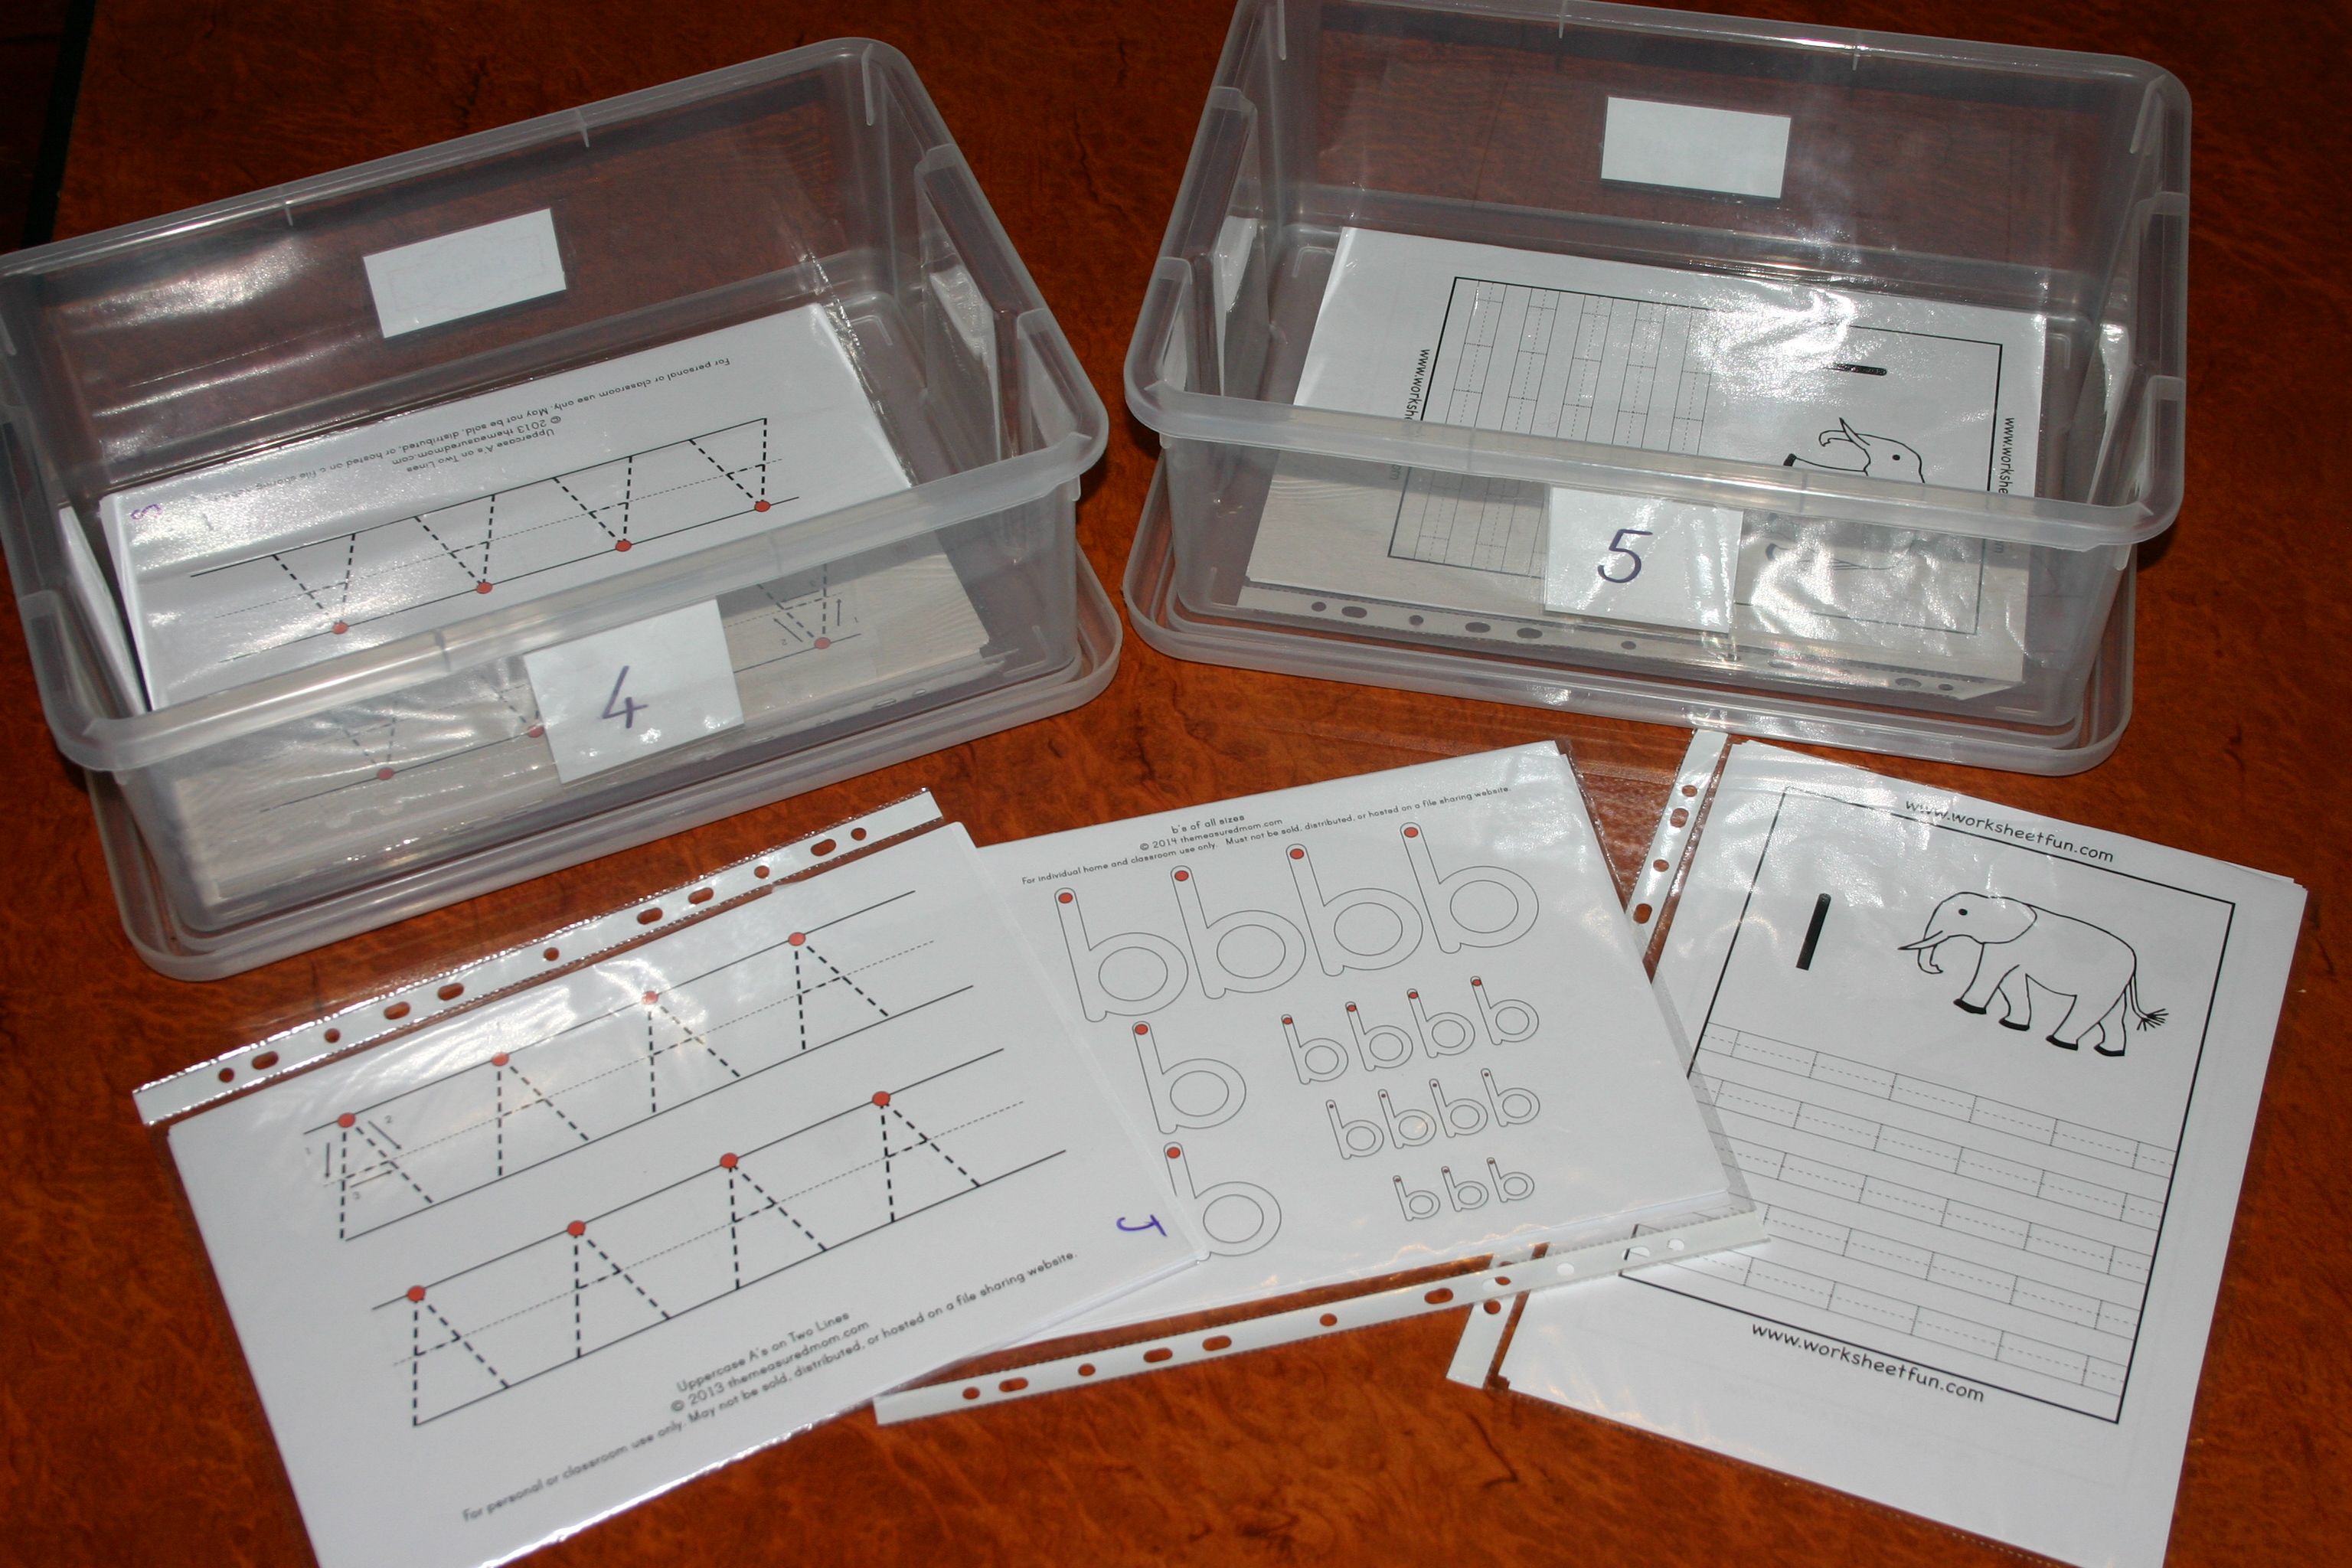
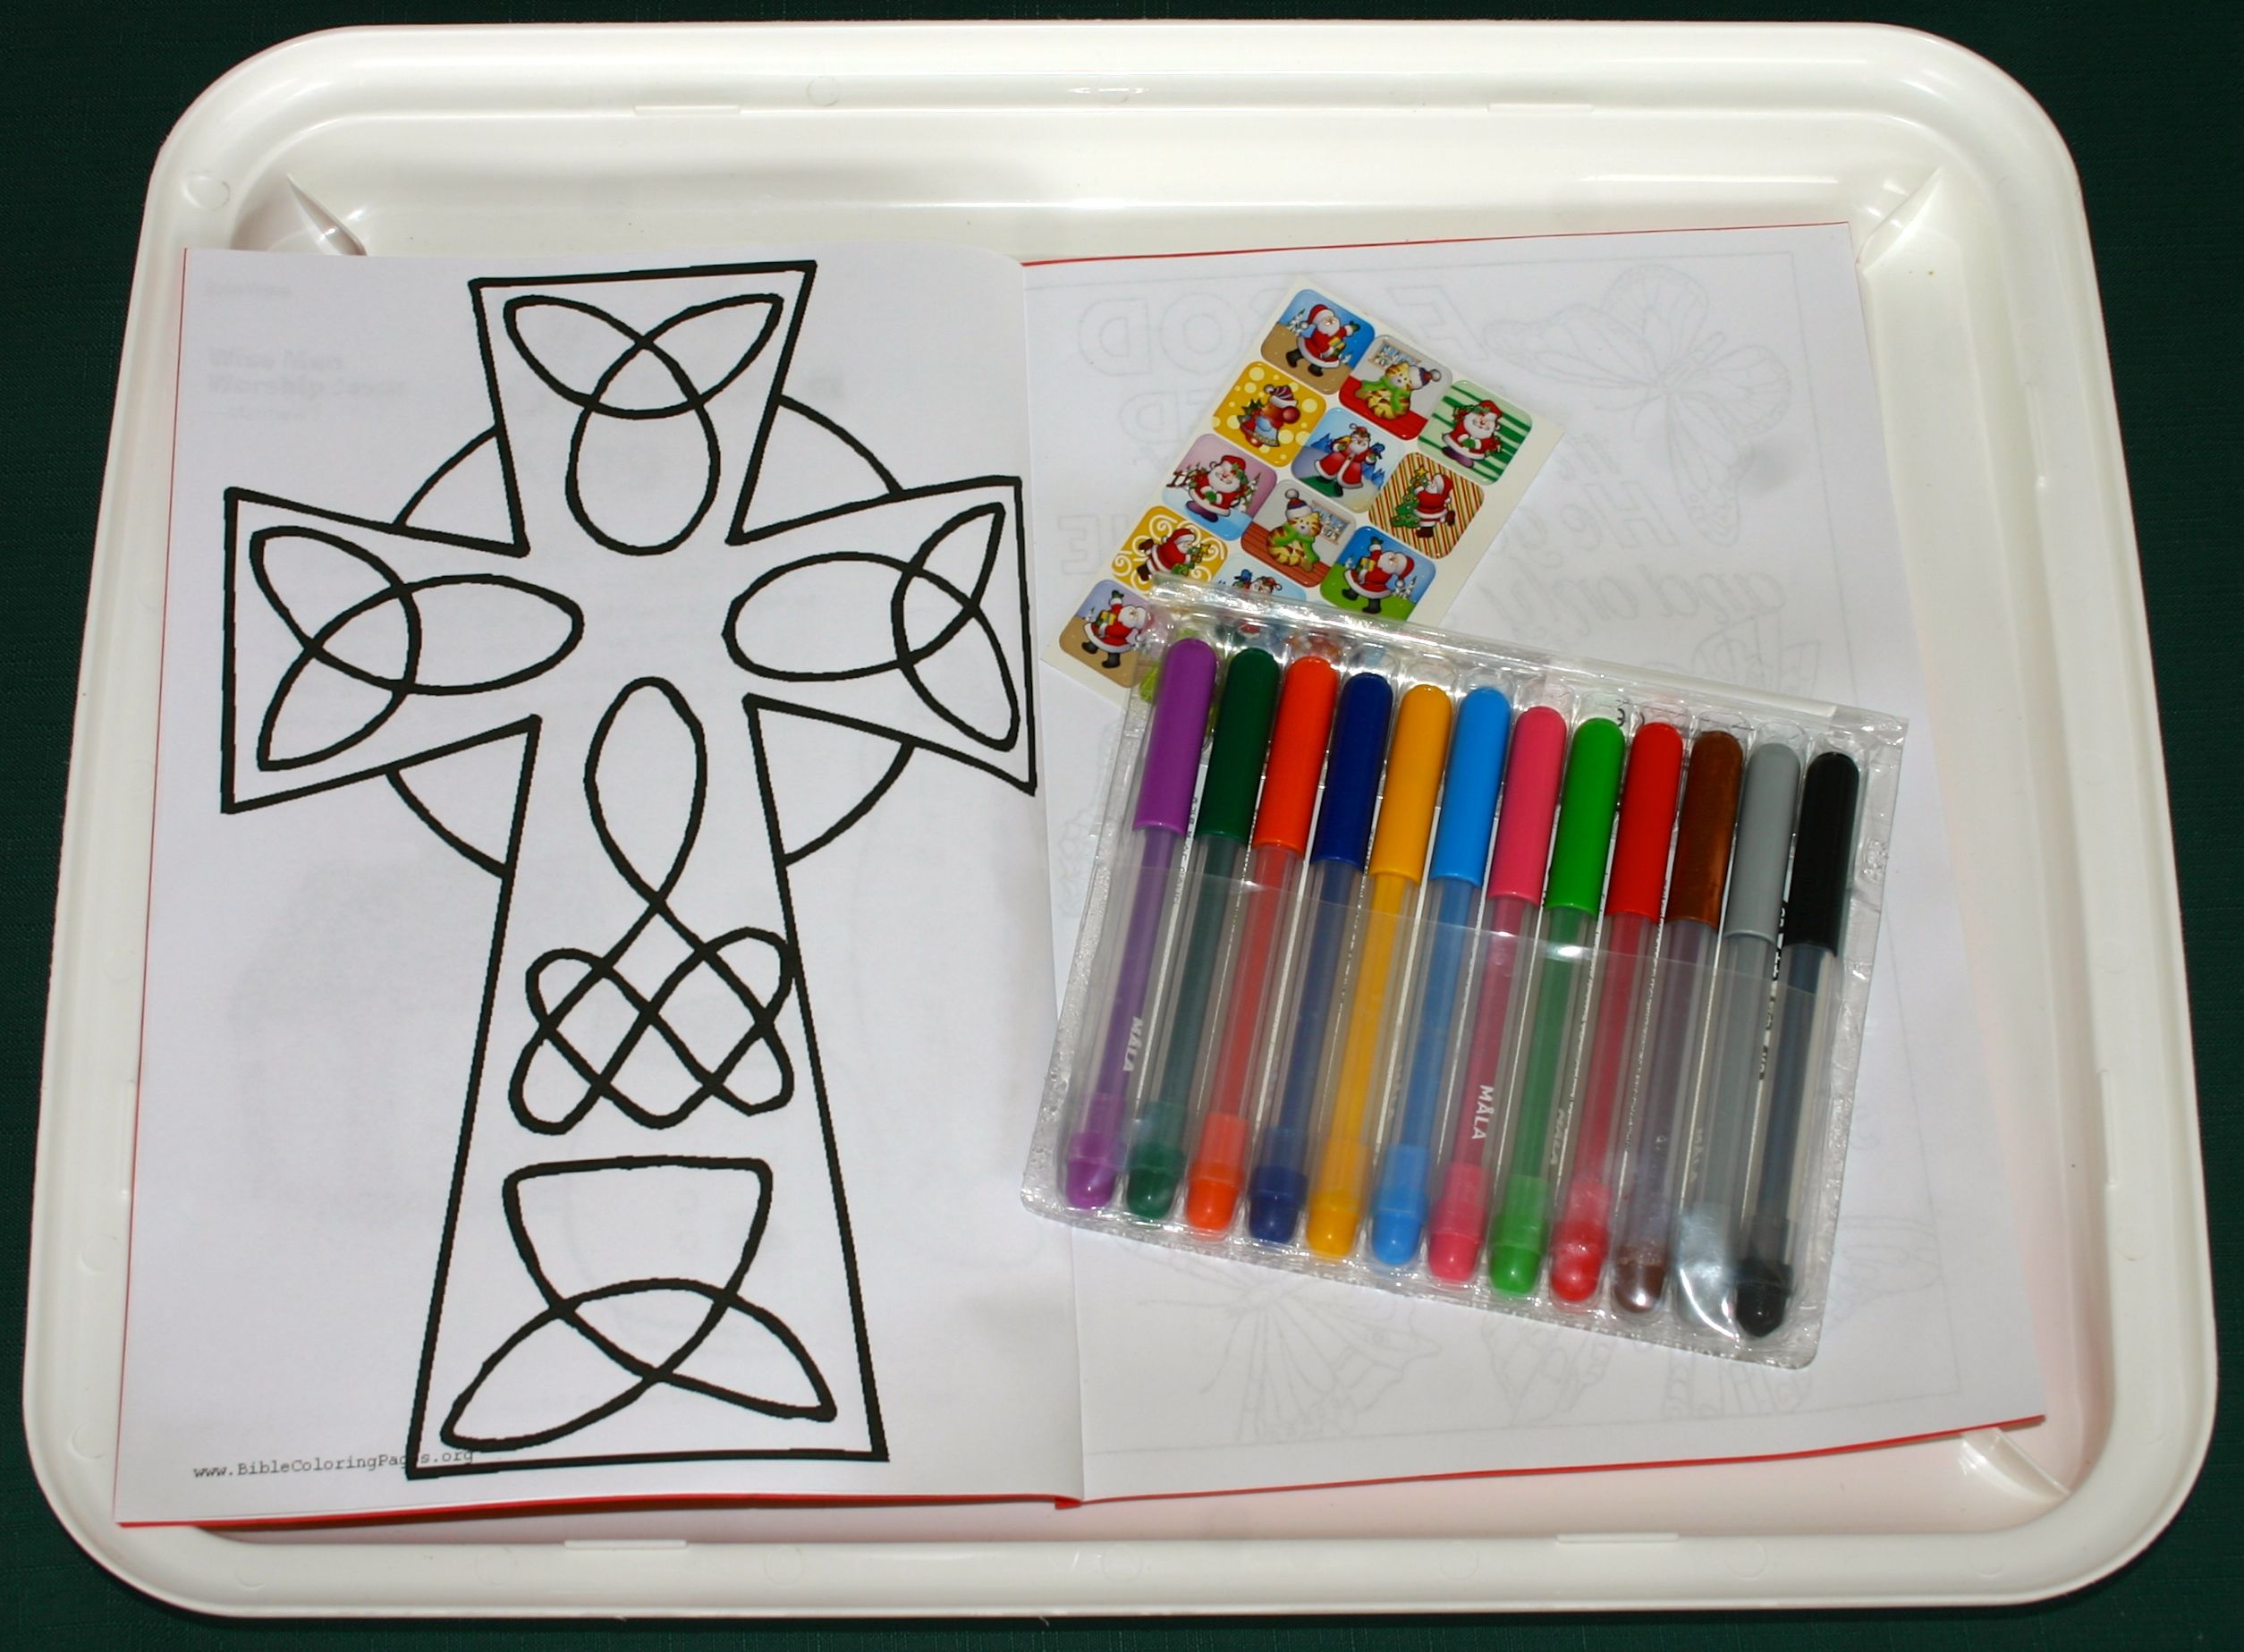
Tracing letters and numbers. I try to supervise handwriting practise to ensure that the correct letter formations are being made. There are heaps of free worksheets on the net. Look for some in your preferred font and laminate them if you choose for repeat practise. For children who find fine motor control difficult, the channel writing (bubble letter style) are the best because it allows more leeway than dotted letters for wobbly pencil paths. It can be very discouraging for children who try so hard and yet cannot stay on that dotted line. The “fat” letters to keep inside are somewhat more forgiving.

IMG_1621

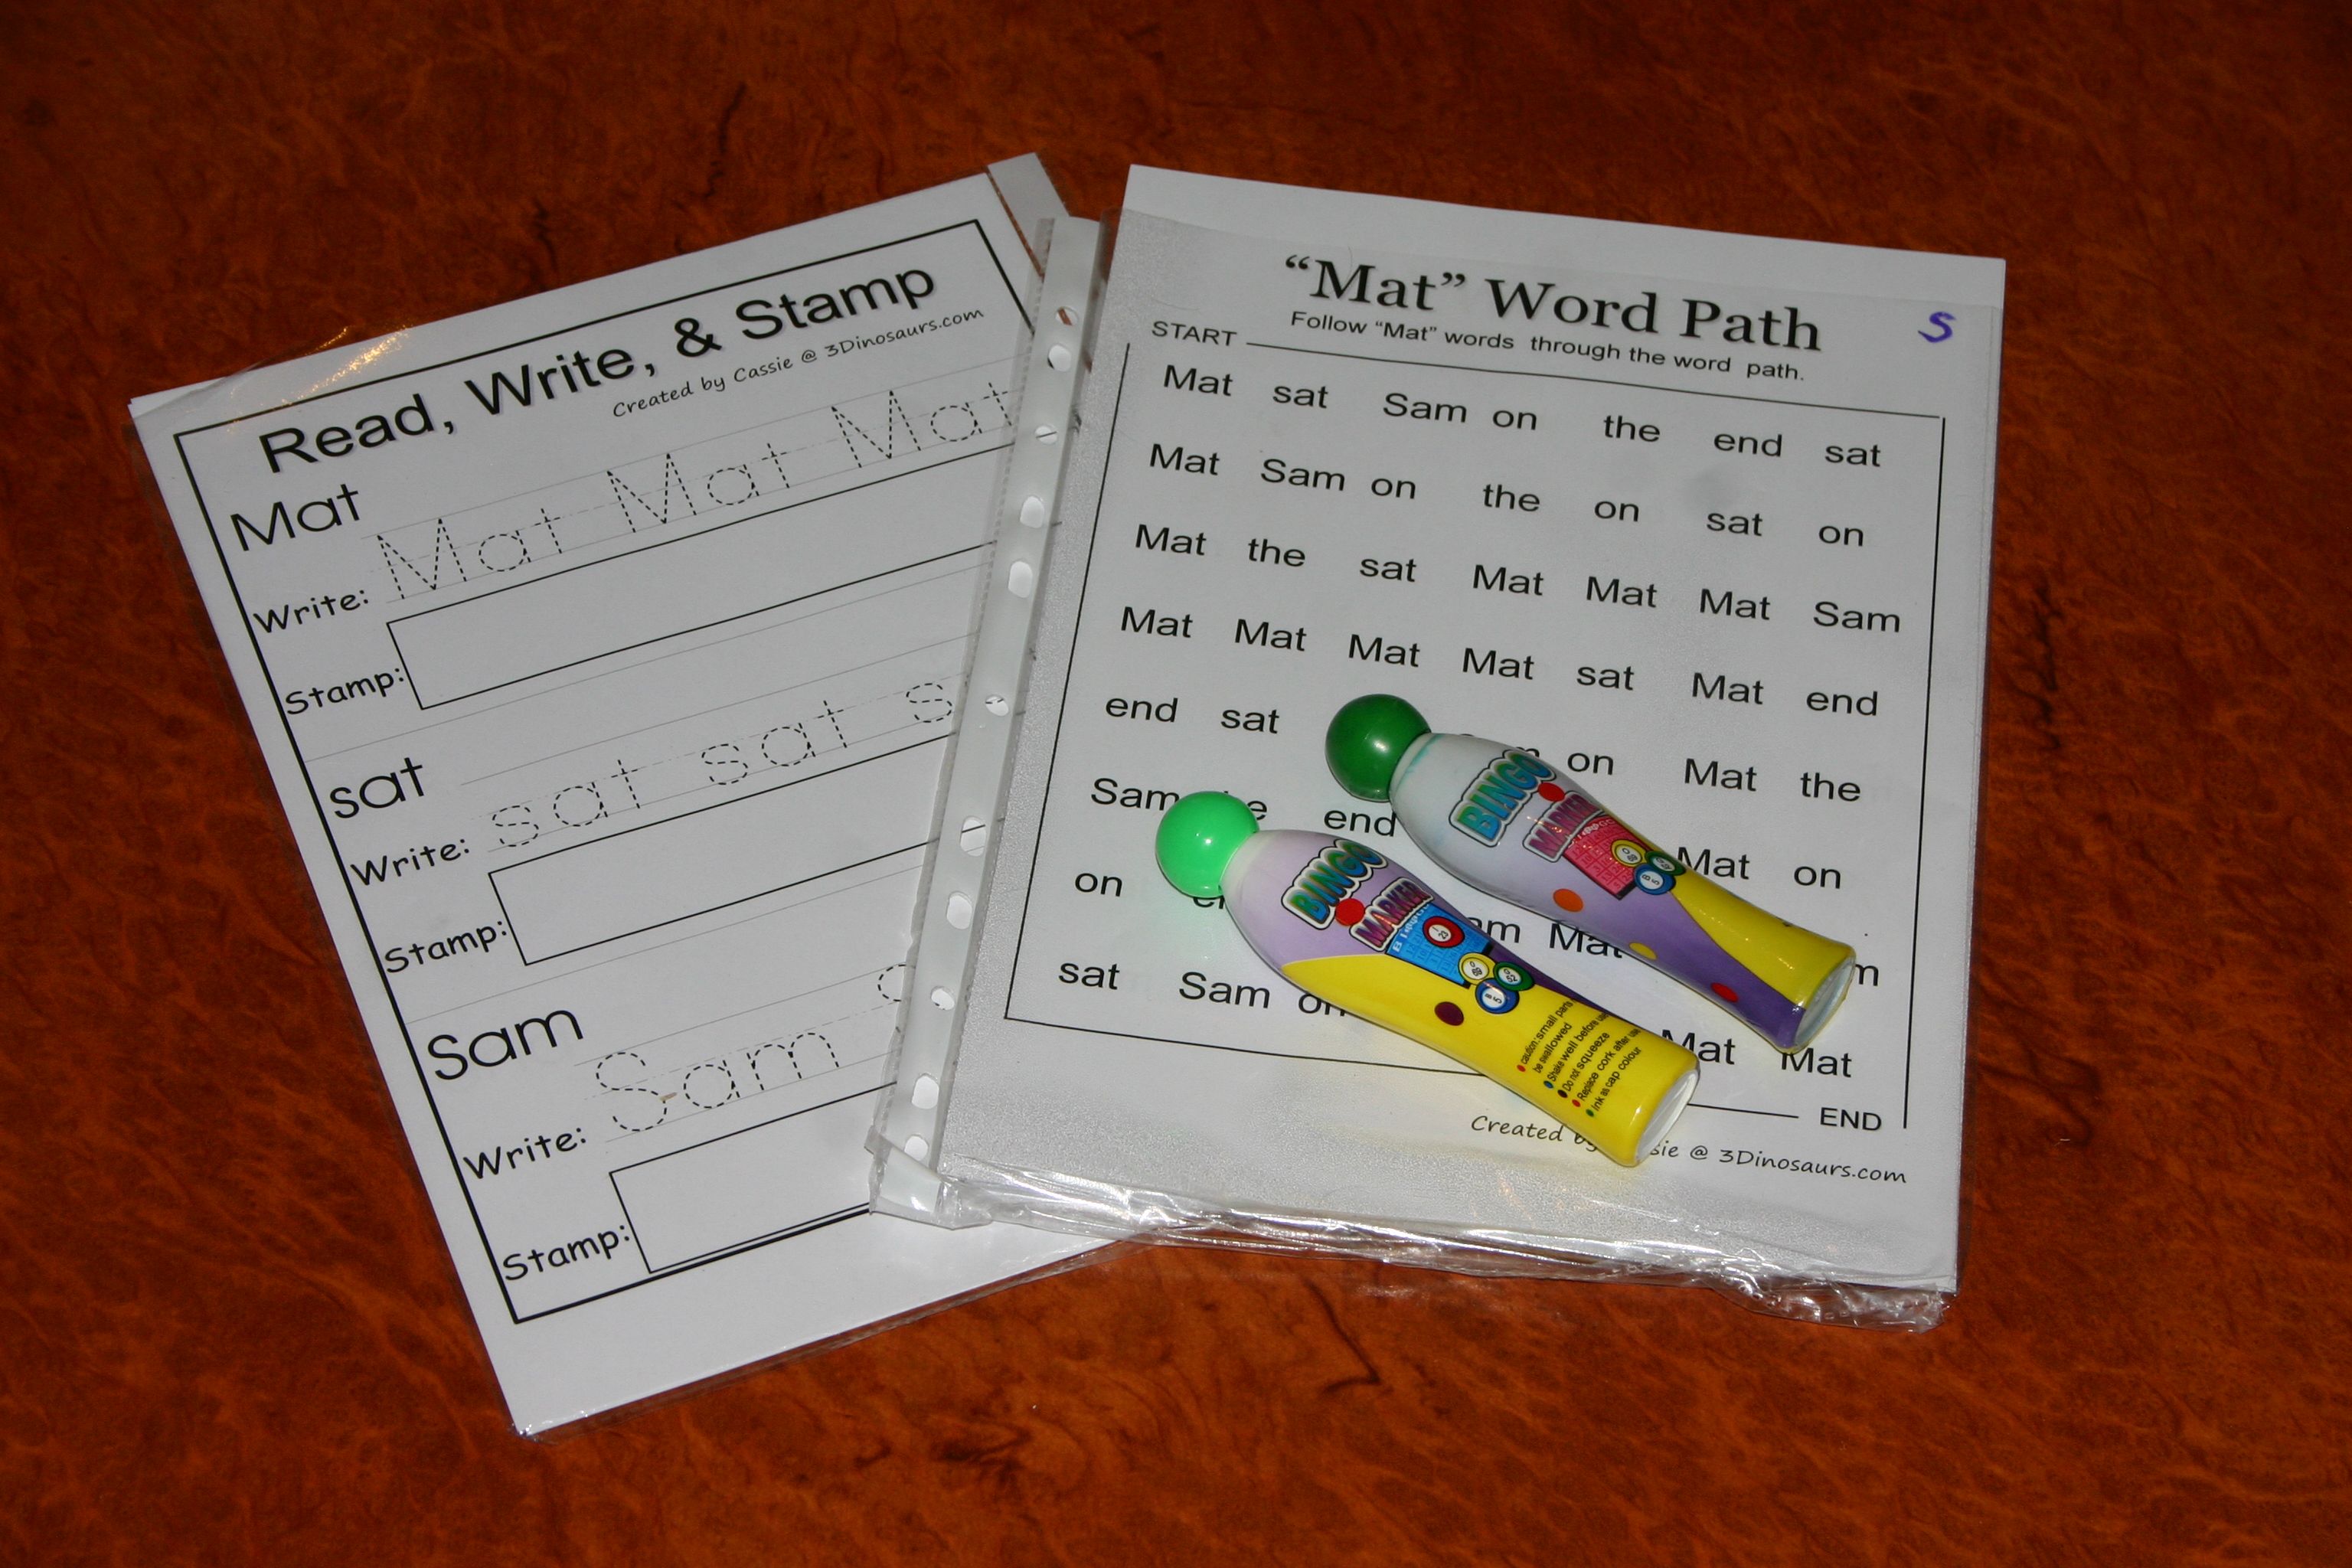
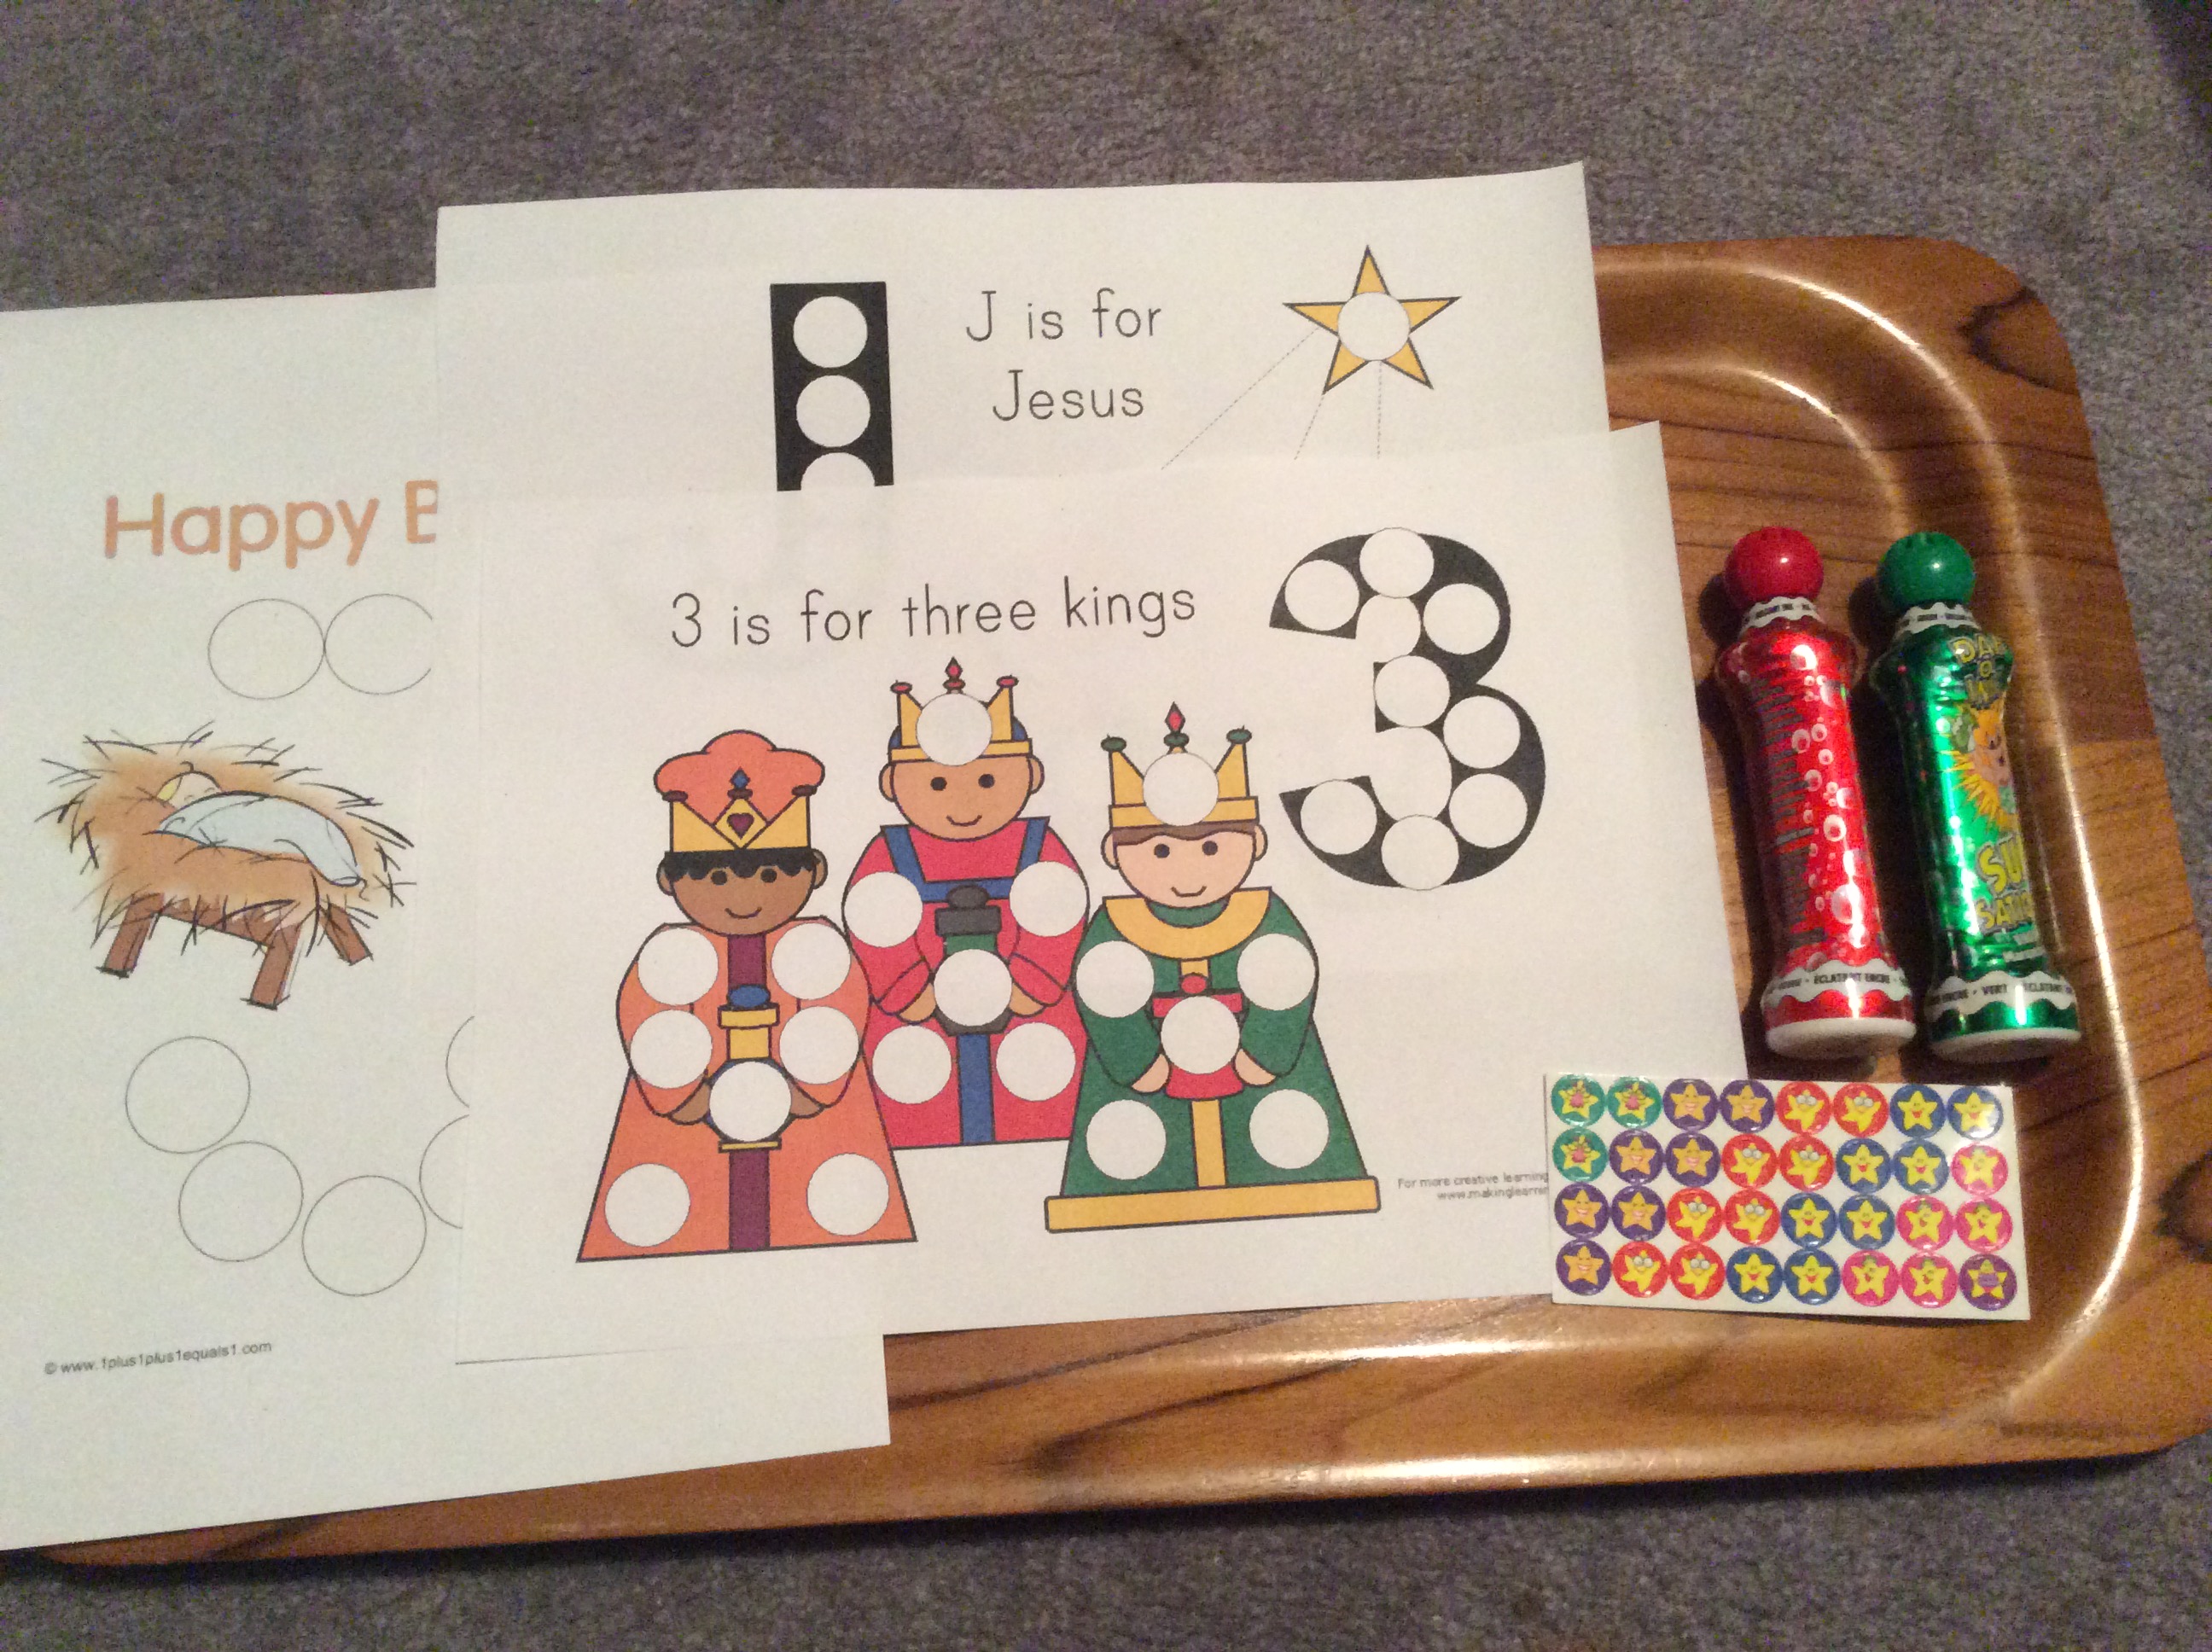
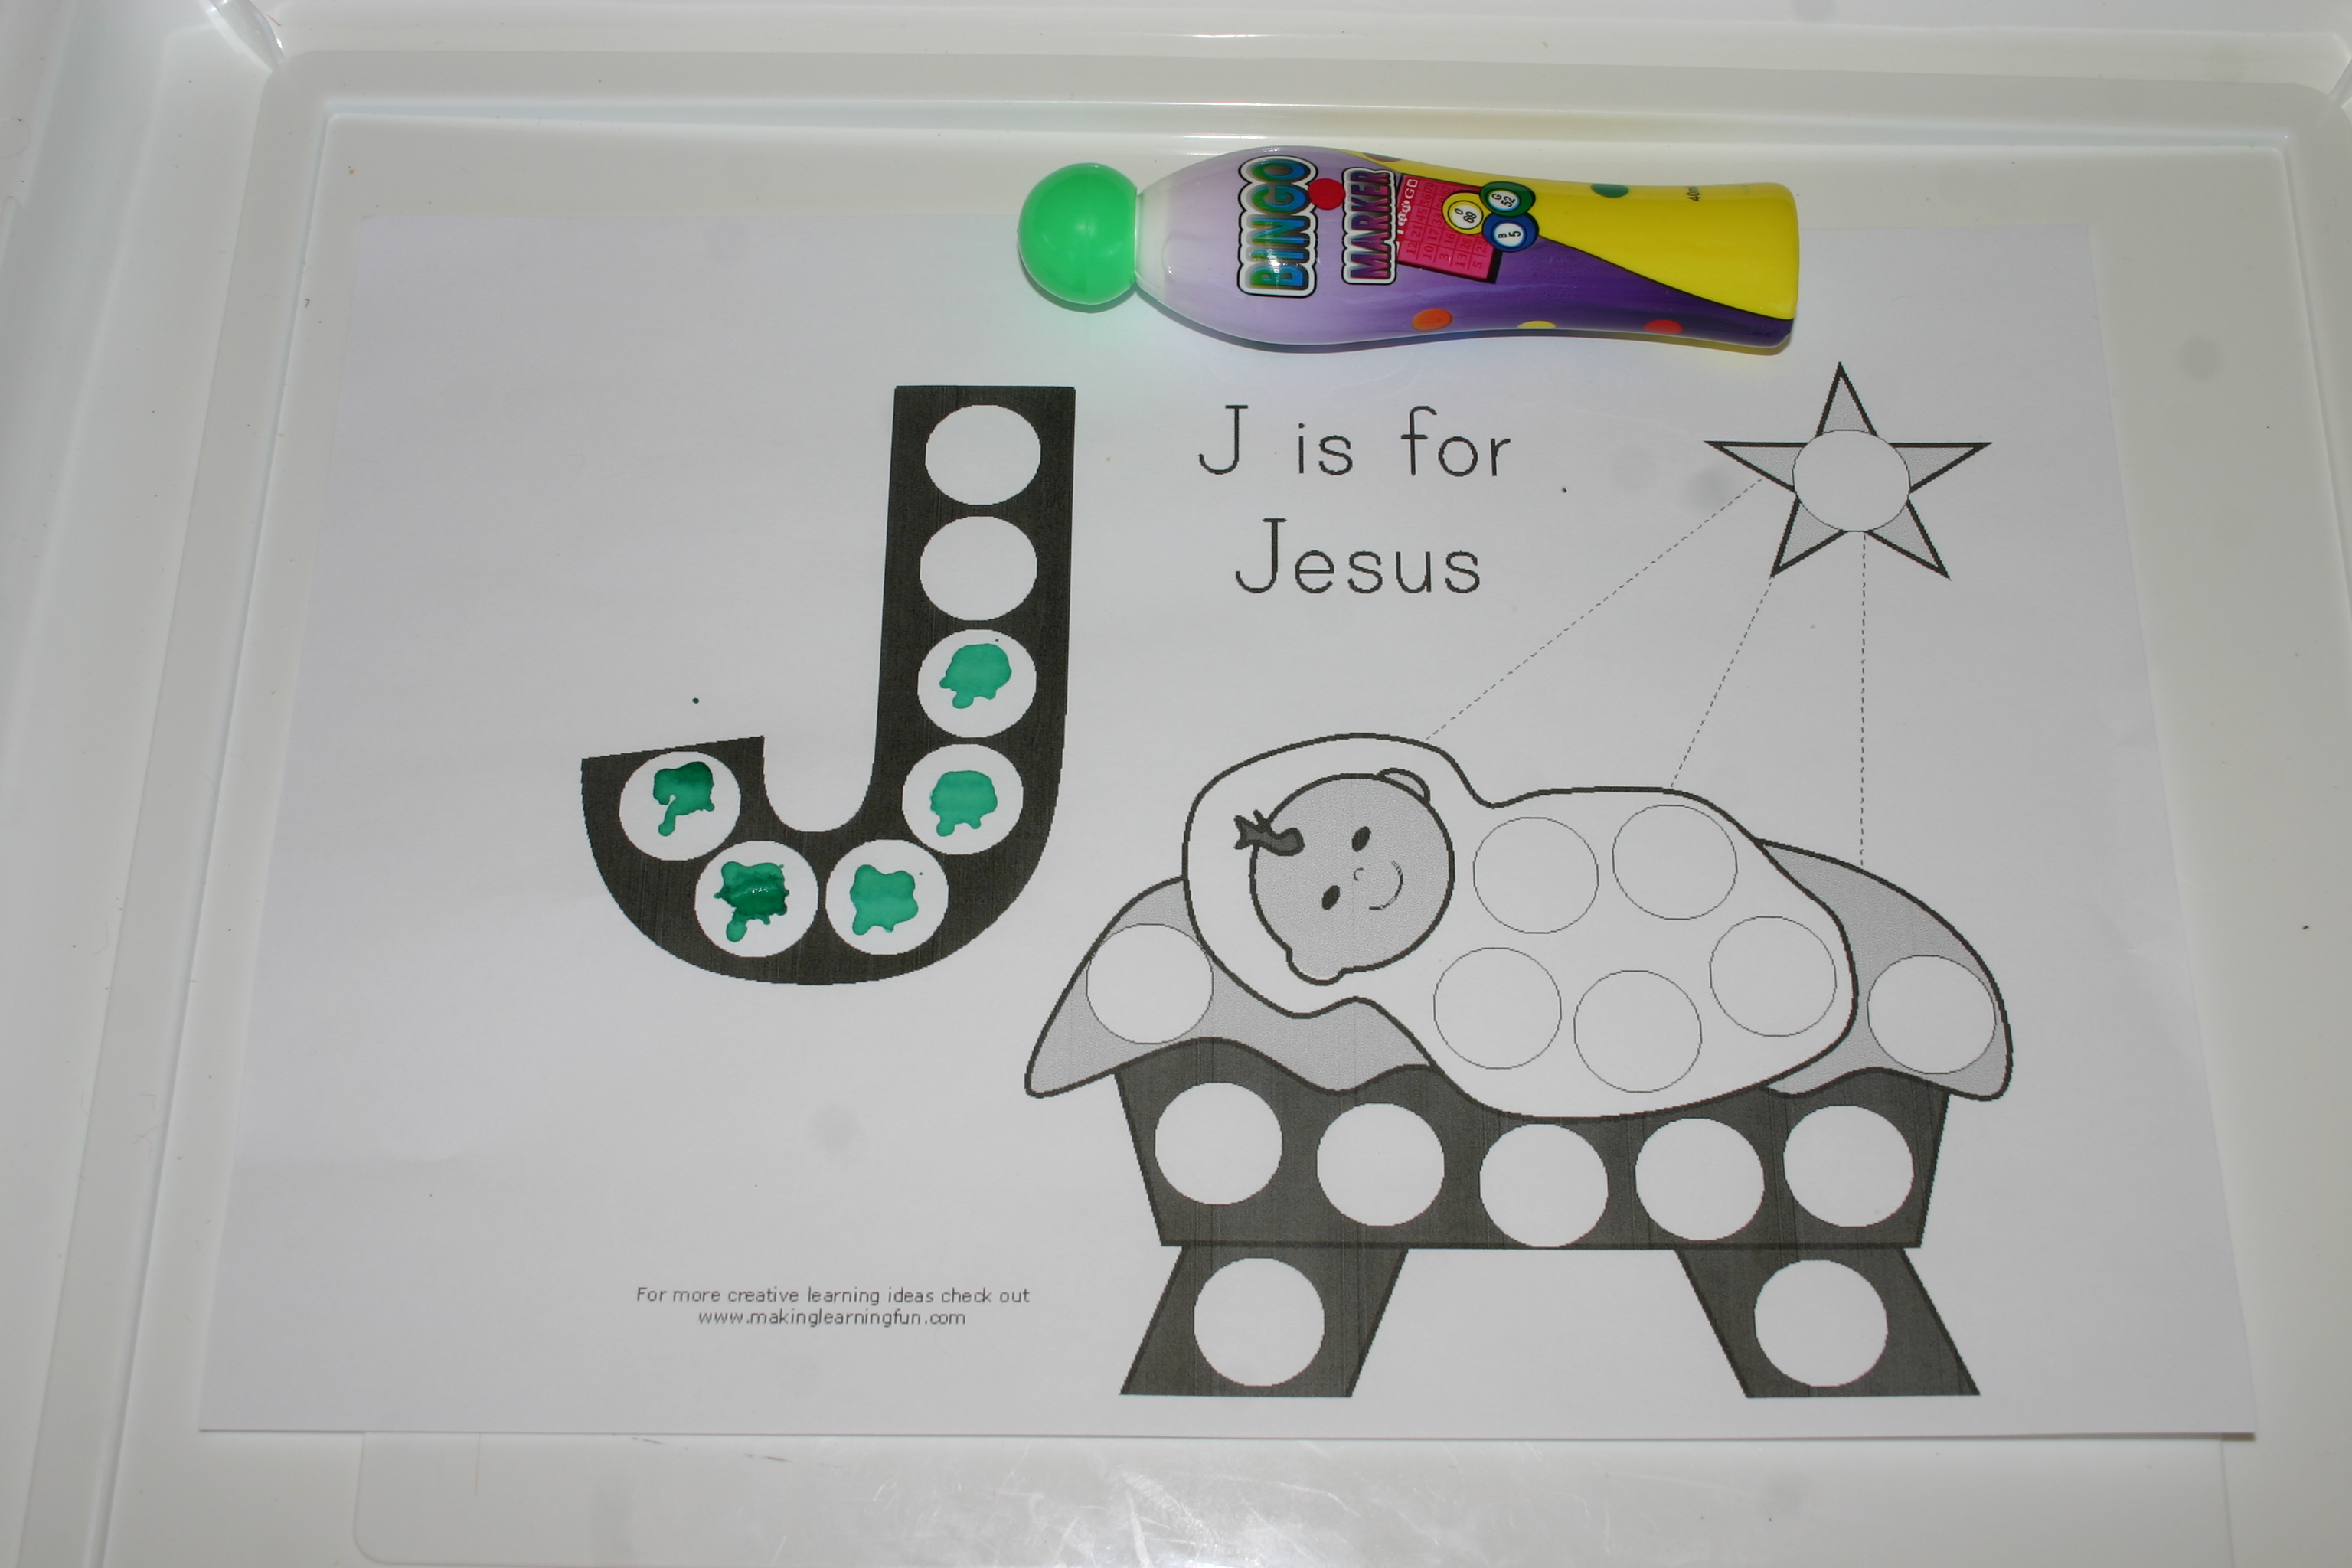
The last workbox contains a selection from some free printable worksheets to go with the Bob Books that I have found online, mainly for my daughter who finishes all her school work in nanoseconds and wants to know what else there is to do. She loves to do “real” school work like her older siblings so the more books and worksheets I supply her with the happier she is. My son will do them if he wants to which will translate to not doing any at all except possibly using the bingo dotters to follow the word paths simply because he wants to randomly dot paint everywhere 🙂


Advertisement

What’s in the box? Christmas activities for preschoolers – part 4

Today is the fourth instalment of our “What’s in the box?” Christmas activities for toddlers and preschoolers. My 2 1/2 year old searches each morning to find his sparkly Christmas box filled with a new Christmas themed activity. He works on these after breakfast while his older siblings are preparing their Blessing Buddy acts of kindness for the day. Combined with room time, this highchair time gives me 1 1/2 to 2 hours of time to either homeschool the older children or in this case, complete some more complicated crafts that need me to be available. As each box is opened it is added to his “school” shelves and can be rotated with the other Christmas activities to extend the time.

If you have trouble getting your little one to sit and concentrate, have a read through this post for some tips on the practicalities of getting started. While some children are naturally better at sitting for longer lengths of time and focussing on a given task, all children can be taught to do this and will improve with consistency and training. I now have 6 children who are (or have been) old enough for highchair activities and I can assure you that they were not all on board with the idea of highchair time from the beginning!

IMG_1483

Day 16

Tweezer star transfer. Practising pincer grip is important for young children who will need the finger strength and dexterity this develops later as they begin to write and draw. The card stars will be presented in a small container that holds them upright to make it easier to grasp the edges with the tweezers as they are transferred into the ice block tray segments.

 IMG_1502

Day 17

These oversized popsicle sticks, pompoms and stars have magnets on the back so that they will stick to the baking tray.

IMG_1490

Day 18

All the children have quiet time books filled with dot-to-dots, colouring pages, puzzles and assorted activities. This is a toddler version of the same with stickers, stamps and texts for free creating.

IMG_1501

Day 19 

Even though this is day 19 of my activities, I actually introduced it right at the beginning of December when we decorated our large Christmas tree. Little children love to decorate without having to do it a certain way so we have this little tree set aside with a bunch of assorted decorations for the children to add on and take off as often as they like.

IMG_1494

Day 20

Poking toothpicks into the foam tree and adding large beads to decorate the tree will allow latitude for fine motor skills, colour sorting and matching and one-to-one correspondence.


What’s in the box? Christmas activities for preschoolers – part 3

Our first “What’s in the box?” Christmas highchair time activity was revealed today to our 2 1/2 year old who was excited to search for his hidden sparkly Christmas box. He enjoyed his Christmas sensory tub activity and will be keen to see what tomorrow’s box reveals. He played with his new activity while his older siblings worked on their act of kindness for the day, which came with the much anticipated arrival of our Blessing Buddies.

Here are 5 more of the Christmas activity trays for toddlers and preschoolers that I have prepared, ready to be revealed one at a time each morning in the special sparkly Christmas box.

IMG_1488

Day 11

These cookies are simply 2 circles of cardboard from a nappy box glued together (picture side in) with a variety of felt shapes to add as icing.

IMG_1486

The older children saw what I was doing and begged pestered asked me to let them have a go. They did such a good job that I handed the project over to them and went on to prep some other activities. Other than the flowers and a couple of bits and pieces, the designs in the photo above are all theirs. They can’t wait to play with them!

IMG_1442

 Day 12

A sensory tub filled with macaroni pasta and a variety of interesting bits and pieces to sort, scoop, tong, tip, pour and transfer.

IMG_1459

Day 13

One of our Christmas traditions is to purchase a new nativity set each year. This one we purchased a few years ago and has been well used. I will be putting a different new wooden set into the sparkly box but as the older kids are about while I am photographing I didn’t want to spoil the surprise!

IMG_1469

Day 14

Do-a-dot printables with stickers to place inside each circle. Great for fine motor skills and one-to-one correspondence. I will need to get some larger stickers though as these are too small for very little fingers to manipulate easily. You could add some stamps and drawing items to this box.

IMG_1474

Day 15

Pretend food play and colour sort tonging activity. A muffin tray filled with coloured silicone pattipan wrappers with pompoms and jewels etc. to manipulate and “cook.”


What’s in the box – bonus toddler Christmas activity trays from Gail

My friend Gail has been creating her own Montessori inspired Christmas activity trays for her preschoolers and has kindly given me permission to share them with you all. So here’s a bonus collection for you in addition to my own 24 that I am currently in the process of sharing during my “What’s in the box?” series.

image1

Jingle bell two colour sorting and tong transfer

image16

2 colour bead threading and pattern making

image14

Pretend cooking tray and colour sort

image13

Bingo dotter do-a-dot pages

image12

Christmas sensory tub

image11

Linking chain patterns. Gail is thinking of making some pattern cards to copy and extend.

image10

Playdough gingerbread man and star cutting and decorating

image8

Geoboard elastic band shapes. You could add some picture cards to copy as well.

image7

Read and green Duplo with base board

image6

Lacing or sewing cards

image4

Posting matchsticks into a spice jar

image3

Threading coloured beads onto chenille pipe cleaners

image2

Gluing Christmas shapes and wool

image9

Blank book for drawing, stamping and stickers


Thanks Gail, love your work!

Has anyone else been inspired to make their own trays? We’d love for you to share.

What’s in the box? Christmas activities for preschoolers part 2

image002

Today is the second instalment of our planned “What’s in the box?” activities for advent as we count down to Christmas. Our hopefully very excited toddler will search the house for this sparkly Christmas box each morning which will contain his morning table activity. Previous activities will be available in his “school” cupboard for use while his siblings are working on their Blessing Buddy act of kindness for the day.

IMG_1483

Day 6

Using tweezers to transfer stars into an ice cube tray will be new to him so I’m not sure whether he has the dexterity for the tweezers or not. The tweezers can be easily swapped with small tongs if need be.

IMG_1475

Day 7

Pretend cooking play is always popular, especially if I come over for a taste of Christmas cookies now and then. These large coloured glass stones and oversized marbles are from our local discount variety store. A mini muffin tray and tea bag tongs promote one-to-one correspondence practise and transferring skills.

IMG_1466

Day 8

Dotting with bingo markers inside do-a-dot pictures is a semi-controlled way to present a painting experience. I am quite certain however that dotting in the circles will not be satisfying enough and that the final product will be well and truly smeared with paint! (Better cover the tray with newspaper for this one.) Free printable pictures to dot are here and here or google do-a-dot for hundreds.

IMG_1454

Day 9

Decorating playdough Christmas trees with beads and tiny bead strings will be fun. Toddlers find it very difficult to roll out dough though and may also need assistance with the cutter. Be prepared to cut a bunch out for them if necessary.

IMG_1462


Day 10

This toothpick Christmas tree is great for fine motor skills. The child pokes toothpicks with coloured ends into holes in the top of the box lid (use a skewer to poke them through.) I used coloured contact for the tree and punched holes with a single hole paper punch before sticking it onto the box lid as I know from experience that poking holes through contact on cardboard can be difficult and doesn’t always leave a nice clean hole.

How is your Christmas planning going?

What’s in the box? Christmas activities for preschoolers part 1

image002

Our “What’s in the Box?” advent count down of Christmas preschool activities is a new tradition for us. While the older children are working on other projects for our Blessing Buddies acts of kindness, our toddler will be opening his special Christmas box to find his table activity for the morning. The sparkly box will be hidden somewhere around the house for him to find each day and will contain a new and exciting challenge for him to work on independently while I help with the older children’s more complicated projects.

Here are the first 5 days of “What’s in the box?”

IMG_1447

The first activity needs to be one that is guaranteed to hold his attention for a longer time span as it will be the only one available. As each new activity is introduced, I will place it onto our toddler activity shelves so that I can rotate between them when interest in the new tray for the day has worn off.

Day 1

This Christmas sensory tub will be filled with all the wonderful “Christmas” items in the photo above. (If it’s green it’s Christmassy right?) The items can be sorted, transferred with tongs or cutlery, hidden and found, tipped and poured and generally fiddled about with.

IMG_1453

Day 2

A new batch of green playdough formed into a rough Christmas tree with small lights cut from a plastic Christmas garland to poke into the dough. You could also use beads or any other small decoration.

IMG_1480

Day 3

A colour sorting activity with 3 colours of Christmas bows. I have included a toothpick with a large flat end to hold while sliding it into one of the loops of the bows to transfer them into the matching coloured bowls. We’ll see how difficult this is for him – it may be quickly changed to small tongs.

IMG_1478

Day 4

Simple pattern block puzzles.These free printable patterns are available here. I intend to laminate these for greater durability. My older children all jumped at the chance to fill these out for the photos and after watching me prep these trays throughout the day, my 11-year-old commented that he almost wished he was a toddler again, just so he could do the activities!

IMG_1464

Day 5

Threading bow-shaped beads onto coloured chenille sticks (pipe cleaners.) Make sure the holes are large enough so that this is not too difficult for little fingers. Older children could make patterns with the colours.

Stay tuned for days 6 to 24.

What are your toddler’s favourite Christmas activities?


Montessori style hands-on tray activities for toddlers and preschoolers

Activities for young children are cheap and easy to put together and the peace they will bring to your daily routine is priceless! Teaching your little ones to sit and concentrate for extended periods is one of the key skills every parent should be working on in the early years and one that will pay dividends in the future. Choose a variety of attractive materials that will stimulate their interest and be prepared to change them fairly regularly. It is important that the activity is not too difficult nor too easy. A little bit of a challenge will keep them interested – too challenging and they will be unable to succeed. If you present a tray that is too difficult, simply remove it and put it away for the future. Chances are they will love it in just a few short months.

I have written several posts detailing how to train your children to sit in their highchair, mat or playpen and the practicalities of when and how to change activities. Getting started takes a little extra time, but once you have built “tray time” into your day, it will become something your child looks forward to. Place them somewhere near you so you can chat and interact while you are cooking or doing some other task that enables you to encourage them in what they are doing when they need it and keep an eye on those smaller objects that they may find tempting to put in their mouths. Here are several ideas for the 2 to 5 age-range (approximately) that I have used in the past with my own children.

Sliding oversized paperclips onto matching coloured cardboard squares.

Matching clips to coloured popsticks. Great pincer-grip training for later writing. Make sure the clips you get have long enough handles and are not too stiff to open. These clips have one short and one long side and the children were not able to grip them properly.

Sorting popsticks by colour.

Tong transfer combined with colour sorting. The flowers came from a cheap plastic Hawaiian lei.

Duplo colour sort.

Tong transfer combined with bead colour or shape sort.

Golf tee hammering by colour. A piece of foam salvaged from packaging and a light wooden hammer from a Tap Tap game.

Colour and shape match combined with pincer grip practise while pegging.

Shape puzzle. This is a commercial set of attribute blocks. I remove all bar one set of the same colour and thickness and use it as a simple shape puzzle. Once they master this, I add other colours and thicknesses back in.

Pattern blocks are lots of fun. Leave them out on a small table and even your older children will not be able to resist putting a bunch together to make a picture. Young children enjoy the matching cards you can purchase to go with them.

Geoboard matching. Little ones just experiment with elastic bands but older children can do a variety of extension activities. Matching and copying geometric shapes is one.

Shape matching cards. You could use them for basic card games as well.

Good quality wooden puzzles are always attractive for children.

Chunky, simple puzzles are a good start for younger kids.

The concepts of heavier, lighter, full, empty etc. can be developed while playing with a set of balance scales.

Stacking and nesting objects develops the concept of size seriation; in this case, measuring cups.

This is a cardboard stacking box set that does the same as the Montessori pink tower. Not as nice but a lot cheaper!

Graduated wooden rings.

Picture to picture matching.

Matching picture halves is a good introduction to puzzles for those who get overwhelmed with too many pieces. Start with just a few pairs and work up.

Montessori subtraction trays: Hands-on mathematics

subtraction tray IMG_8368

These Montessori style hand-on subtraction activity ideas are great for preschoolers and young children who need plenty of experience with concrete materials to consolidate basic mathematical skills. (See my last post for more info.)

As with the addition trays, the subtraction facts that  the child has already memorised are added to the screw-top jar to provide a visual indicator of their progress.

Initially, the subtraction problems are split into sets; subtract 0, subtract 1, subtract 2 and so on and only 1 set is out at a time.  Once they know the sets fairly well individually, we combine the lot, taking out the ones they have mastered and working on what is left. As with addition, learning to take away 0, 1, 2, and 10  is very easy, so starting with these gives the child a boost of confidence as they quickly master the first sets, filling that jar almost immediately.

sub tray set out IMG_8371

The subtraction materials are set out as above. The first and last plate are deliberately different from the second to provide a visual reminder of the relationship between the two. Subtraction must be done in order (numbers are not interchangeable as they are for addition and multiplication problems) so the child first counts out the number of objects they are starting with into the first plate. The smaller plate shows what has been taken away (removed, subtracted etc.) and what is left on the first plate is scooped over to the final plate, providing the answer.

When the novelty of the plate tray wears off, I present the subtraction problems the child has not mastered in different formats to provide extra practise and revive interest in the activity.

icecream cont sub pegging

Subtraction problems on pegs are pegged onto the side of the container with the correct answer. The counters are the manipulative. Provide more than one container or a multi-sided container if you want a broader scope of answers.

Cinderella's slipper subtraction

These subtraction cards are a set from Kmart that we were given. A dry erase marker can be used to mark the answers on the cards. The “glass” slippers are wedding favours. My girls love this activity just because they get to handle the tiny shoes! An attractive material will draw them in every time. Add an interesting story to the tray (How many spare slippers Cinderella keeps in her closet?) and you will have them begging to have a go.

bead string subtraction

The same subtraction card set paired with any manipulative of your choice gives you a fresh “new” activity. This time the children were doing the problems in their heads and finding the correct bead string for the answers – good for those who find writing a chore. There is exactly the right number of bead strings so if the strings do not match the last cards this alerts the child to an error that they can find and address.

It doesn’t take too much extra time or effort to keep learning engaging and enjoyable. Have a look around your house or check out your local discount variety store for a couple of different kinds of manipulatives and you are on your way.

Posts you may find useful:

List of useful materials to collect and buy for hands-on tray activities  

Building focussing and concentrating skills in toddlers

Workboxes – homeschooling multiple ages

Surviving new babies, sick kids and interruptions