Homeschooling preschoolers – a new year begins.

IMG_8511

One more homeschool cupboard has been cleaned out and set up ready for the new year. Our 3 1/2 year old little man has joined the ranks with his older brothers and sisters to do “school” after breakfast each morning.

IMG_8564

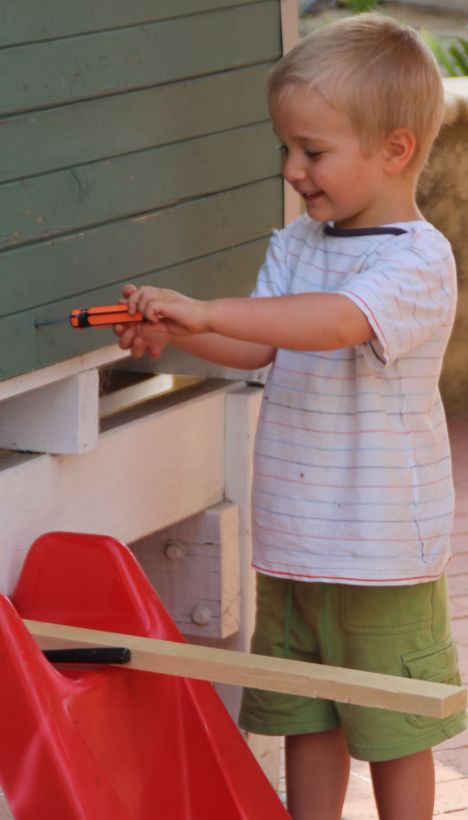
Now I know how important it is at this age to keep school relaxed and enjoyable and not to focus on too much bookwork. Plenty of time for creative, open-ended and active play is an absolute necessity, along with character training as a firm foundation for all other skills. However… there is a place for teaching little boys to sit and concentrate on a task for a good length of time. For some this is more difficult than others but it can be done and dare I say it, must be done. You are doing your sons no favours if you do not teach them the self-control necessary to sit still and achieve a task that is set by someone else. Think ahead to a work or classroom situation – hard as it may be, they need this skill.

This training ideally starts early, with sit time in the highchair, mat time while you prepare dinner, playpen time as babies and all the other parent-directed periods that are so vital to a balanced routine. If you have had all these in place since babyhood then starting some kindergarten activities at the table will be a breeze. If not; it’s not too late – start now! Start small and build on it until it is easy for your little one to sit for a while and finish an activity that you set for them to do.

IMG_9489

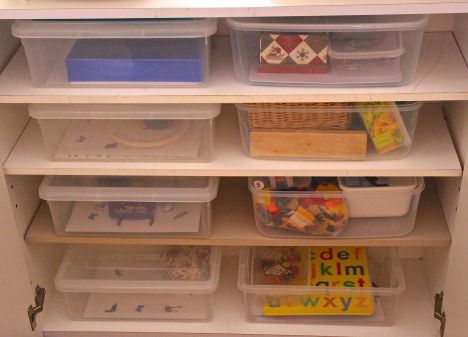
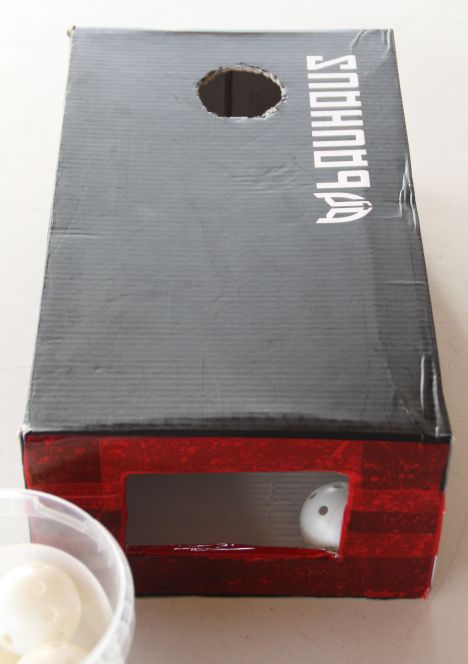
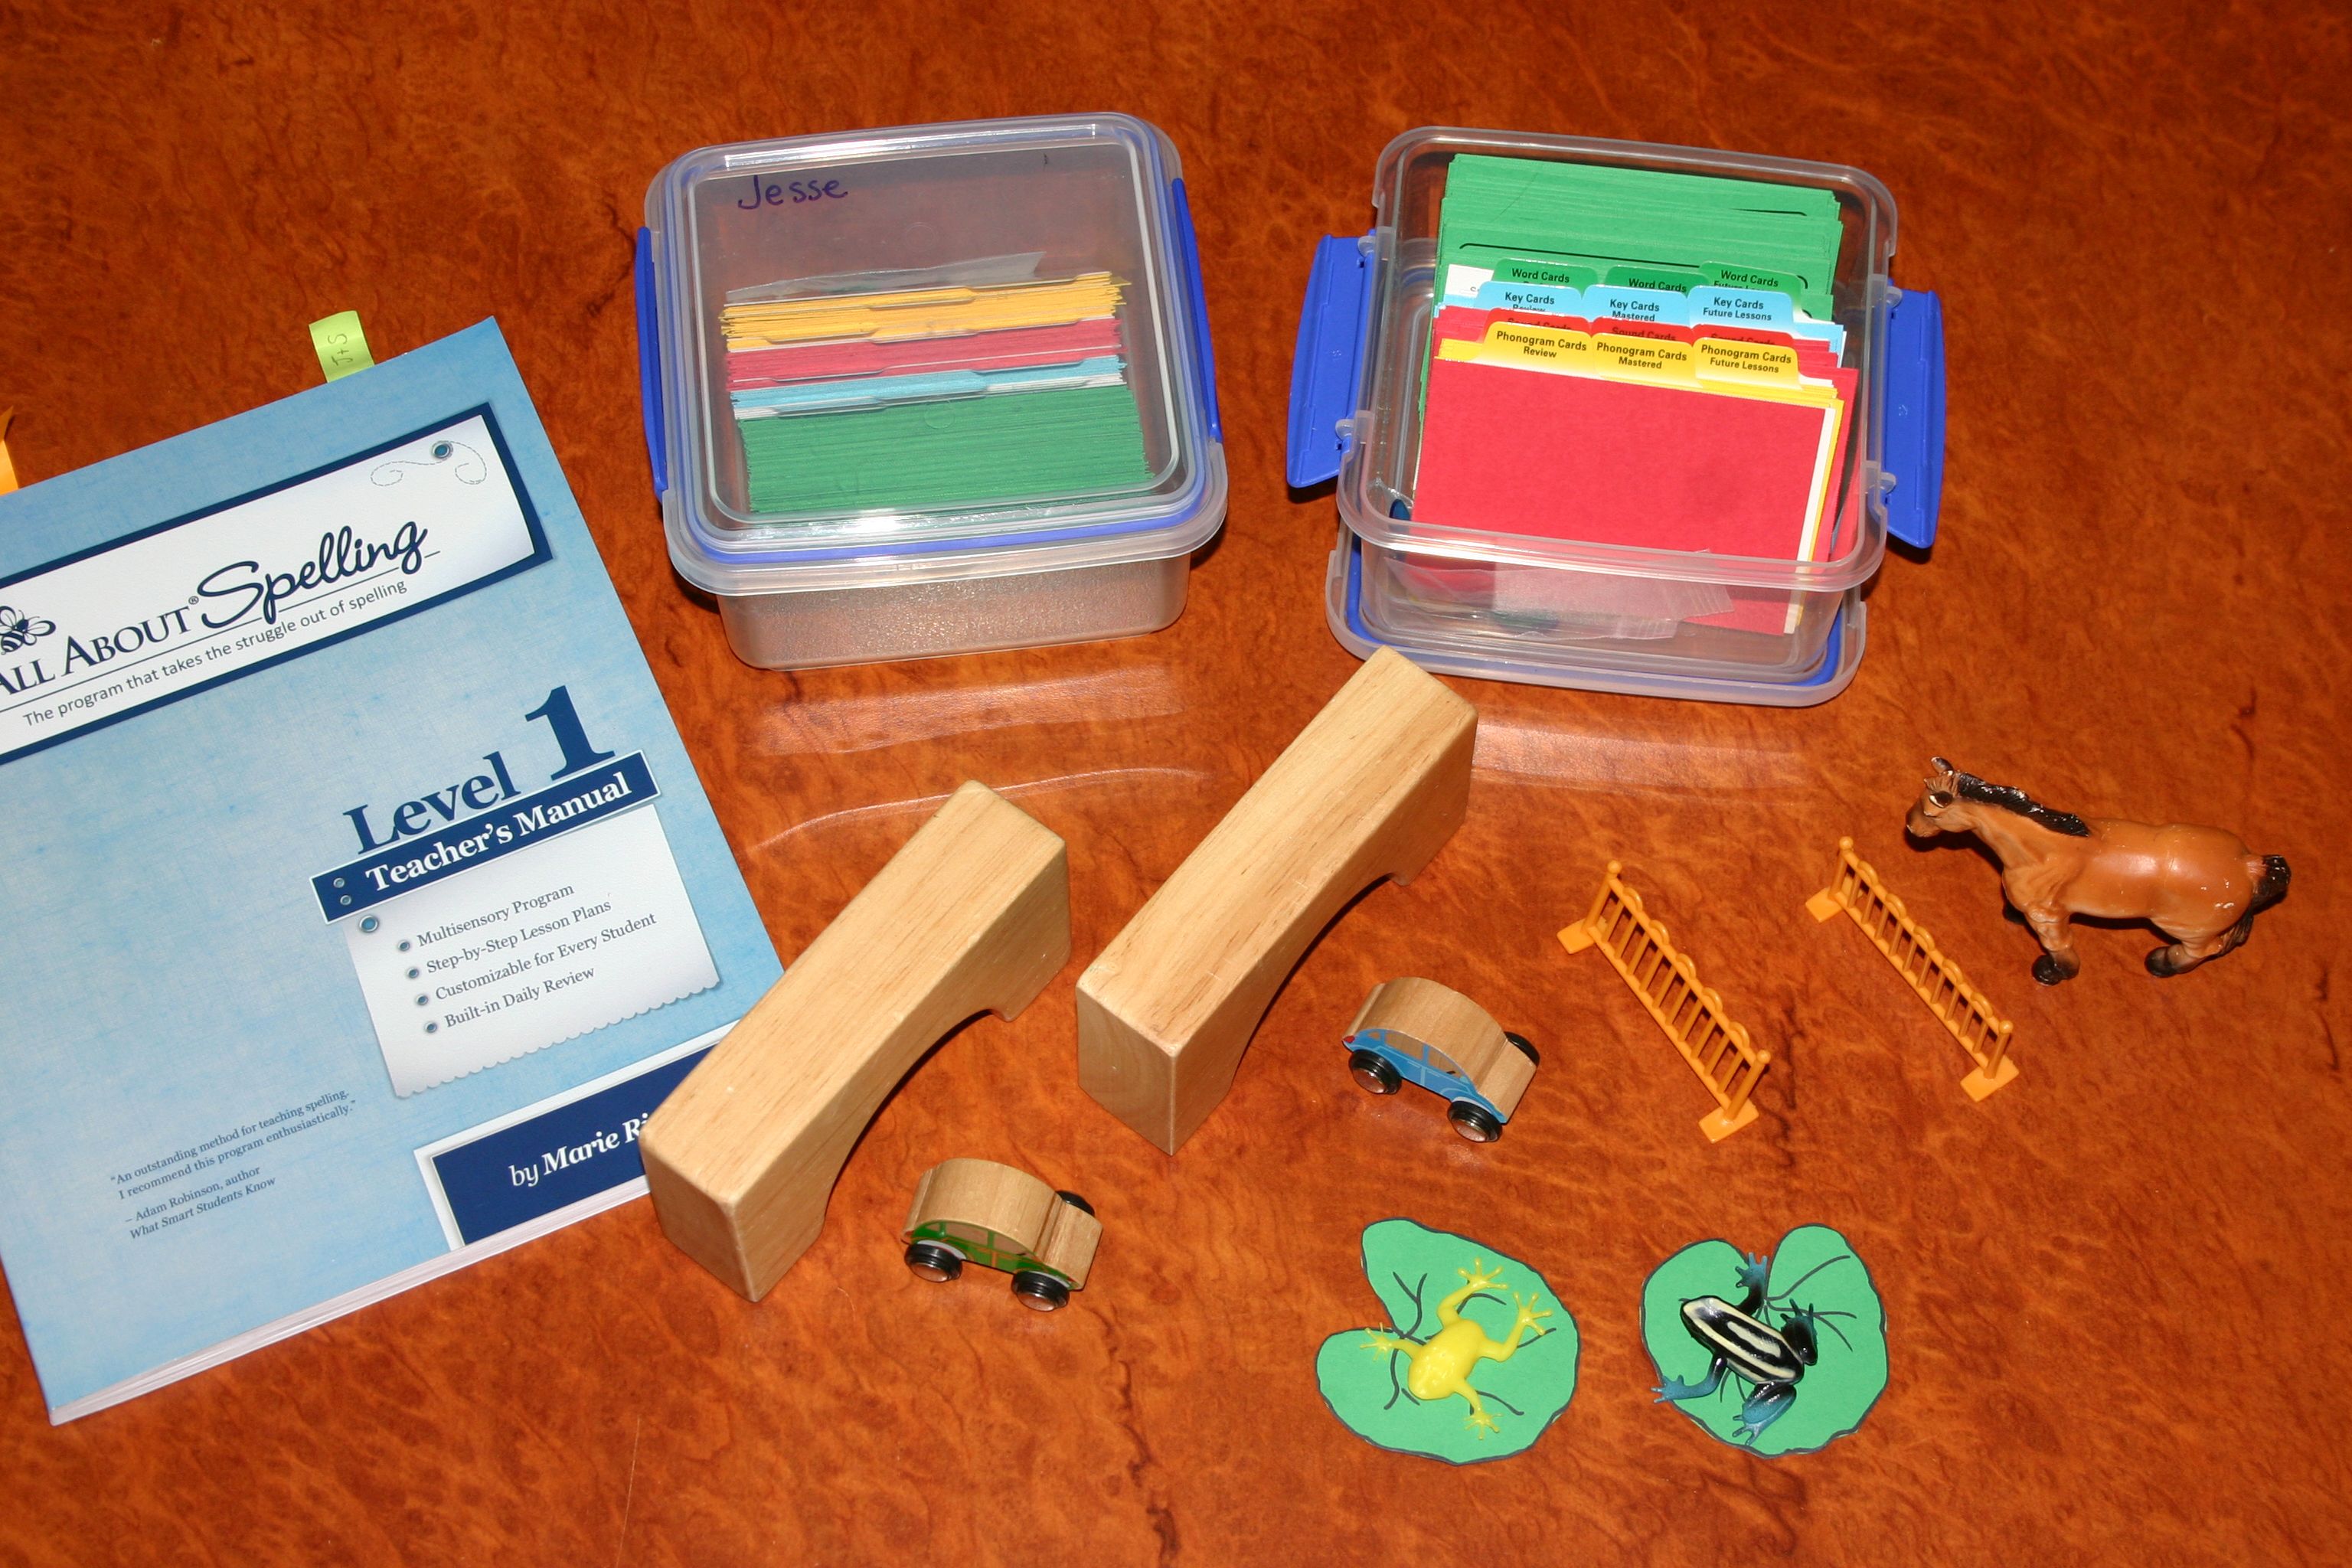
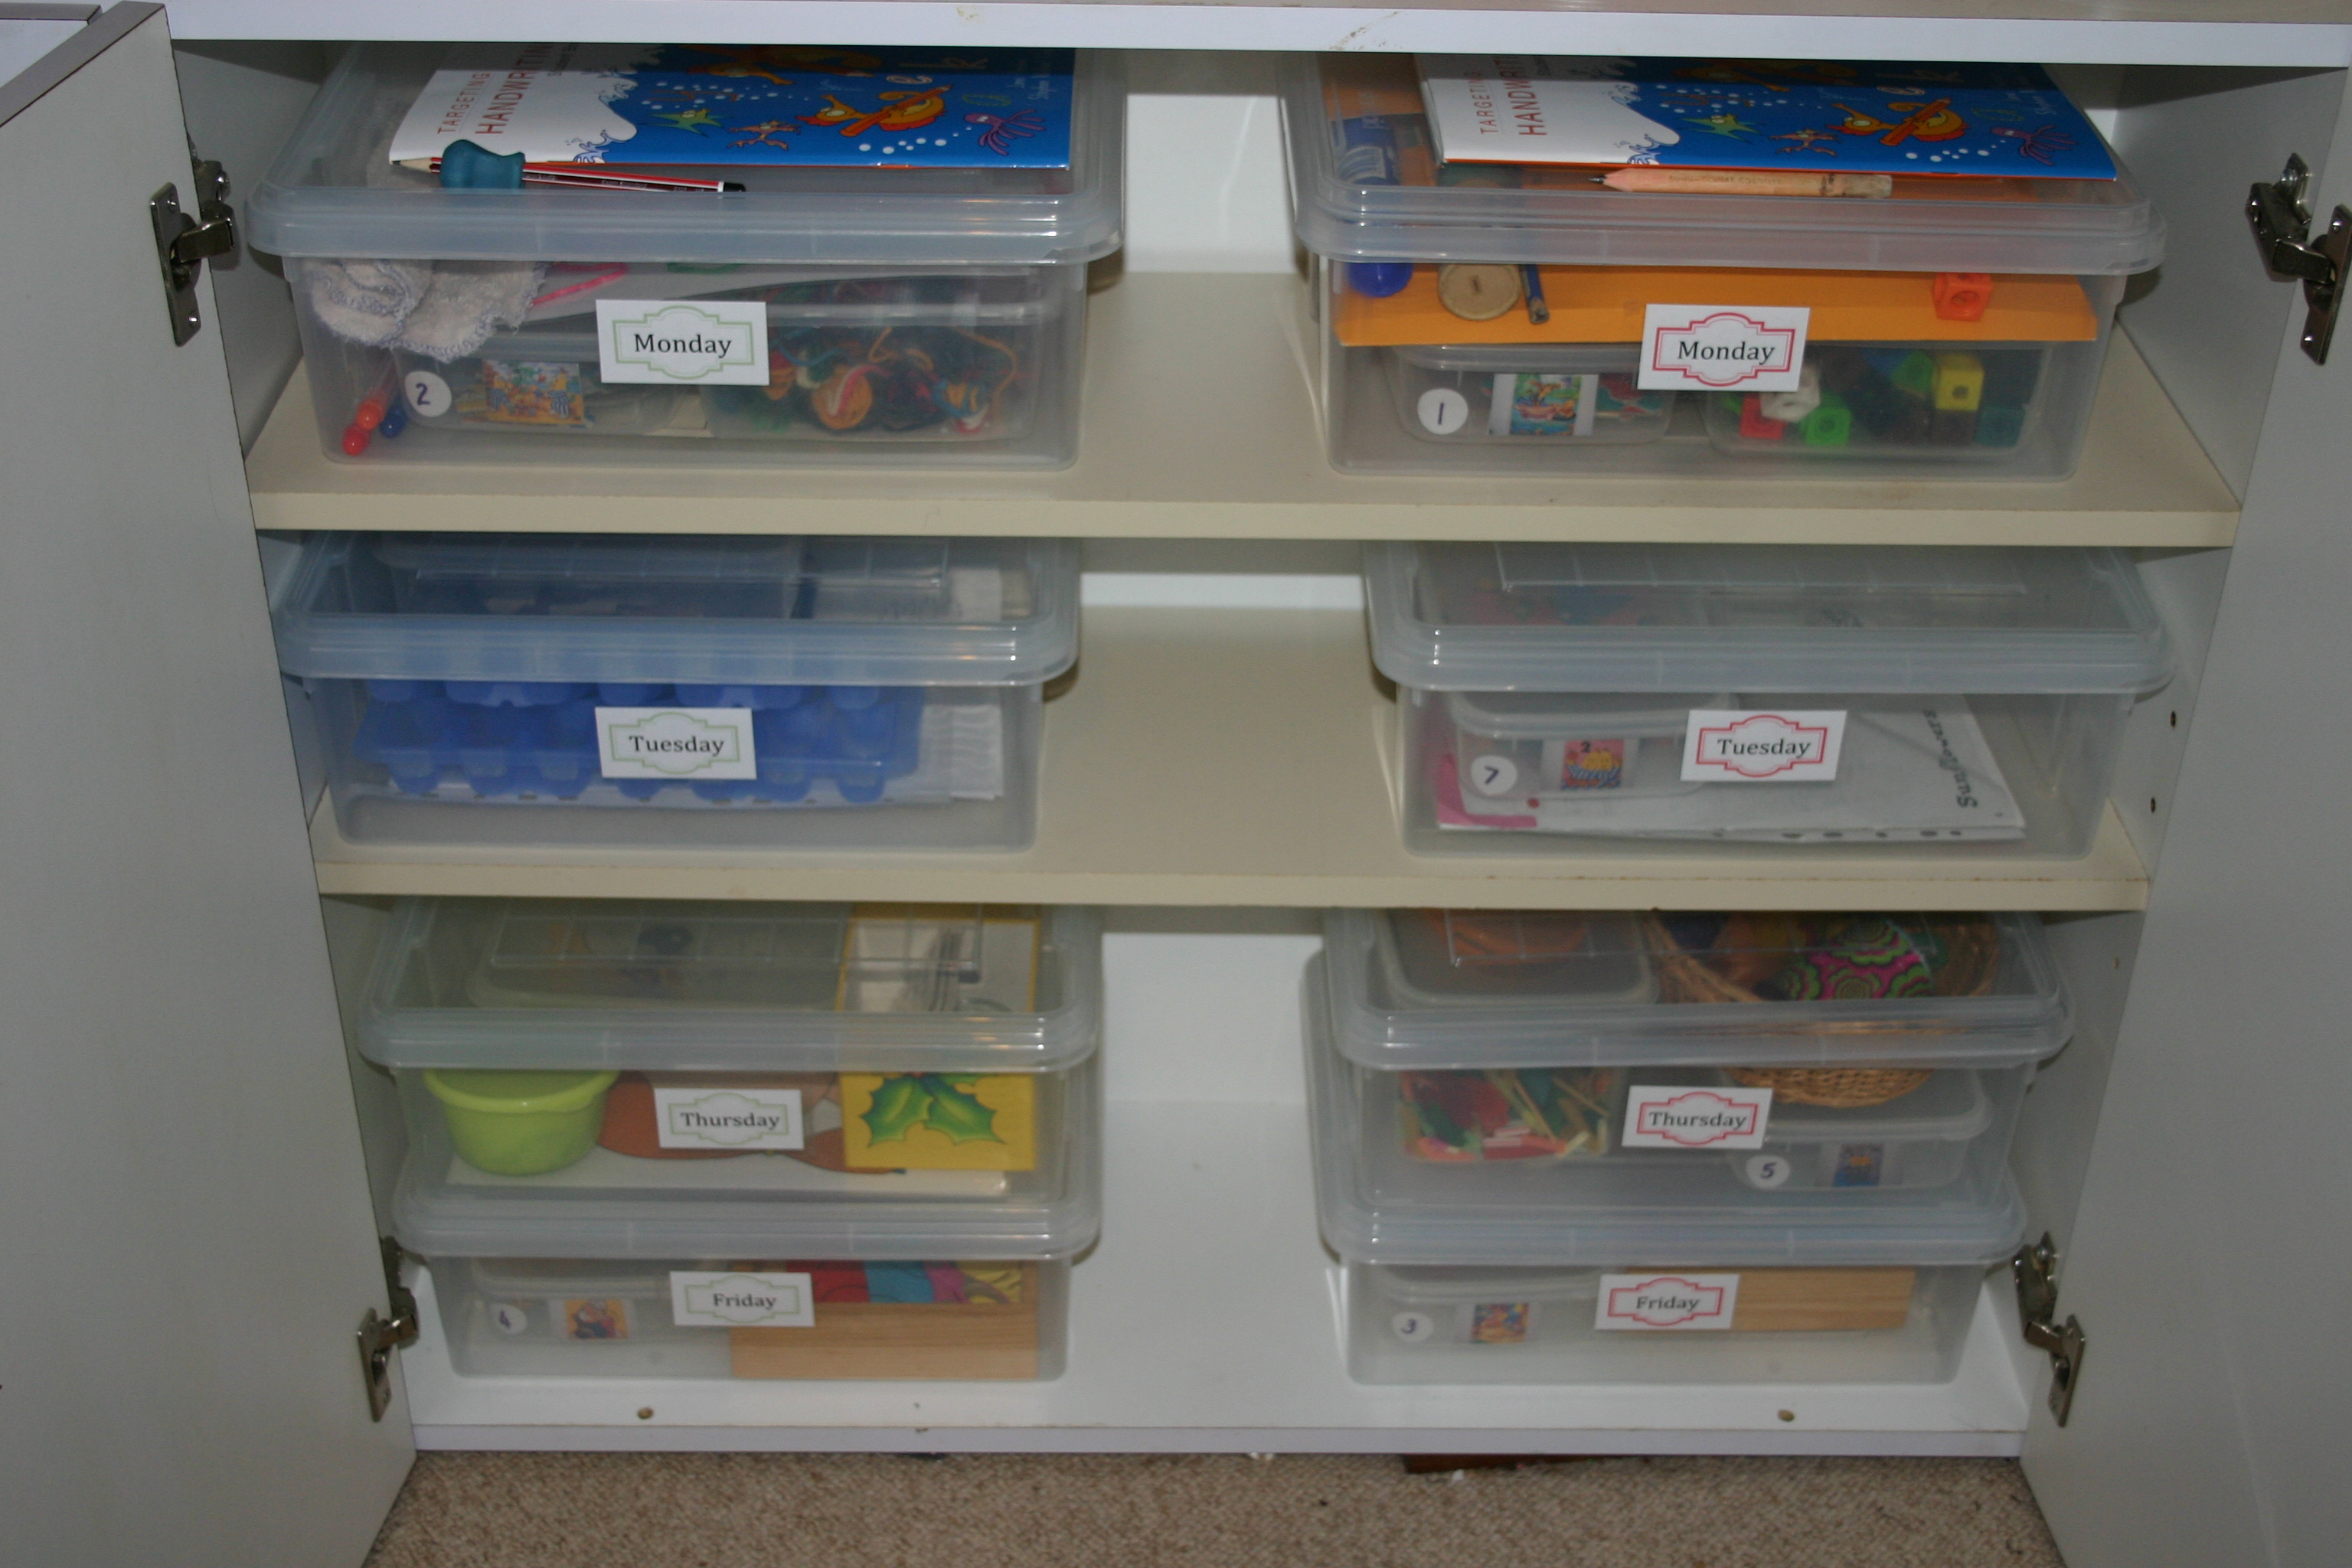
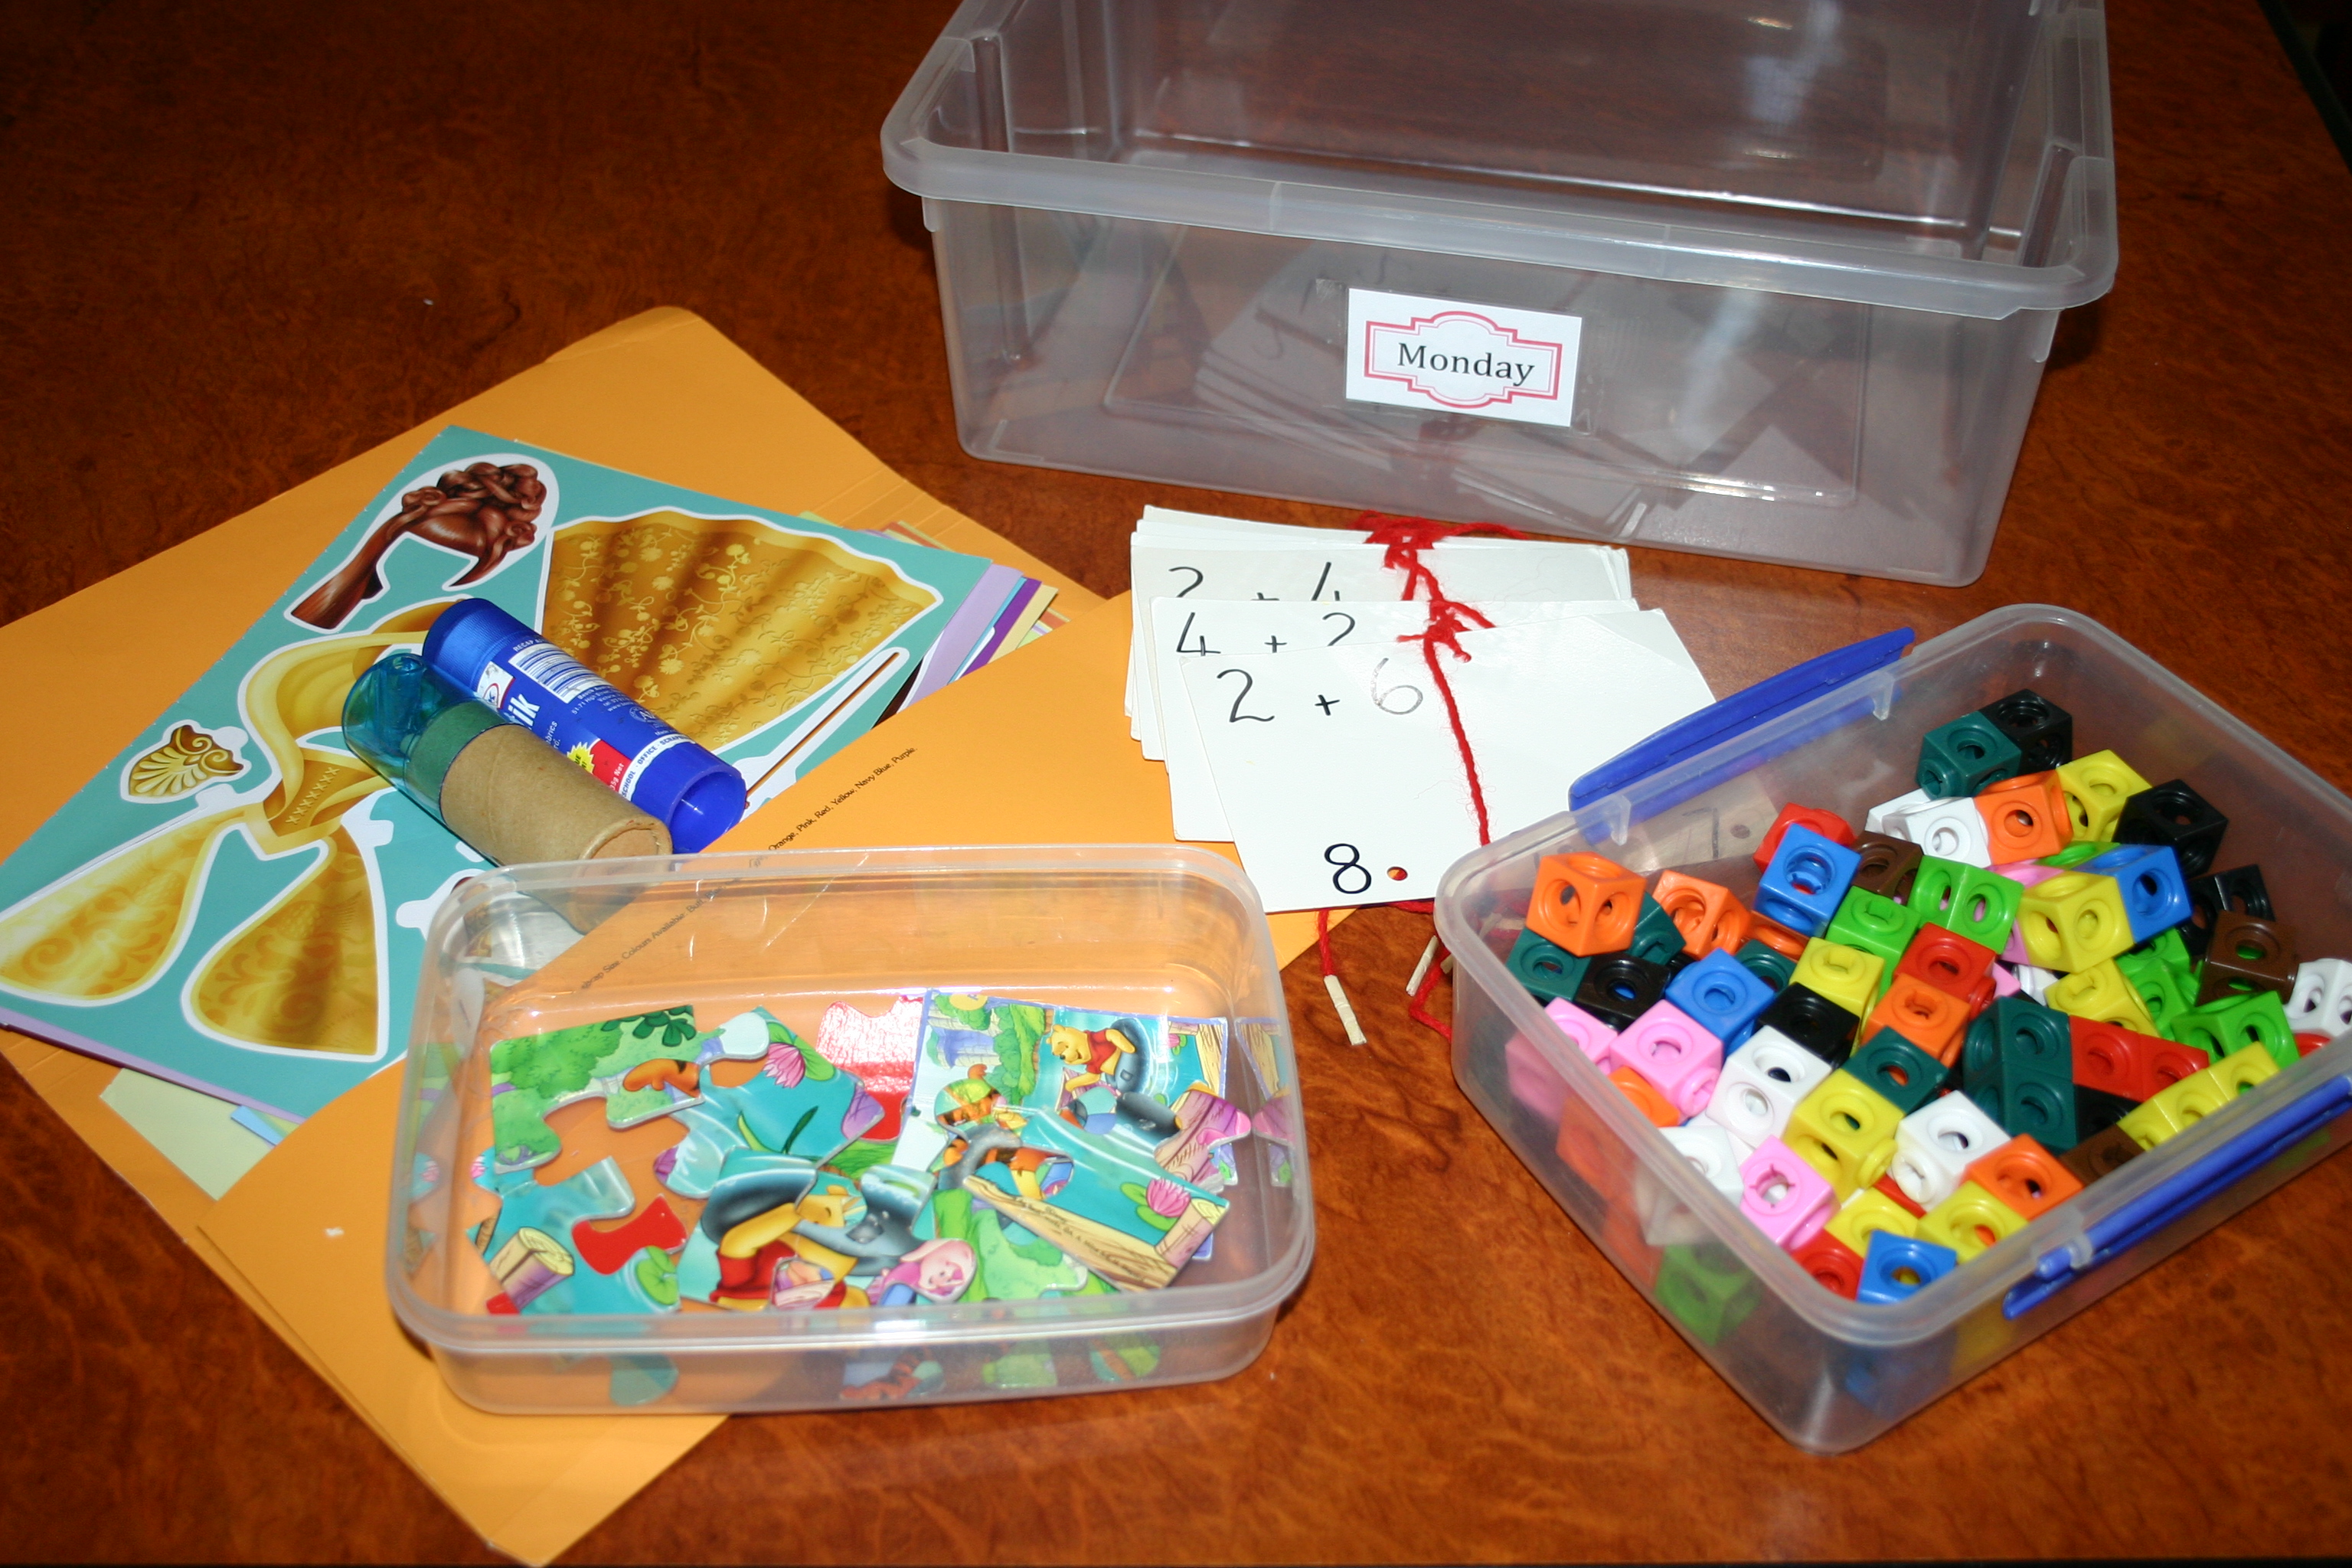
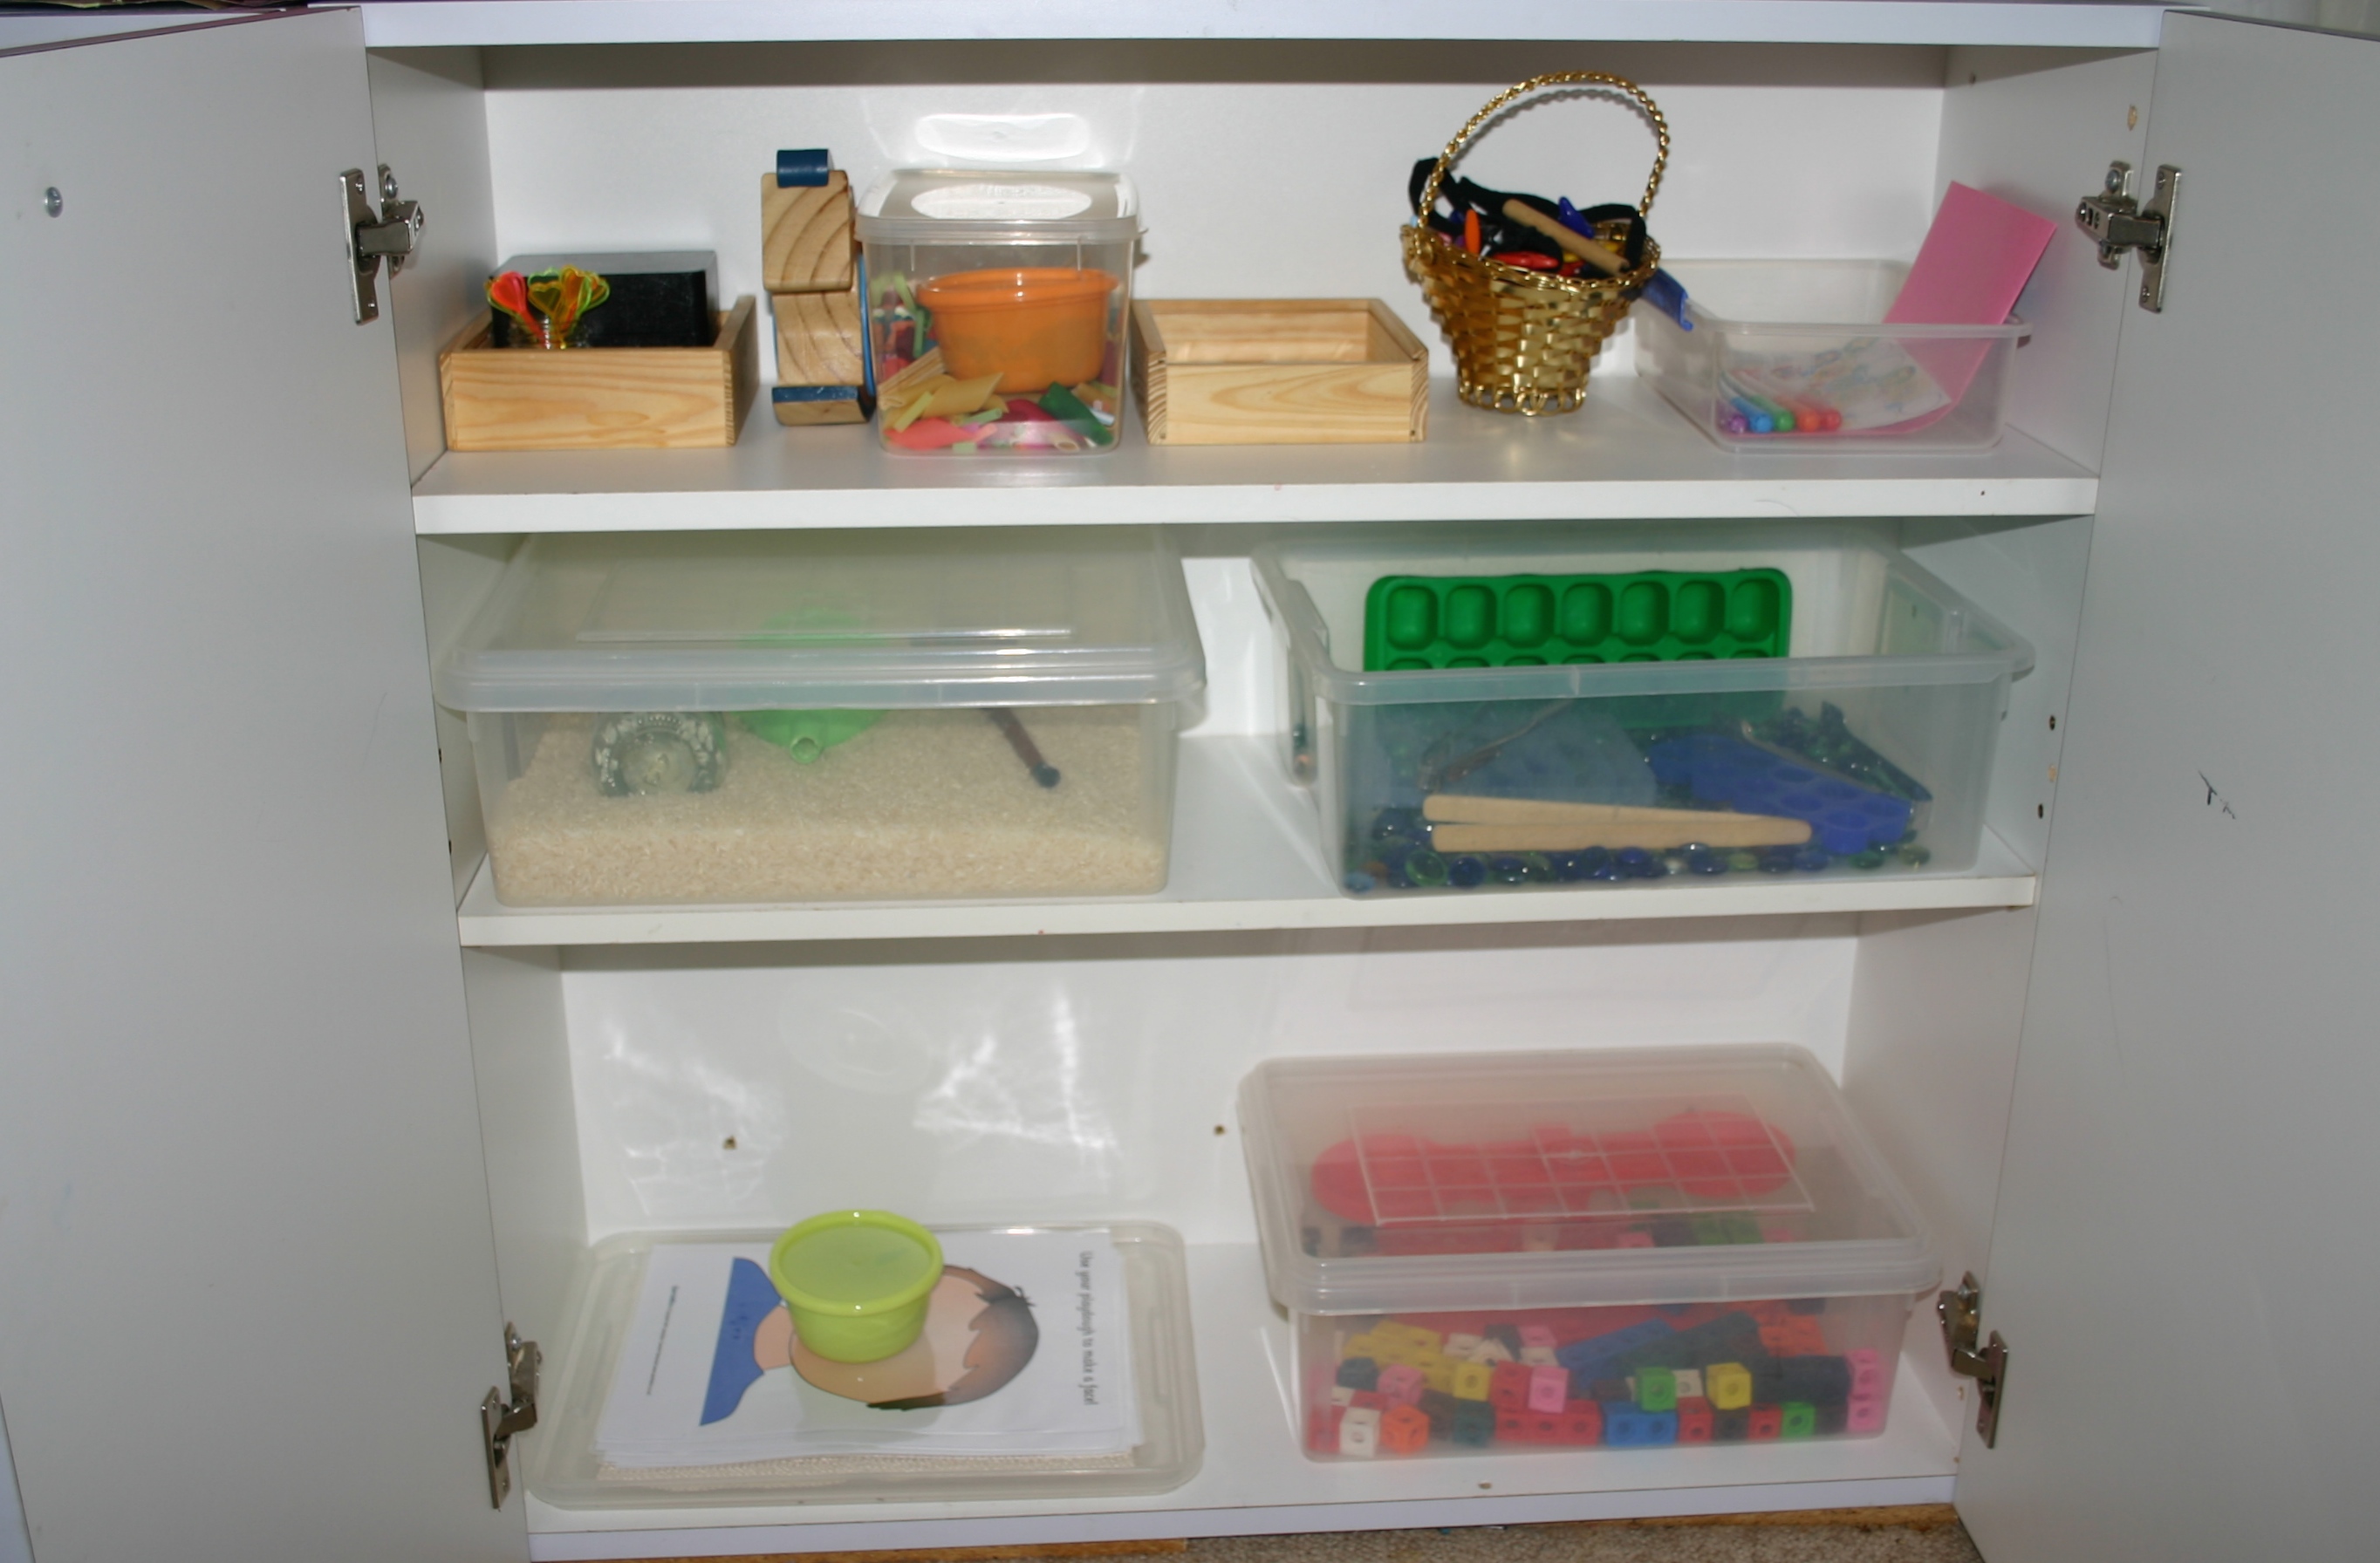
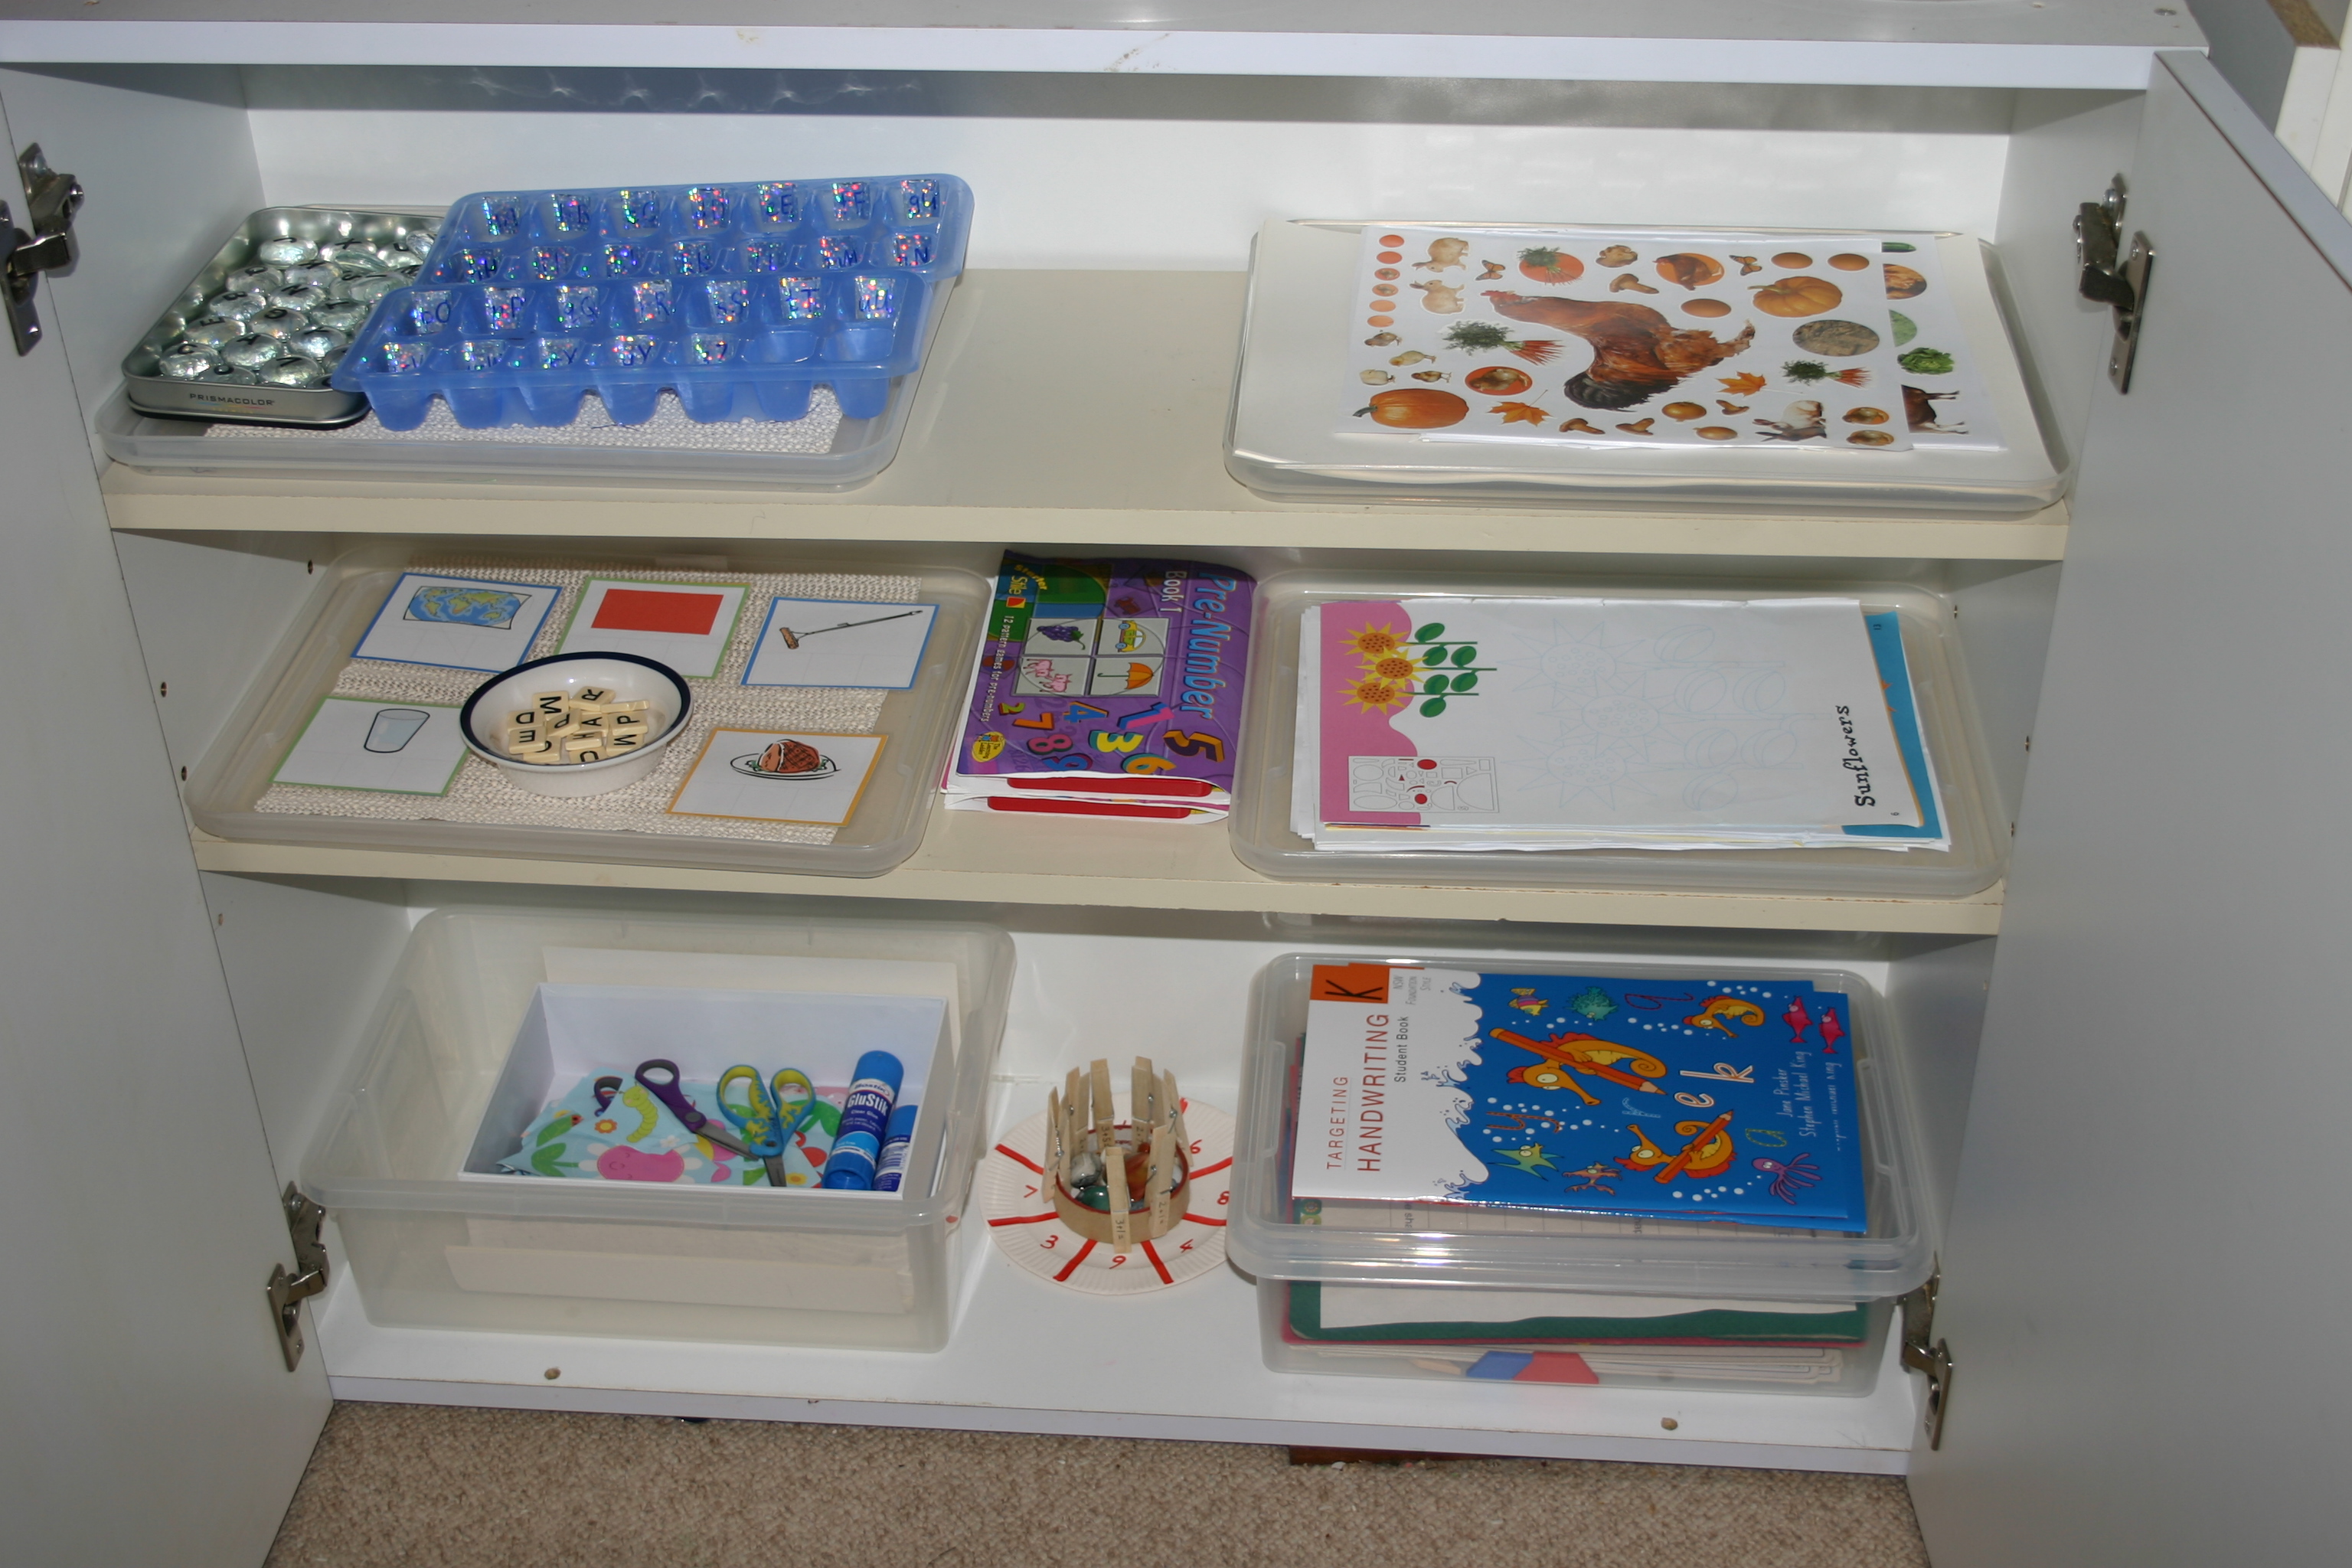
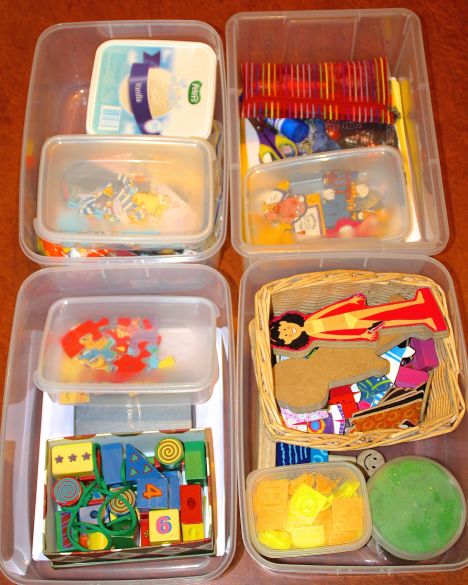
I use a workbox system for my younger students and find it works well. It takes a little time to set up but pretty much runs itself once you are going, with change-overs only necessary every couple of weeks as skills are mastered or interest wanes with particular activities over time. We do “school” at home four days a week so there are 4 shelves of 2 boxes per day. The first box holds the “work” that is done with my supervision and the second box holds independent activities that are completed with some choice once the set tasks are done.

IMG_9472

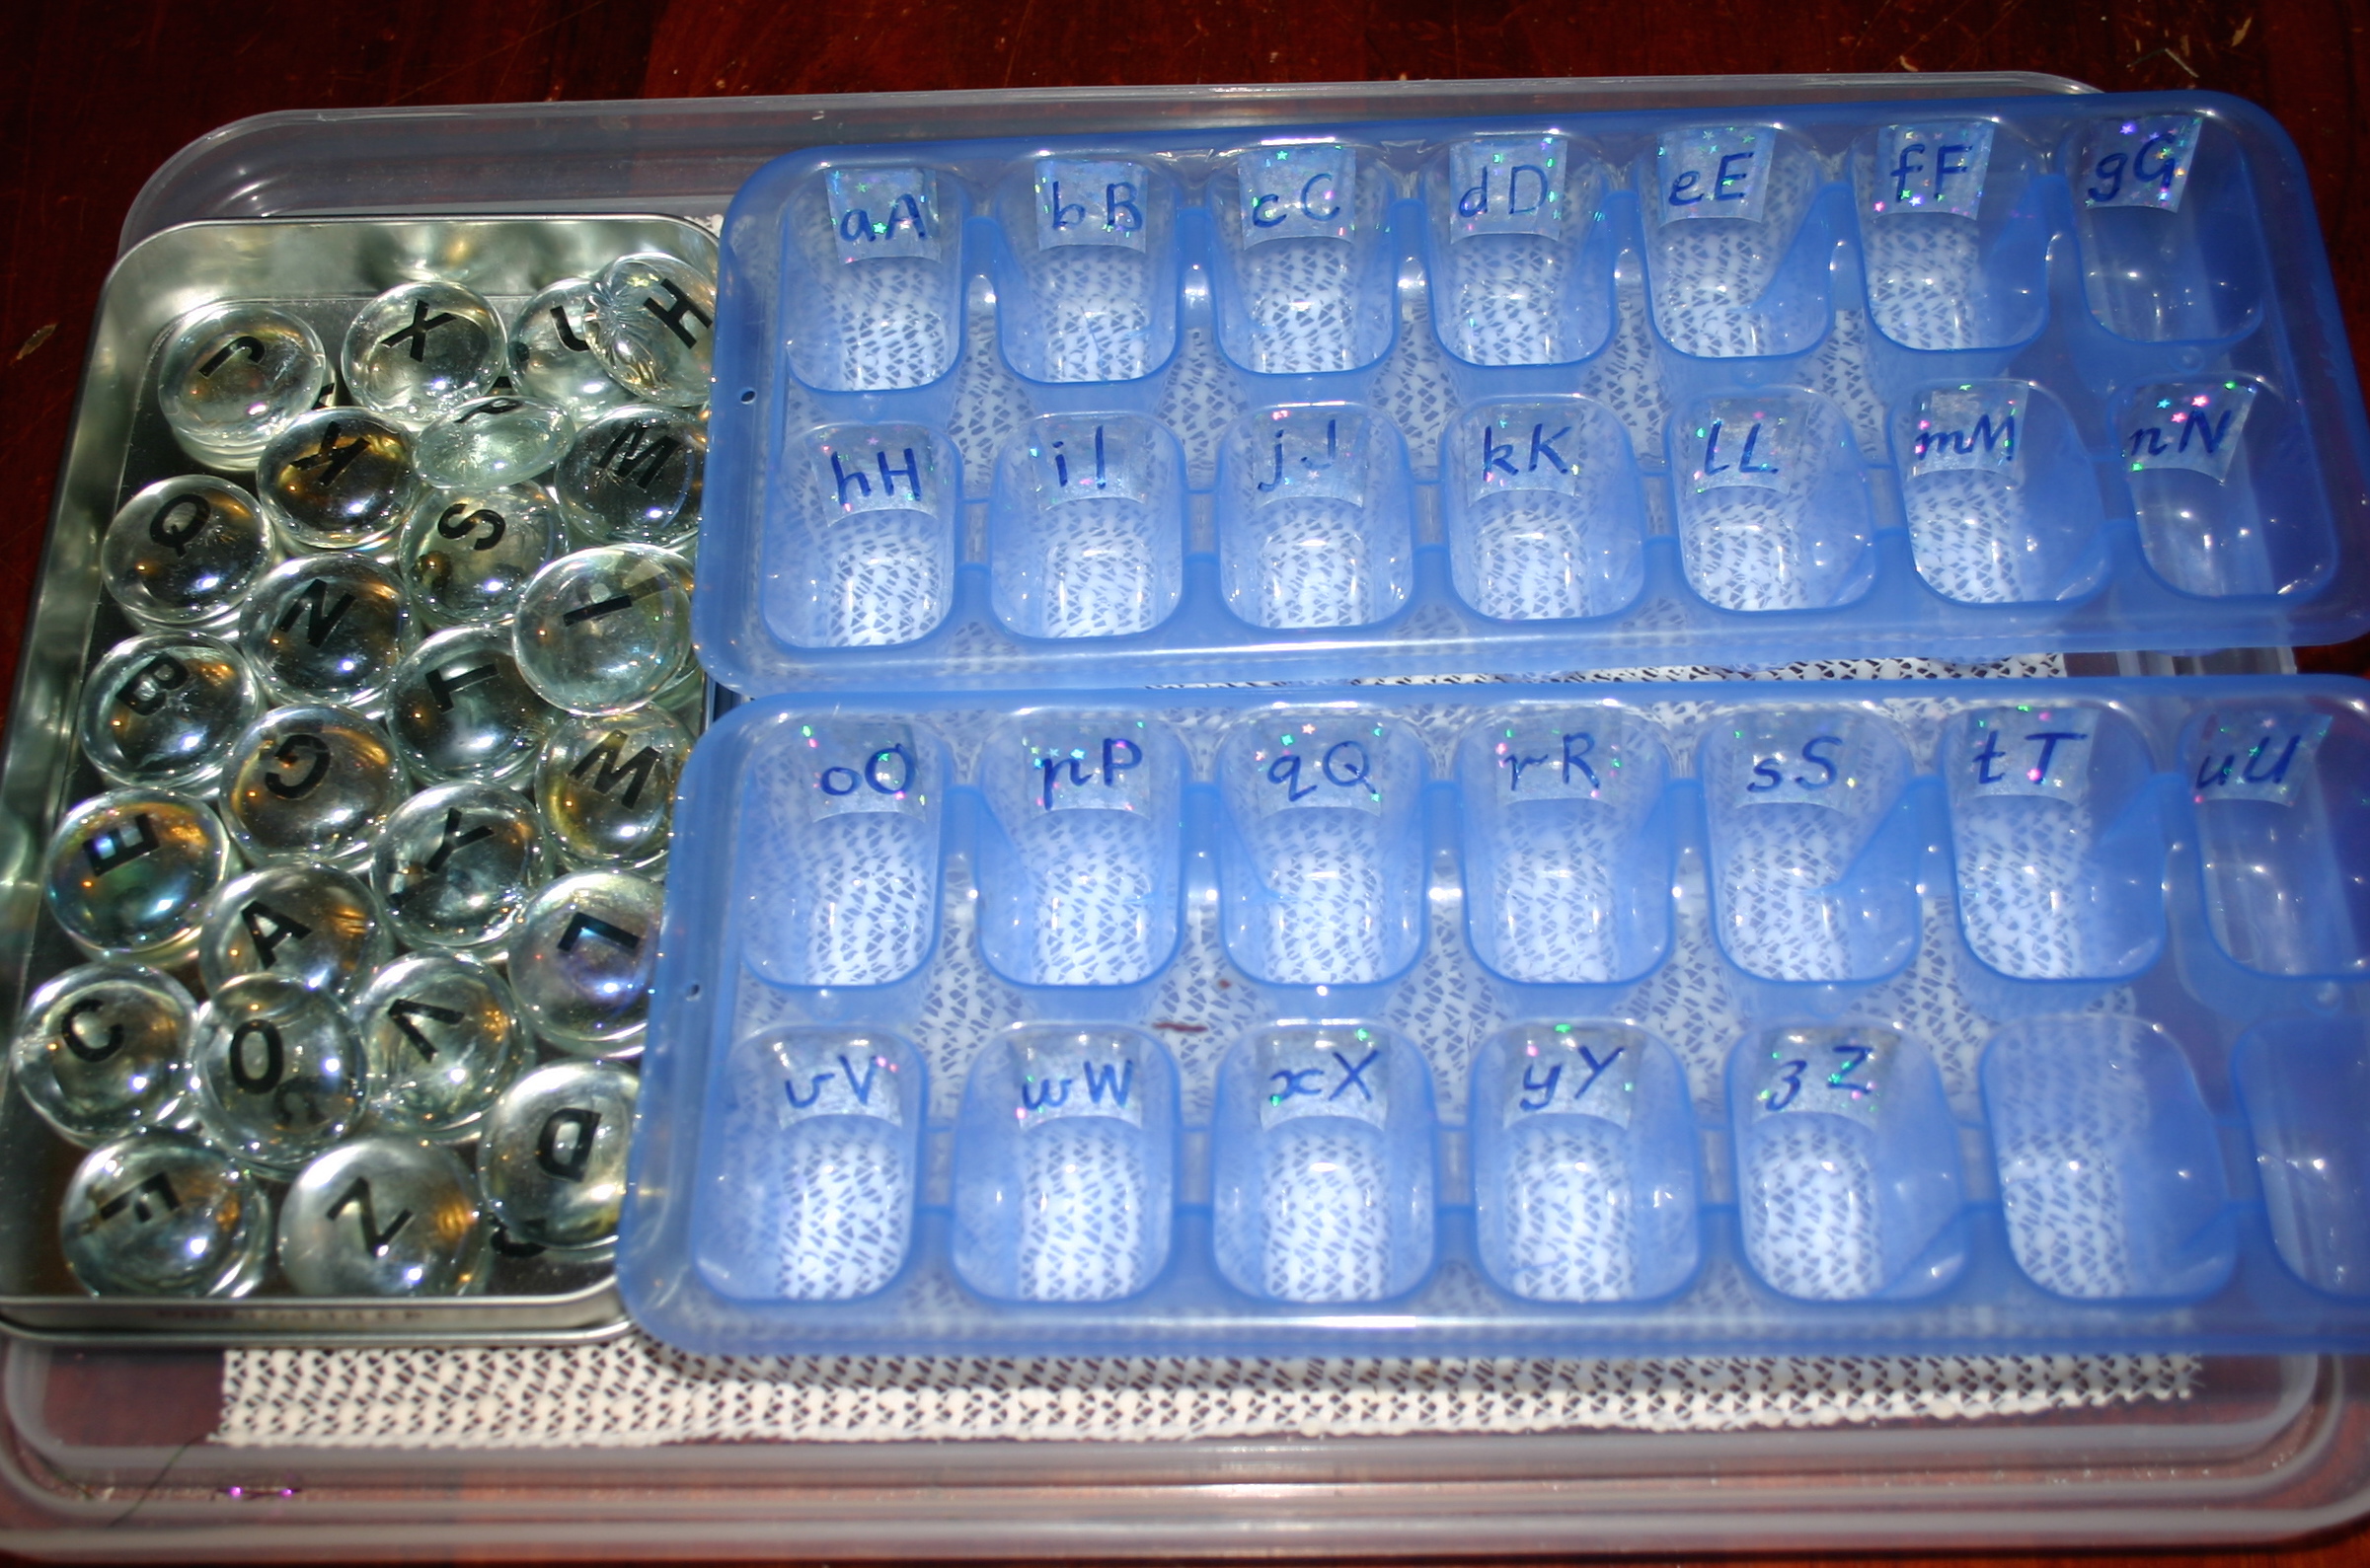
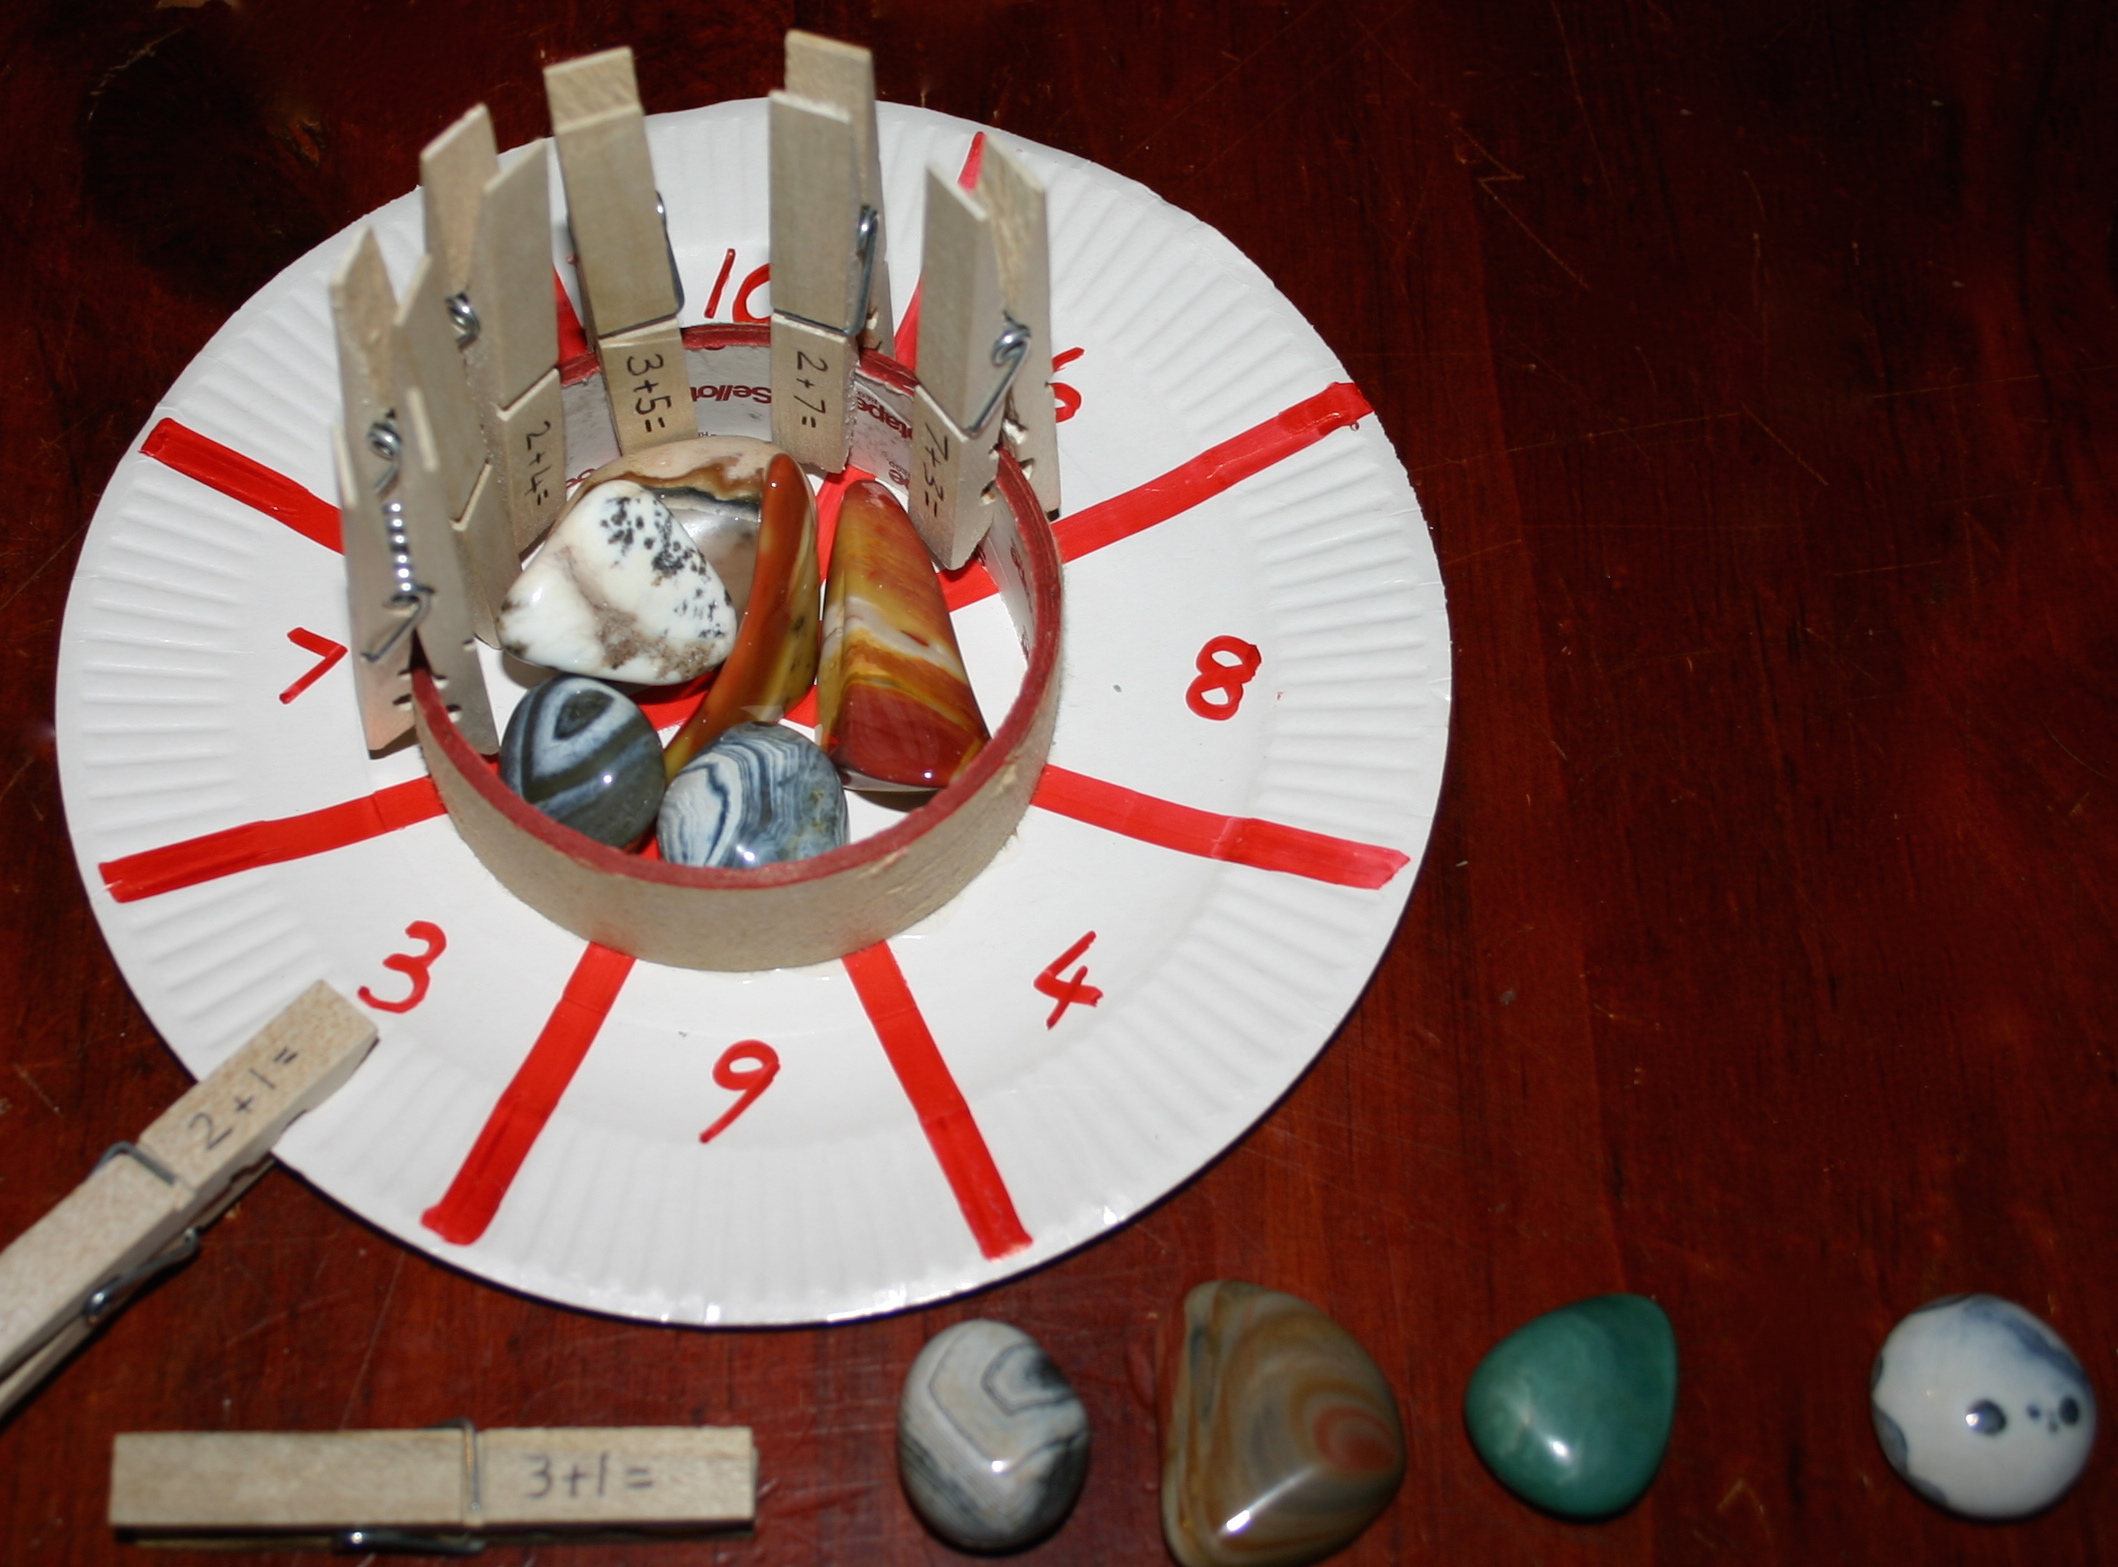
We have already been working on basic counting skills and our little man is familiar with the alphabet and knows most of the sounds. To build on this, his work for the day will be a Montessori style maths counting tray followed by an initial sounds worksheet involving a little bit of writing practice.

IMG_9466

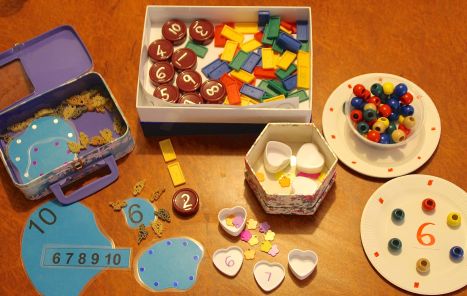
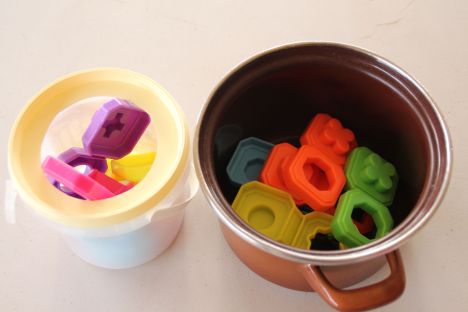
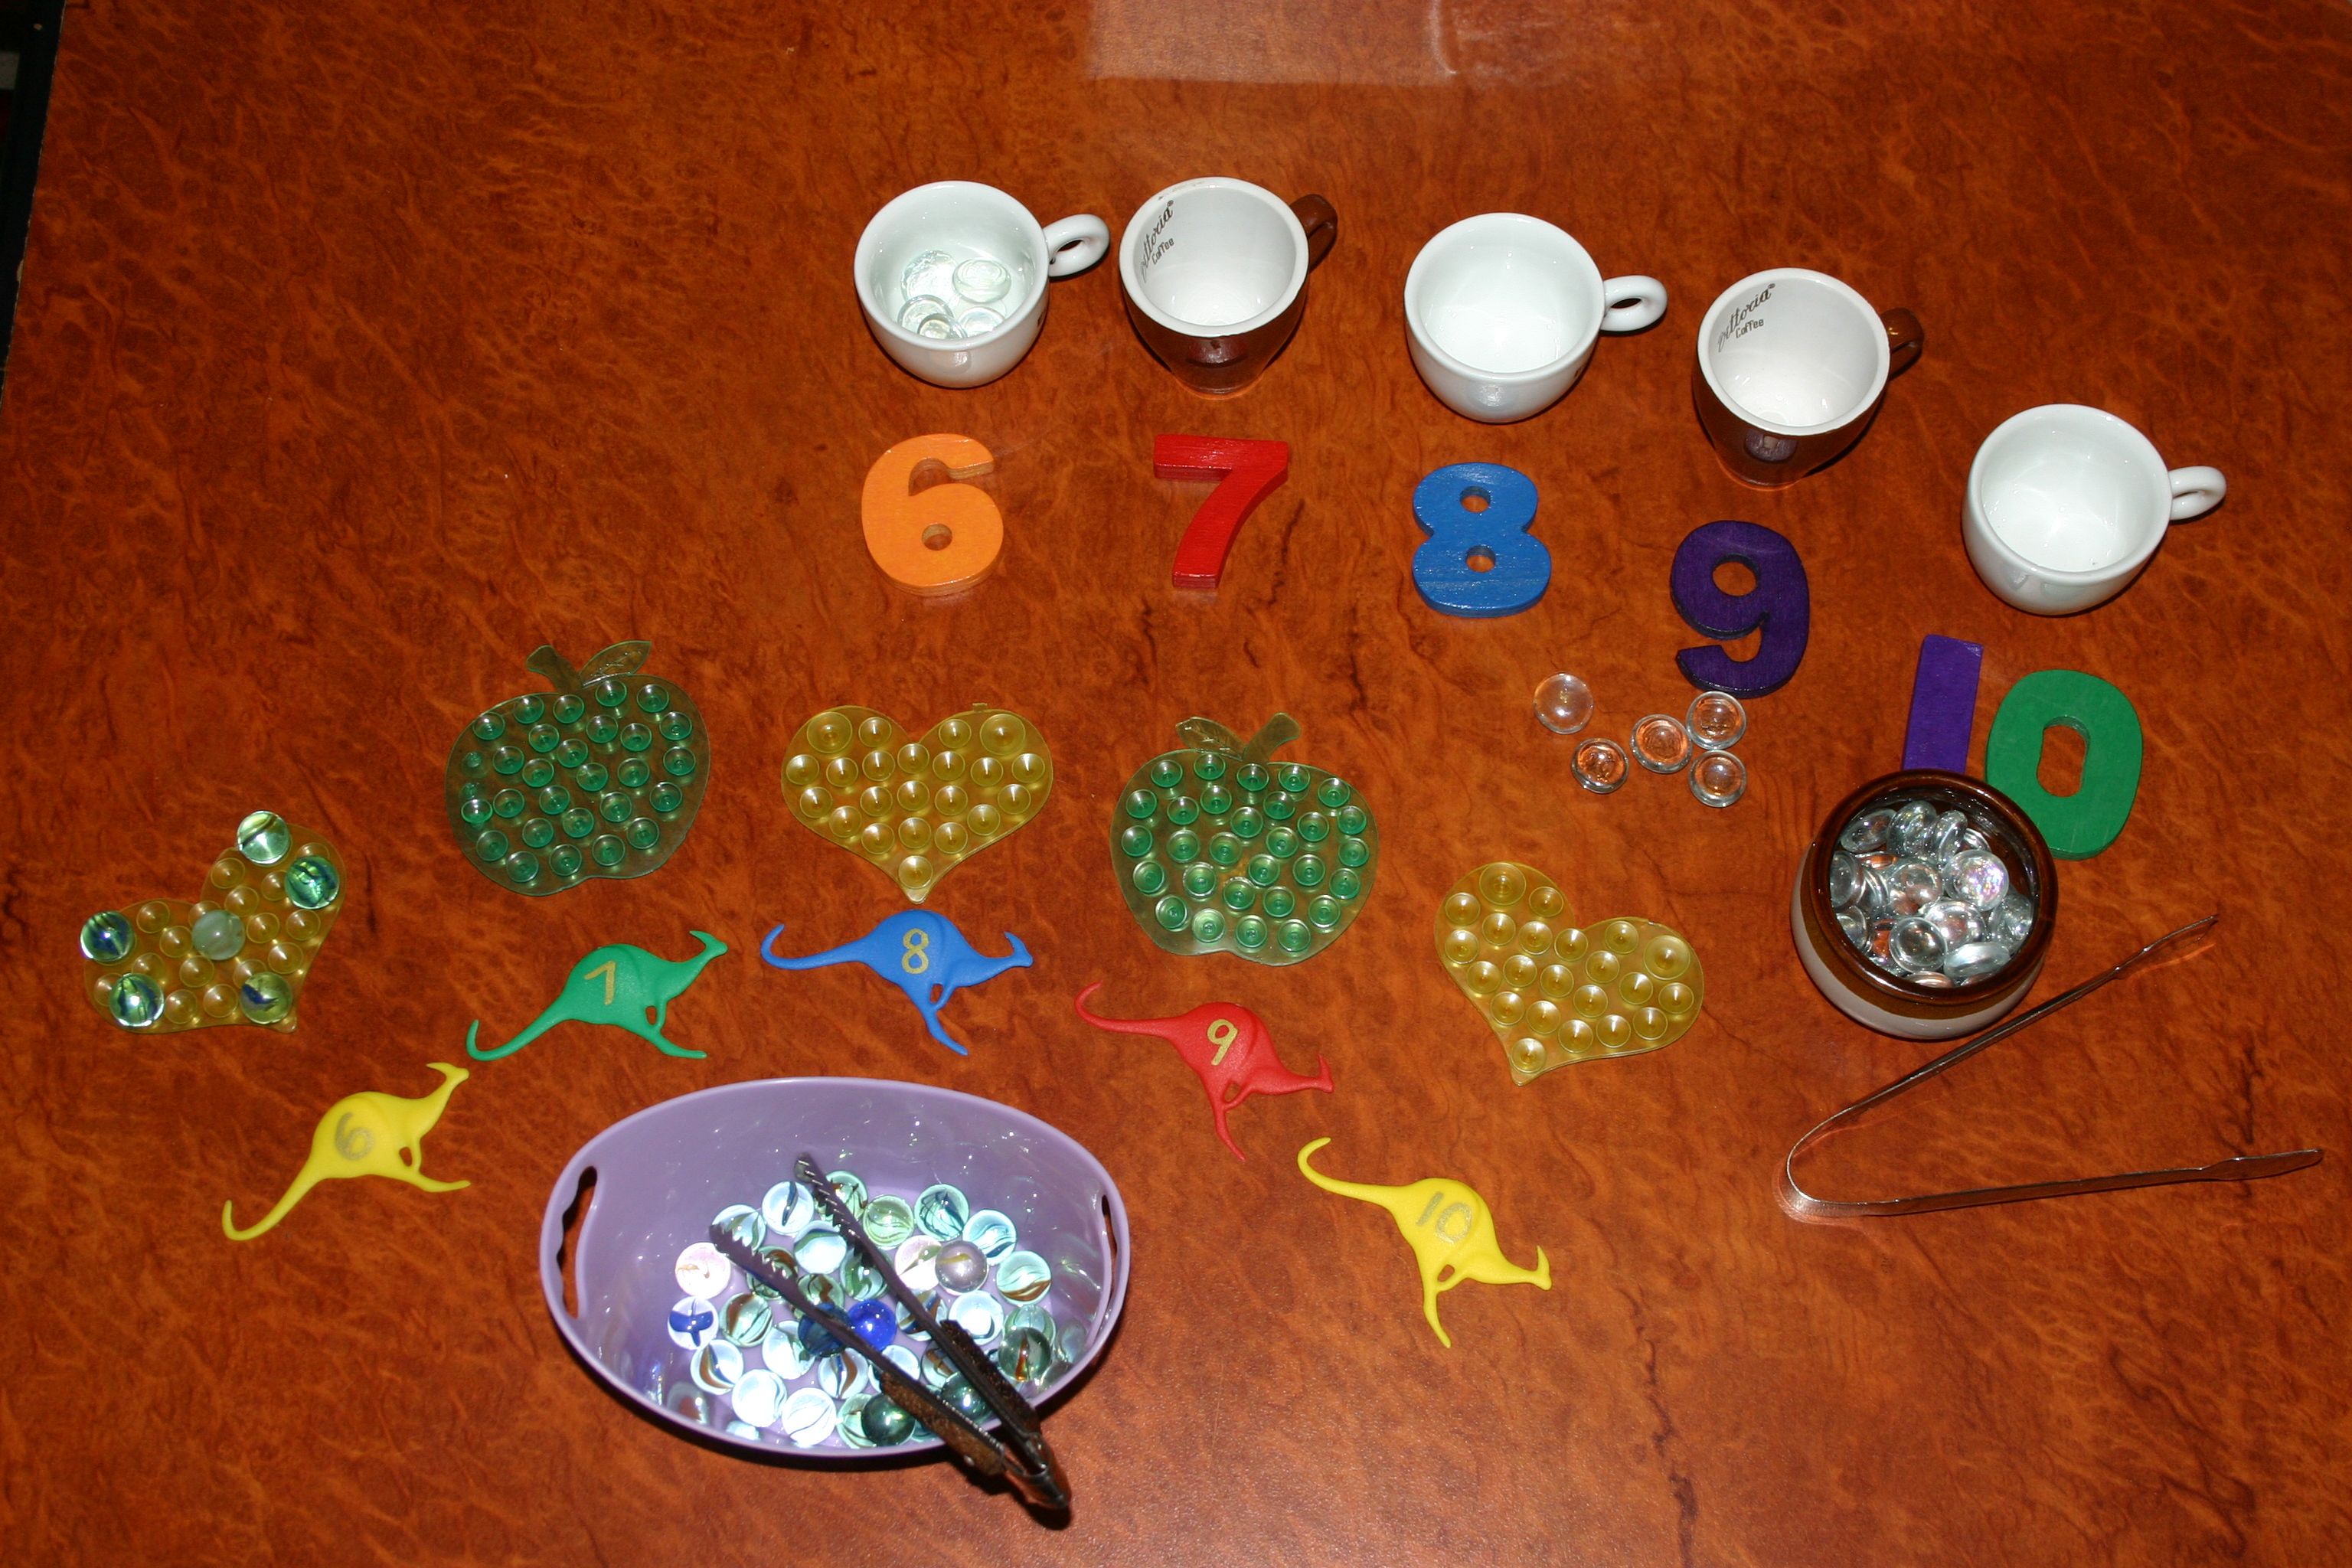
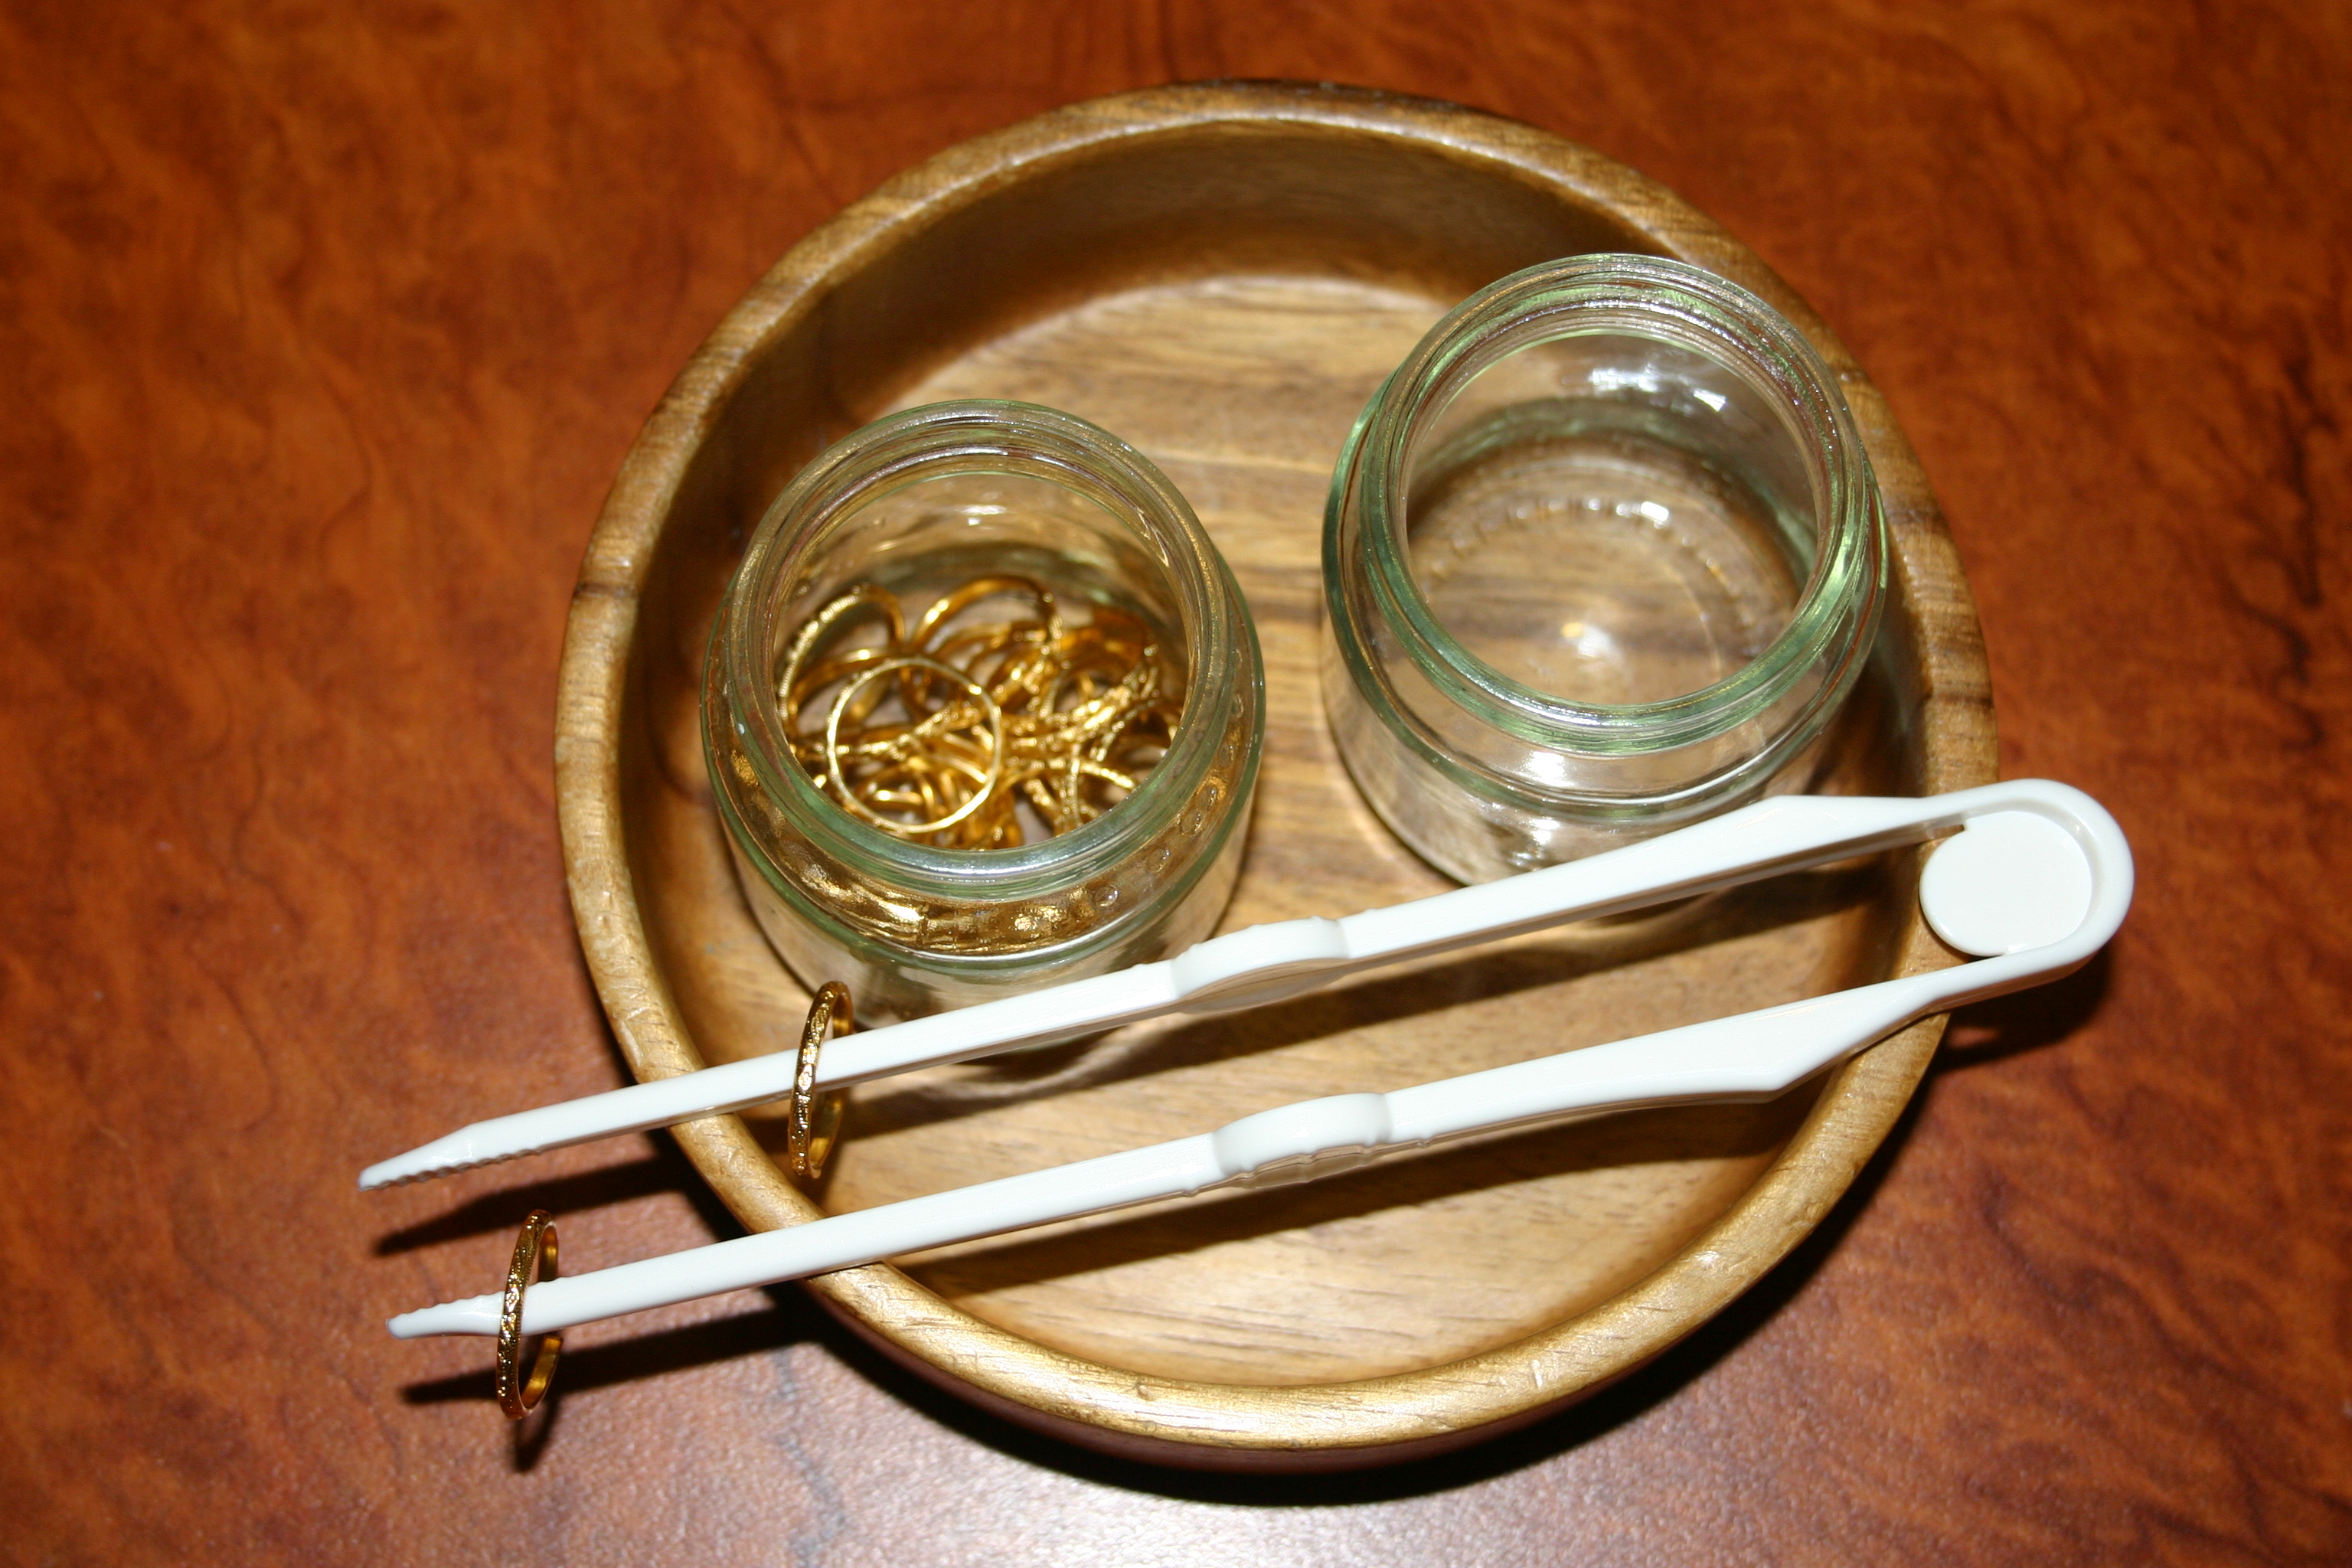
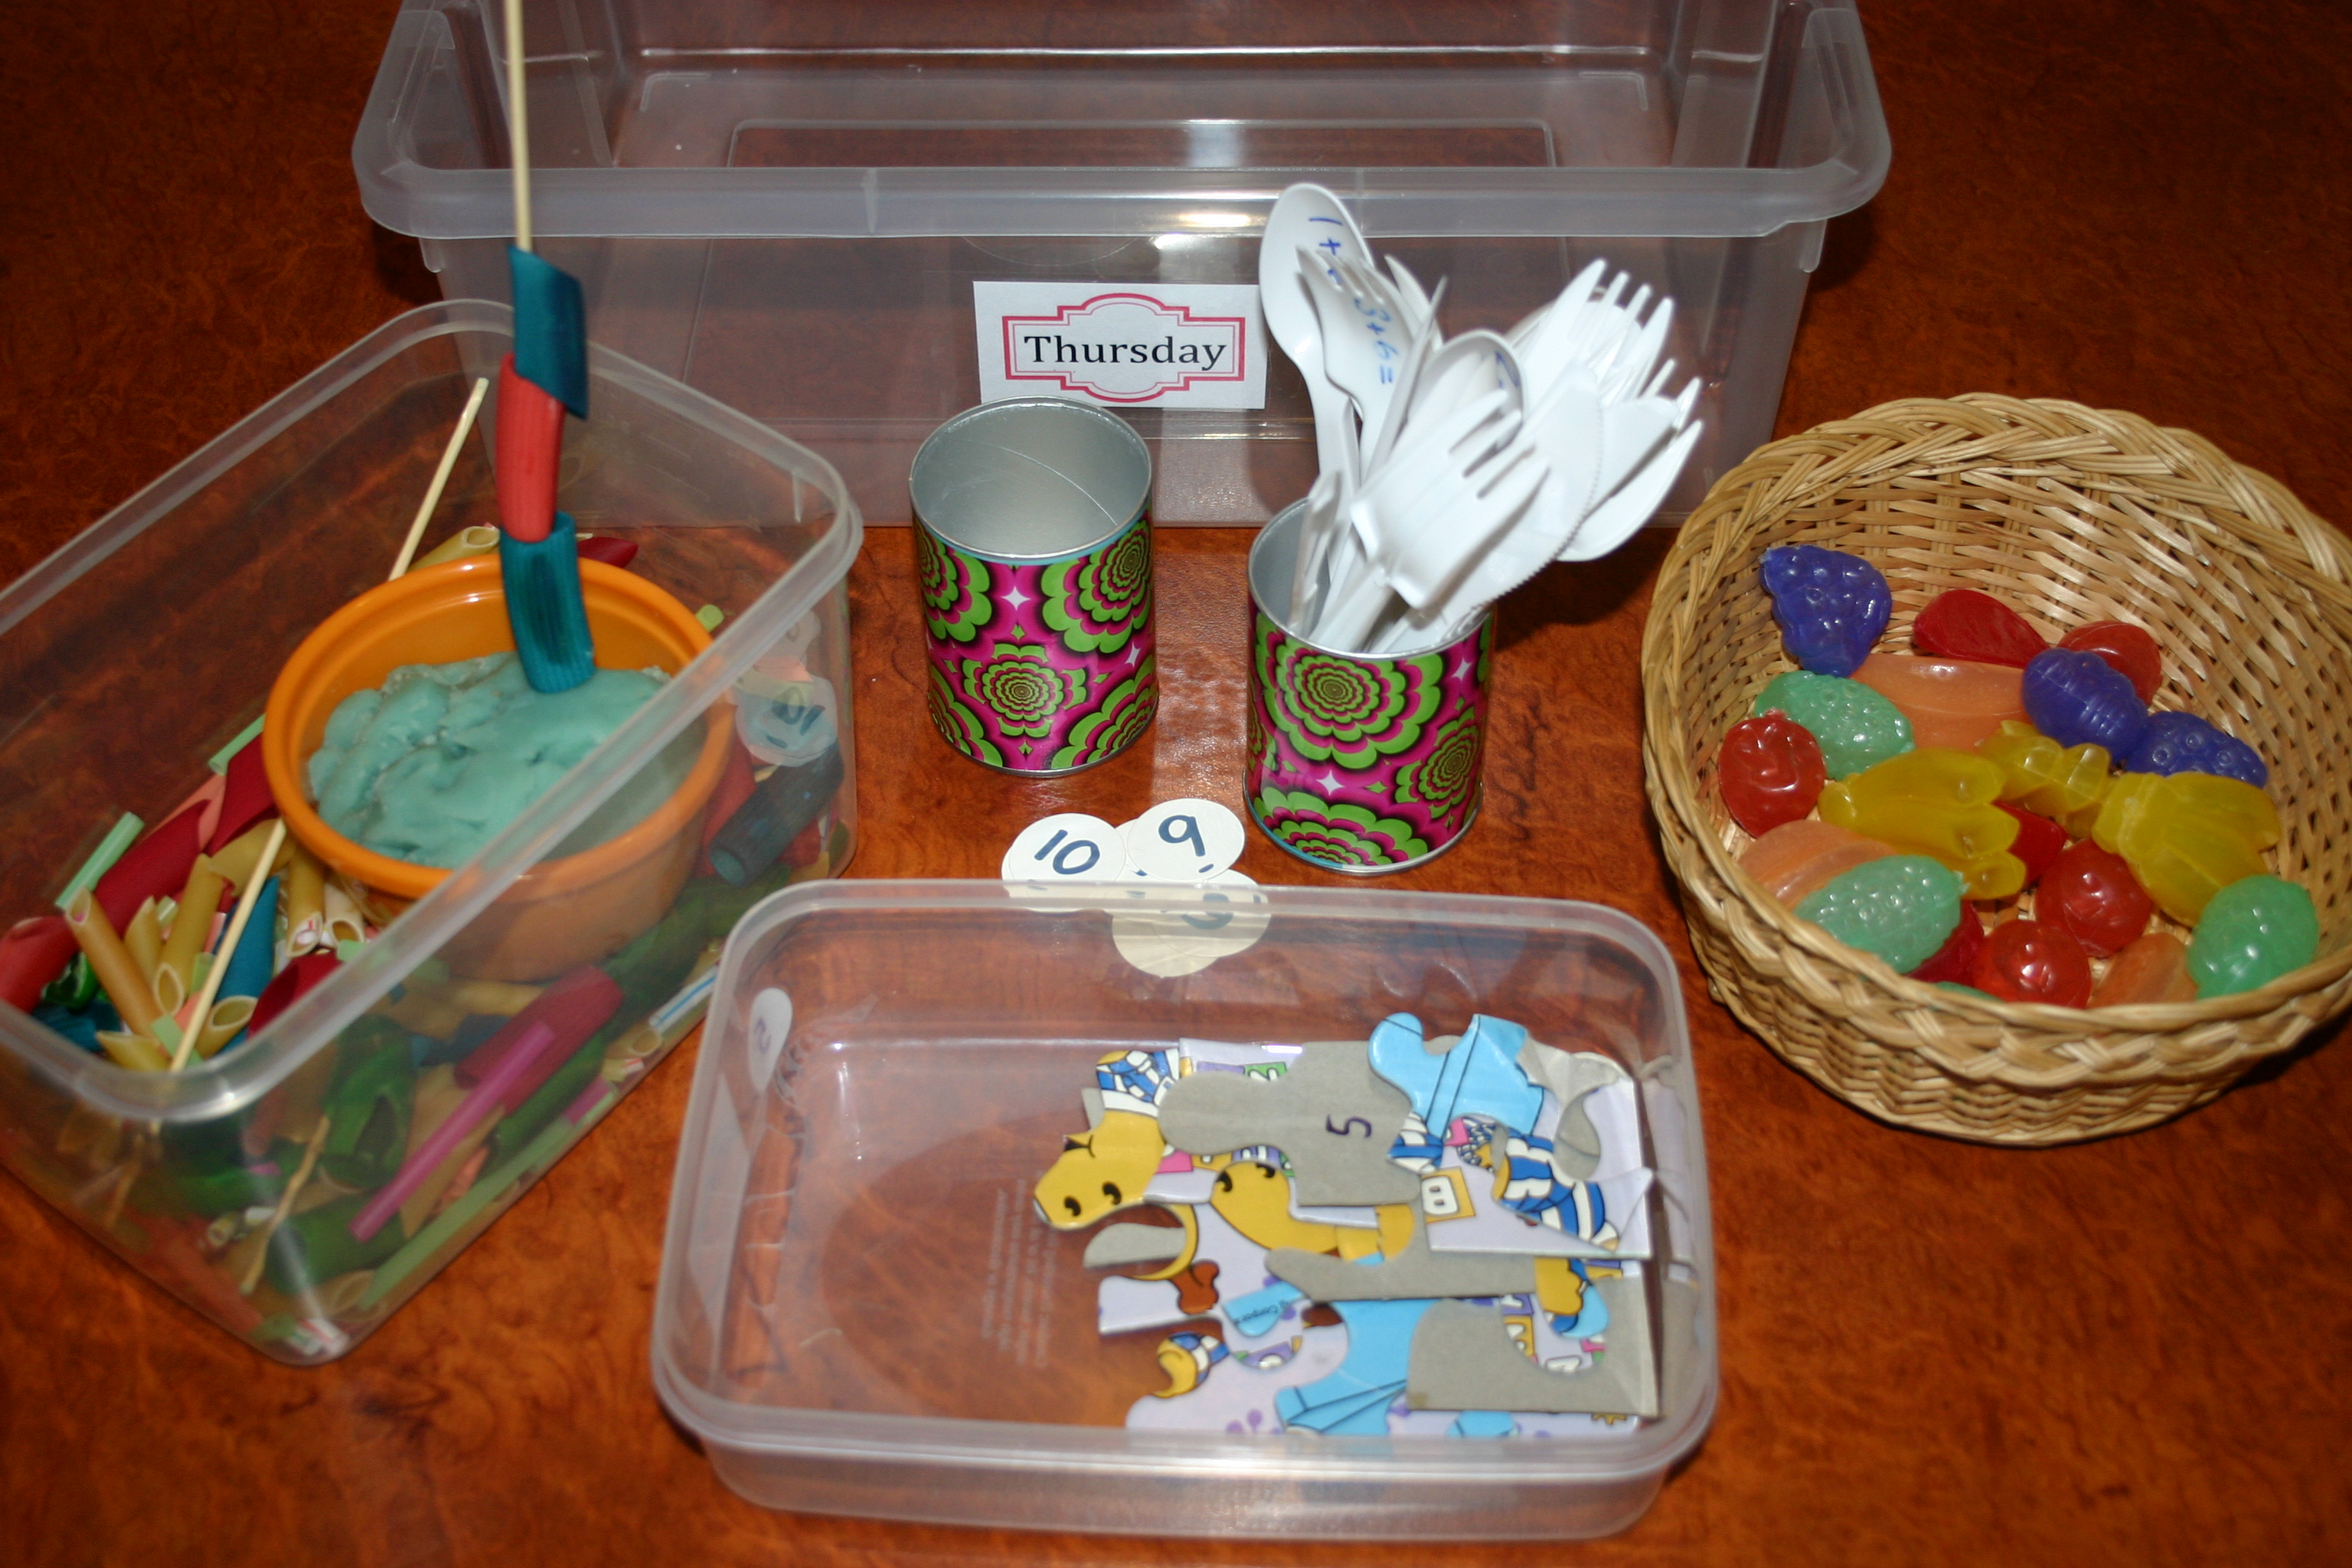
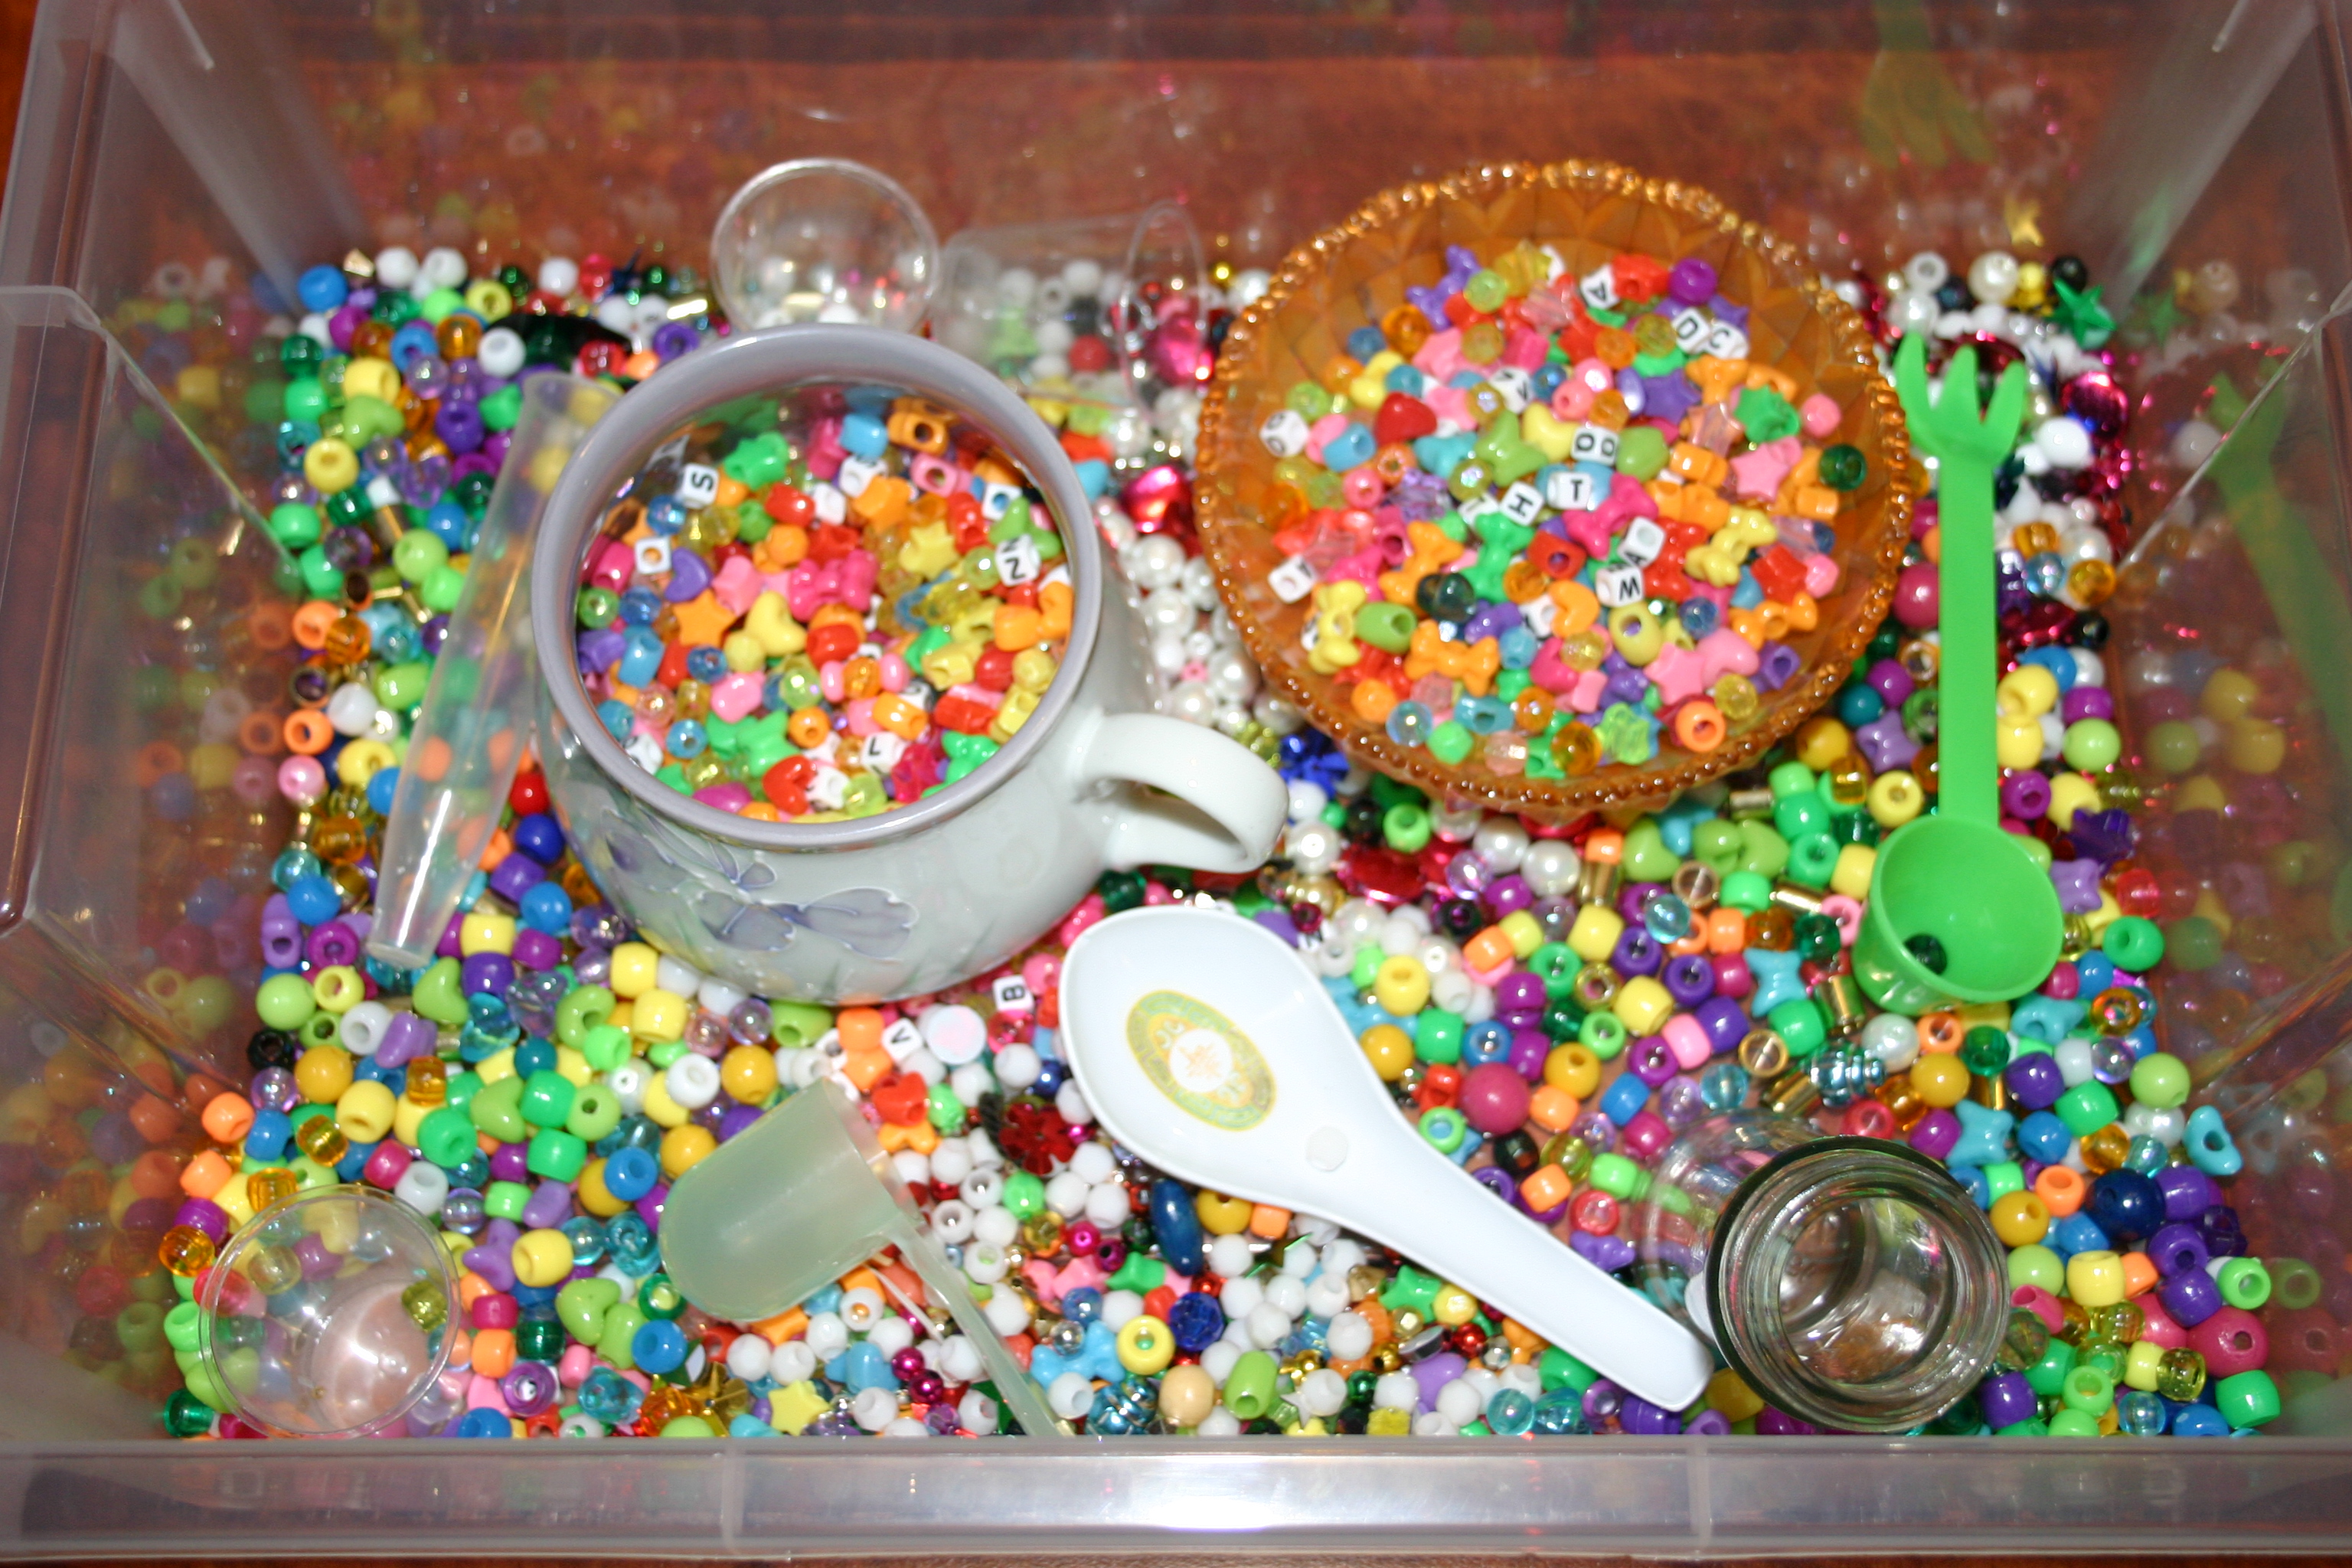
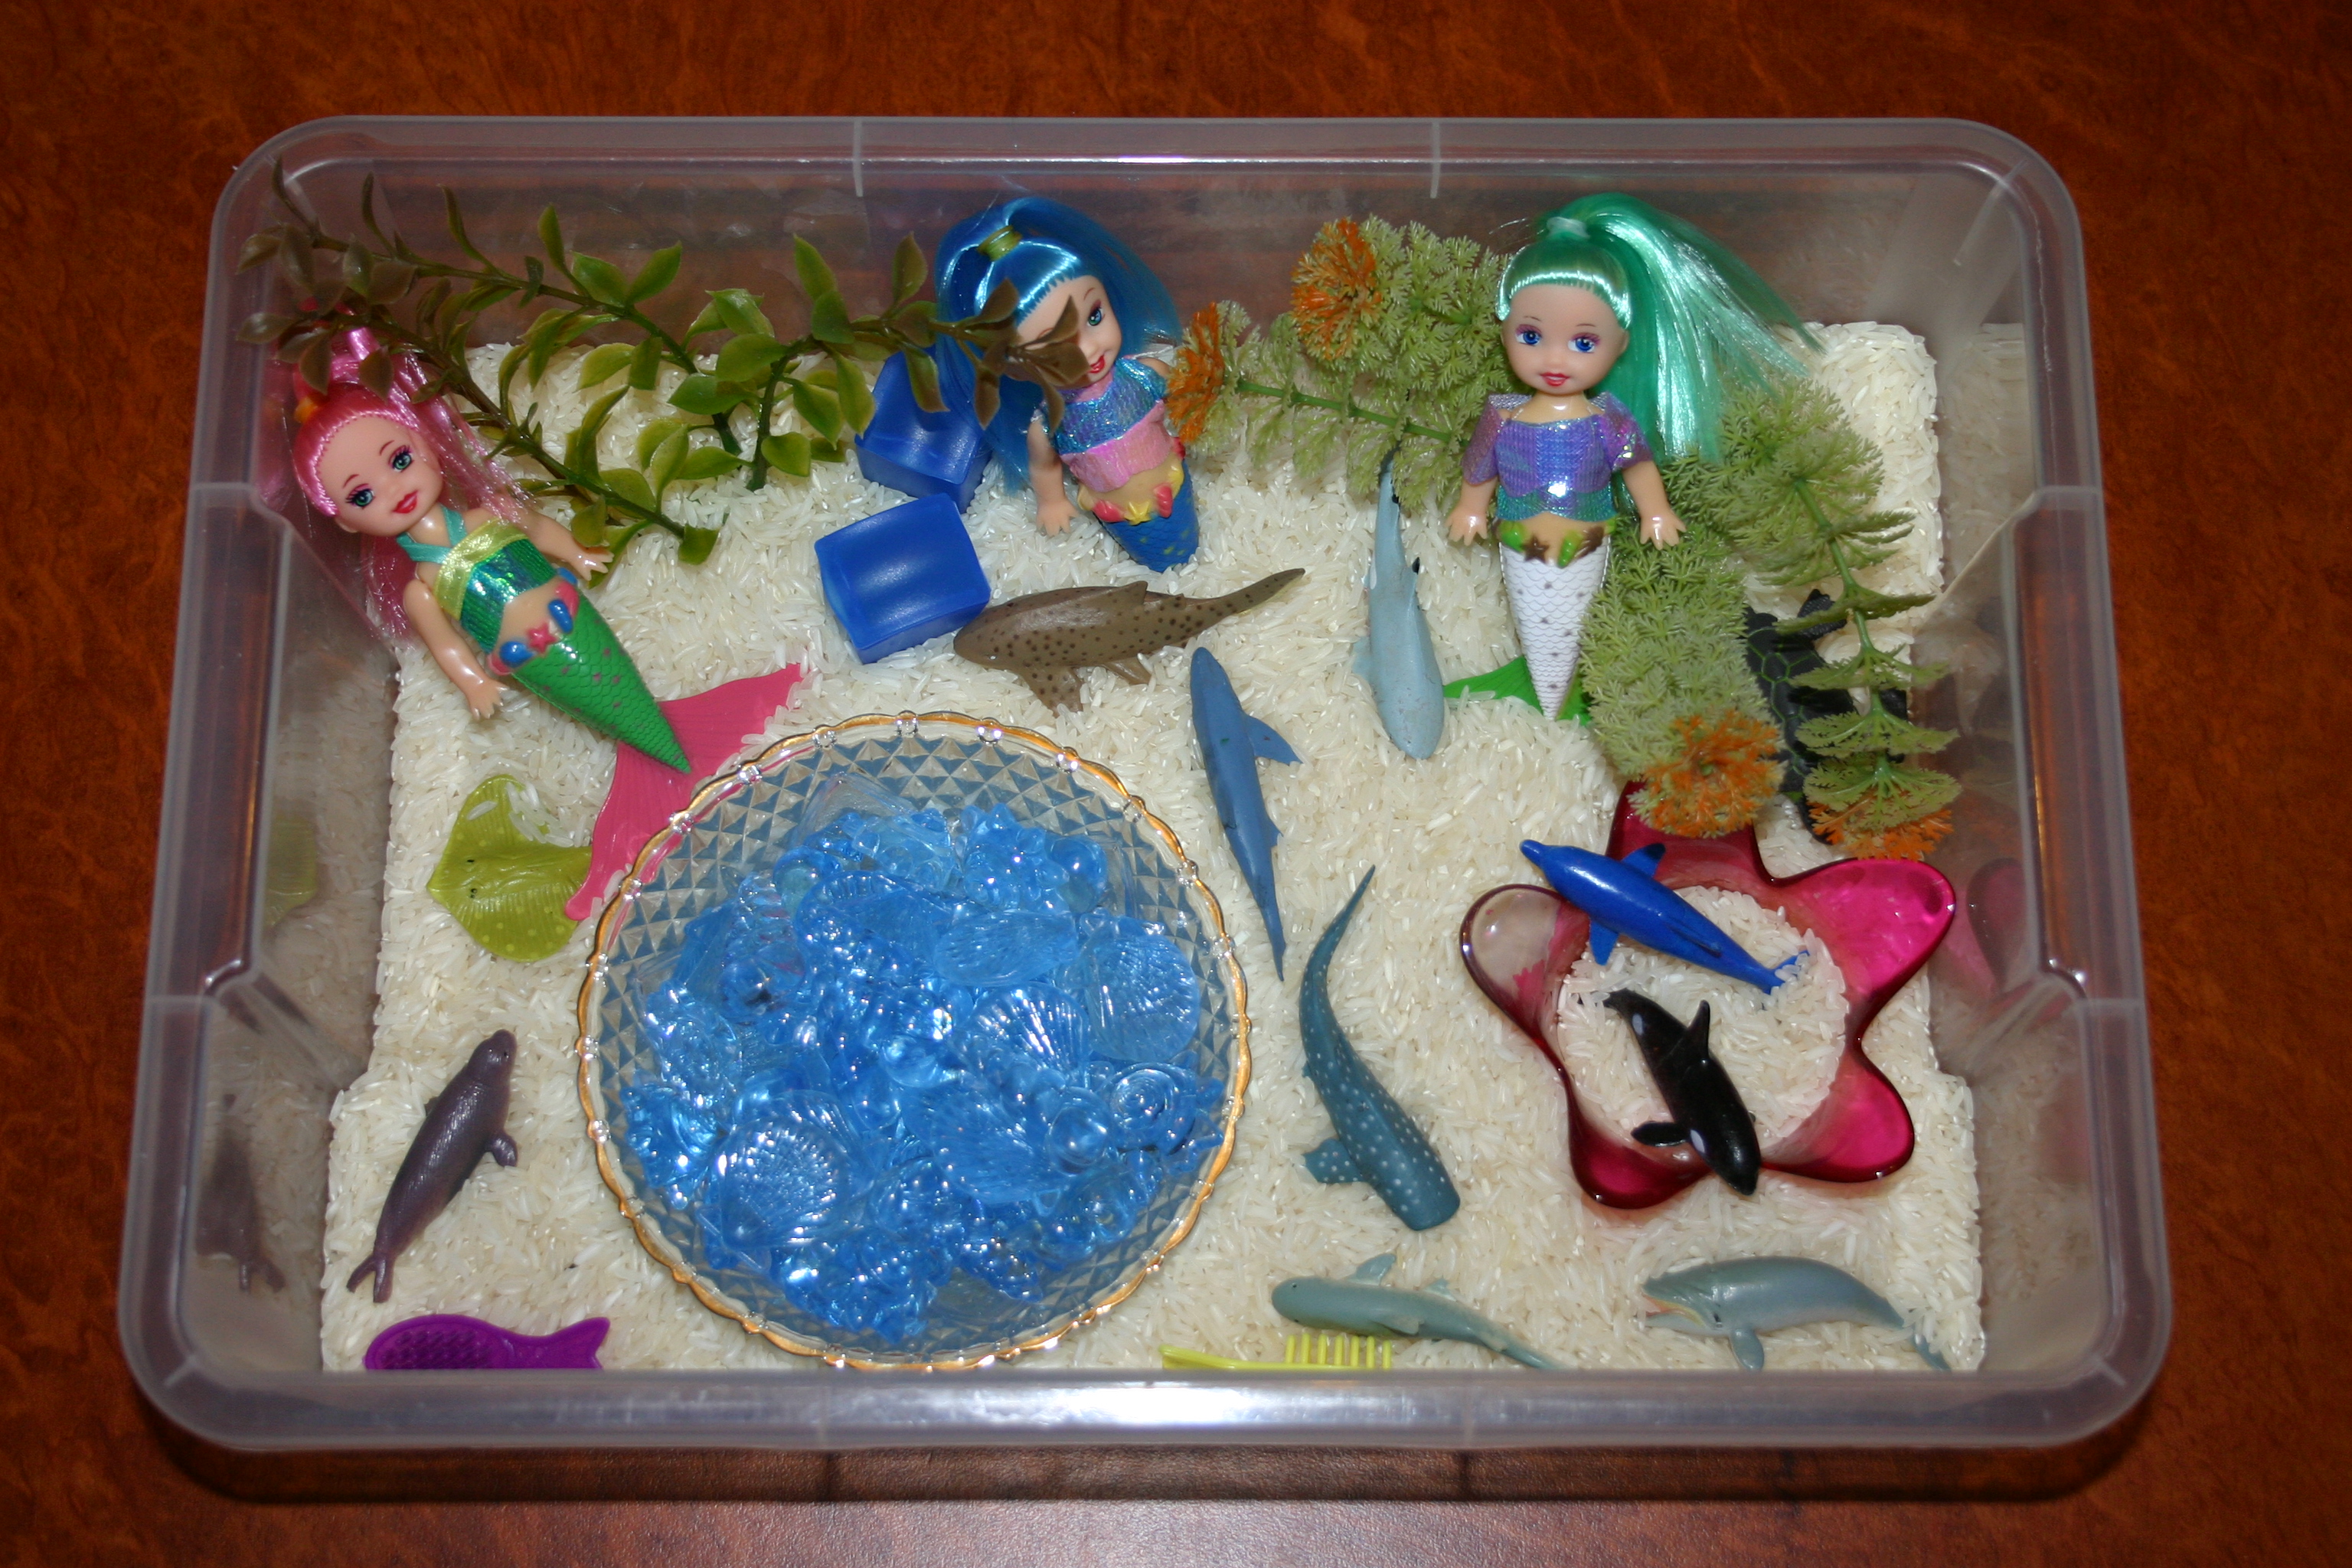
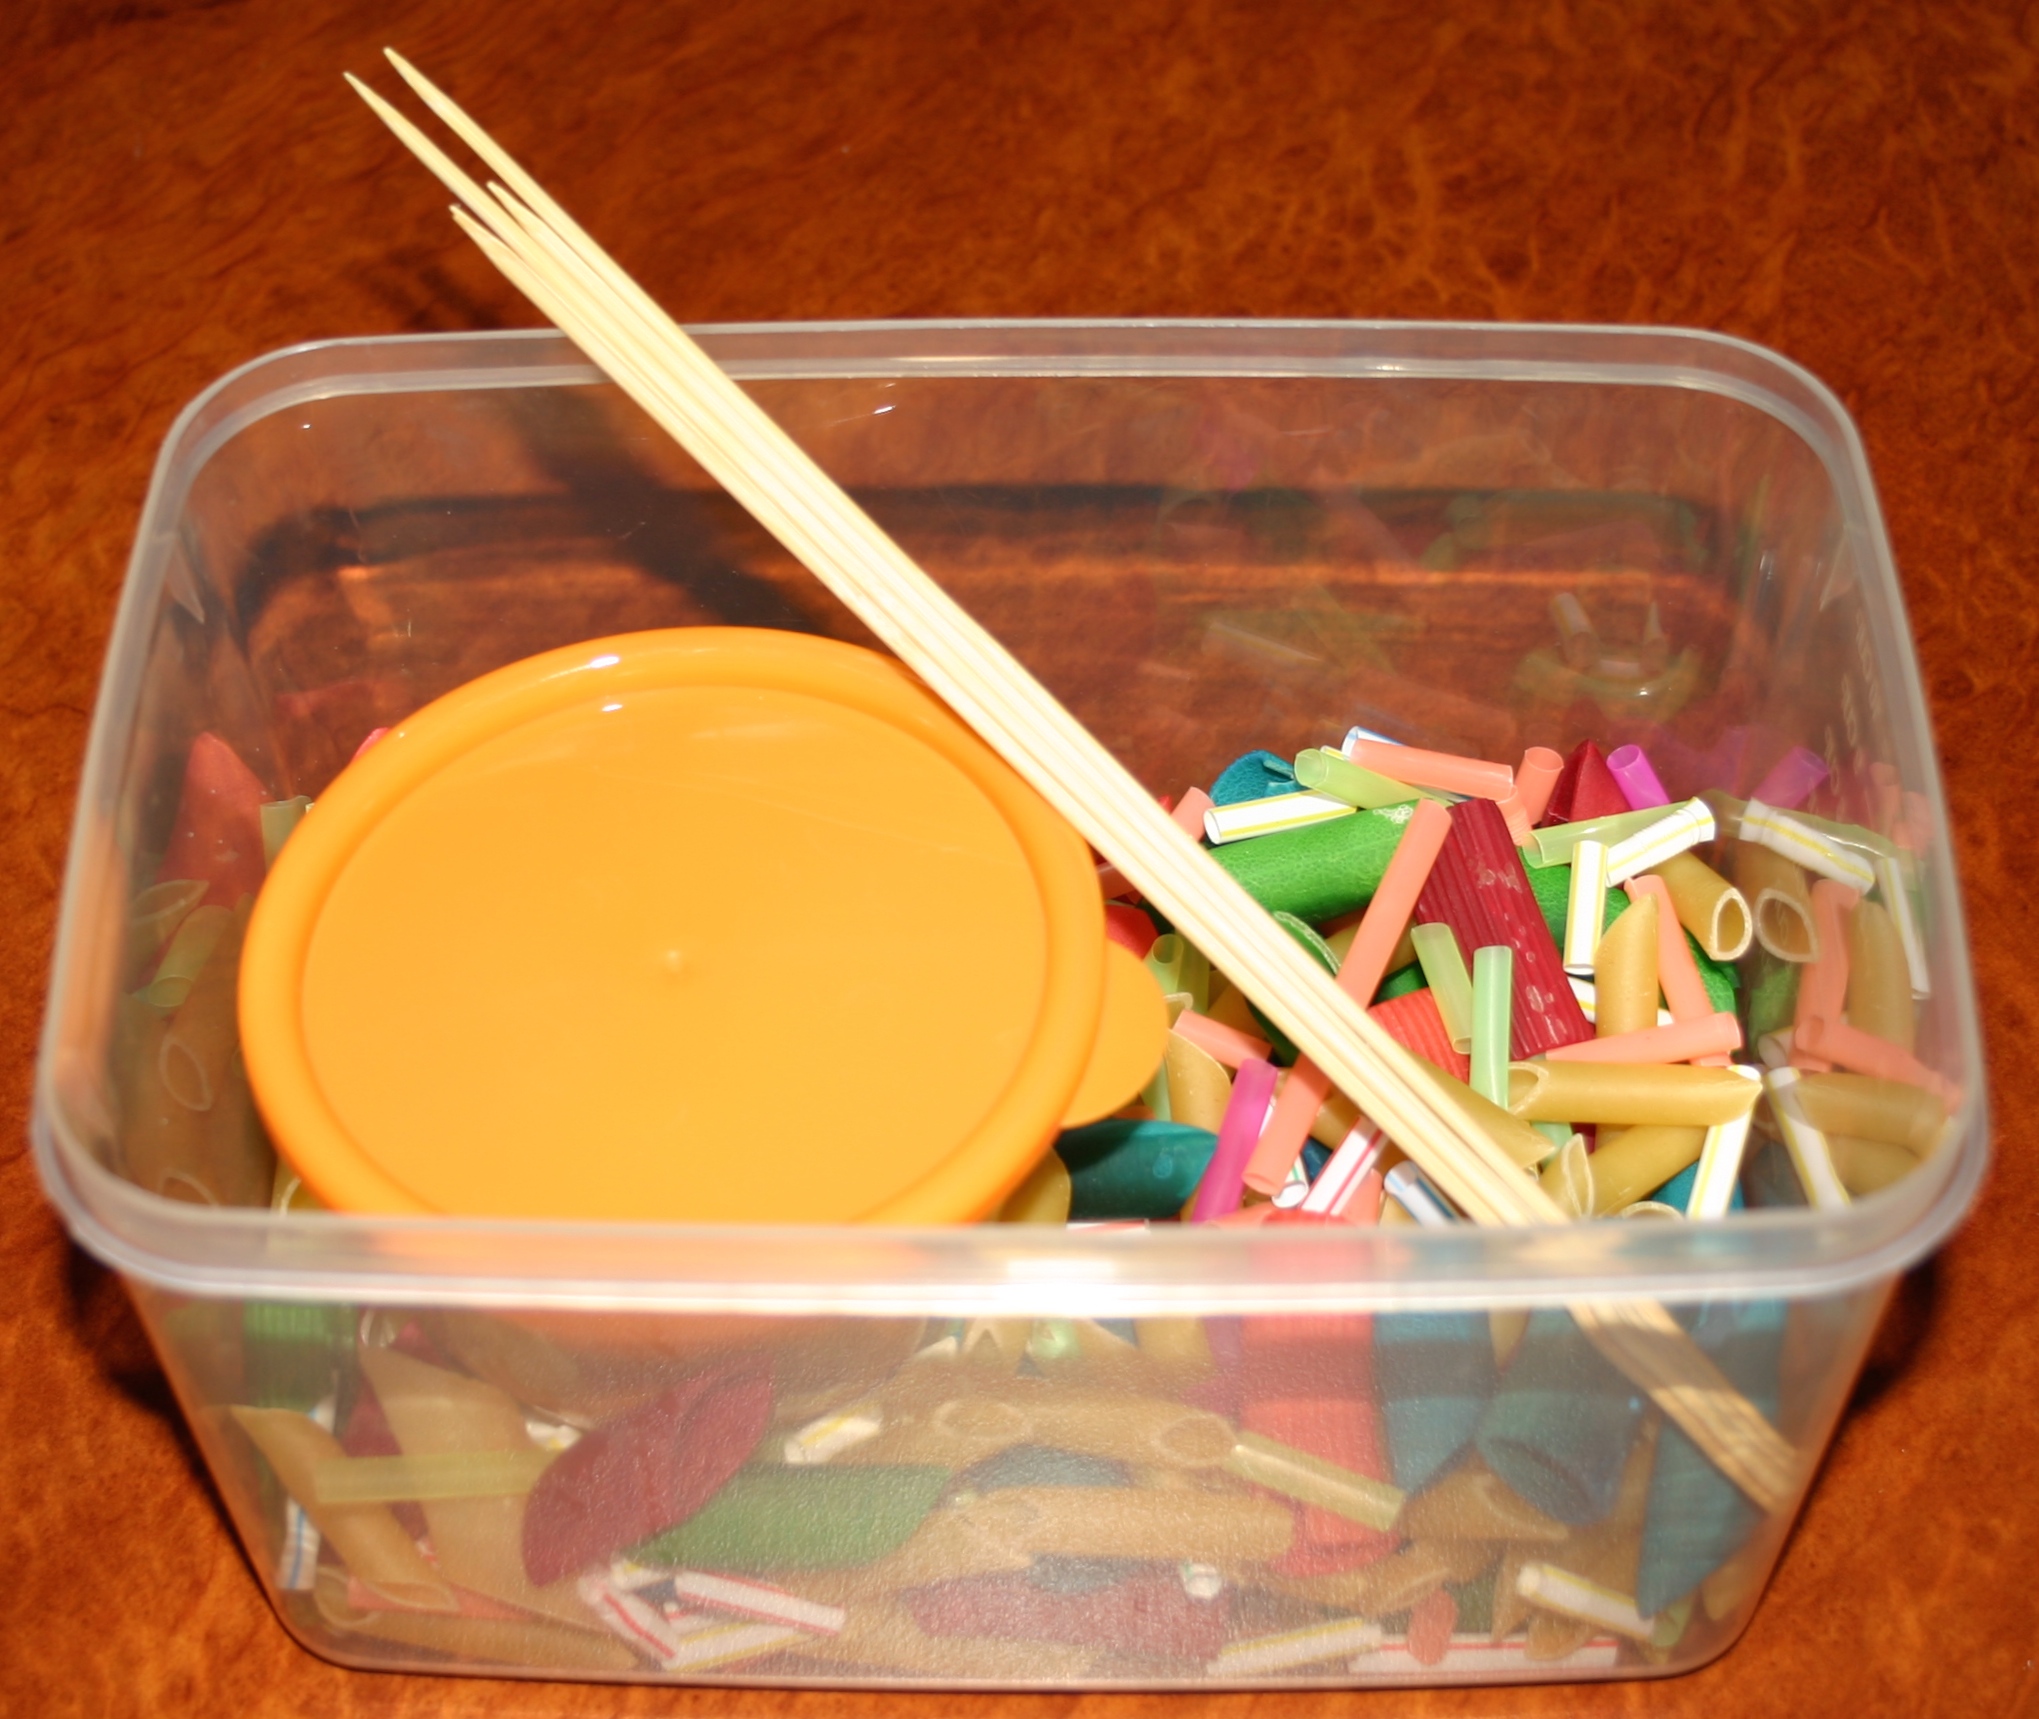
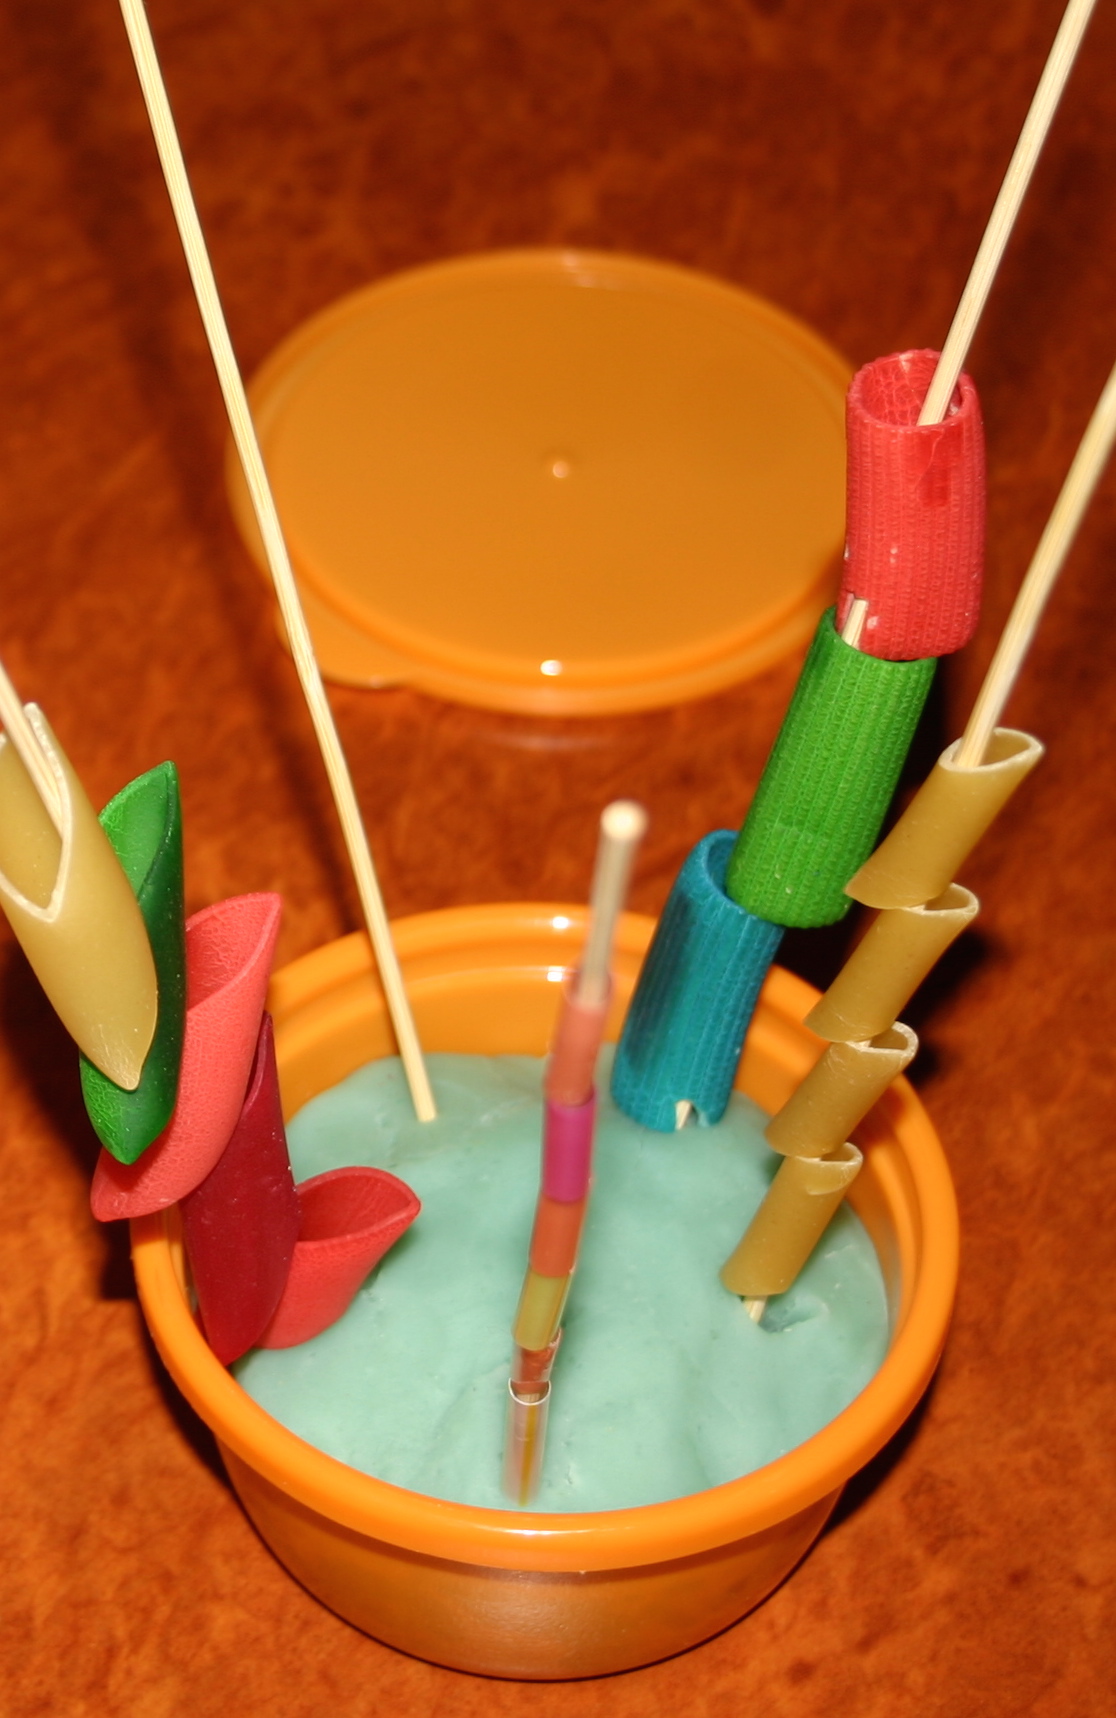
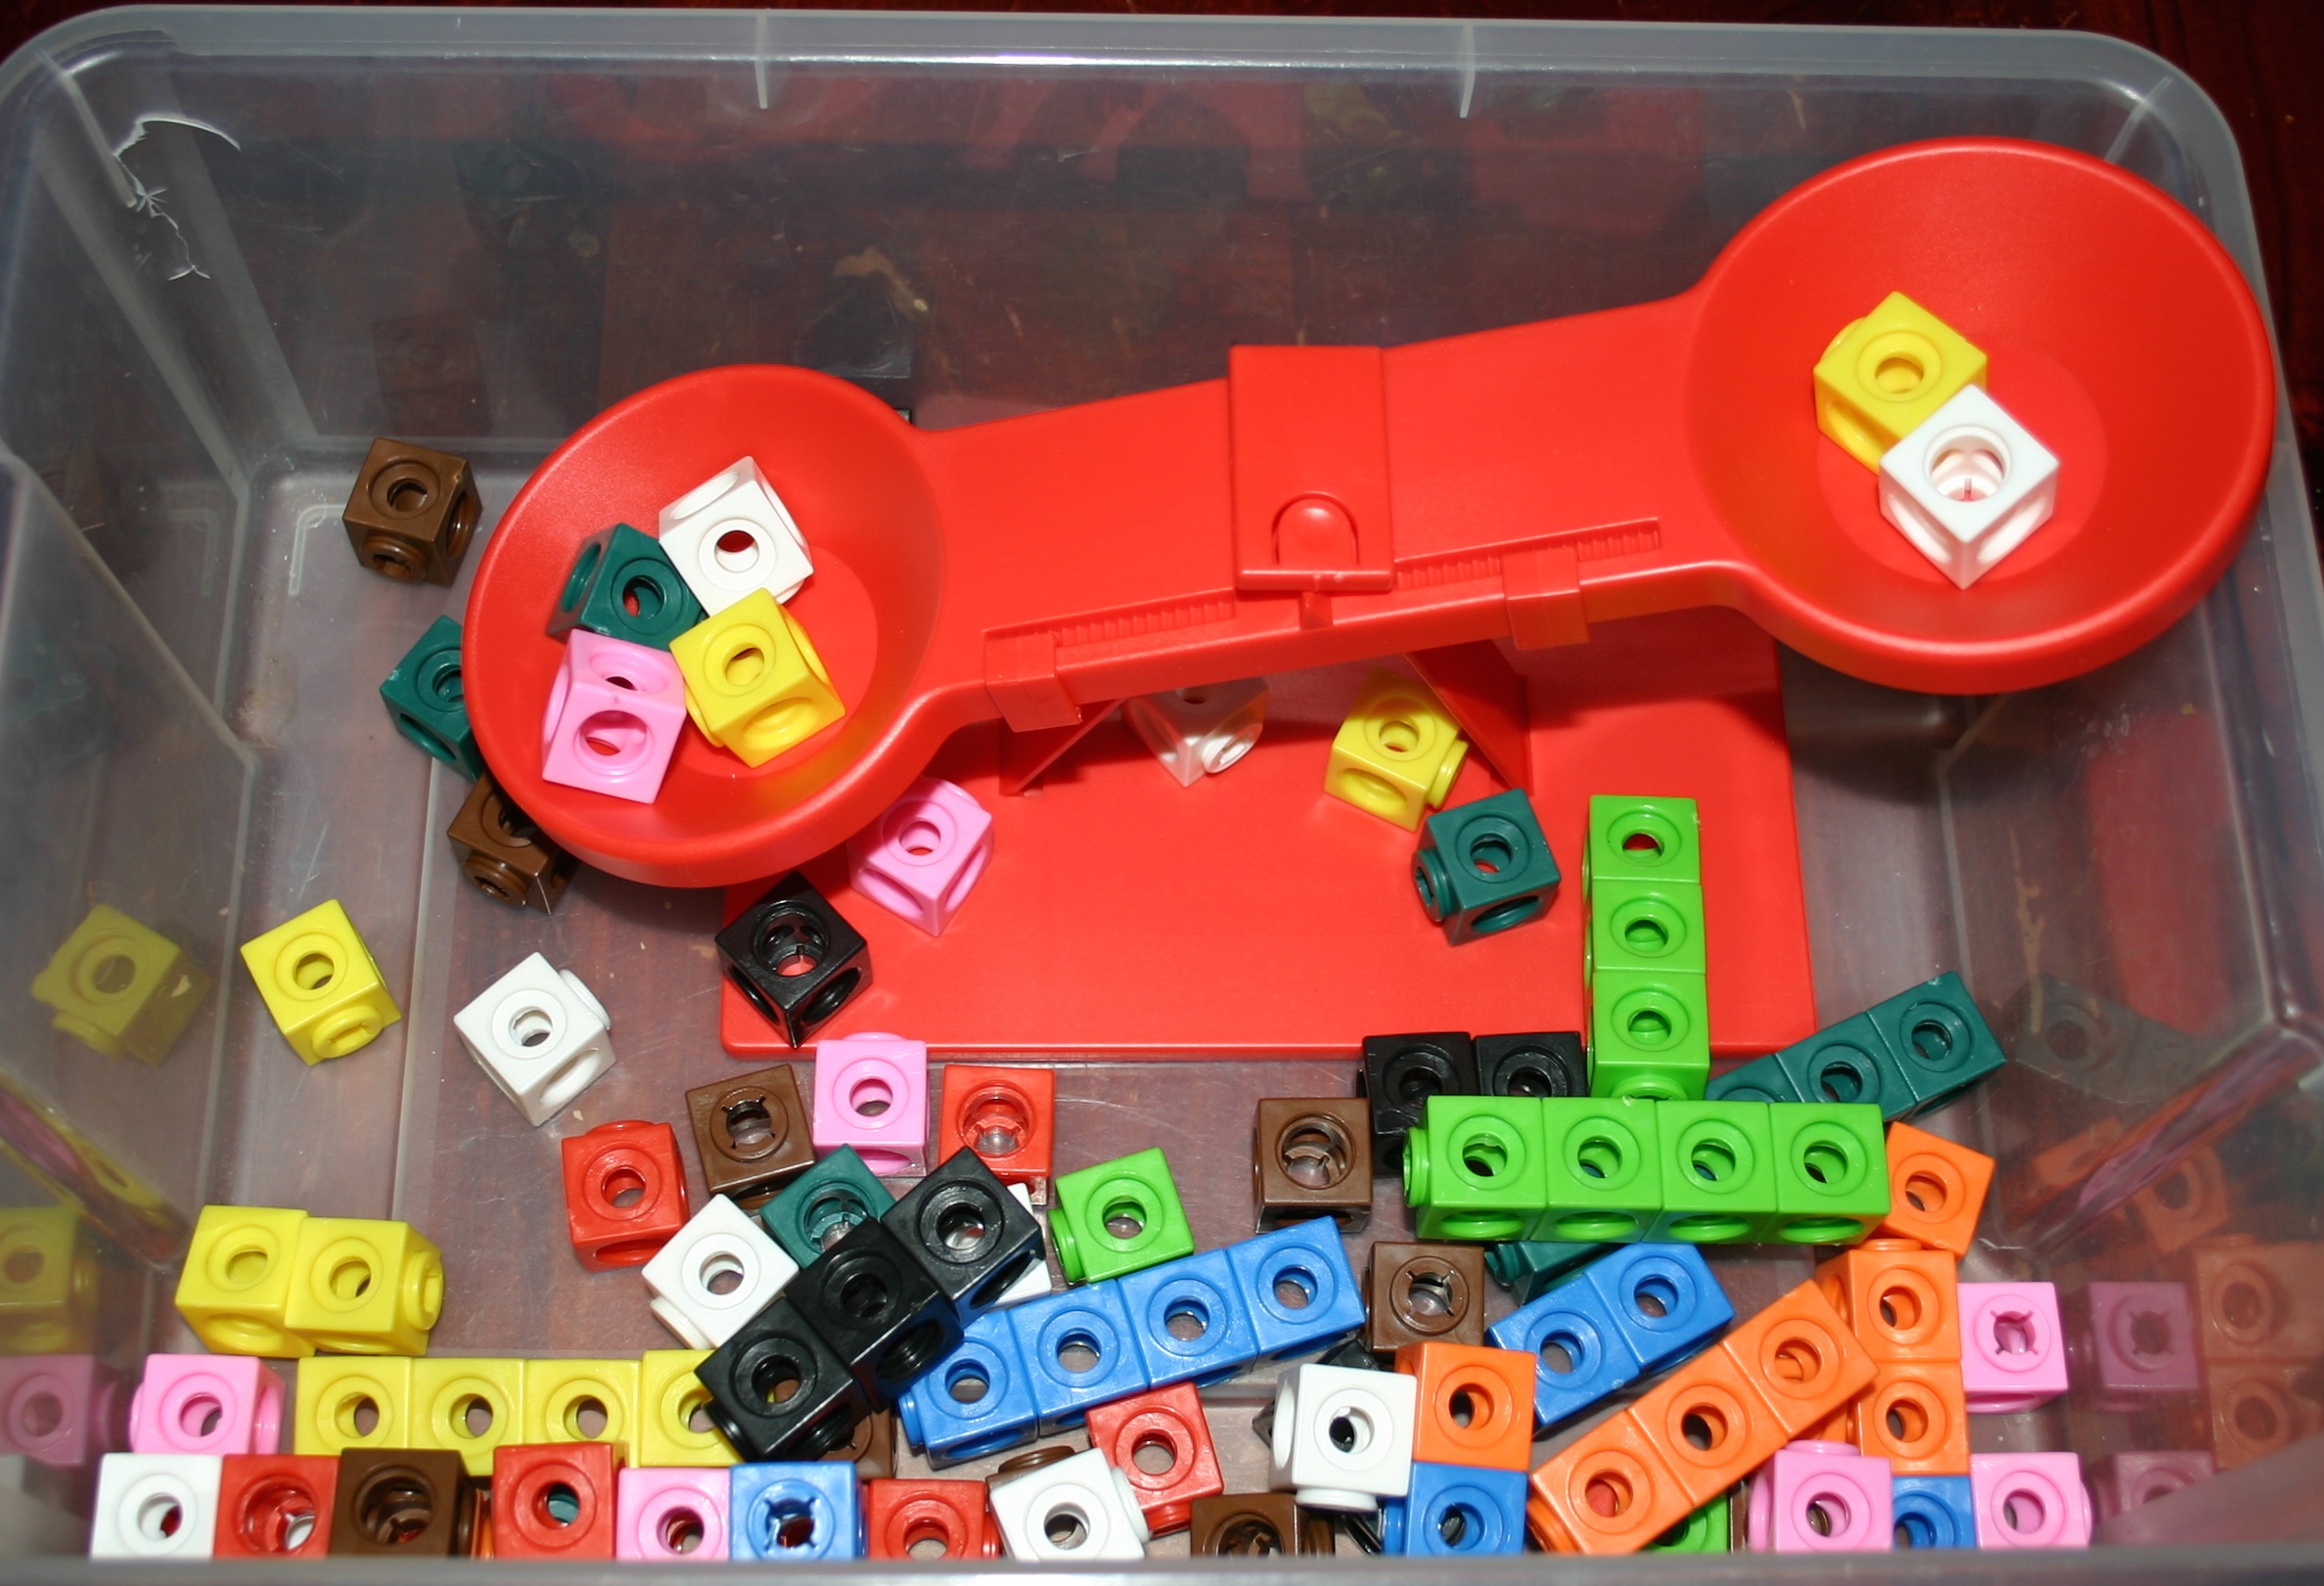
The counting trays all follow the same principle to keep it simple; place the numbers in order, then count out the correct number of objects. Pasta dinosaurs will drink at the watering hole, flowers fill the love heart dishes, coloured bead “food” is served at the number restaurant and coloured tiles line up above the bottle tops. All made with household objects for almost no cost and with visual and tactile appeal to a small person who needs to practise the same skill over and over and still be interested in the task at hand. They are also self-checking in that there is exactly the right number of objects to count and in some, like the plates and watering holes, the items can be matched to the dots to check if the right number has been counted out. (Check out the “Workjobs and Montessori Activities” category on the left for many more ideas for hands-on tray activities.)

IMG_9471

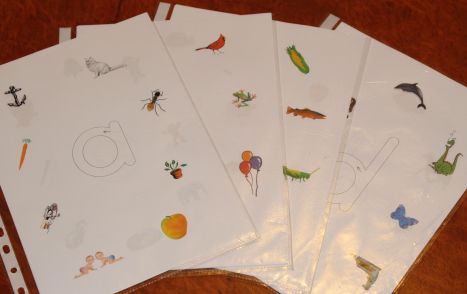
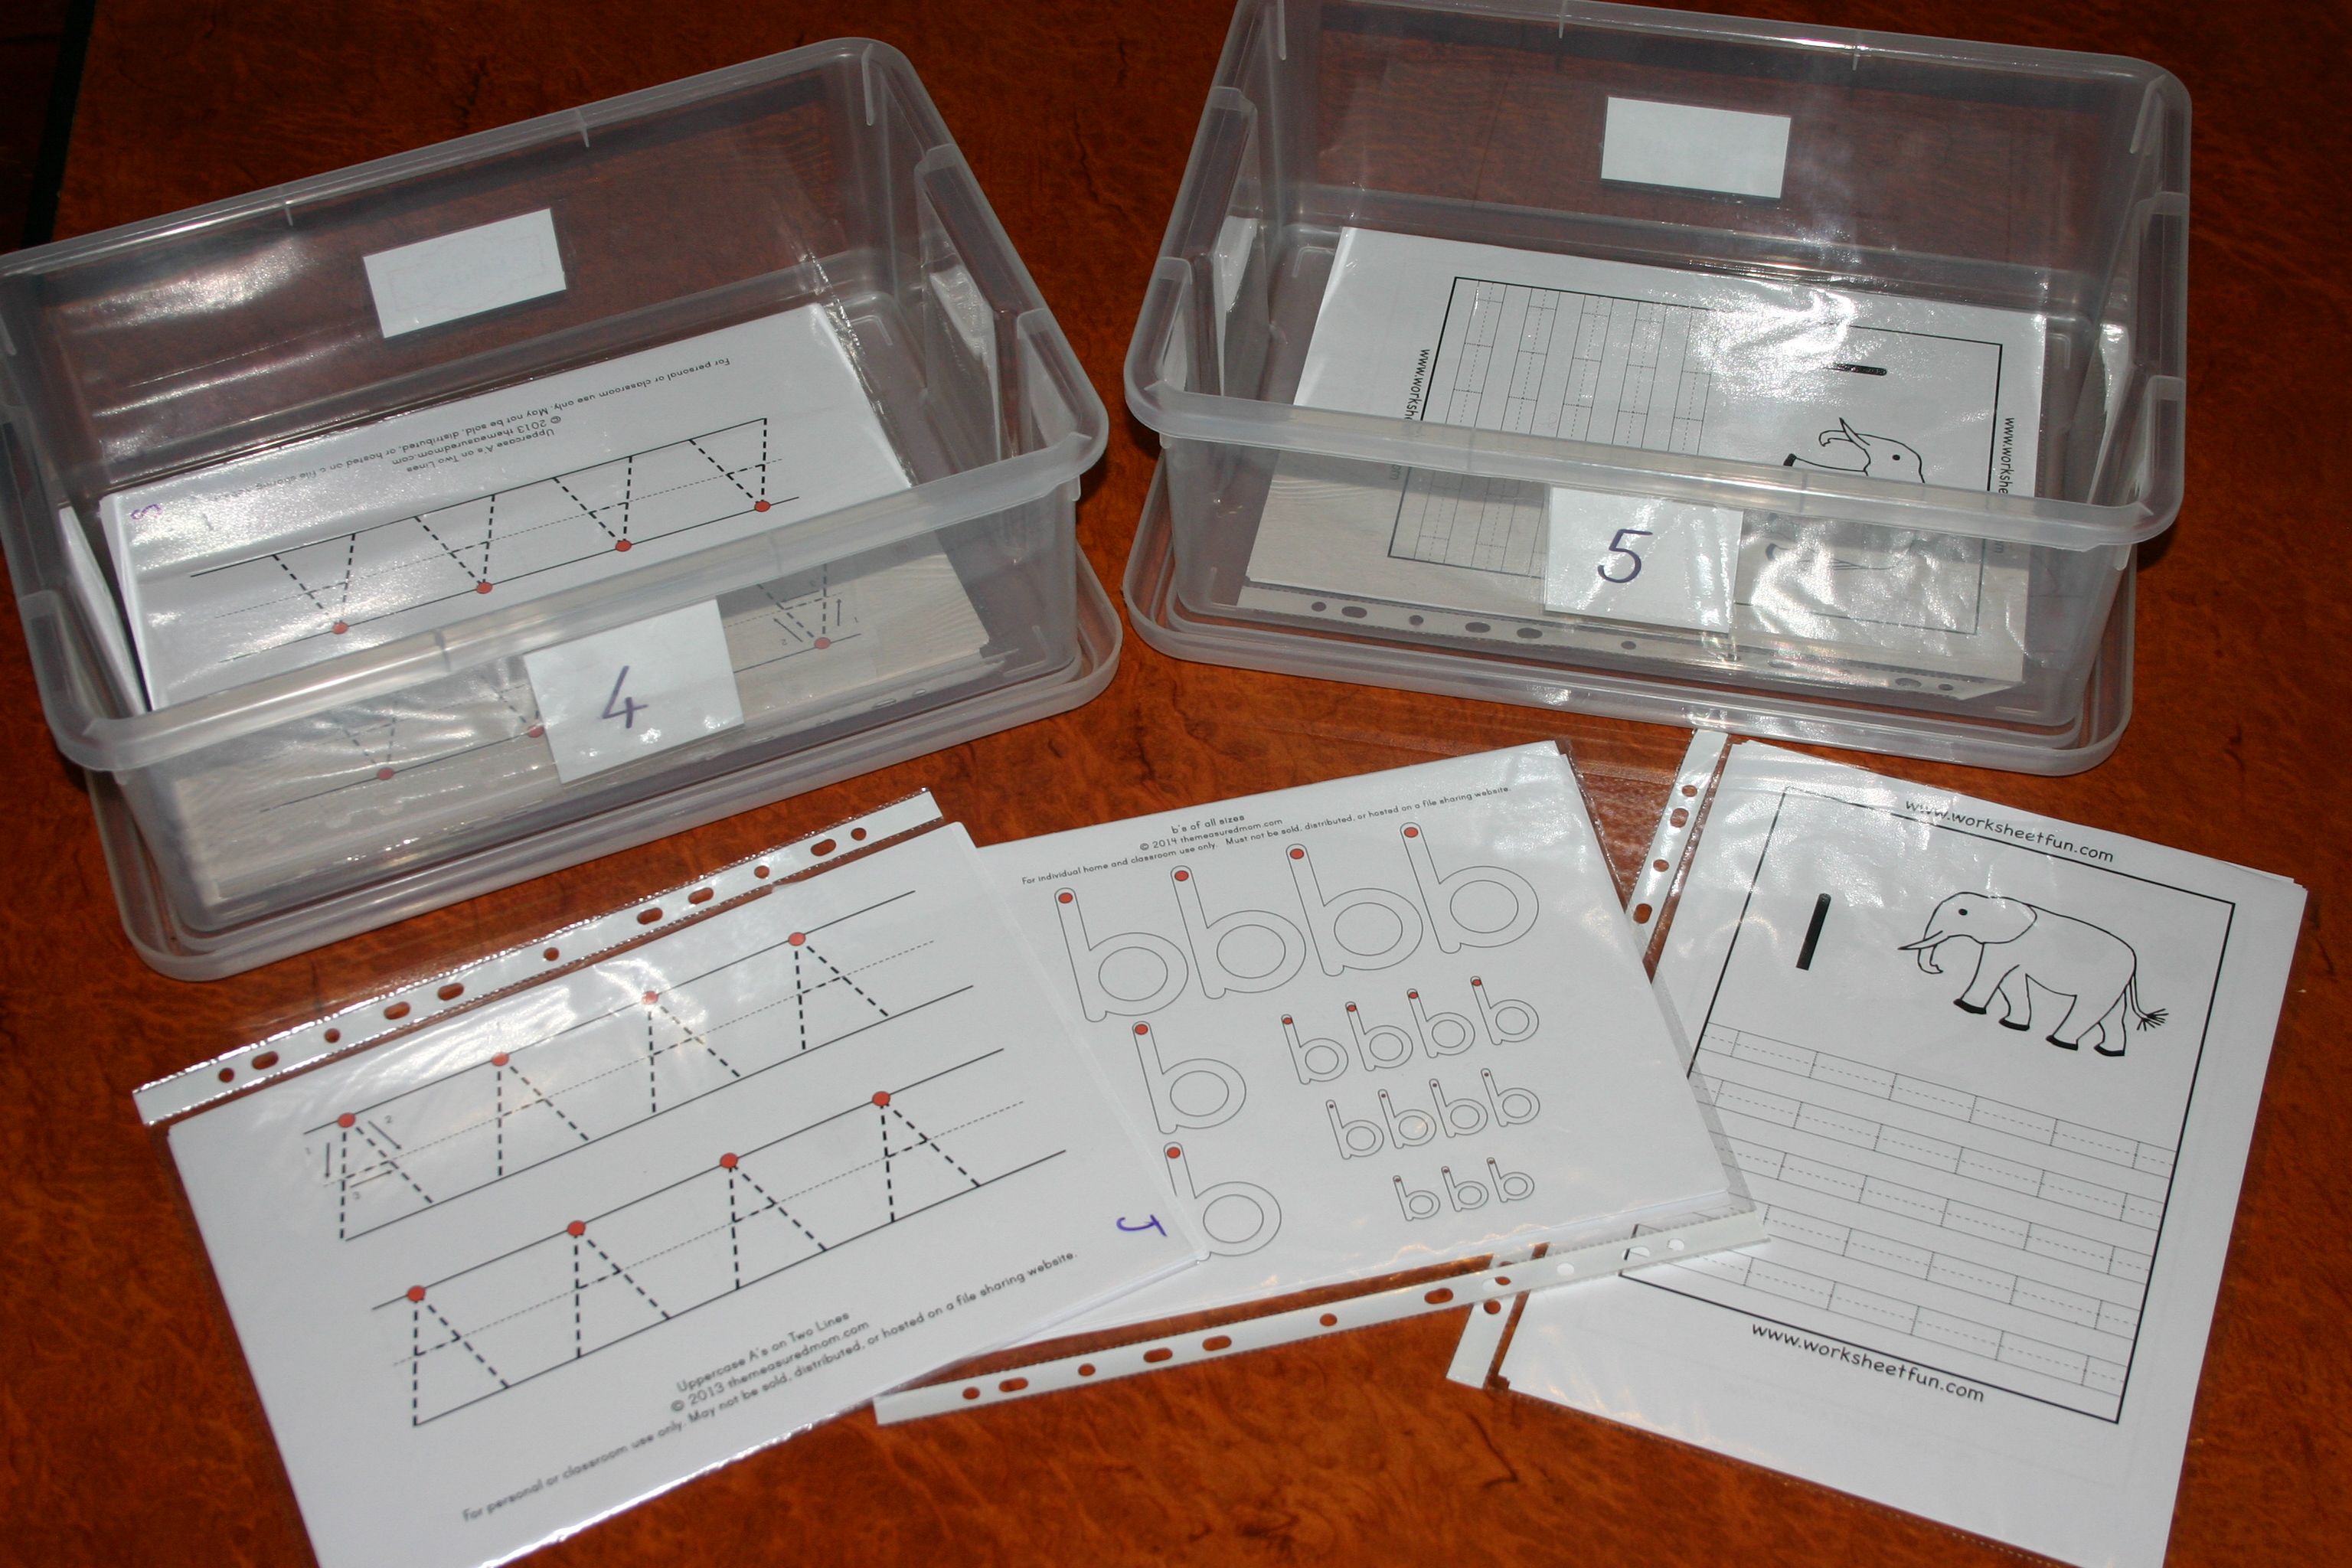
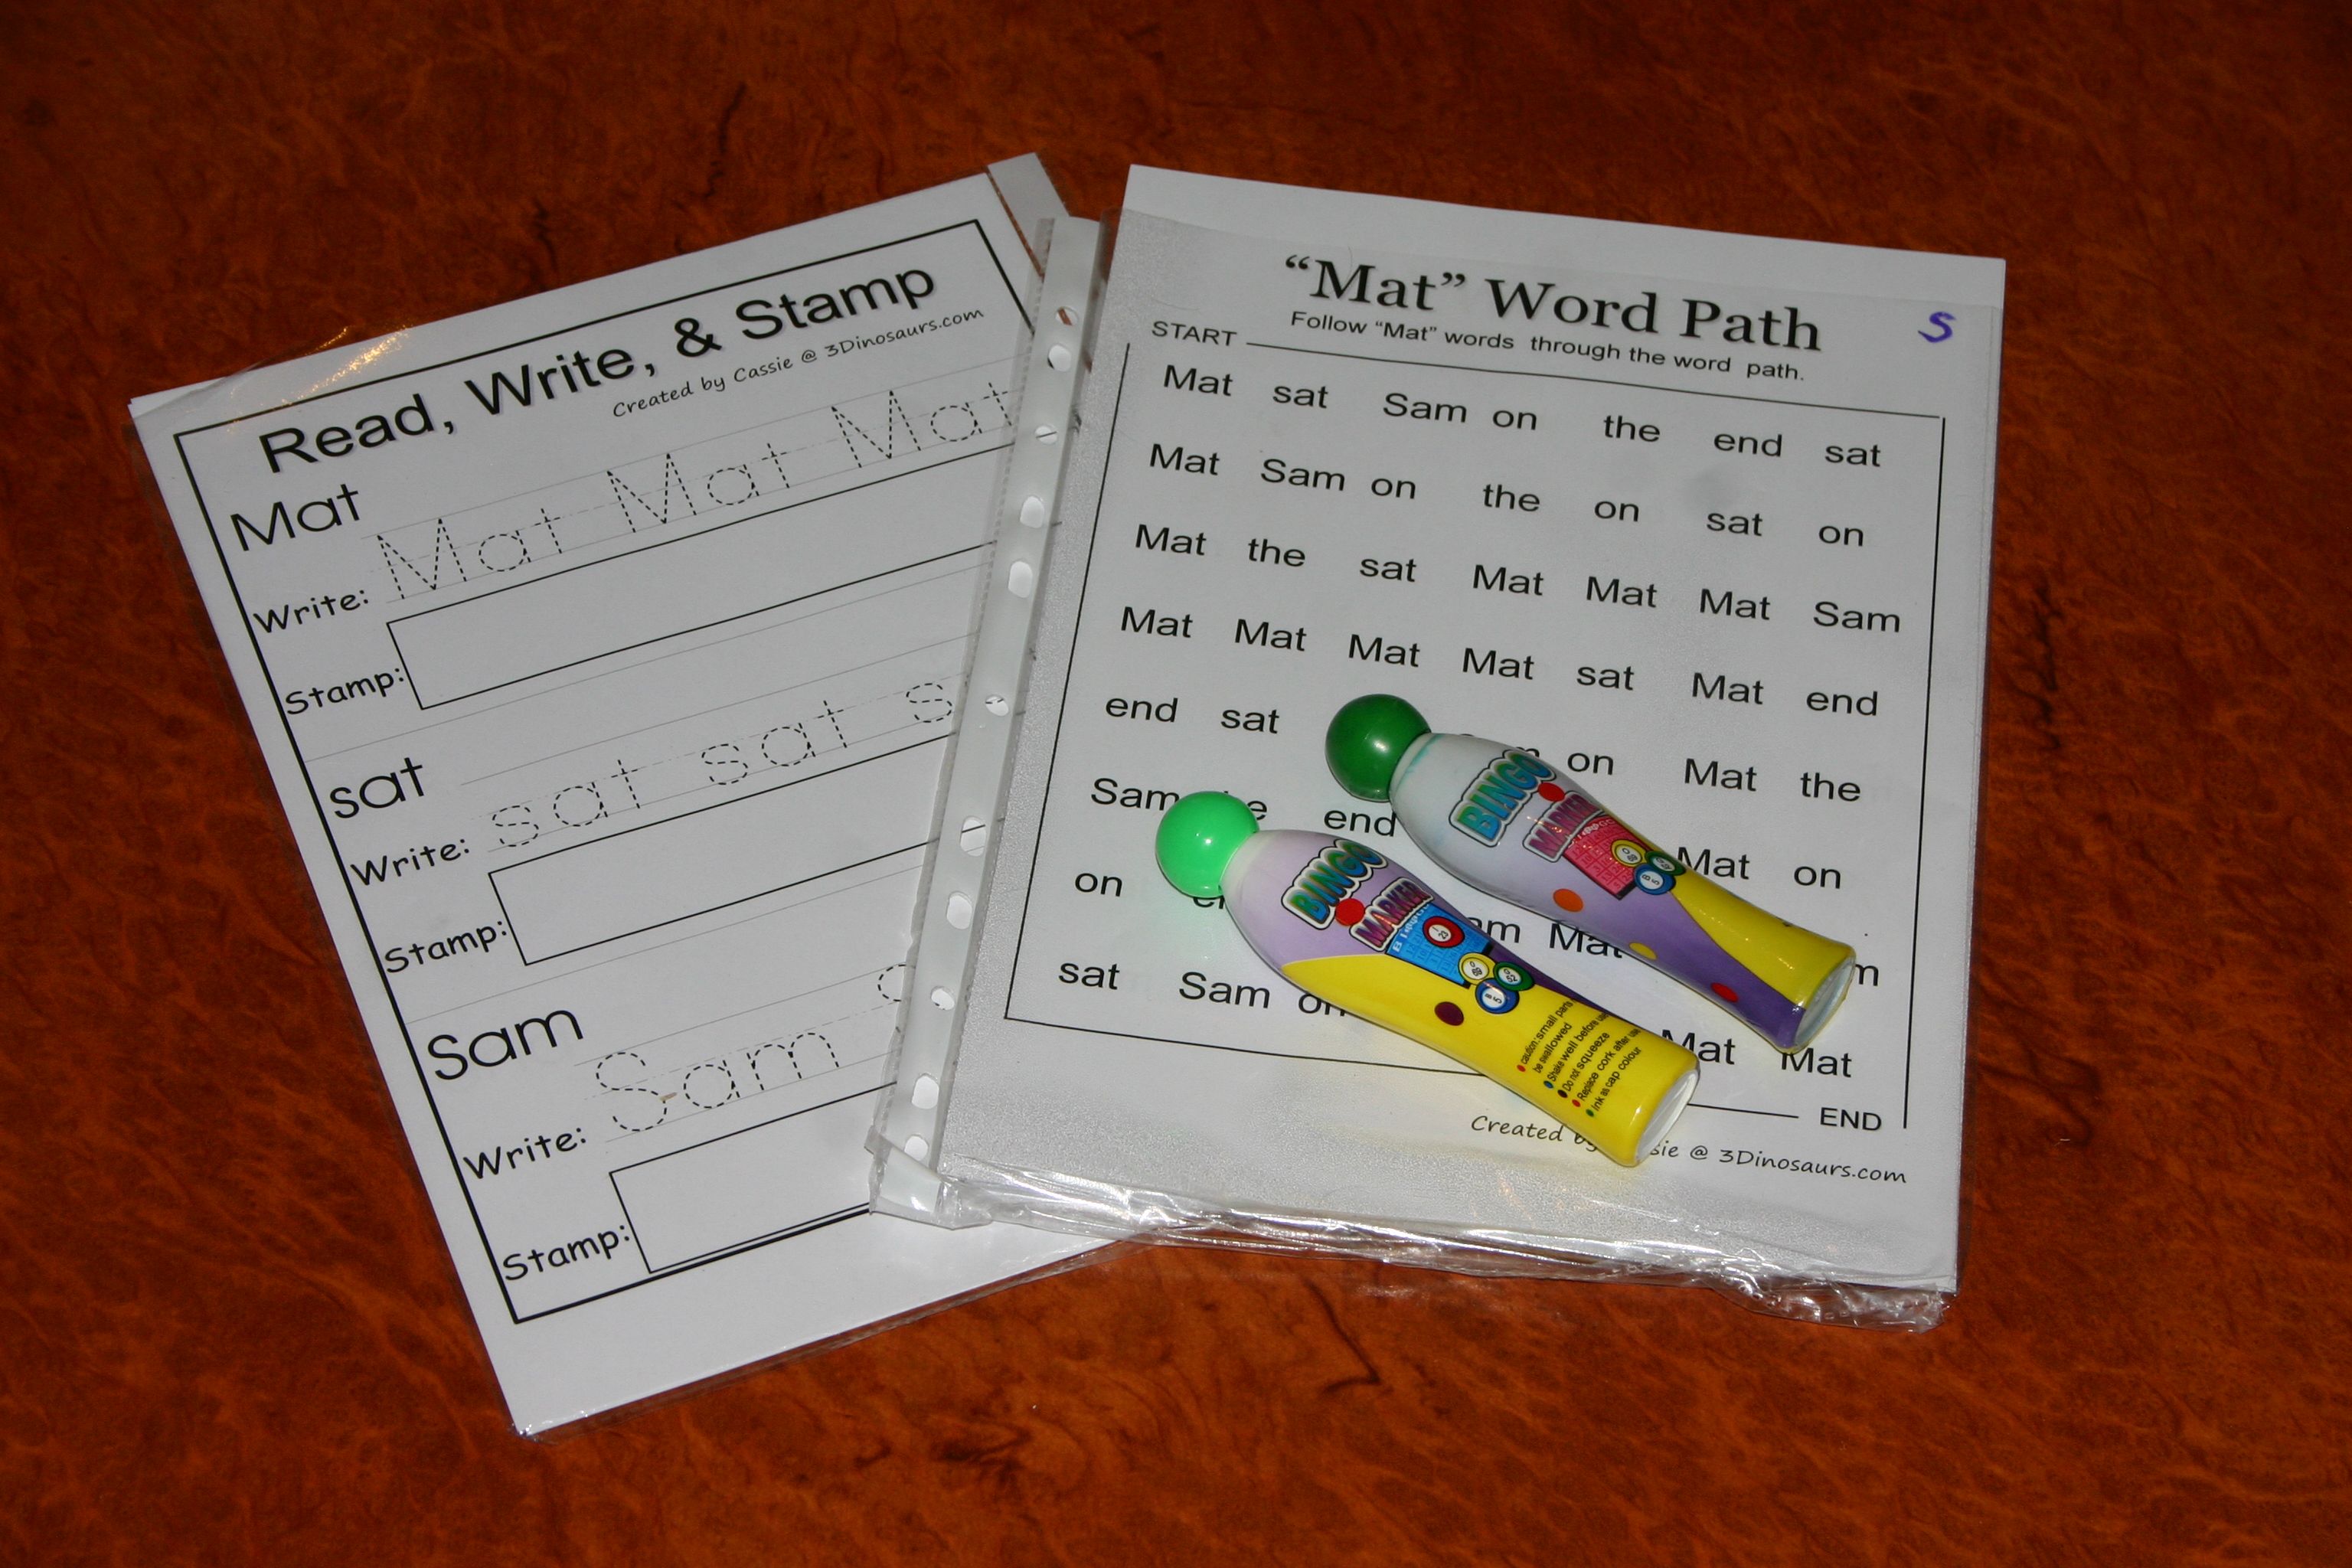
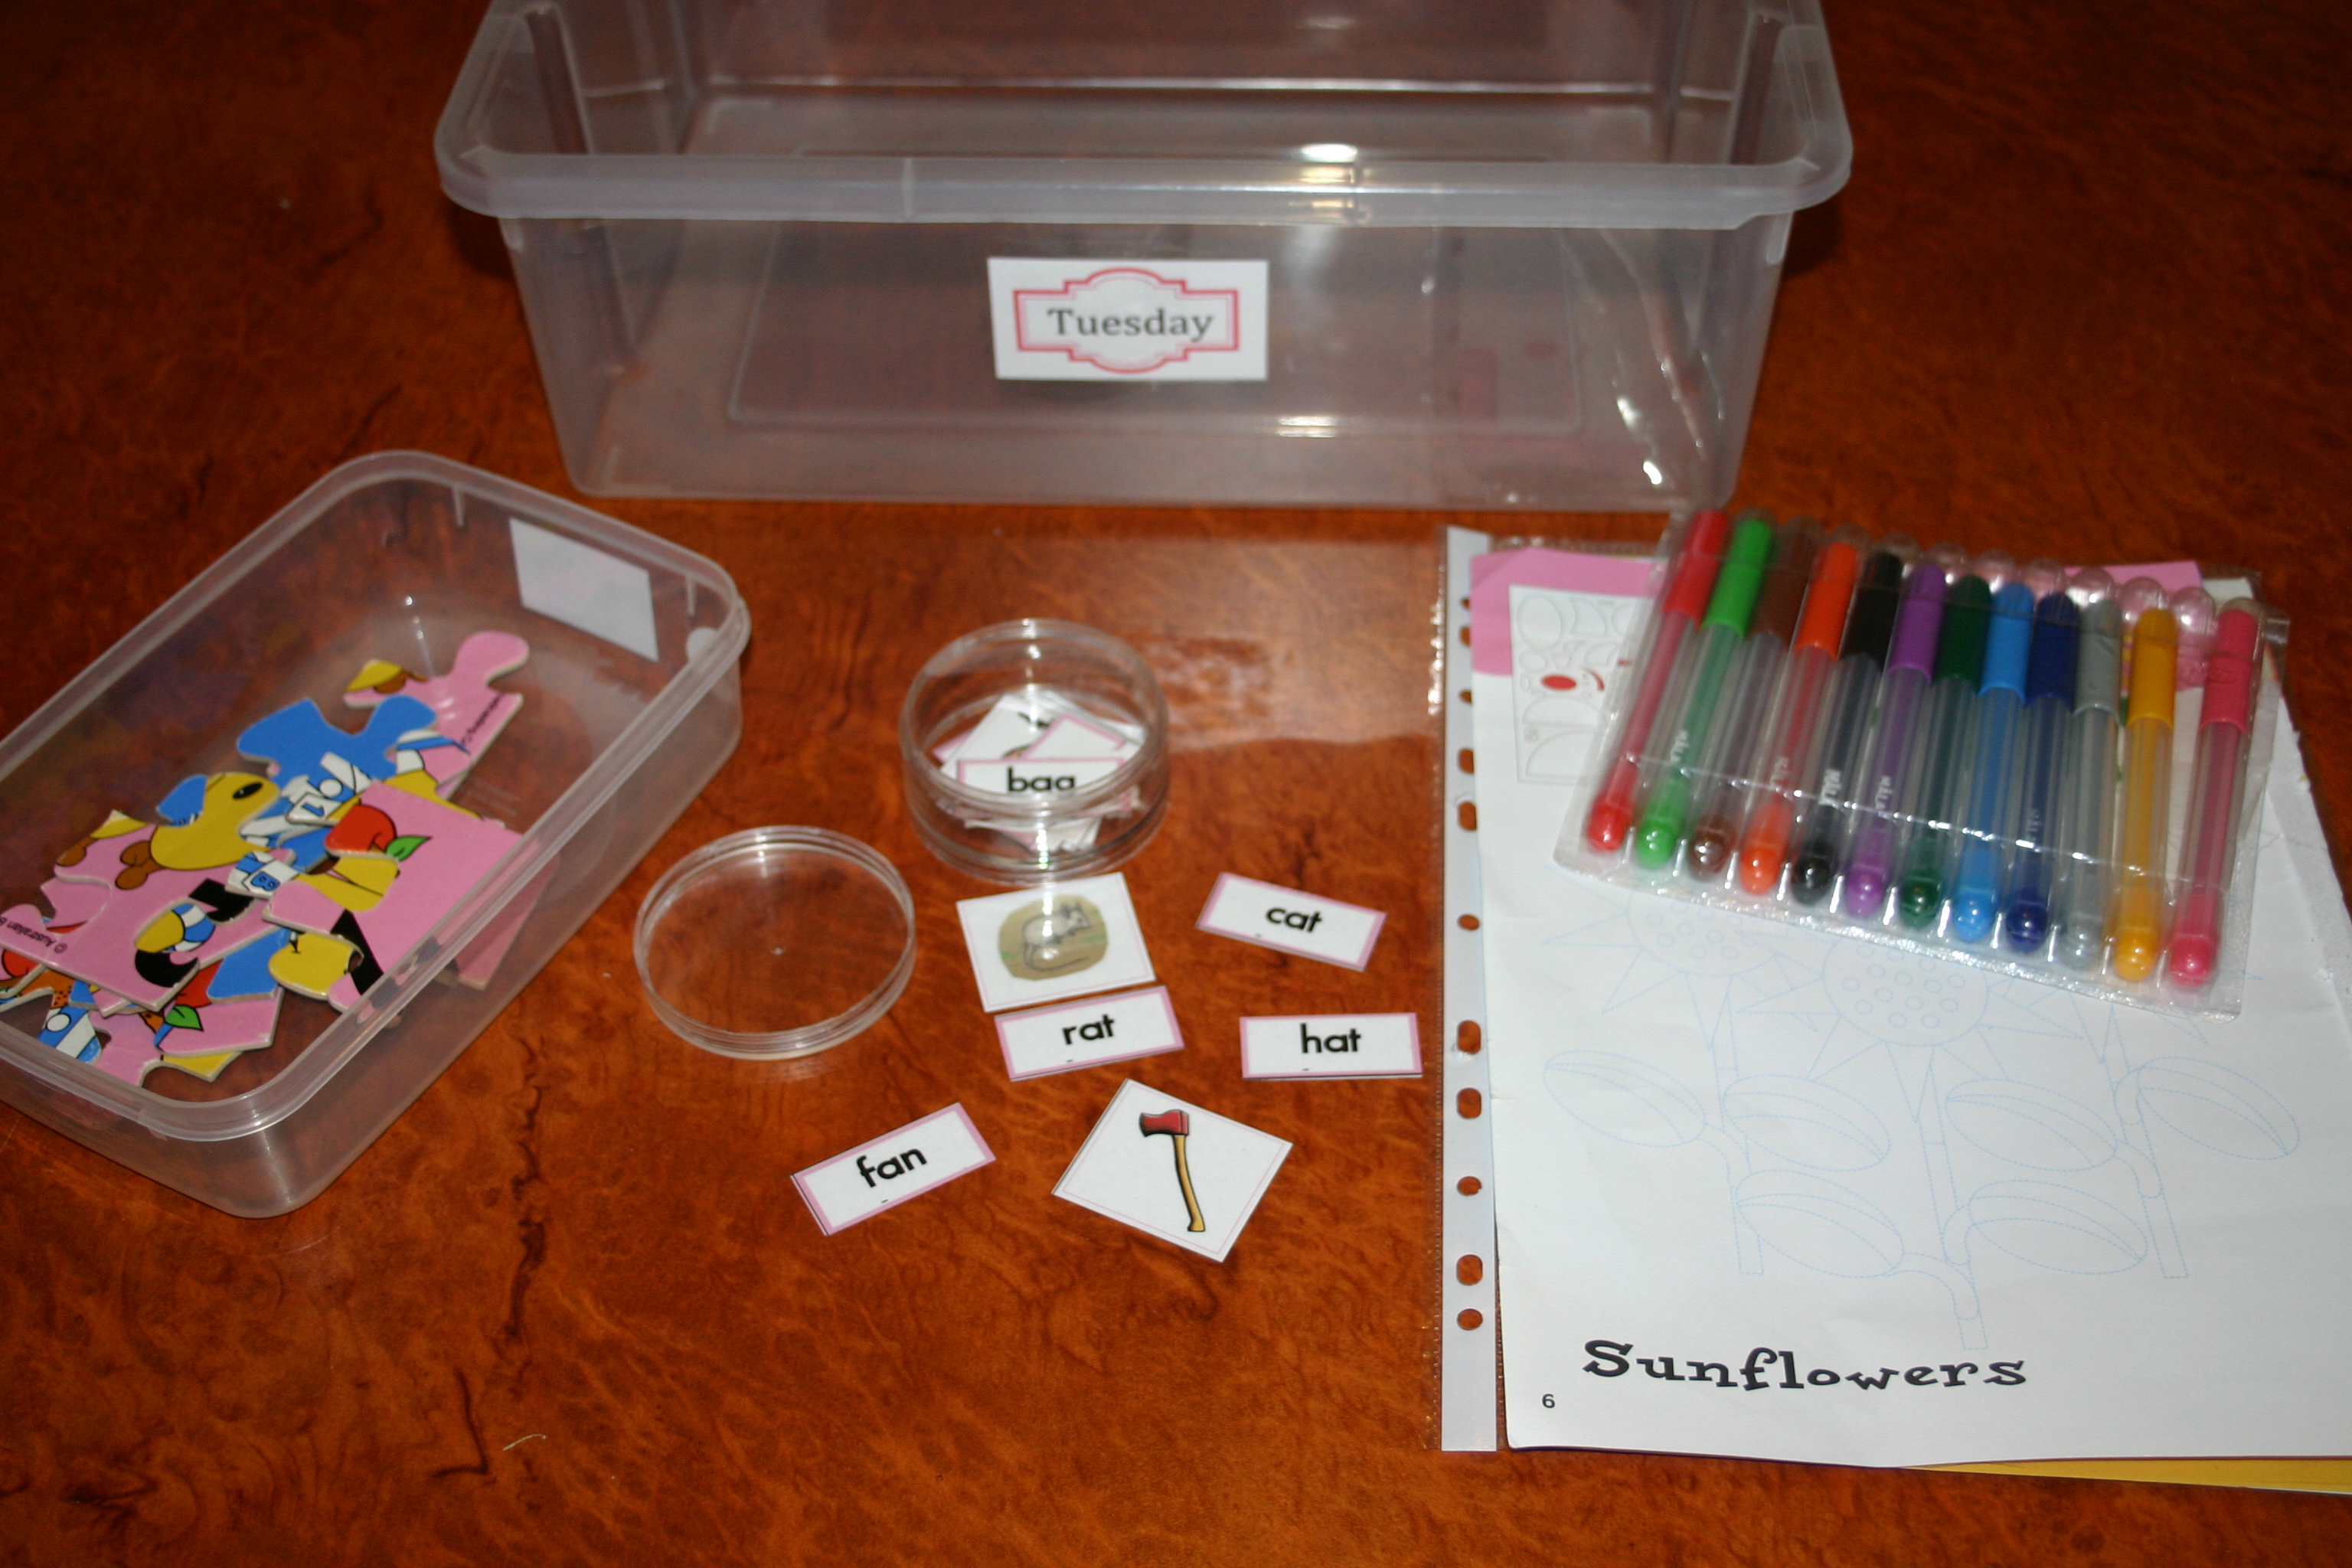
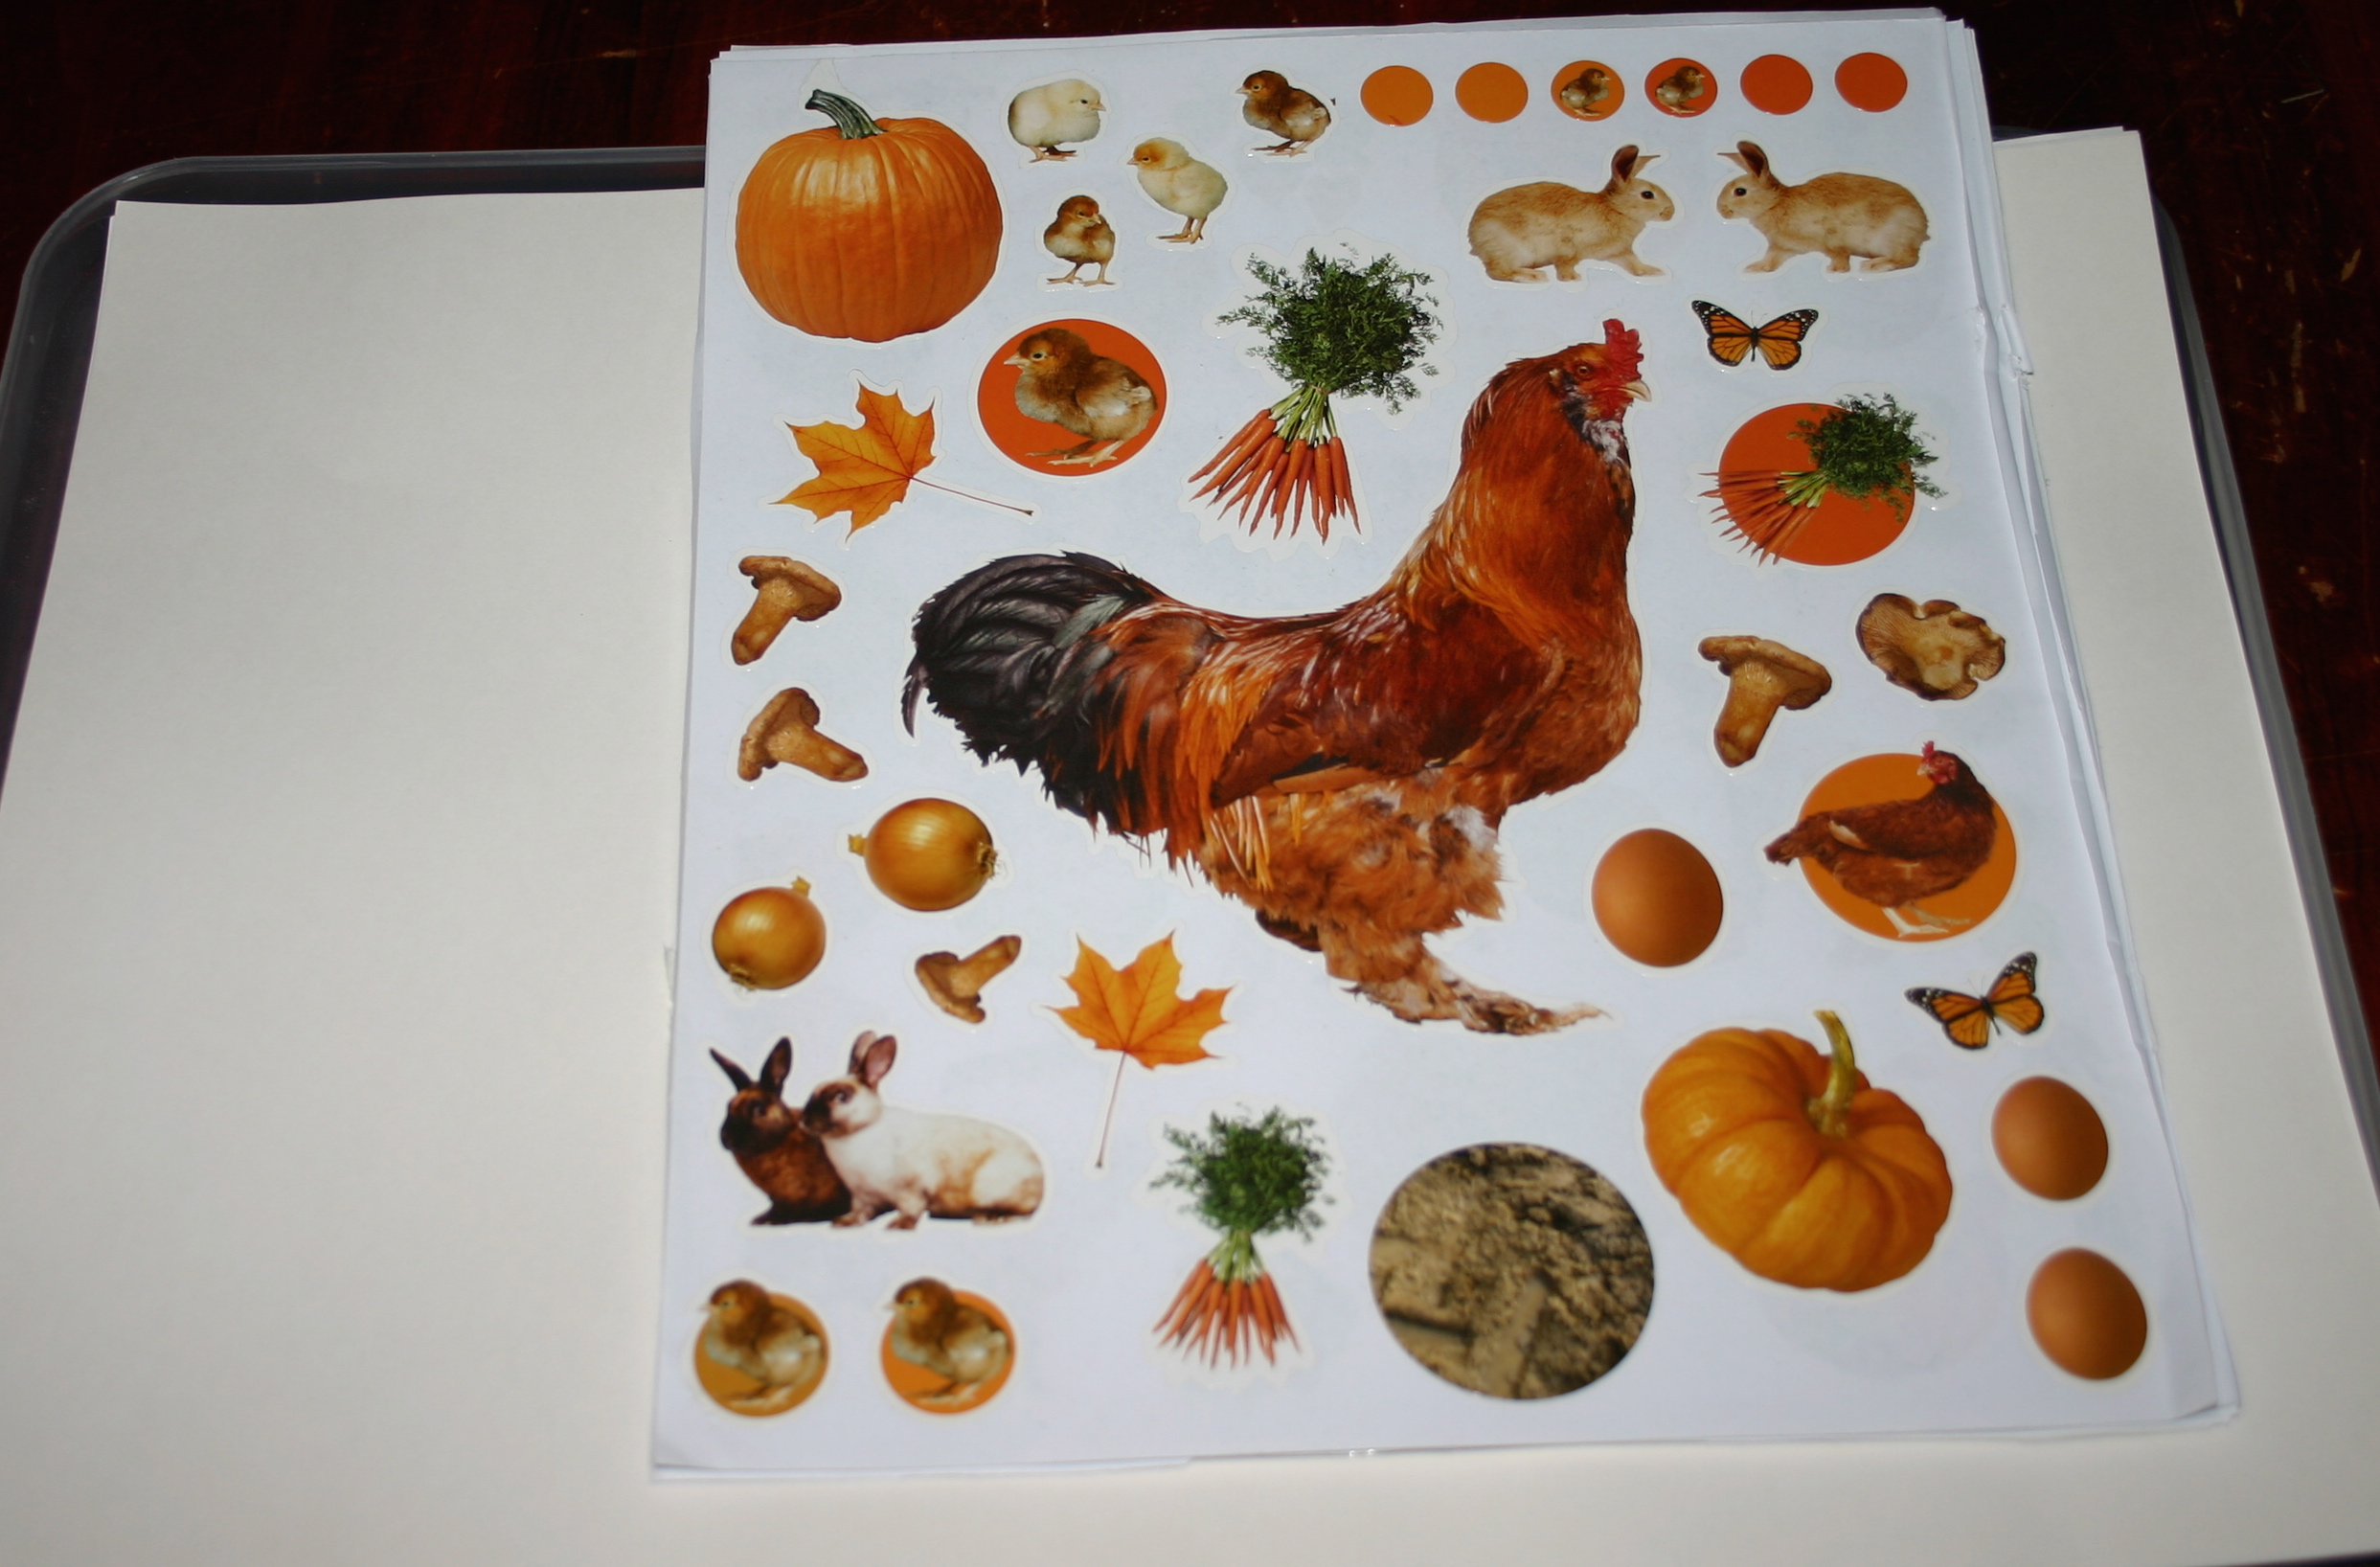
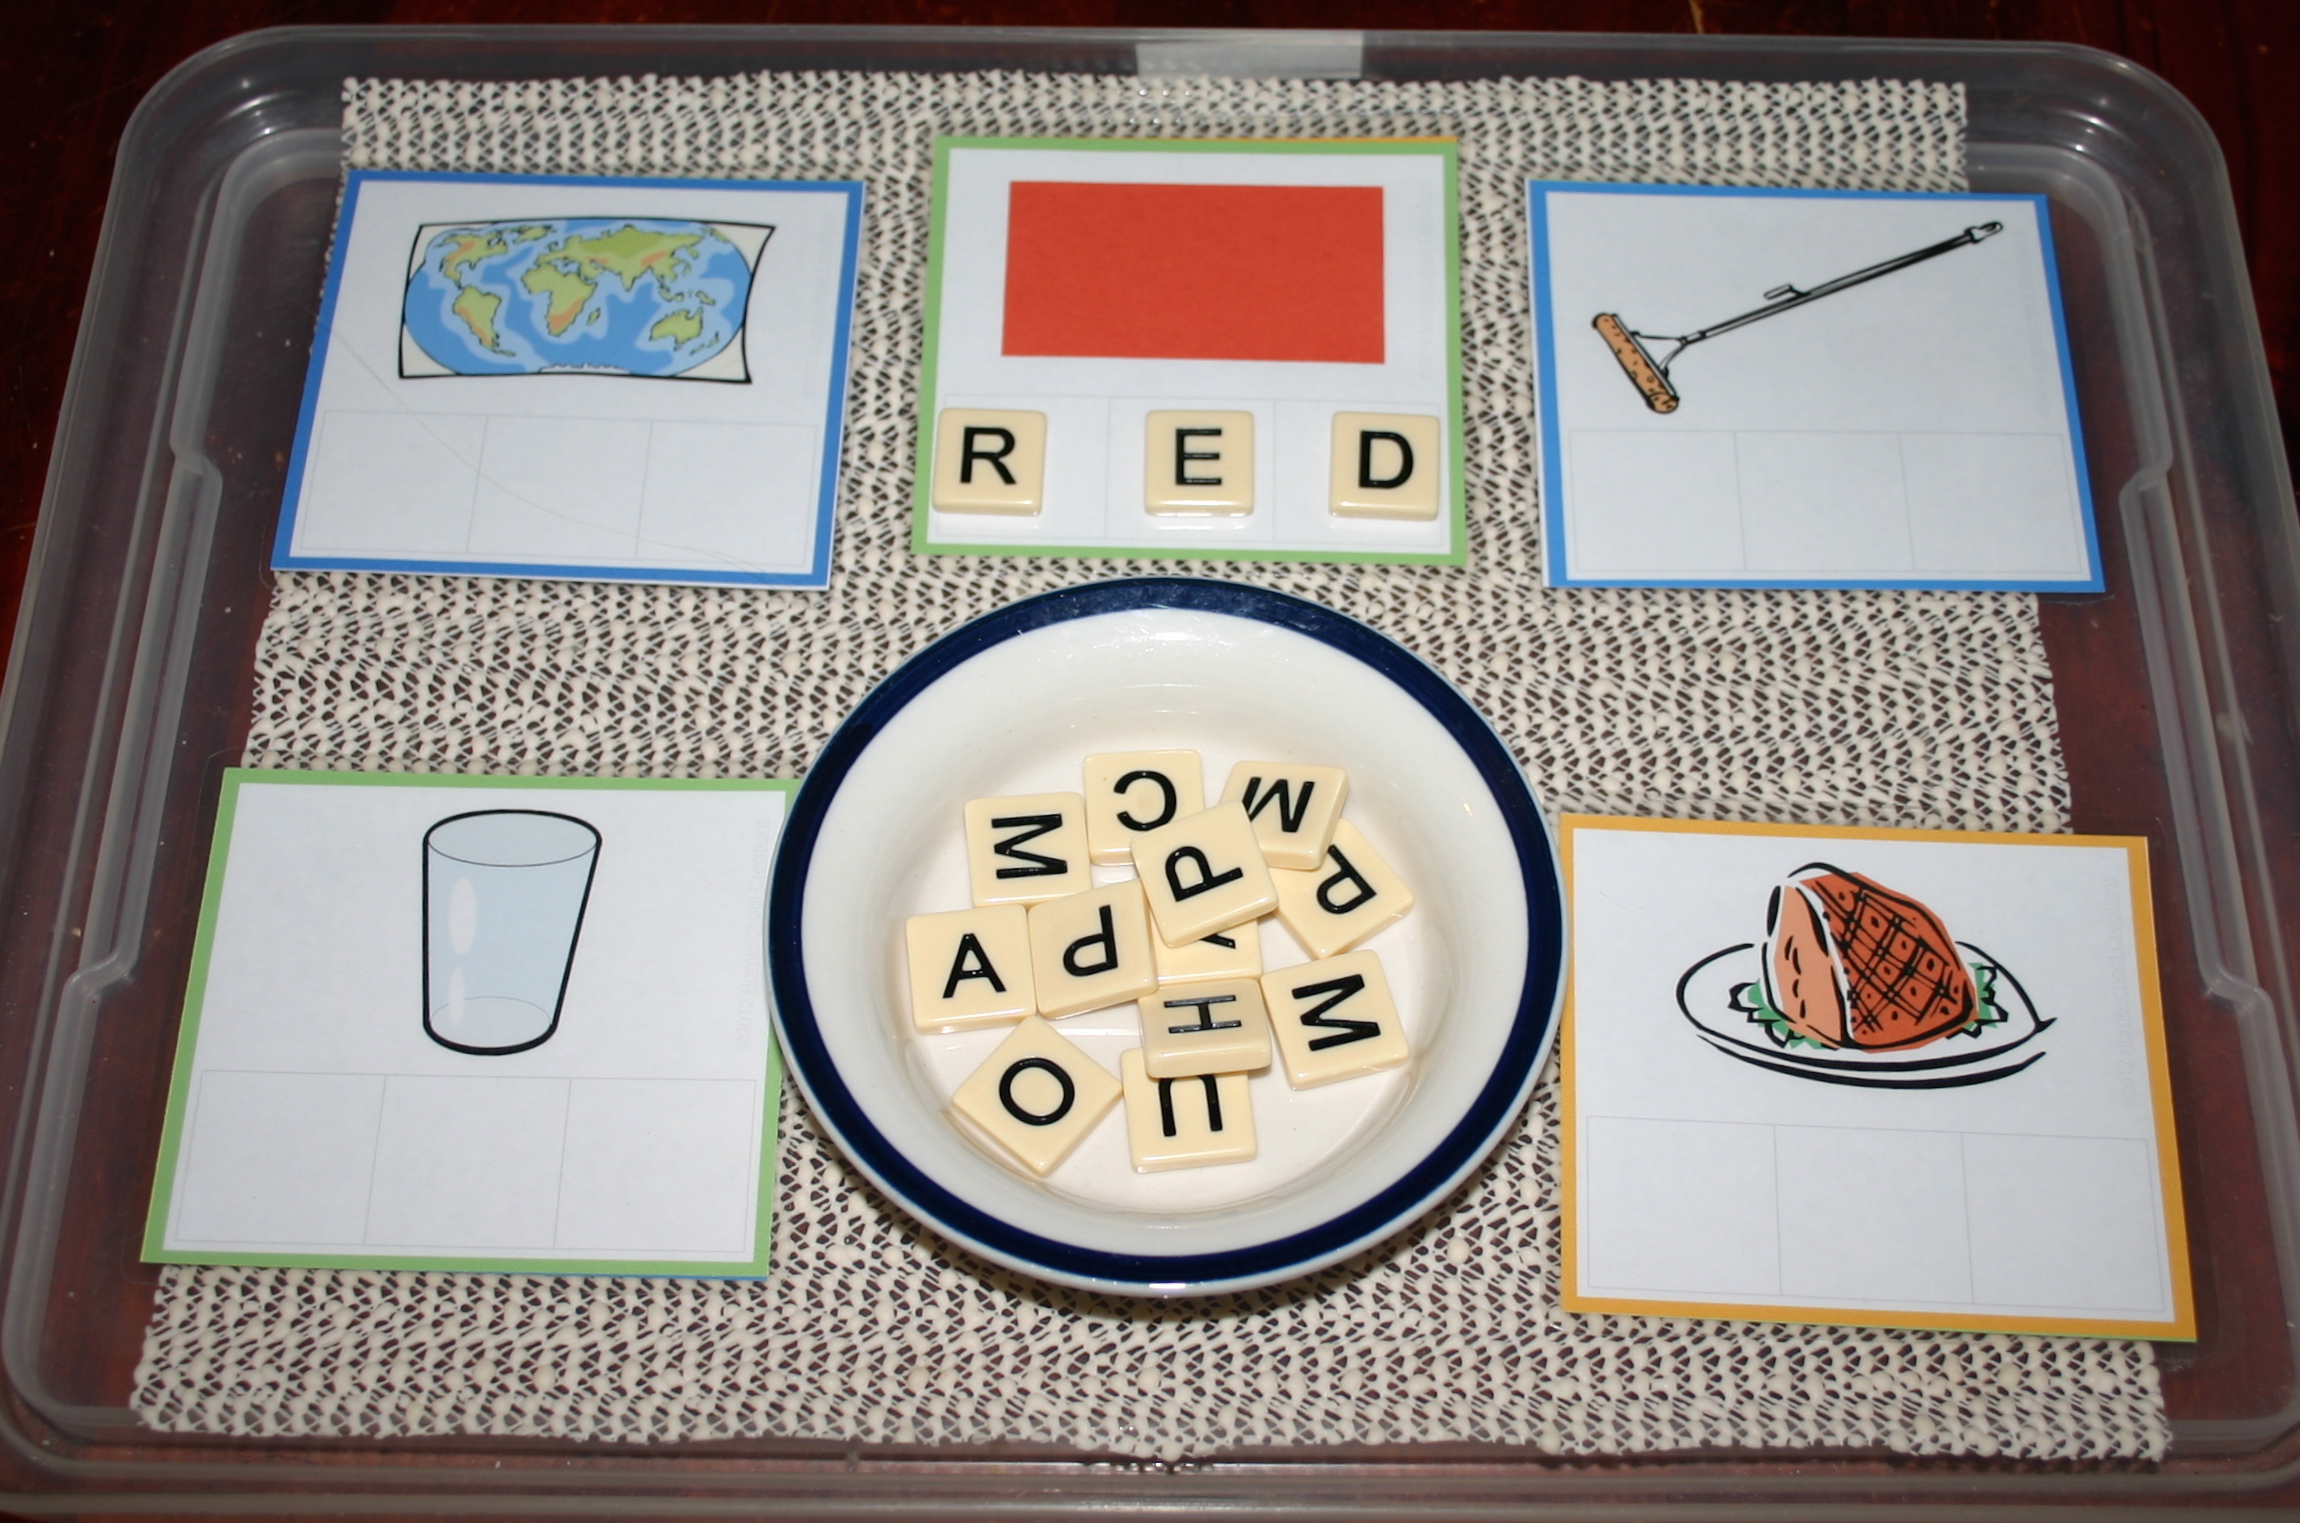
These initial sounds worksheets are so quick and simple but give that bookwork feel that my little kids love because it makes them think they are doing real school just like the big kids. They have to review the letter name and sound then say the name of each object slowly to see if it starts with the right sound. They circle the ones that do and cross out the ones that don’t before tracing the large letter in the middle a couple of times in varying colours. Just a little bit of pencil work to practice but nothing too taxing.

IMG_9477

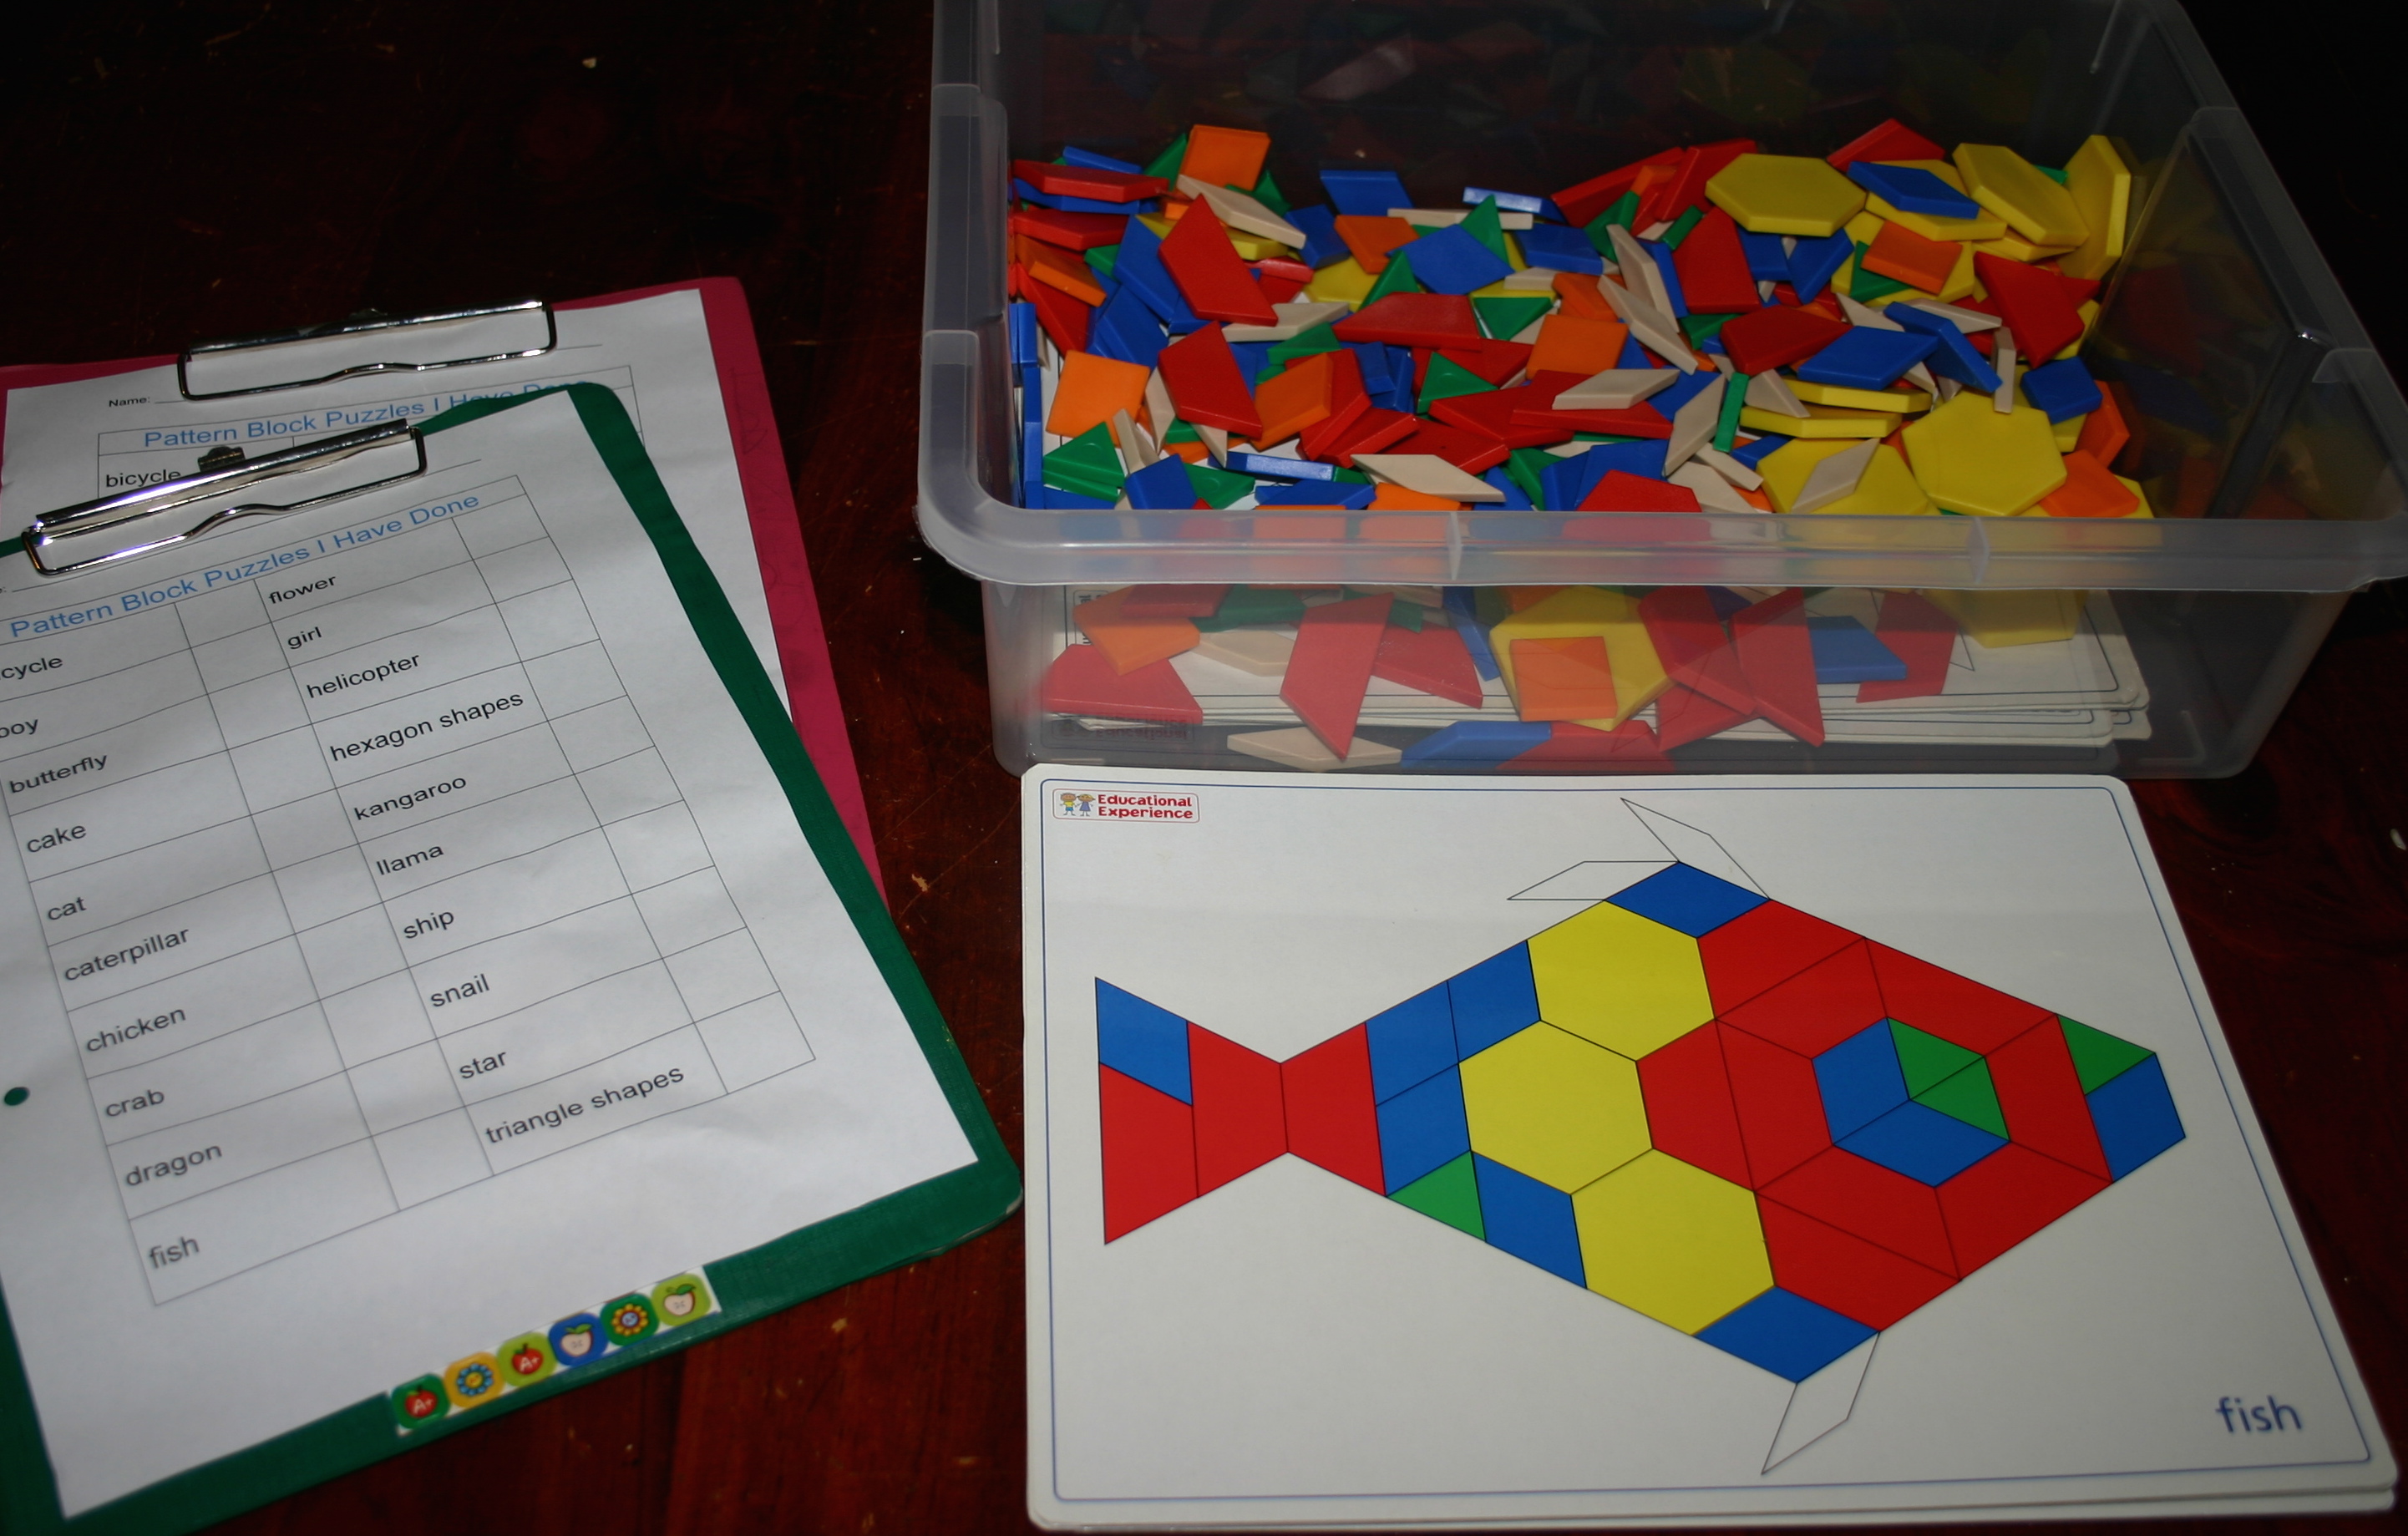
The fun boxes hold activities that can be done without help but still have educational value. Fine motor skills, problem solving, language development and more are included here on a rotational basis.

IMG_9481

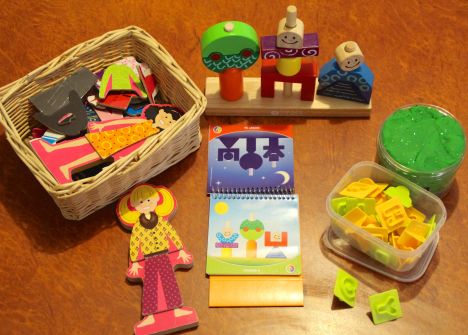
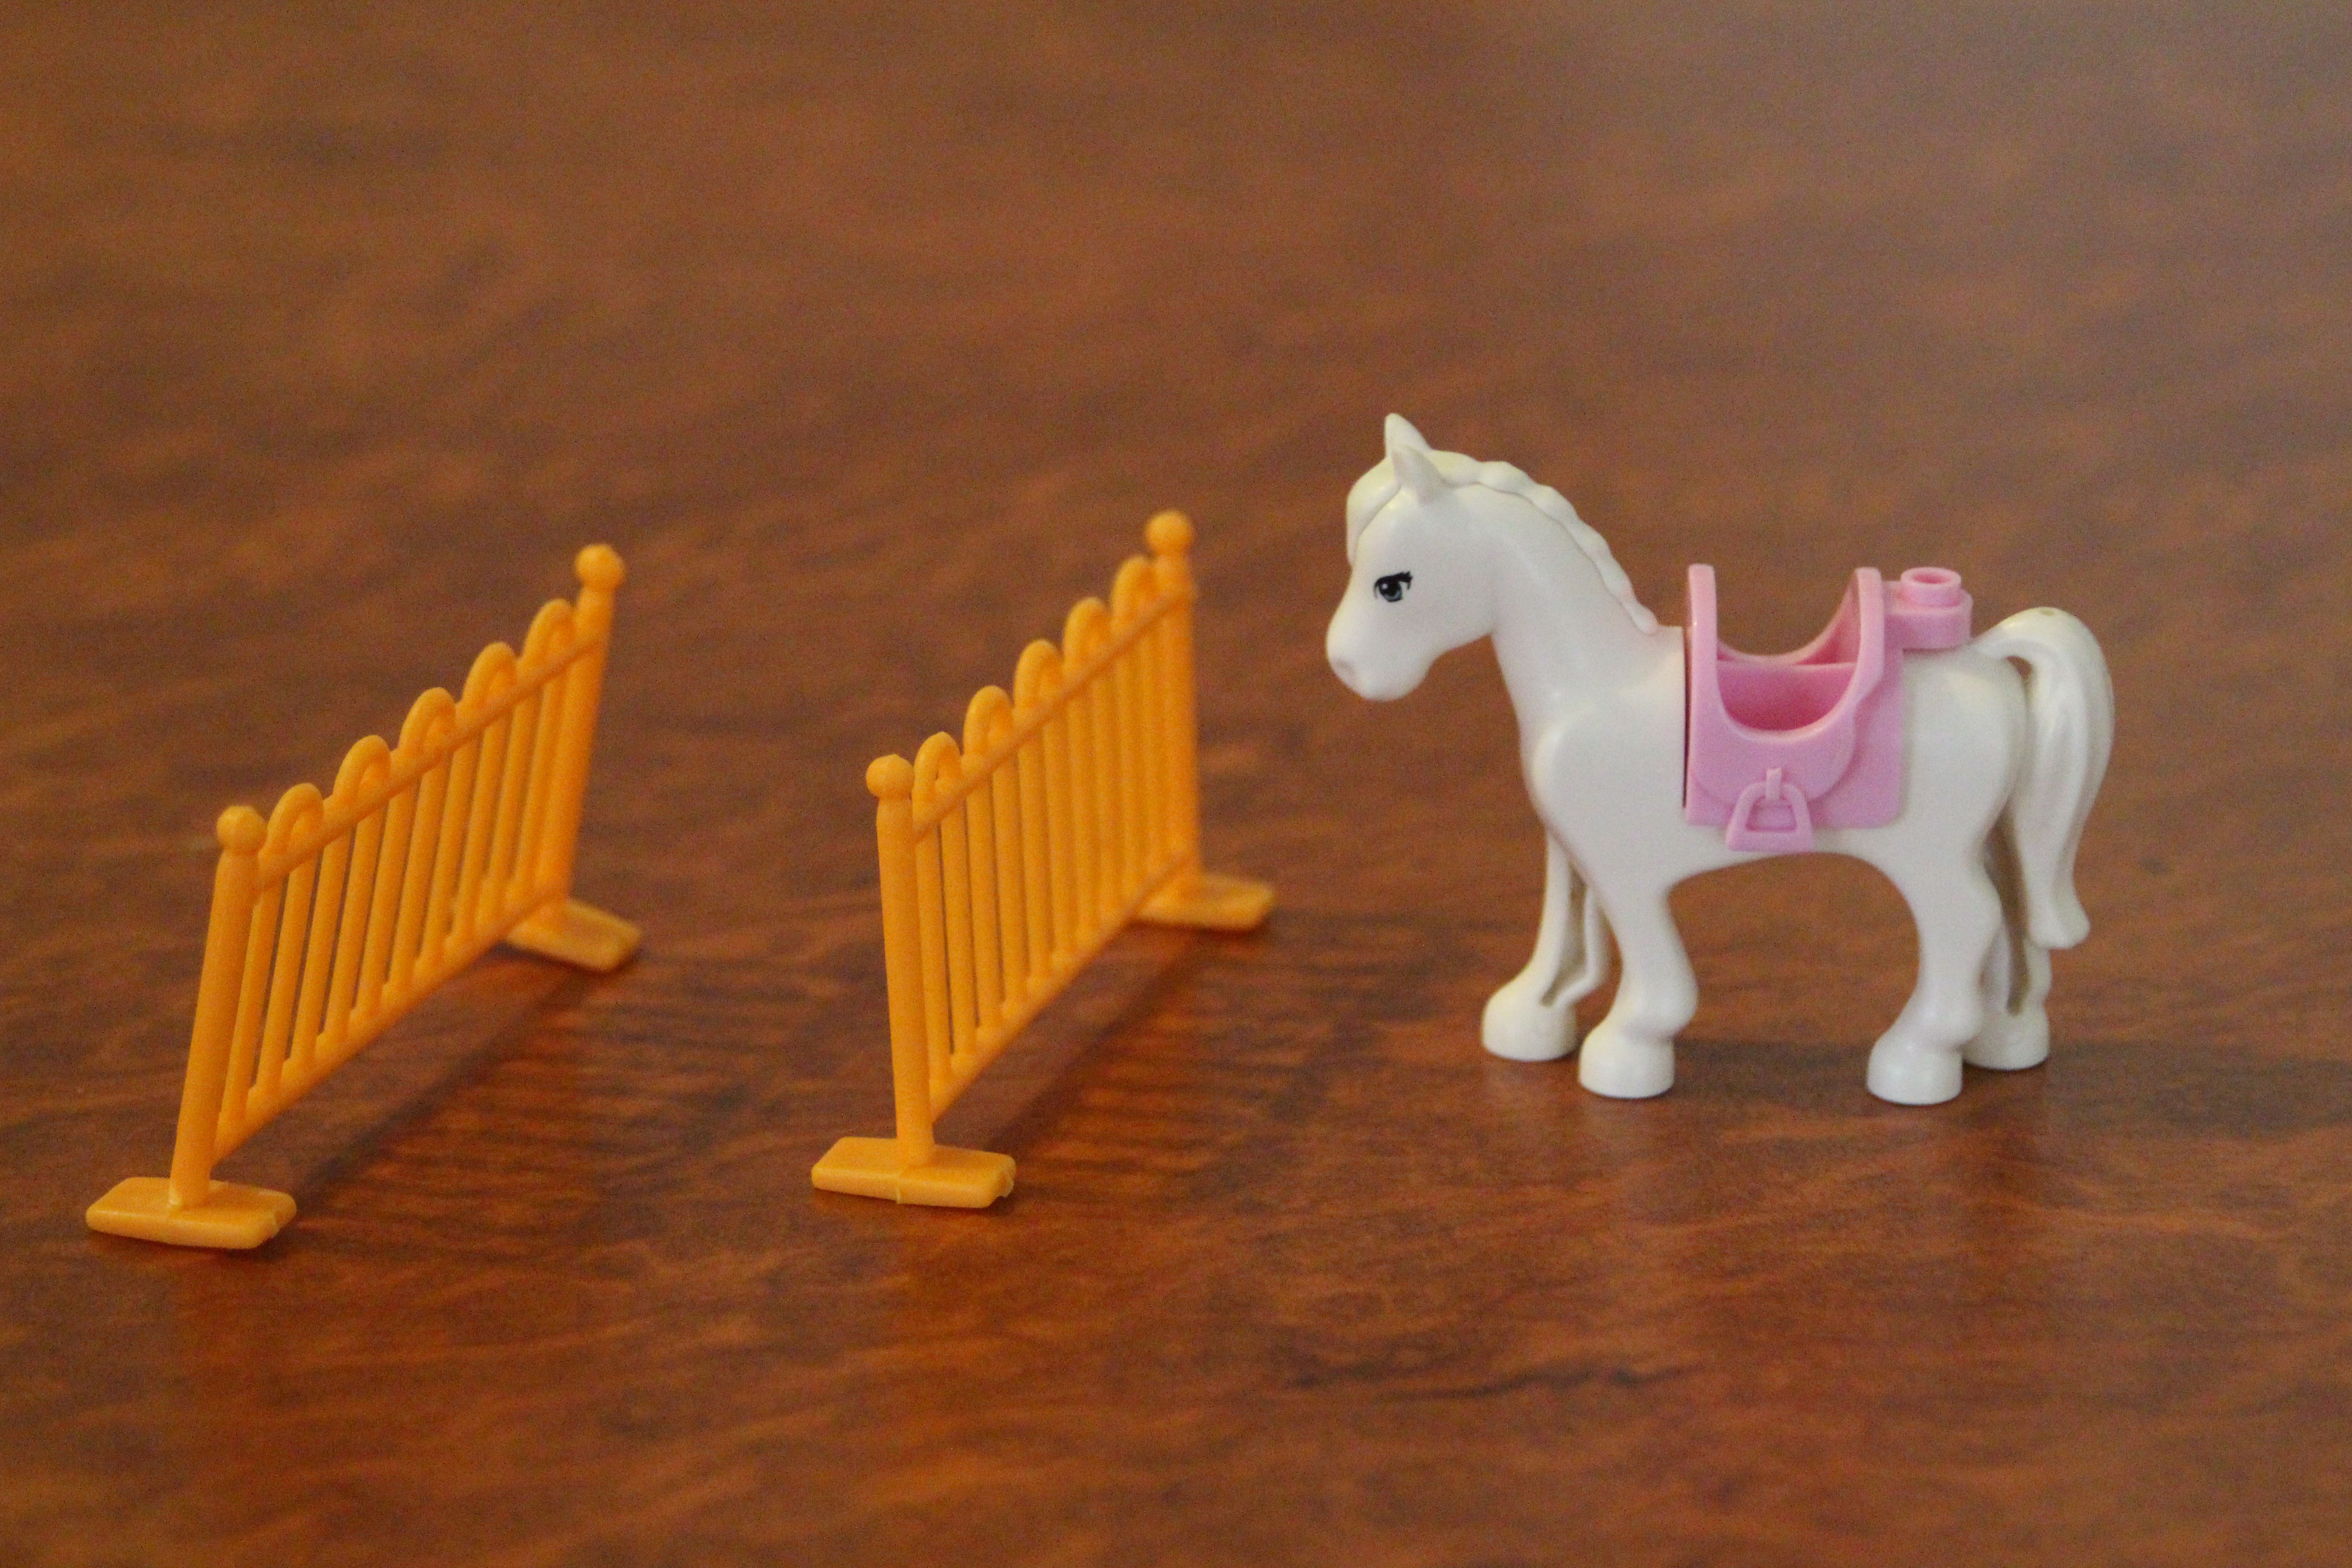
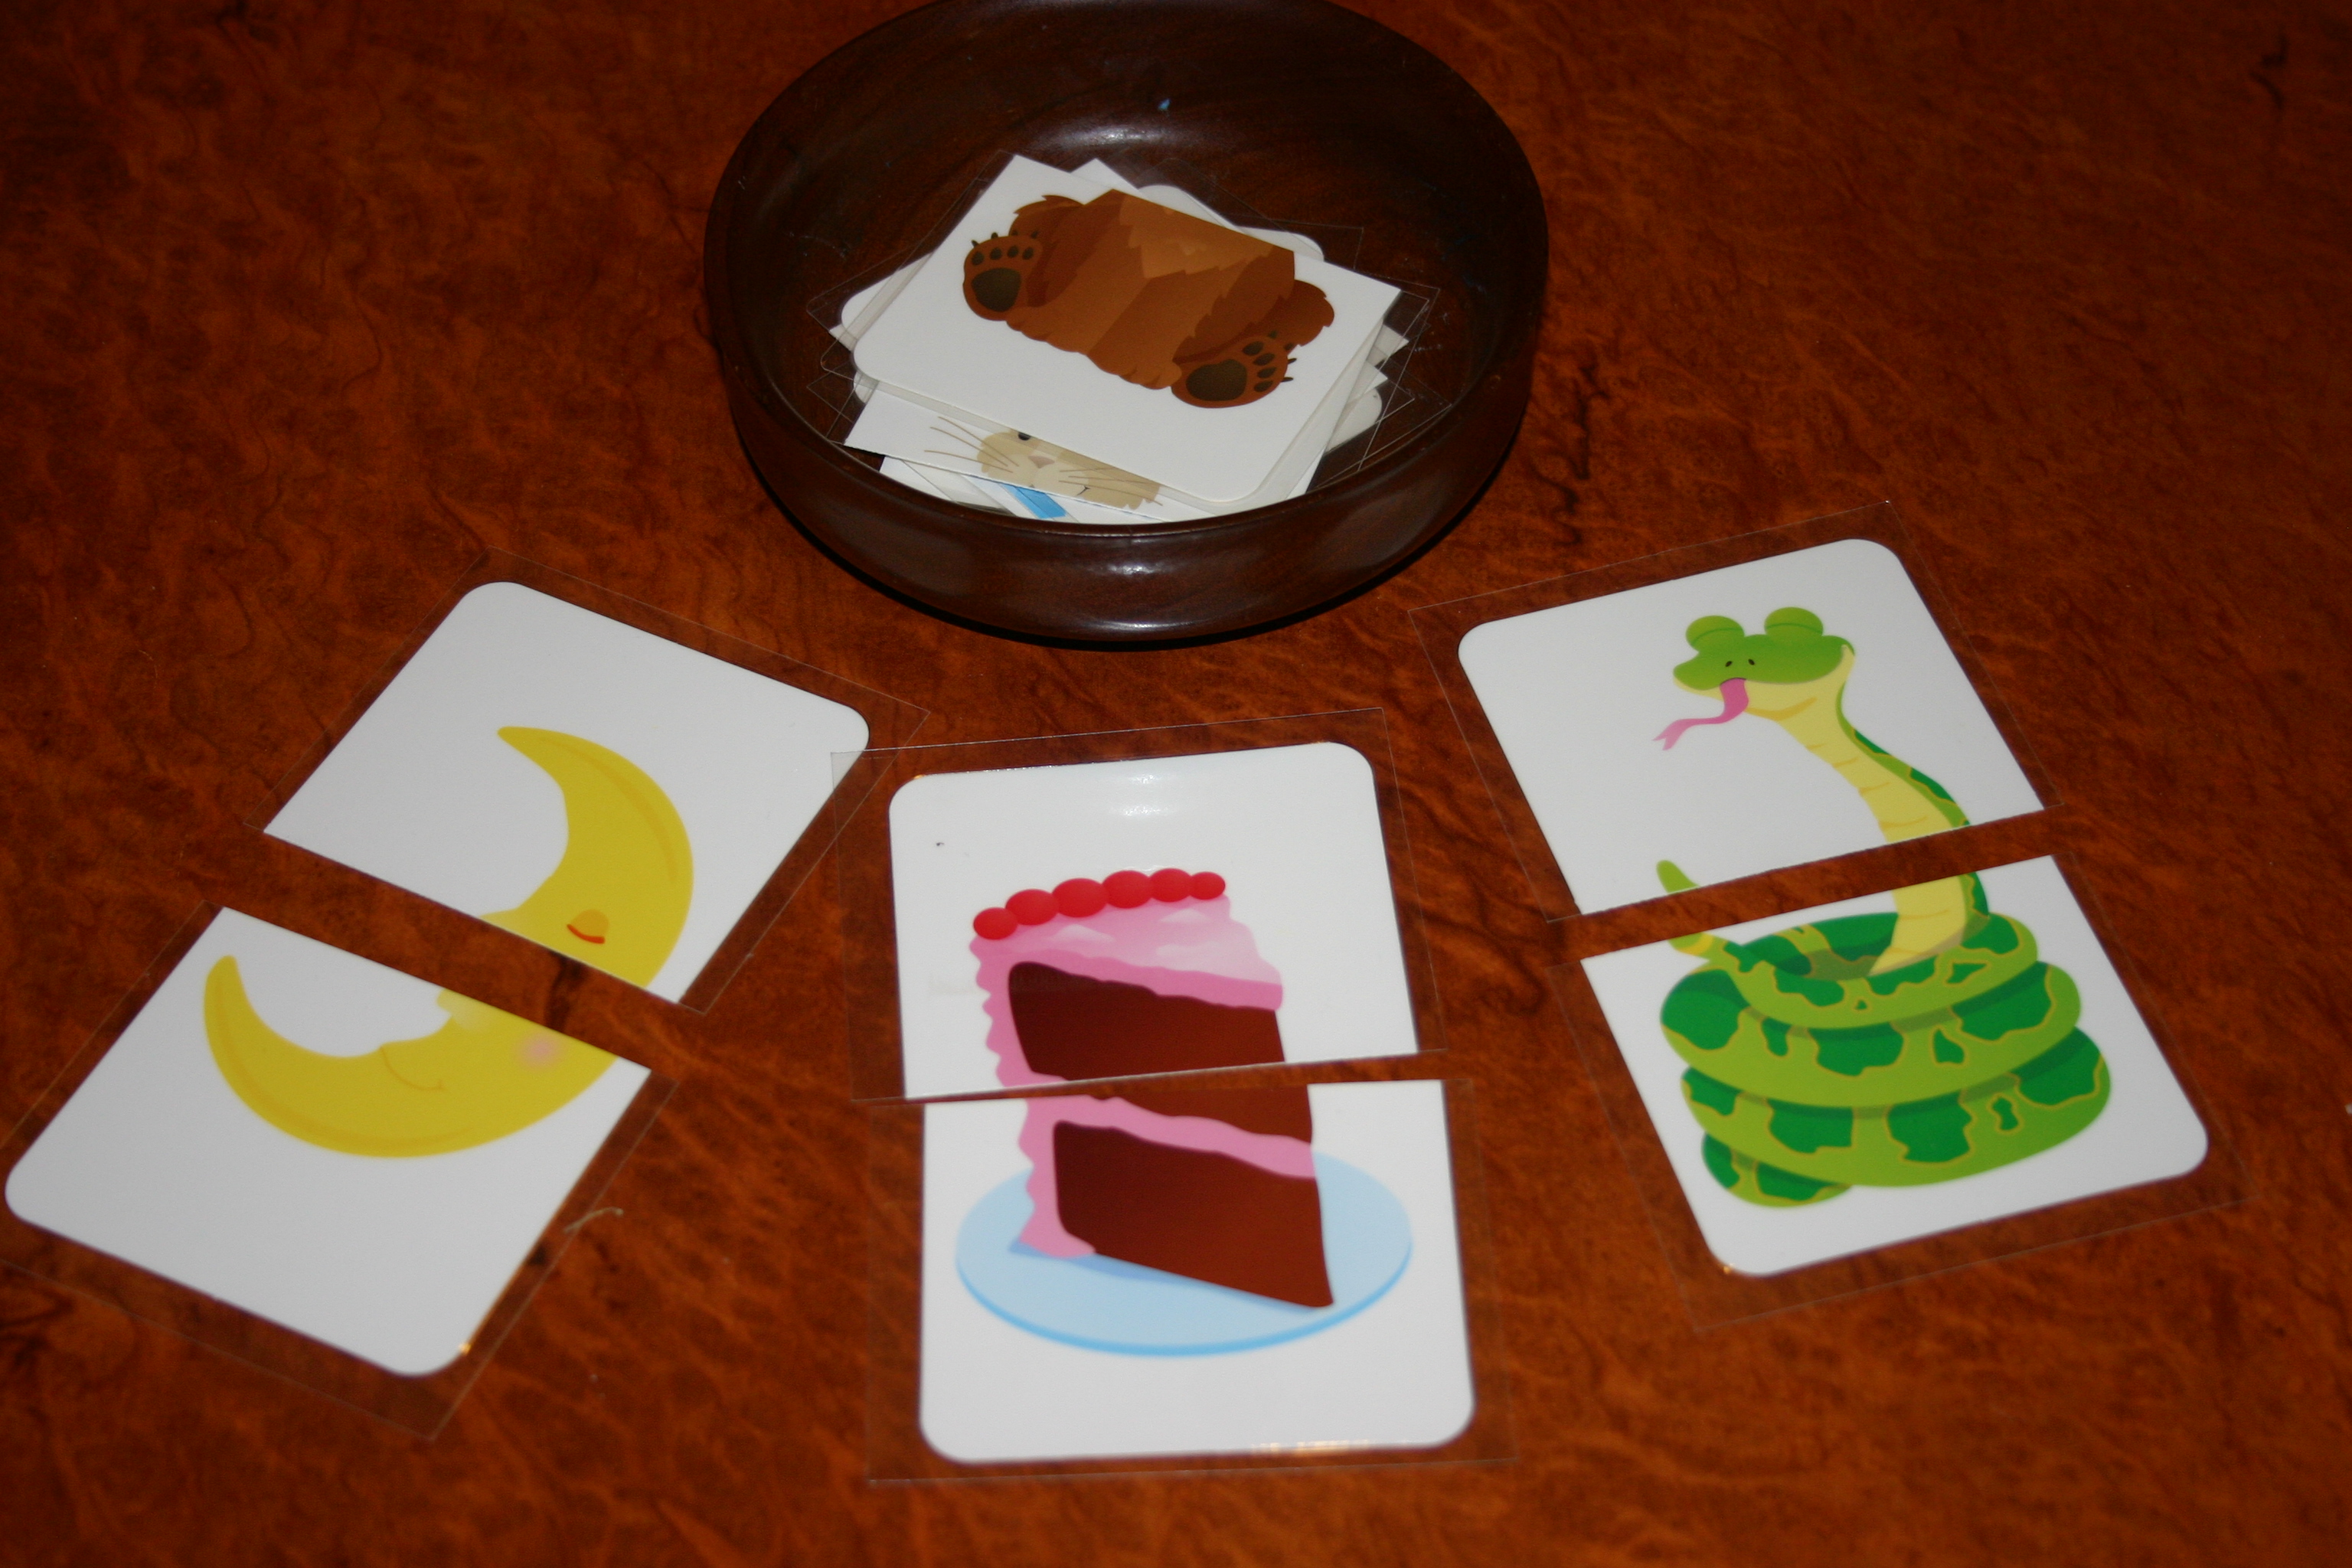
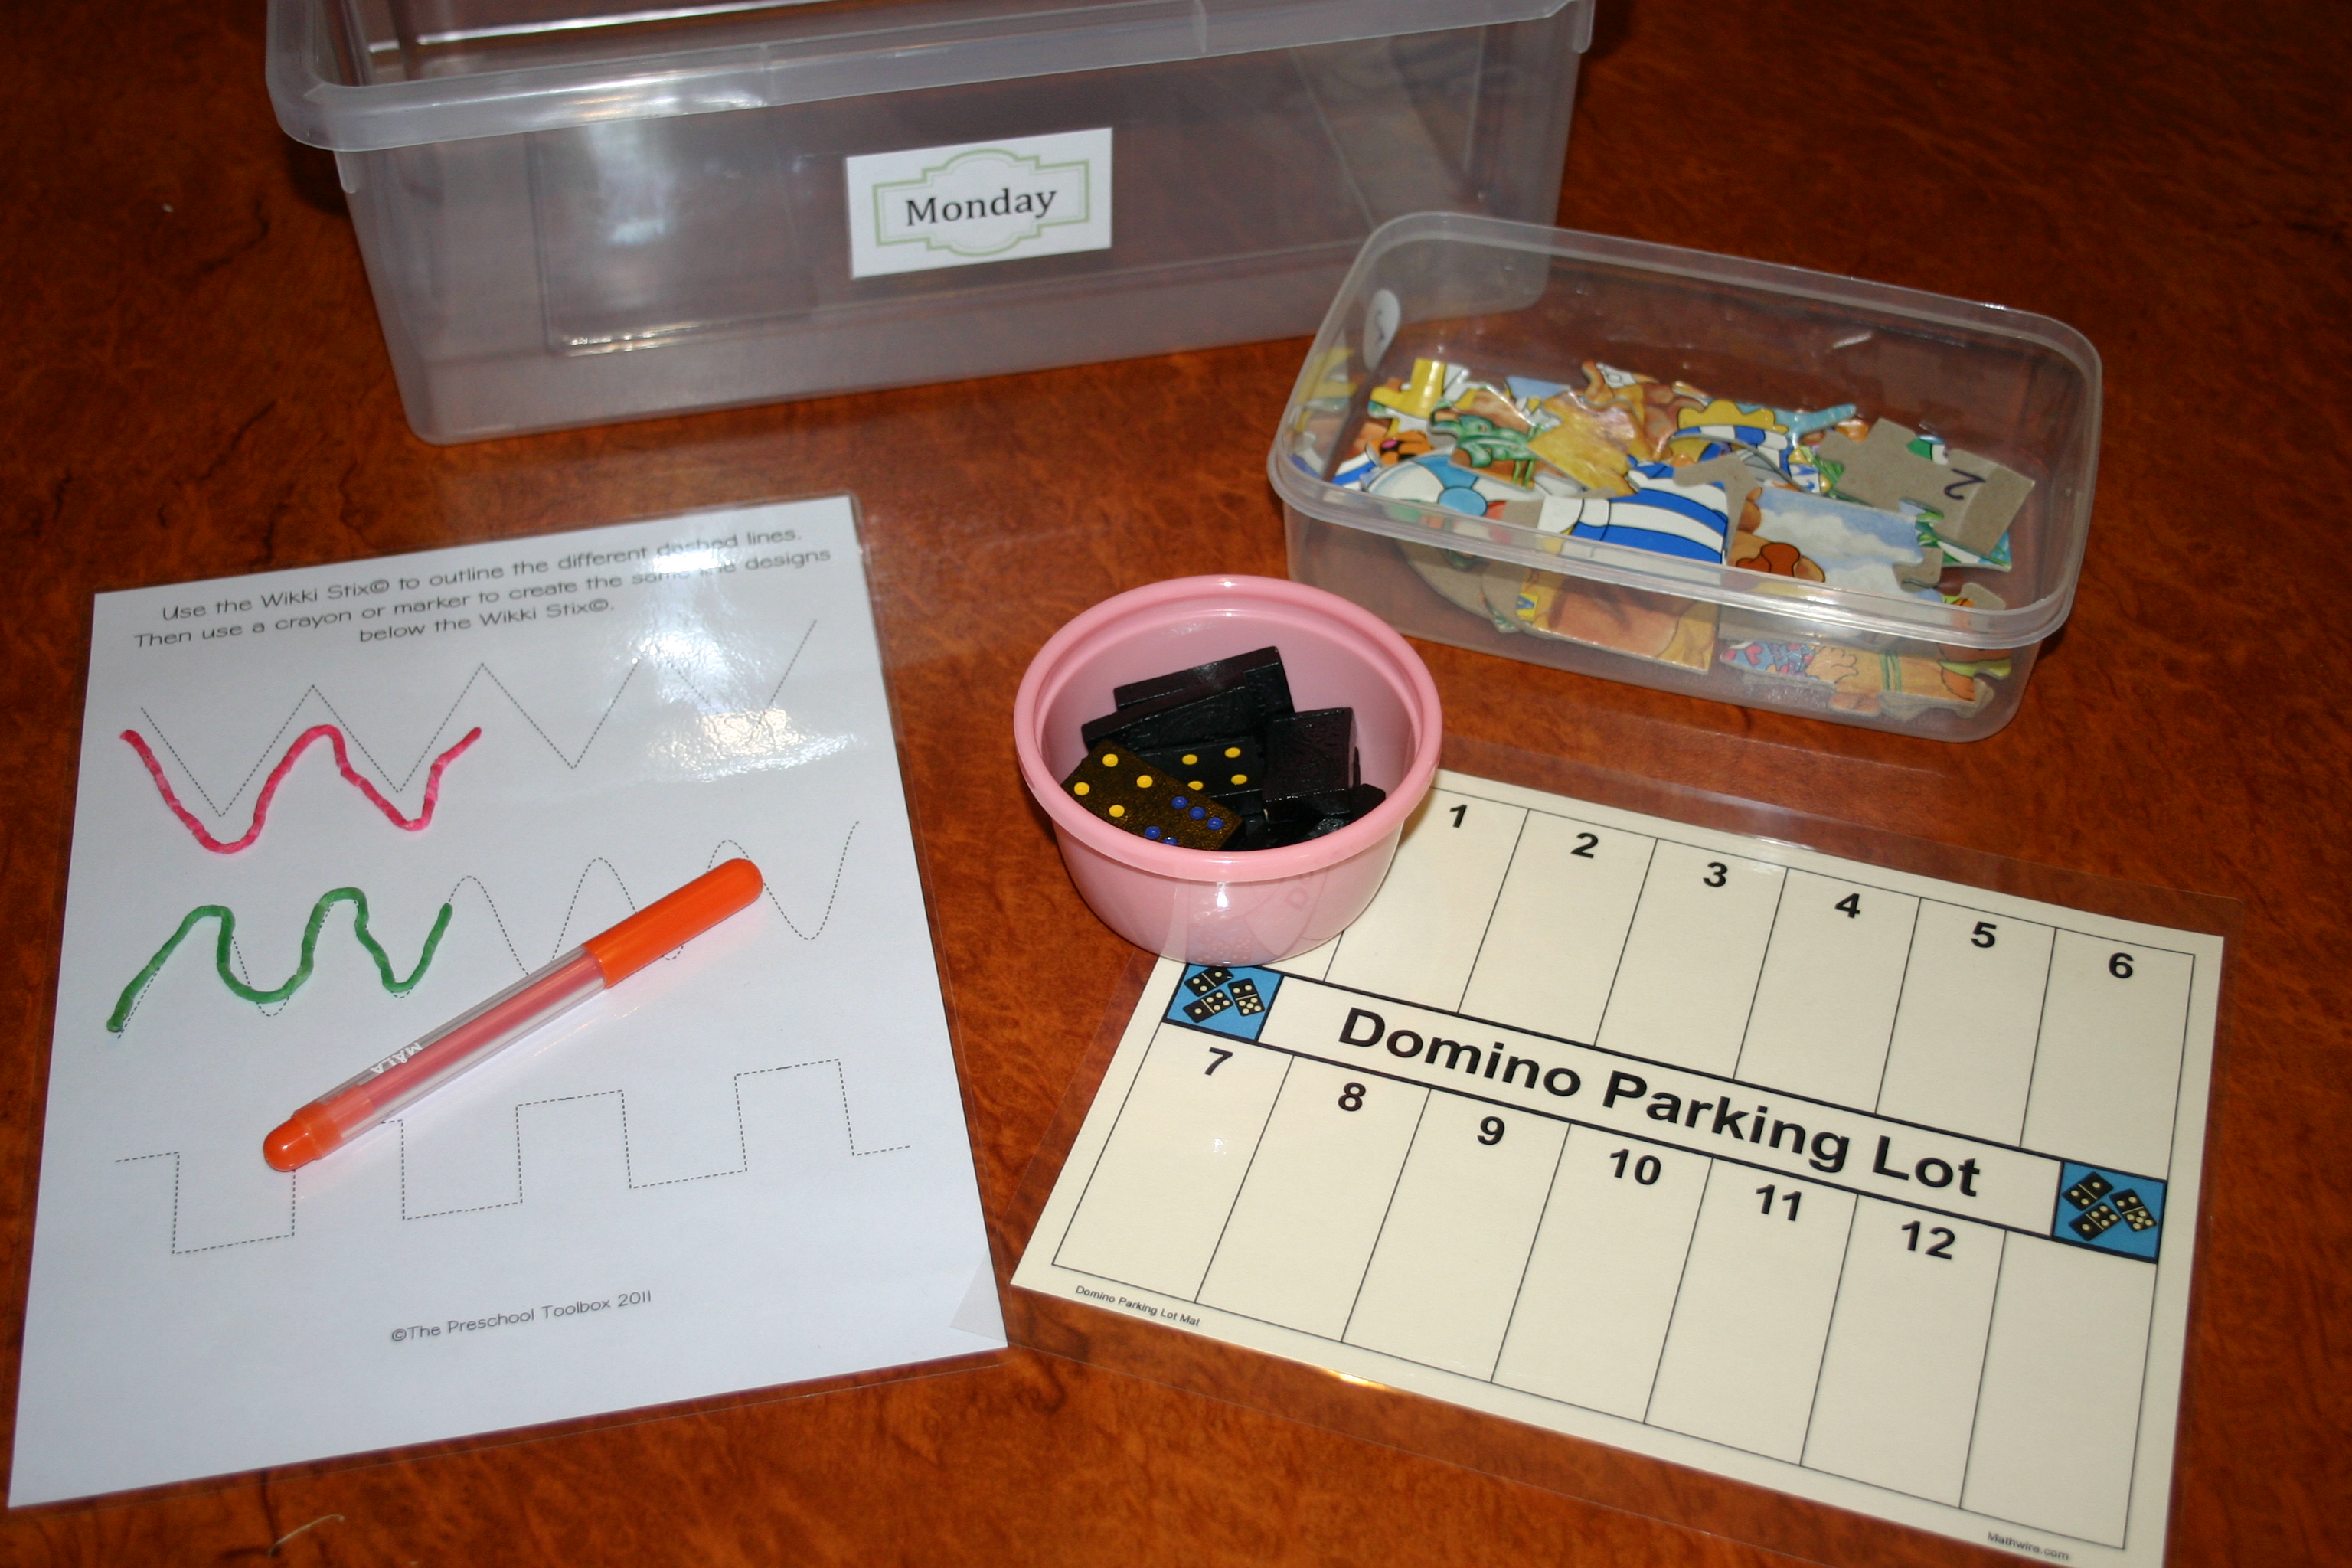
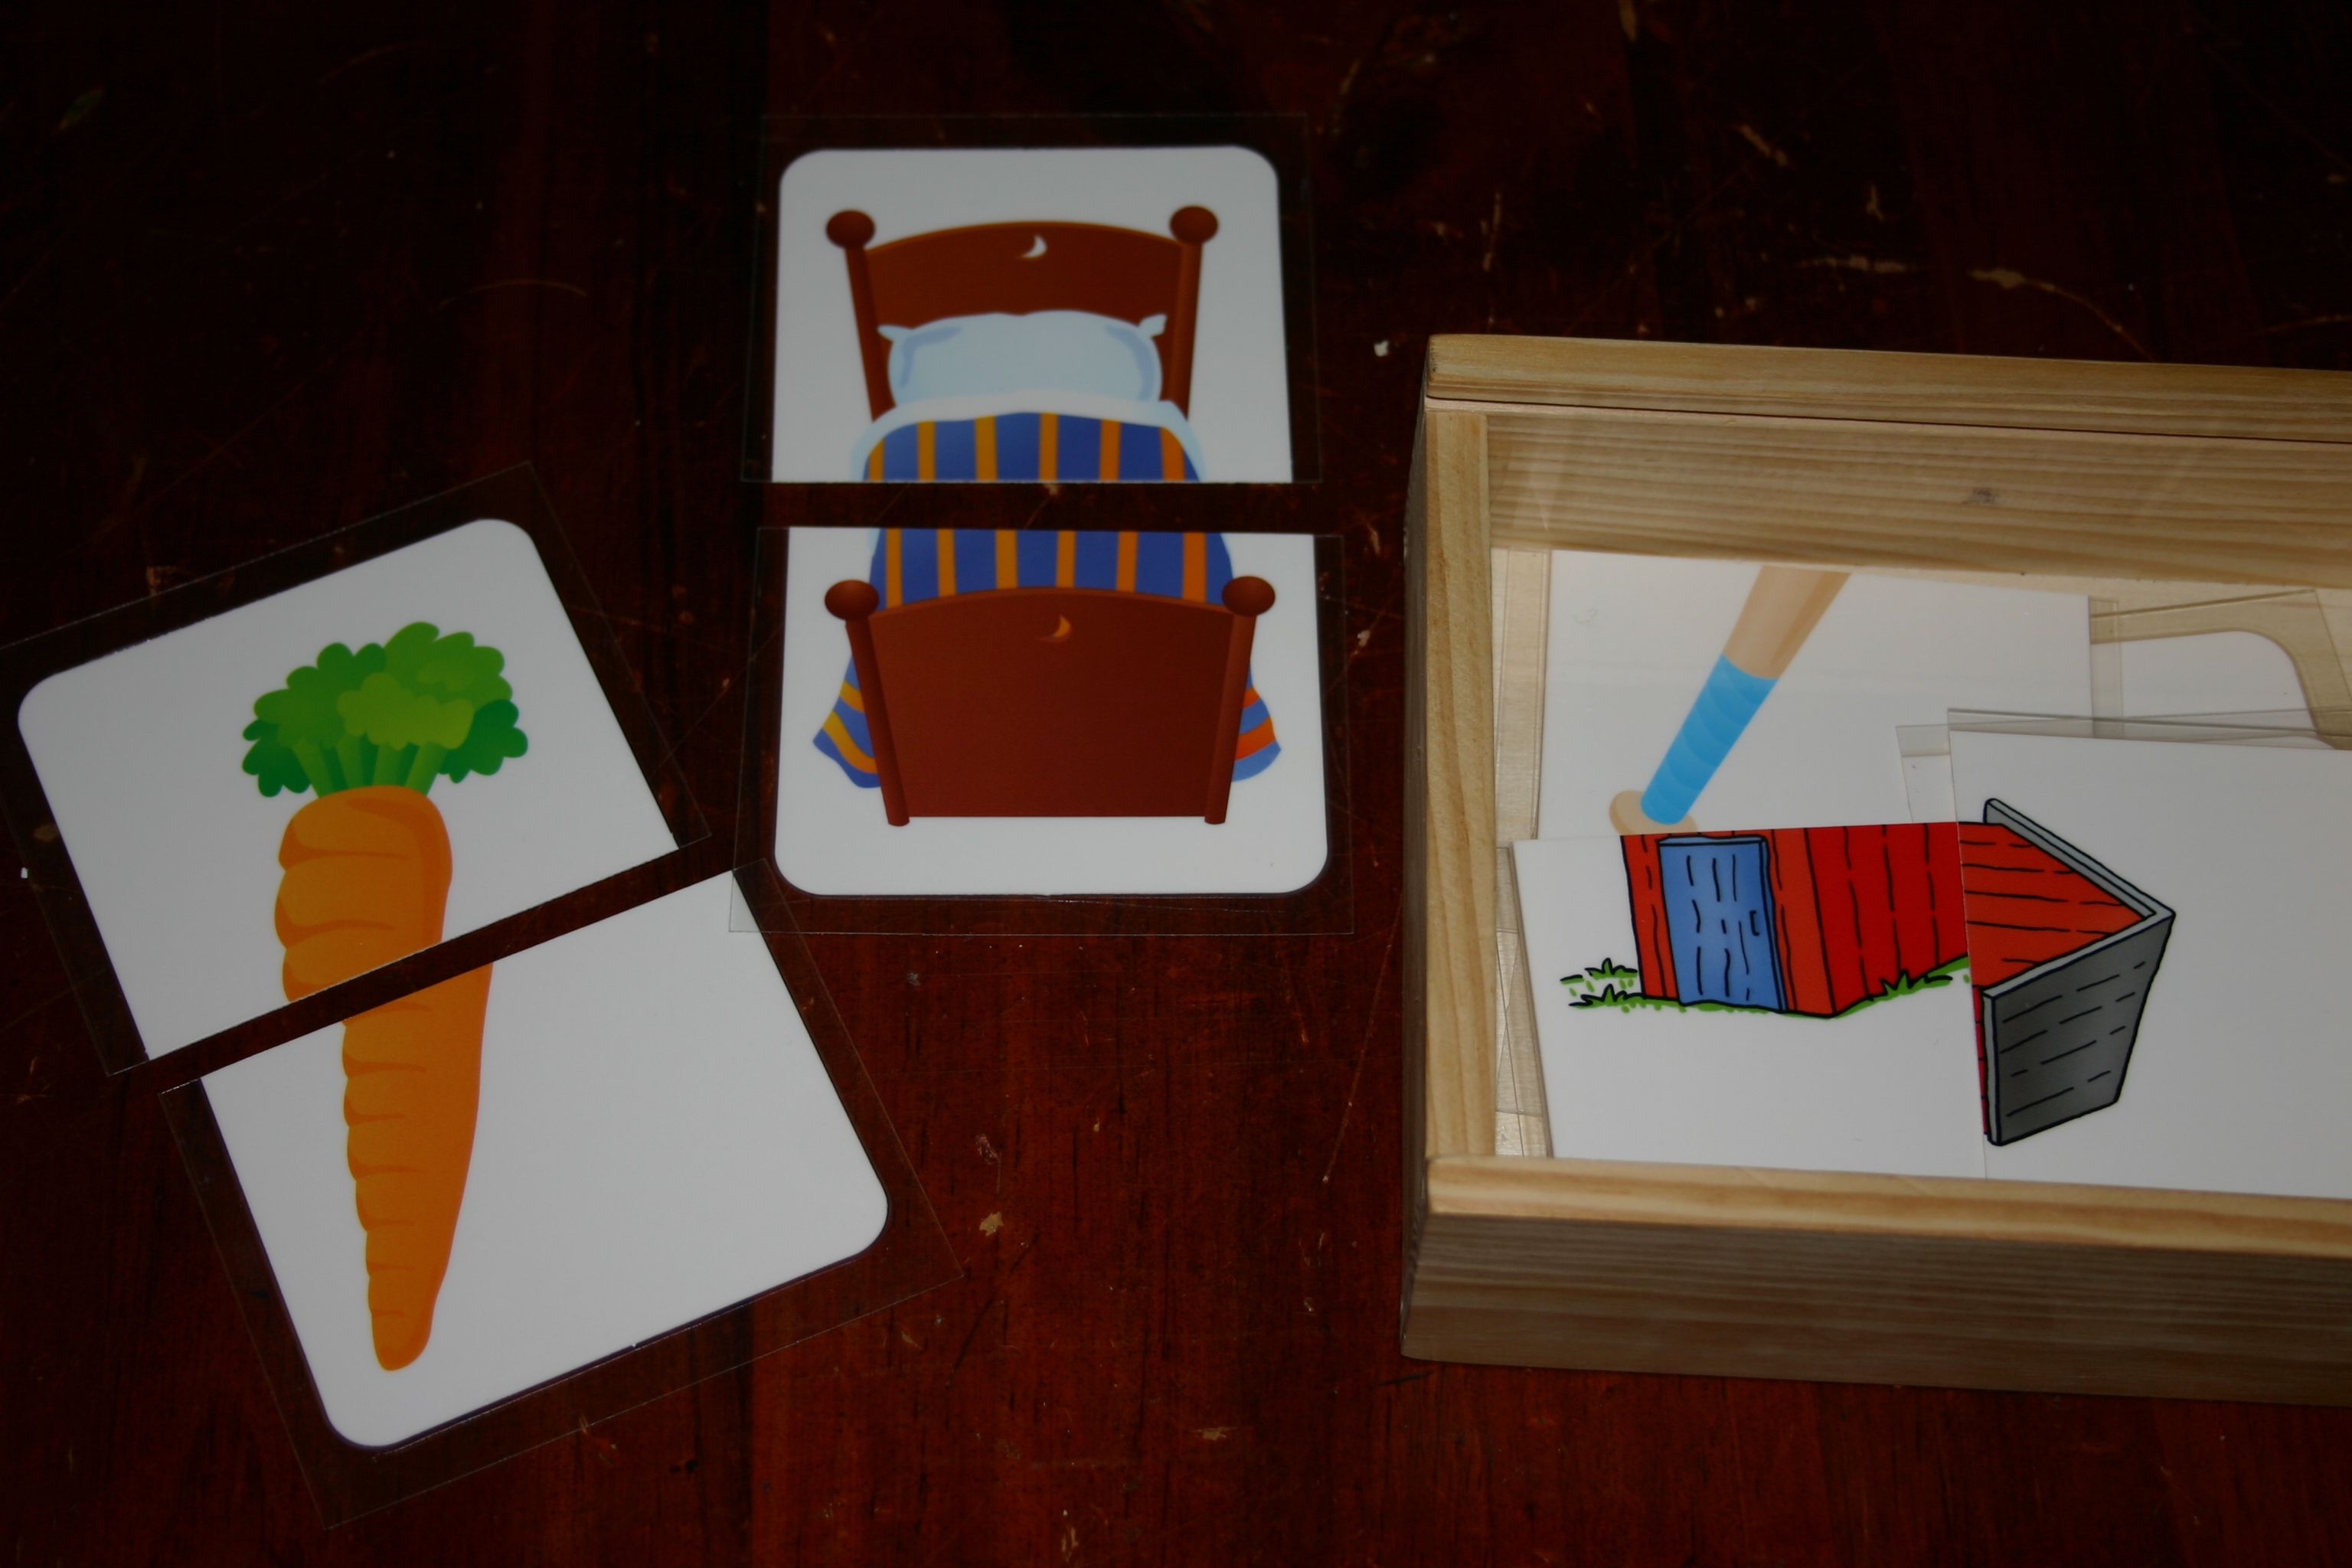
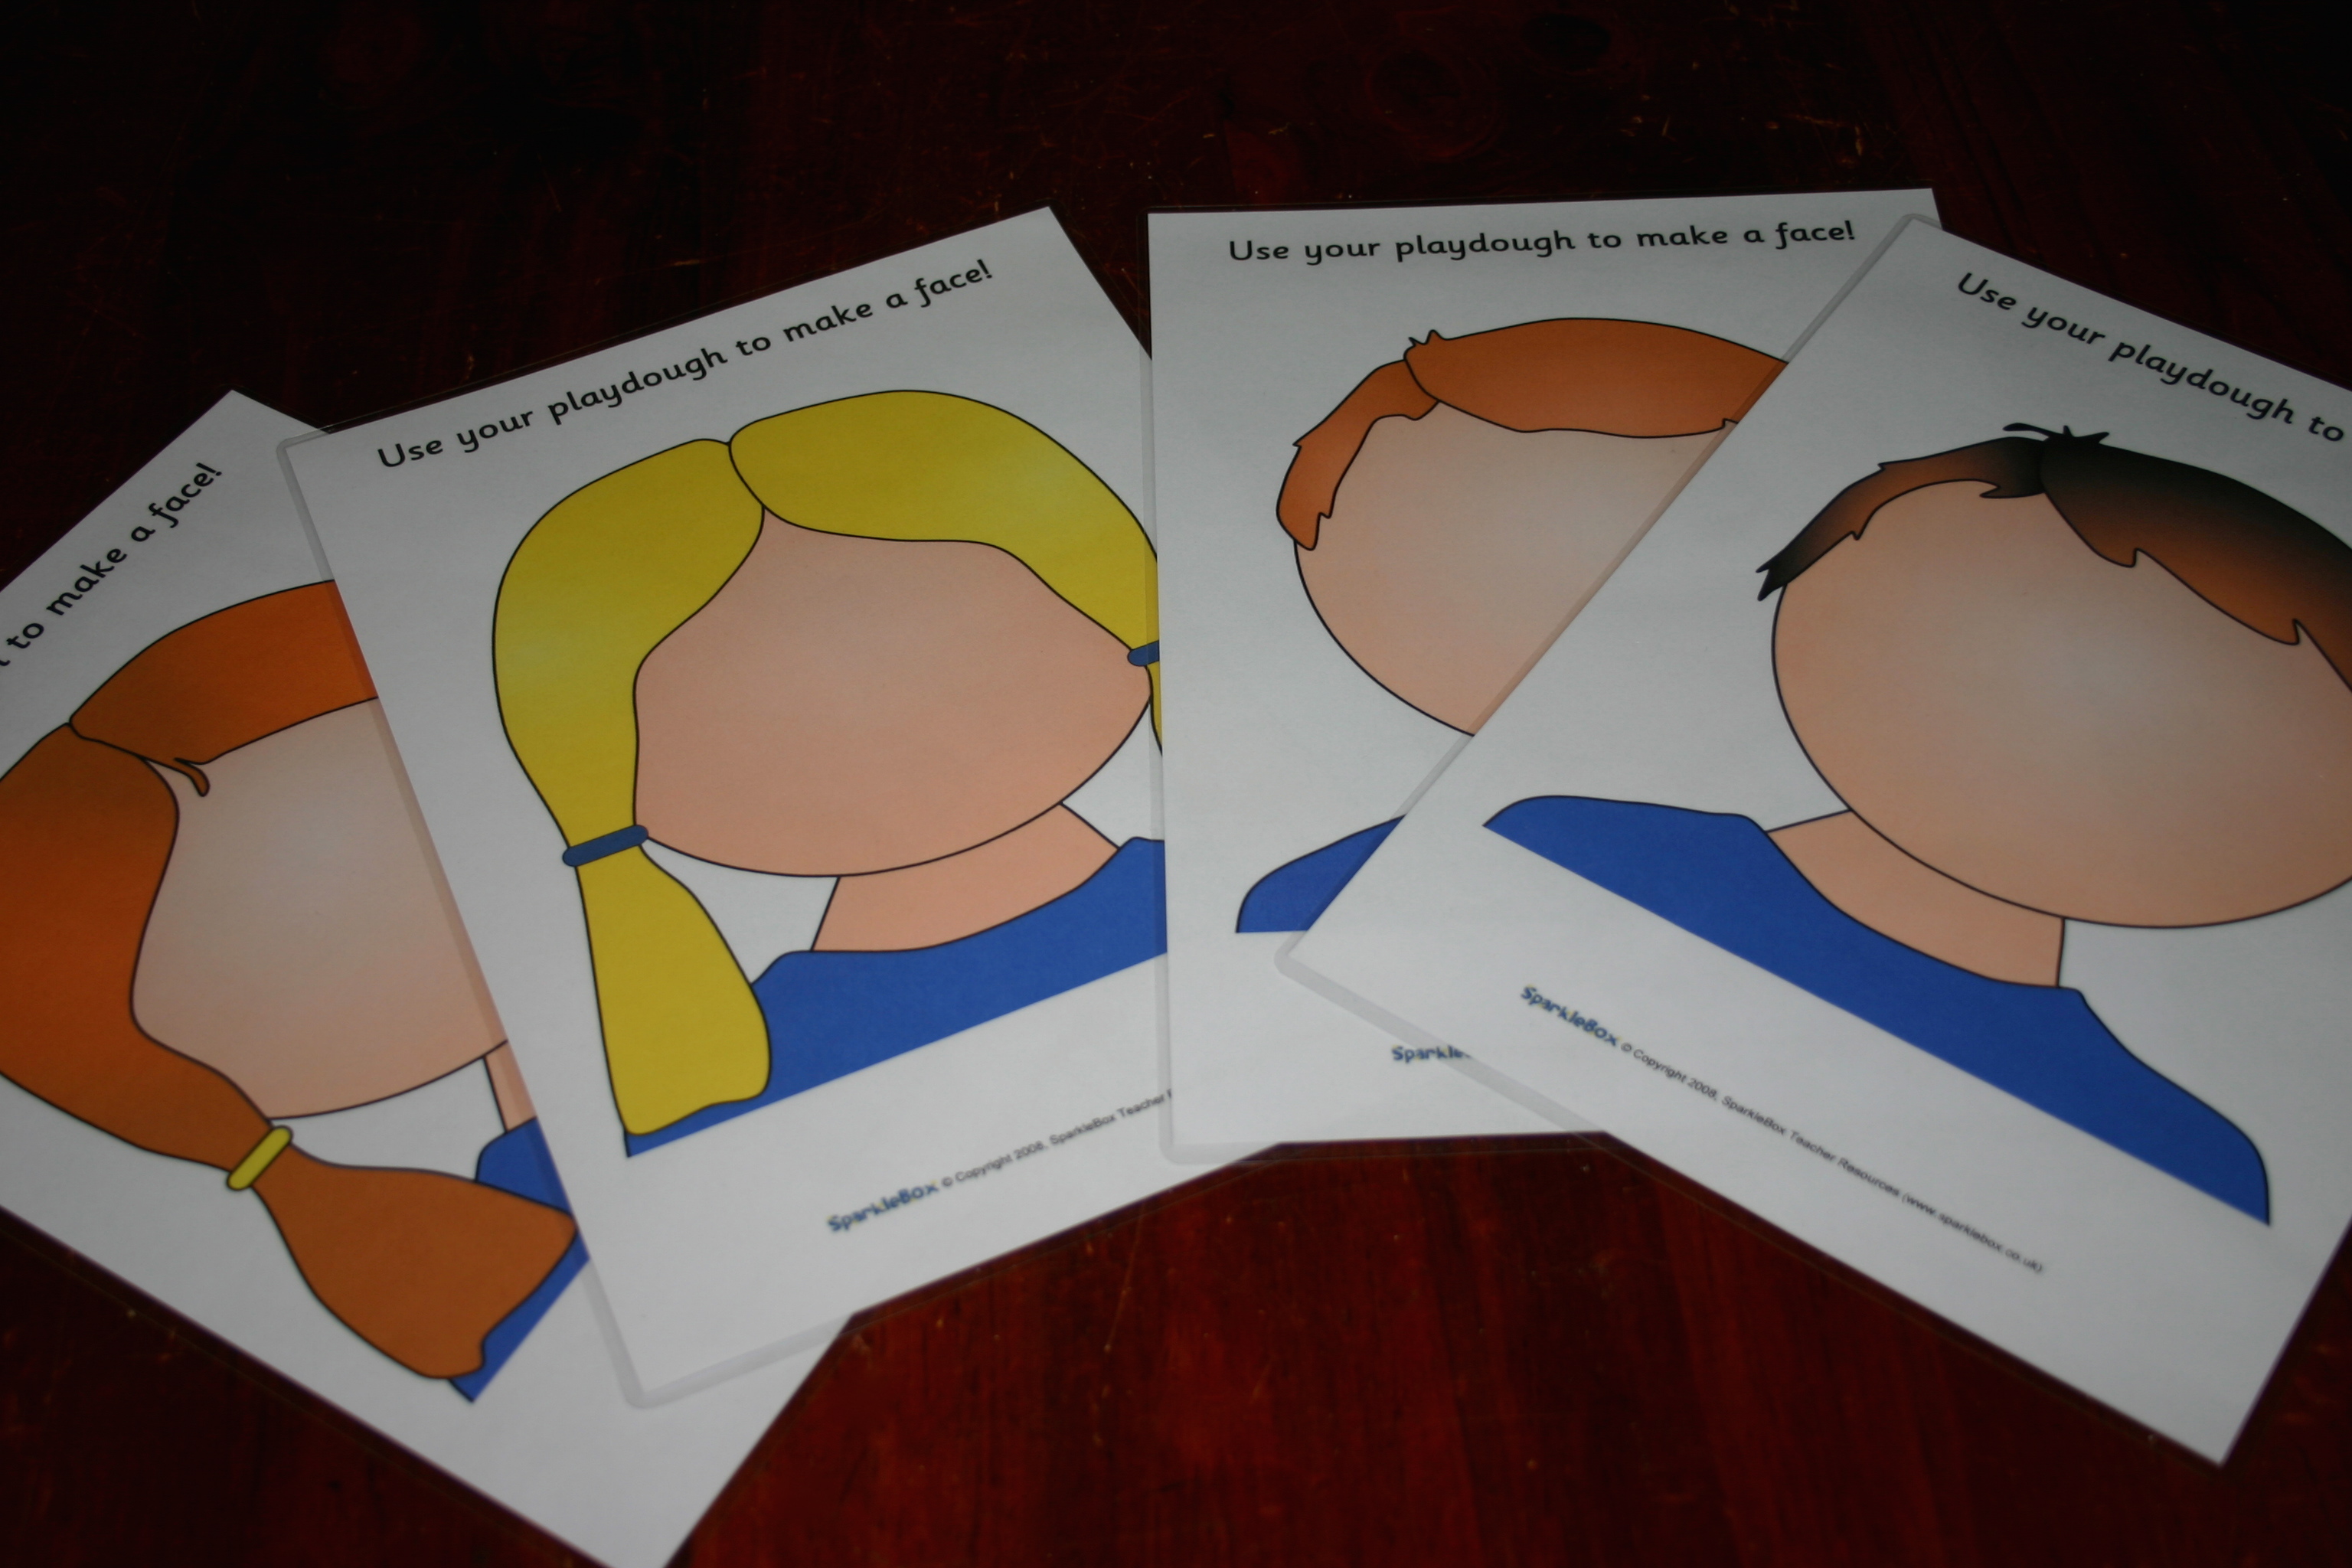
Monday has magnetic dressing dolls, playdough and letter stamps and our “Day and Night” puzzle that requires the children to match the silhouette or picture in the direction cards.

IMG_9483

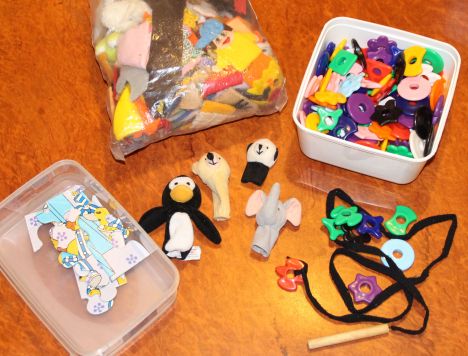
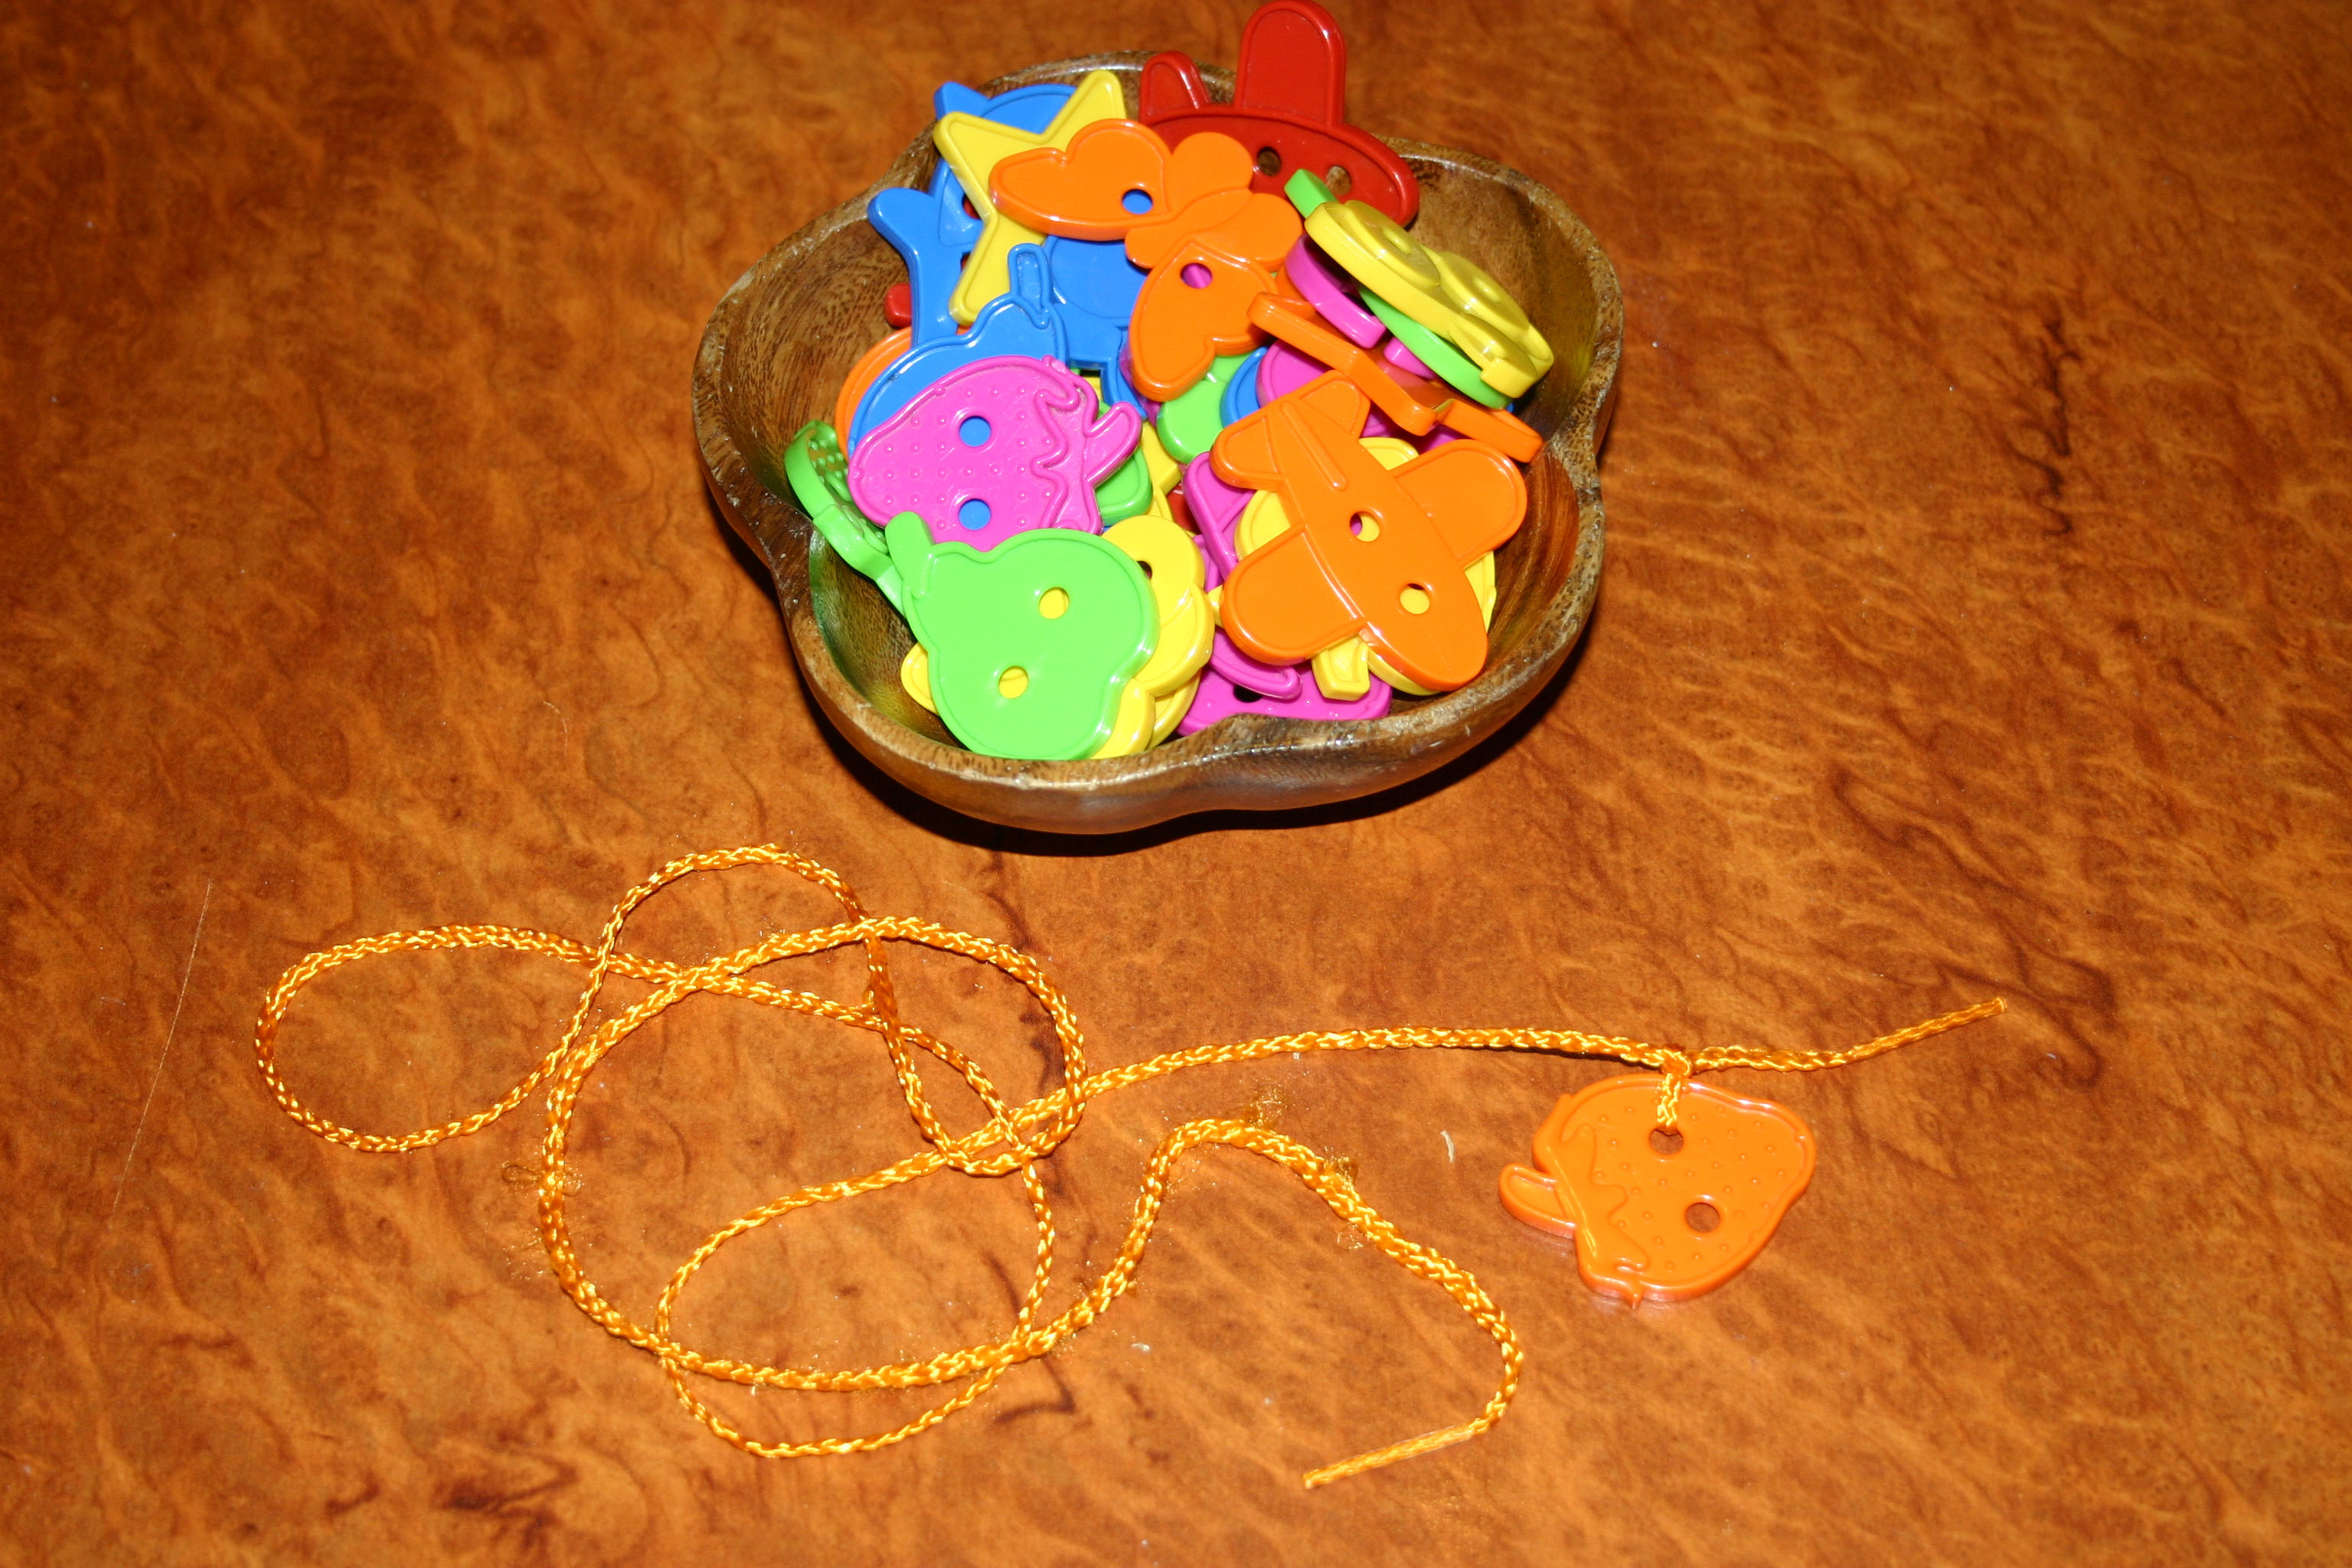
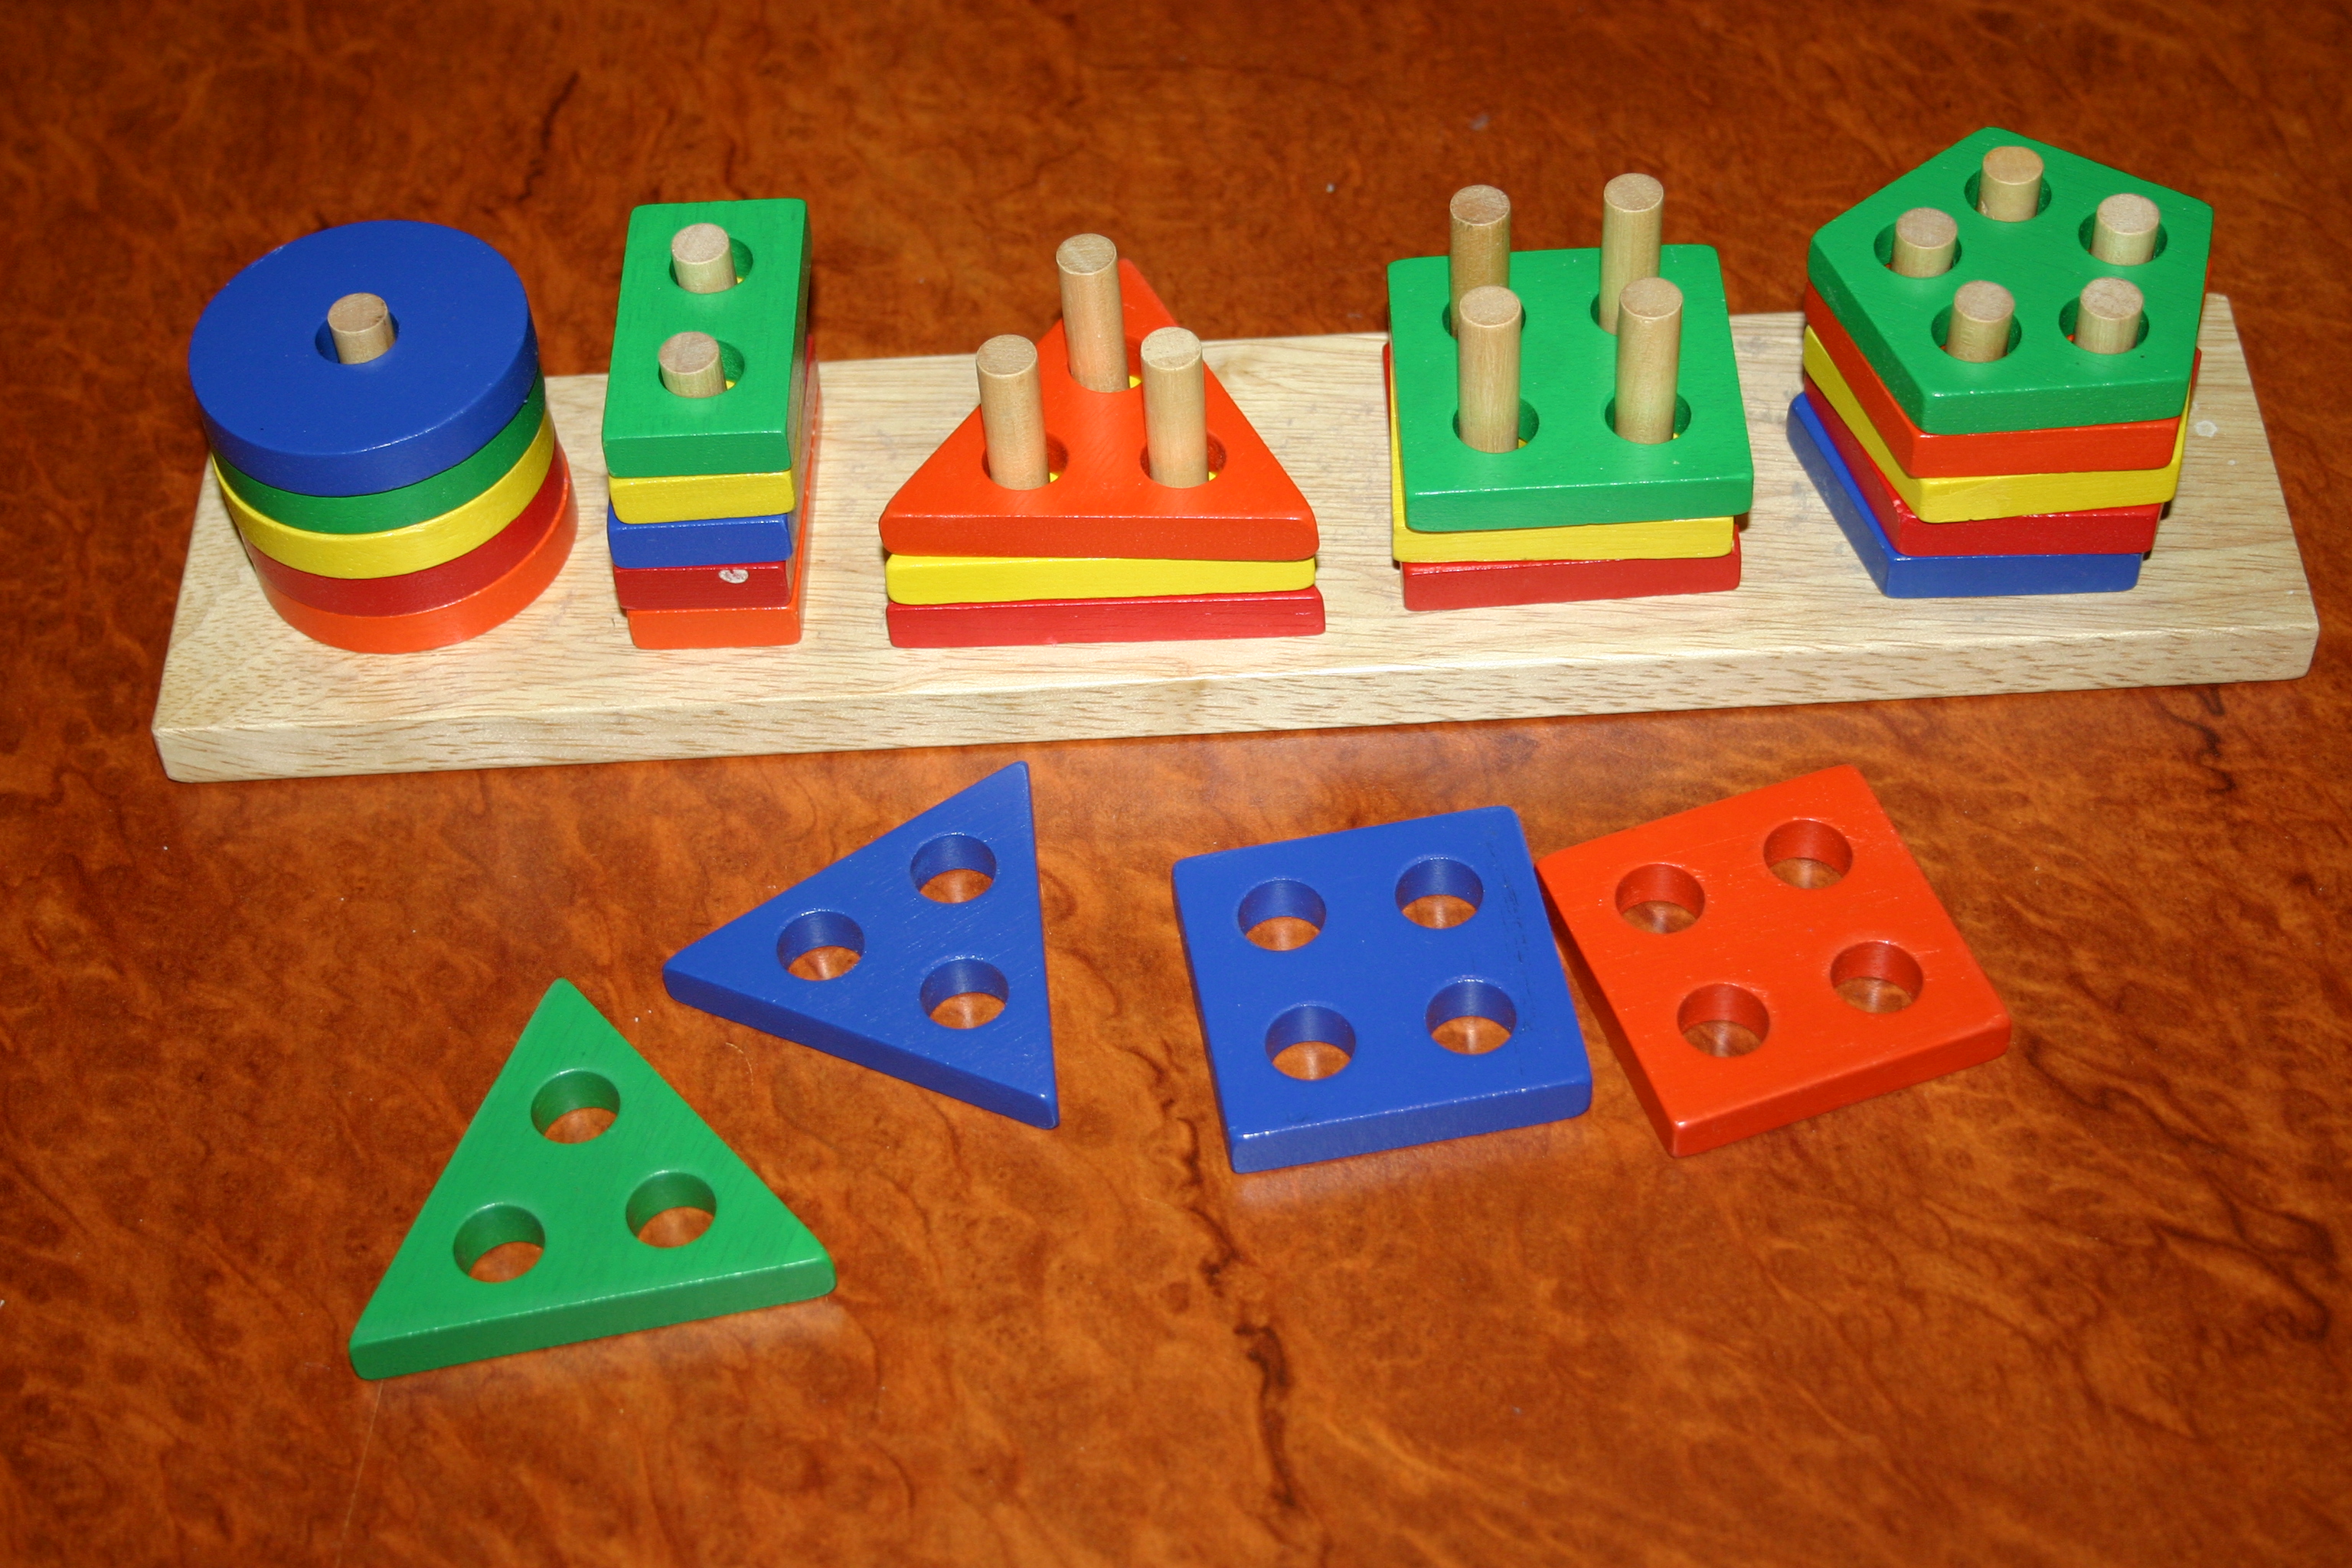
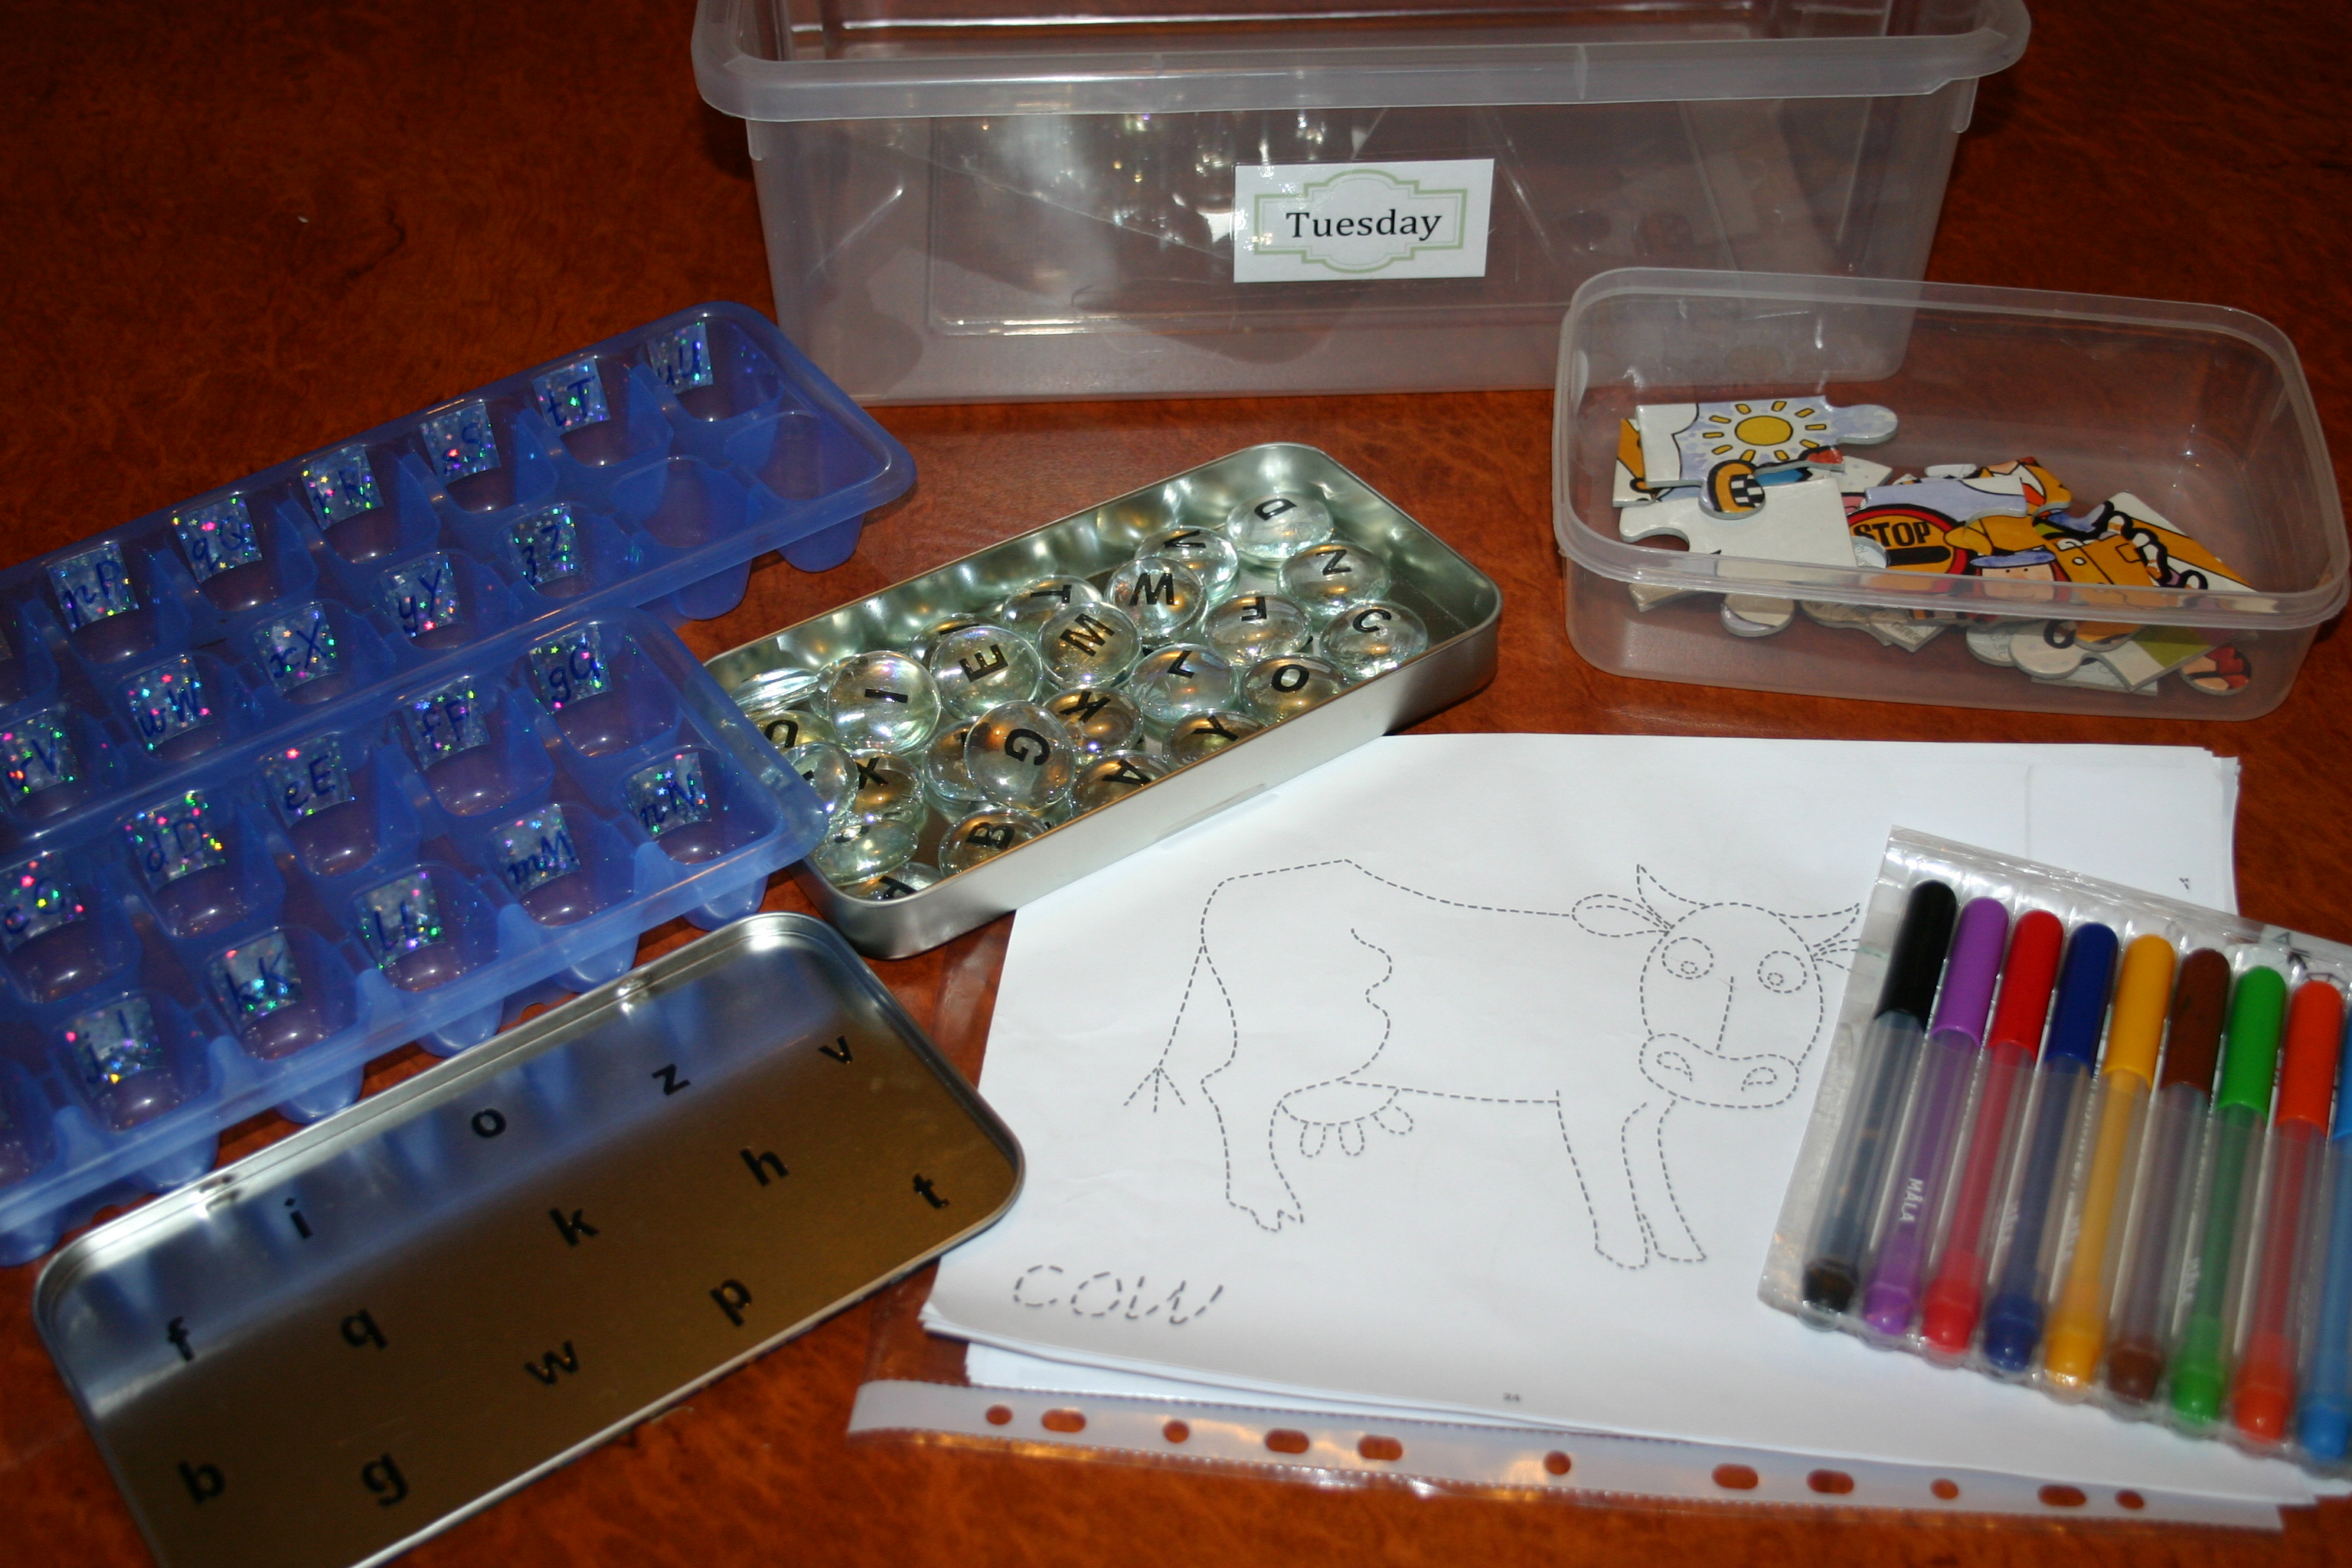
Tuesday has finger puppets, regular cardboard puzzle and lacing beads. The large wooden lacing stick makes it easier for little fingers to put the beads on.

IMG_9478

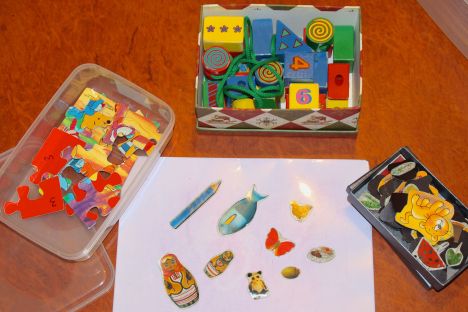
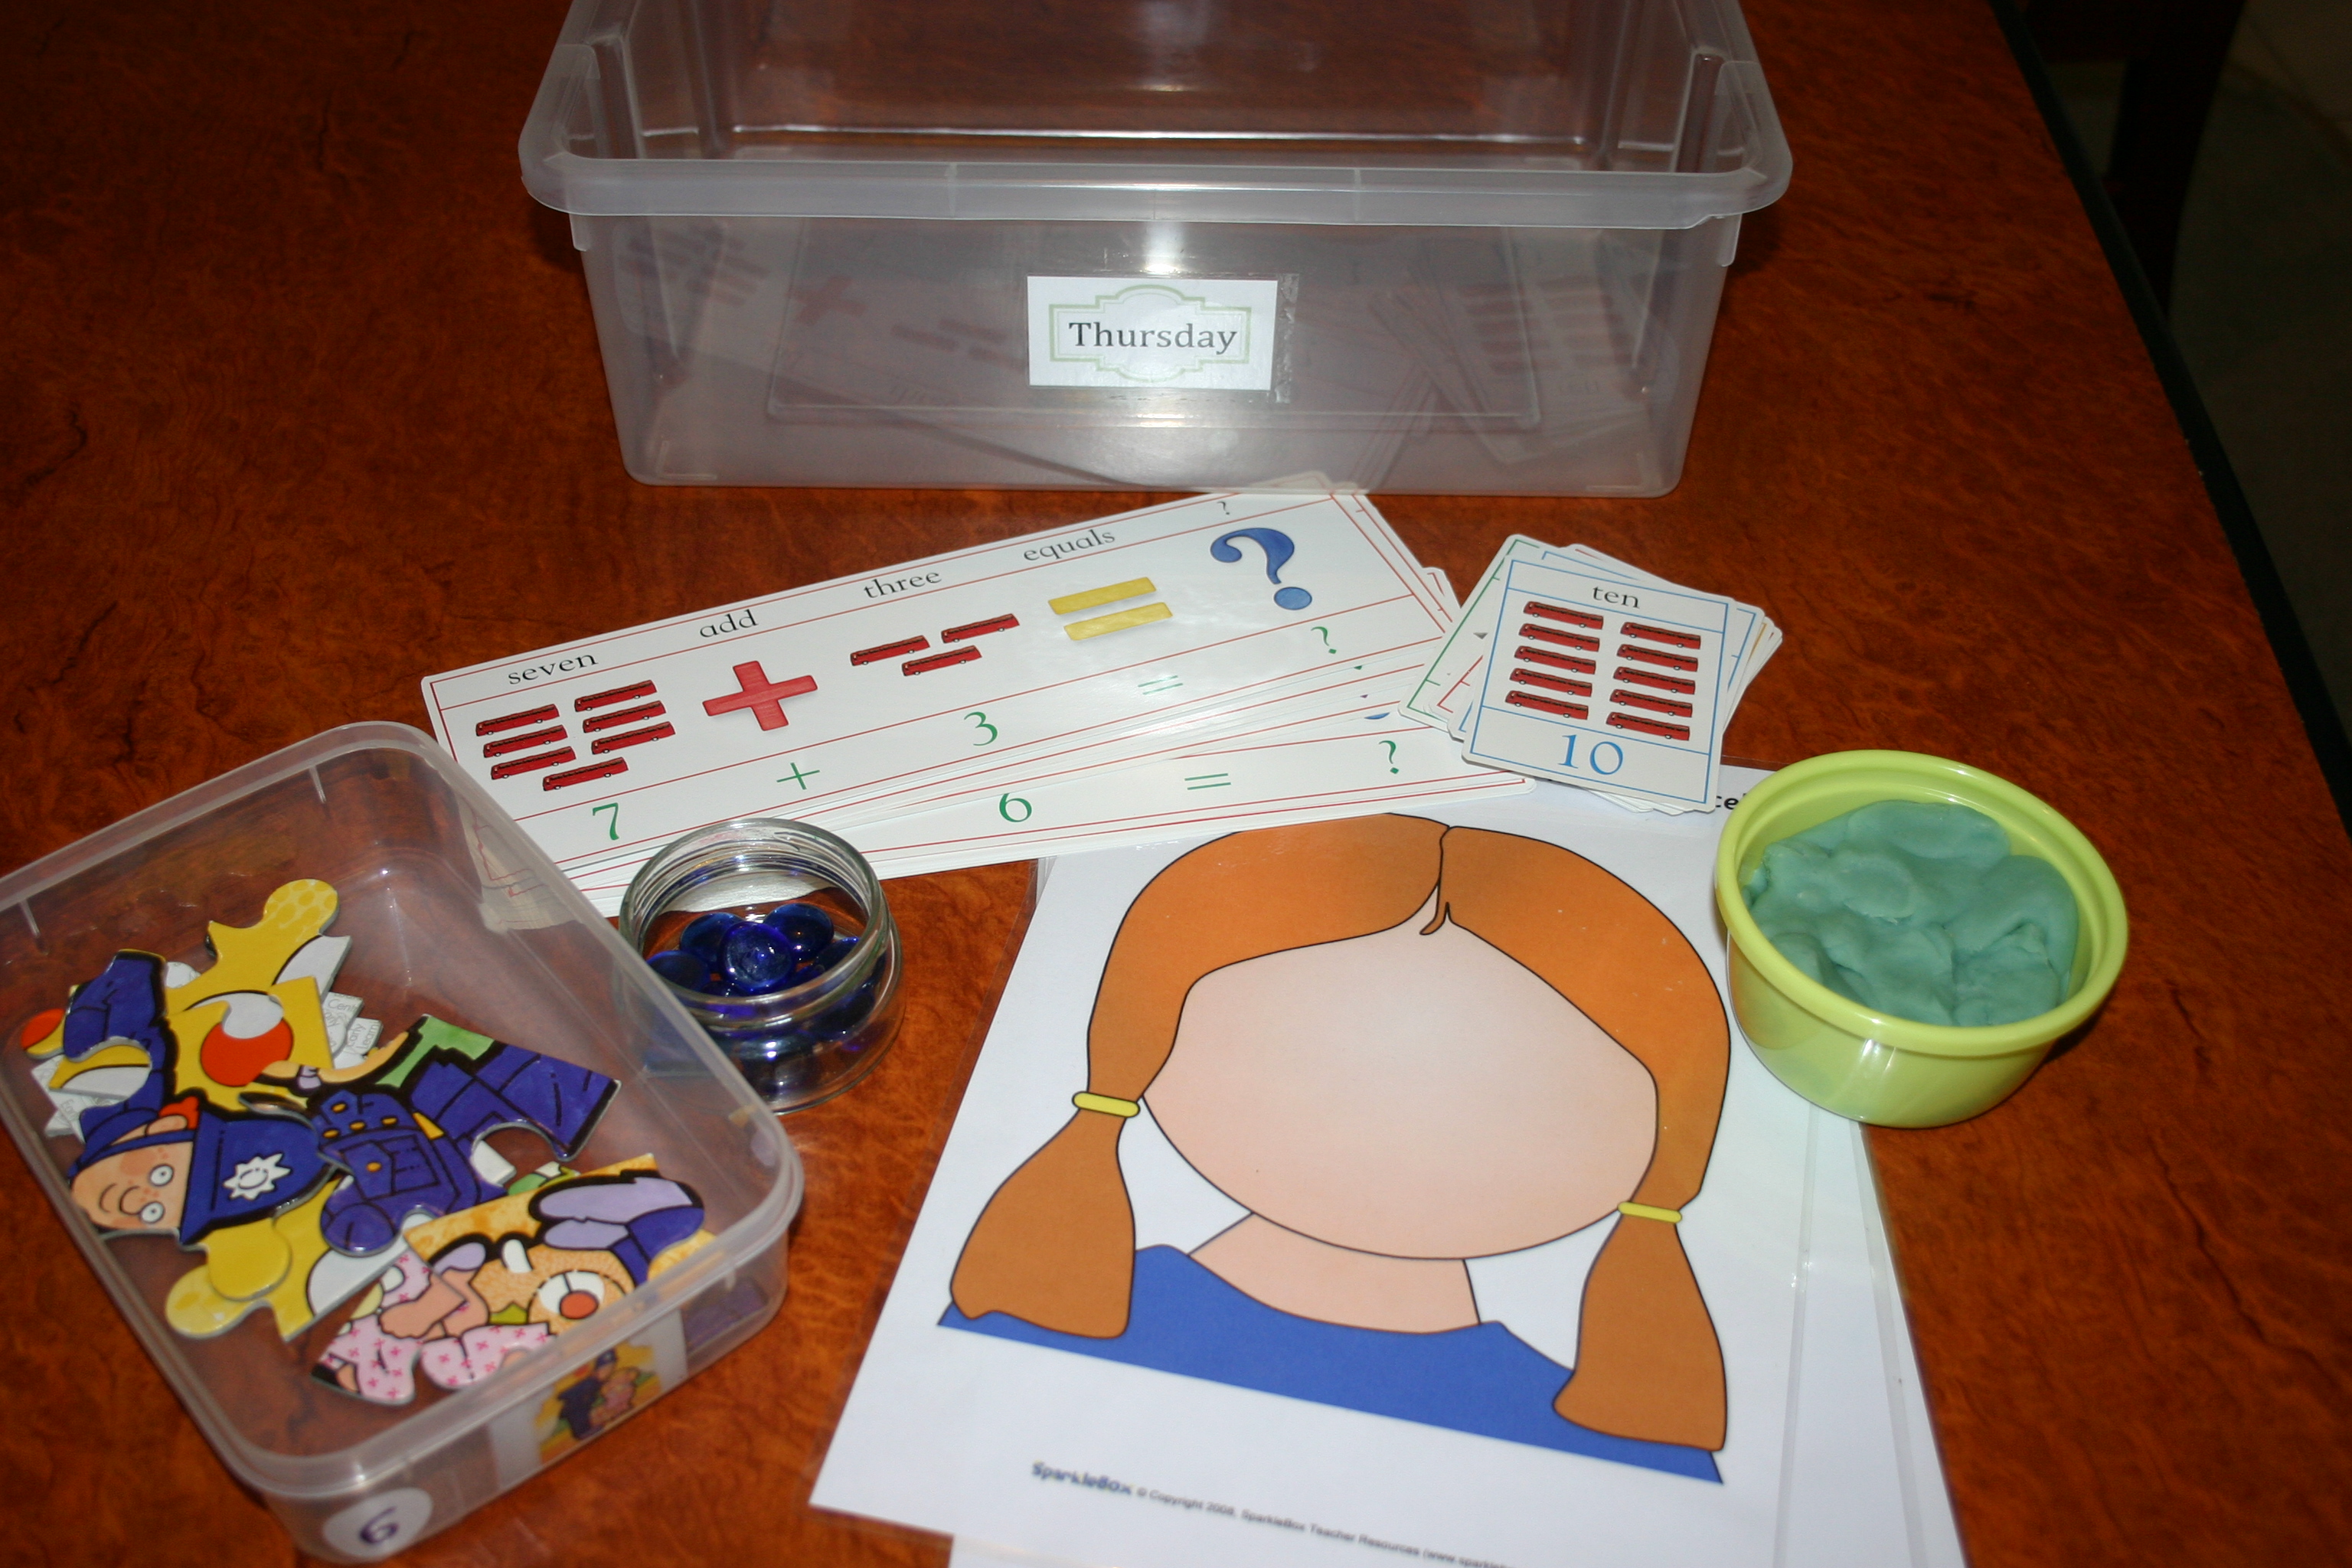
Thursday’s workbox has another puzzle, magnetic pictures and magnetic white board and number lacing beads.

IMG_9487

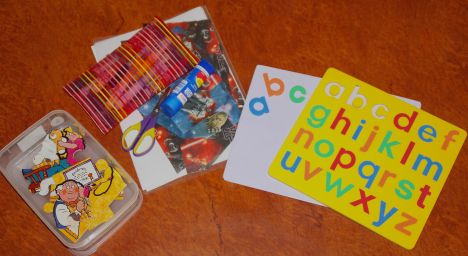
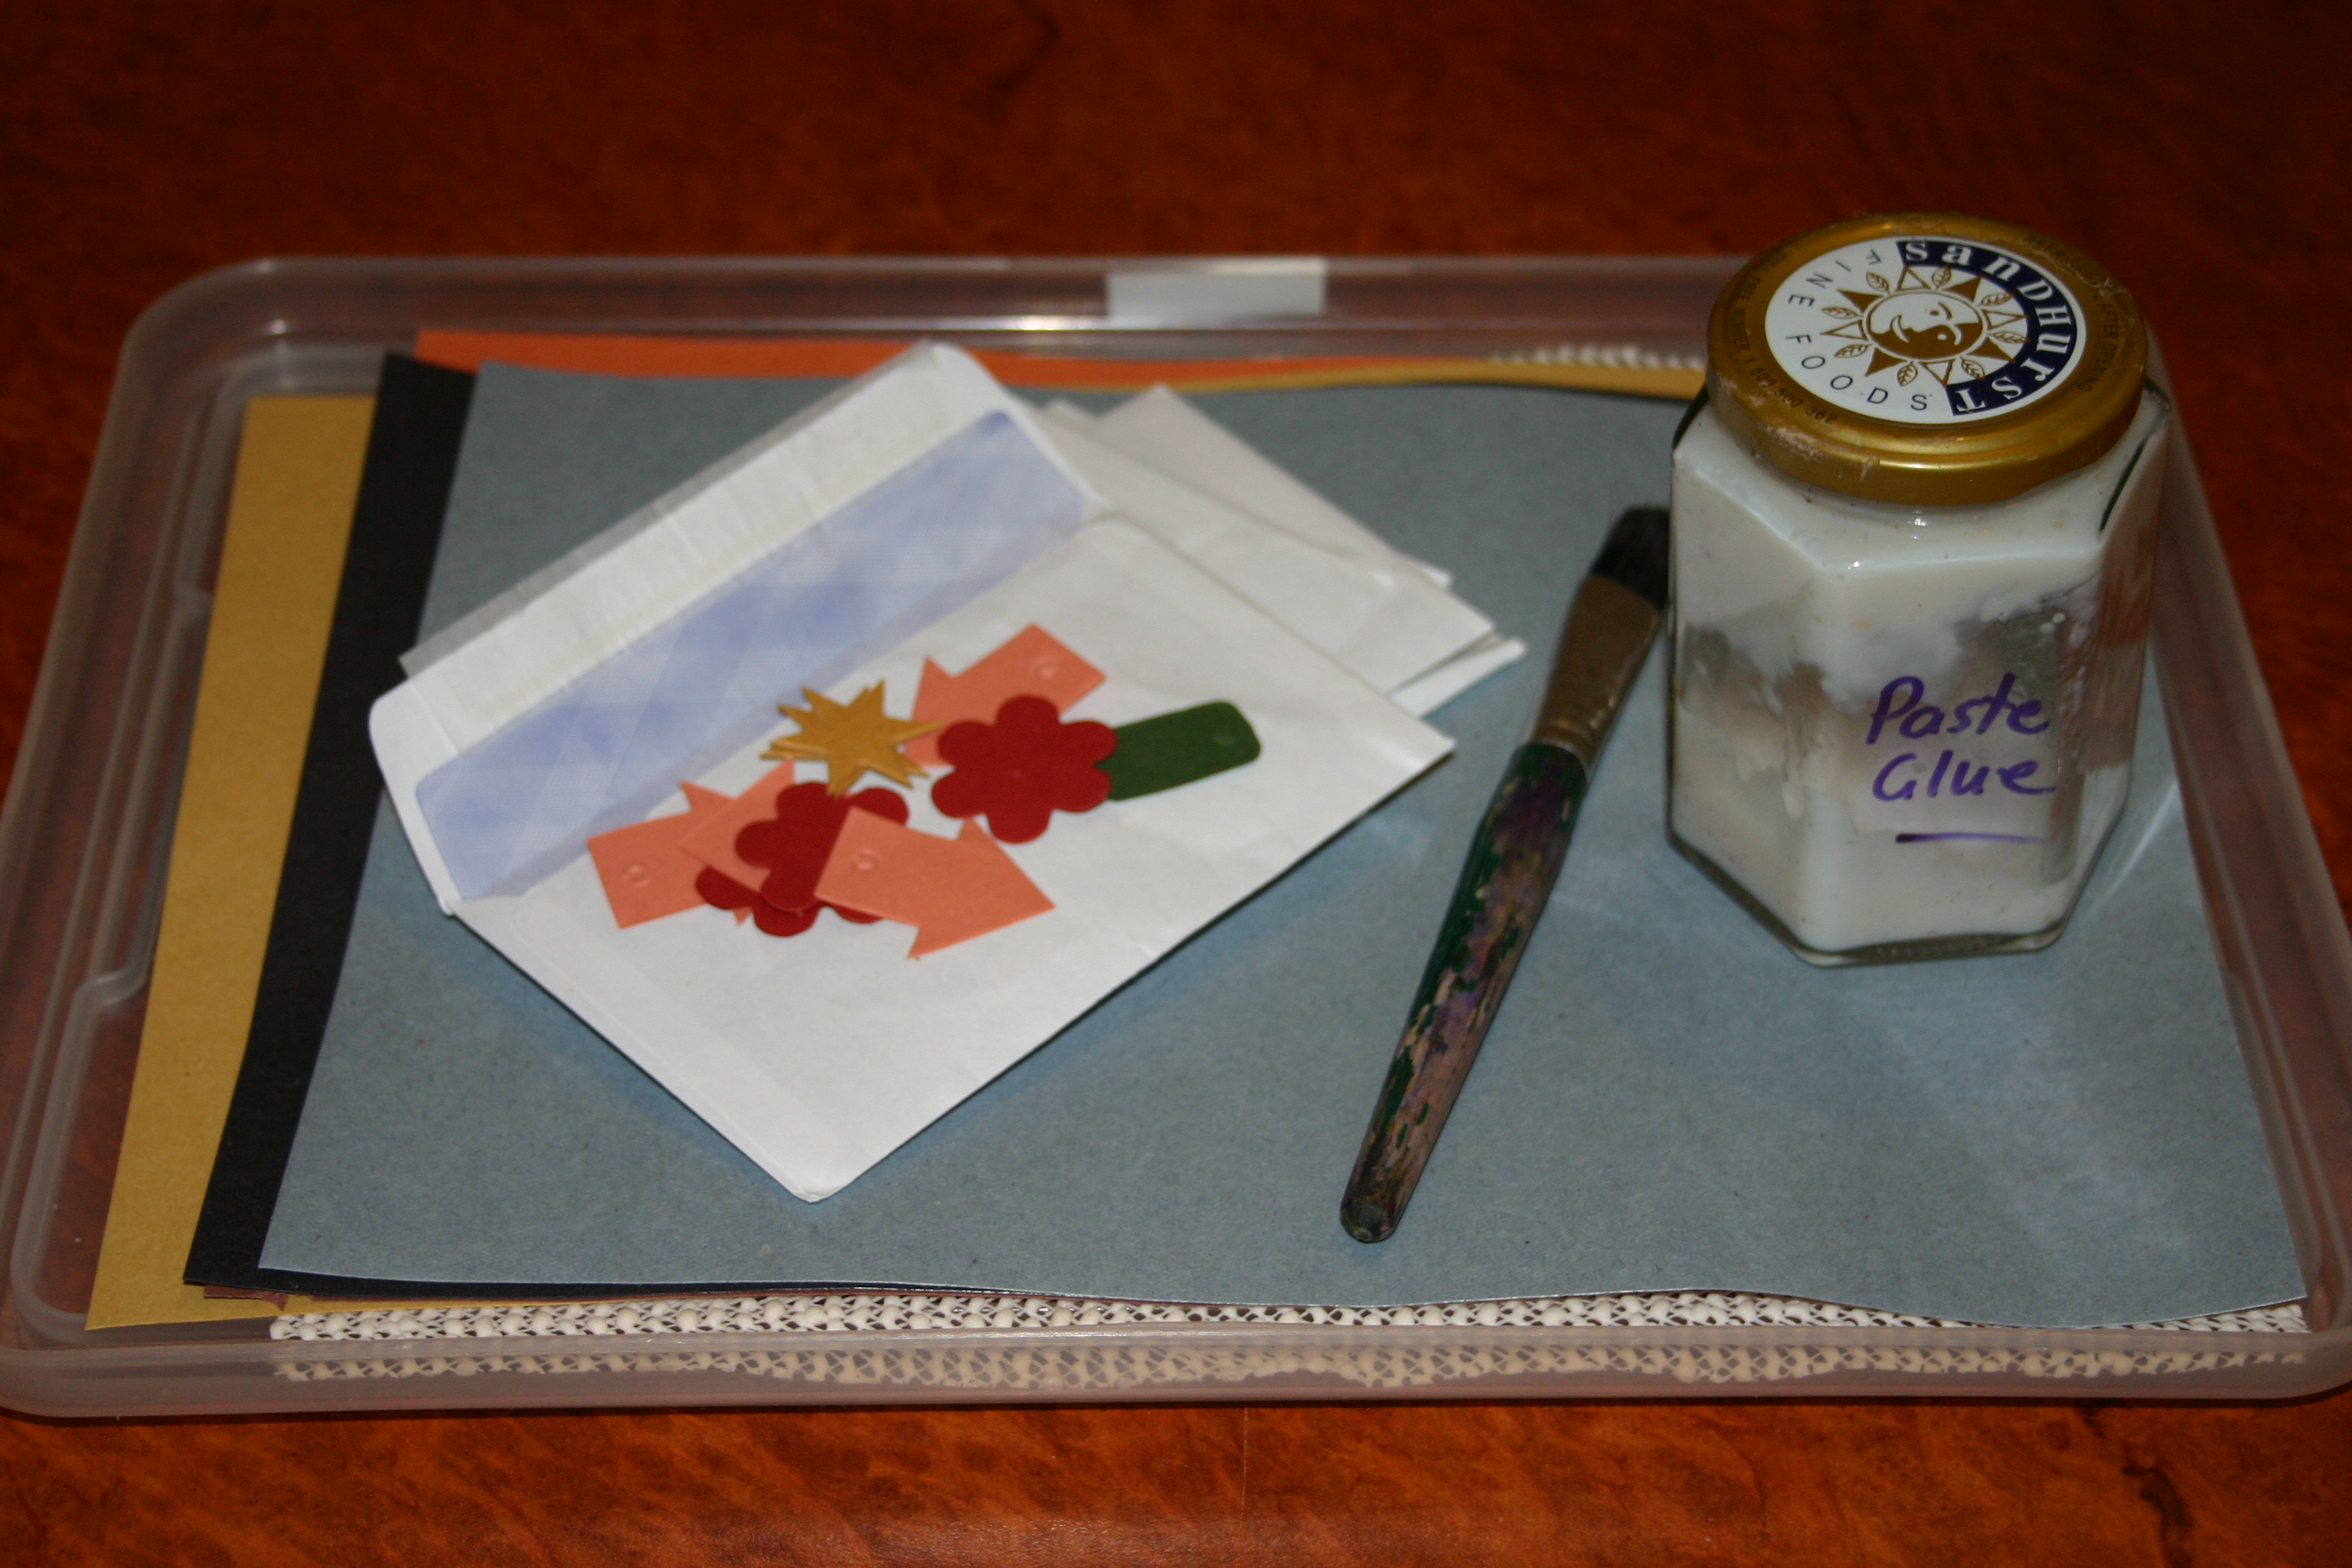
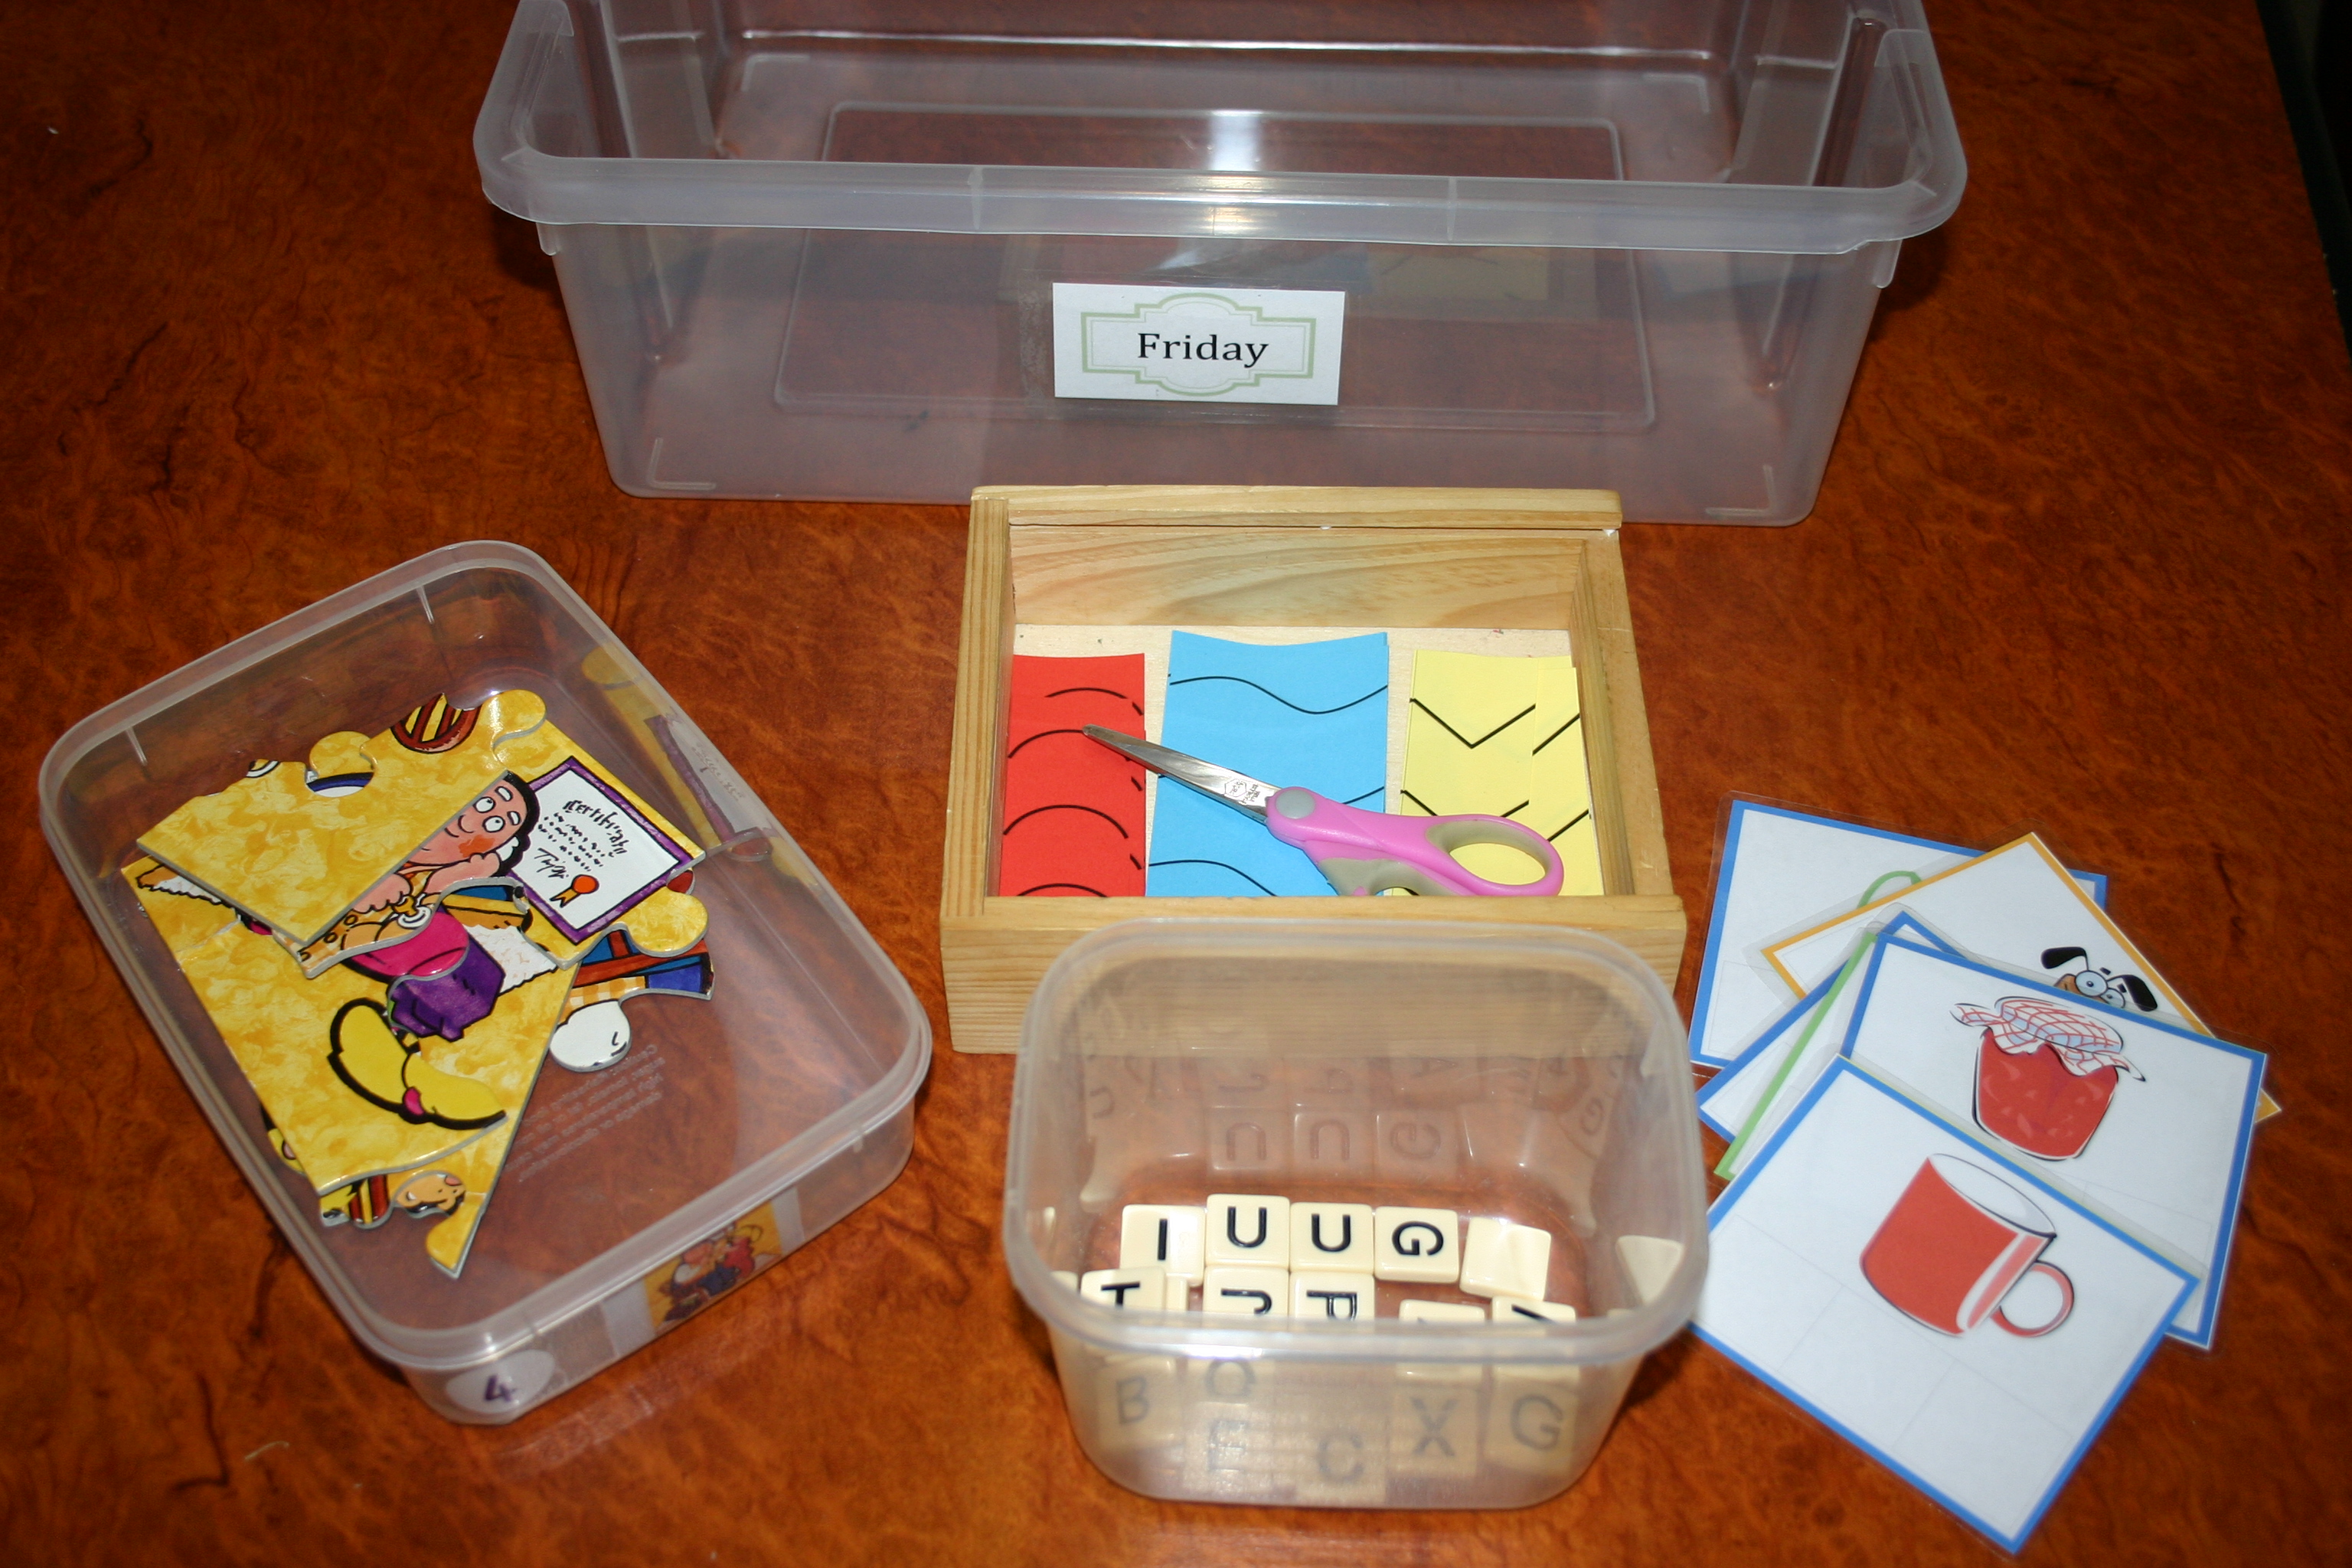
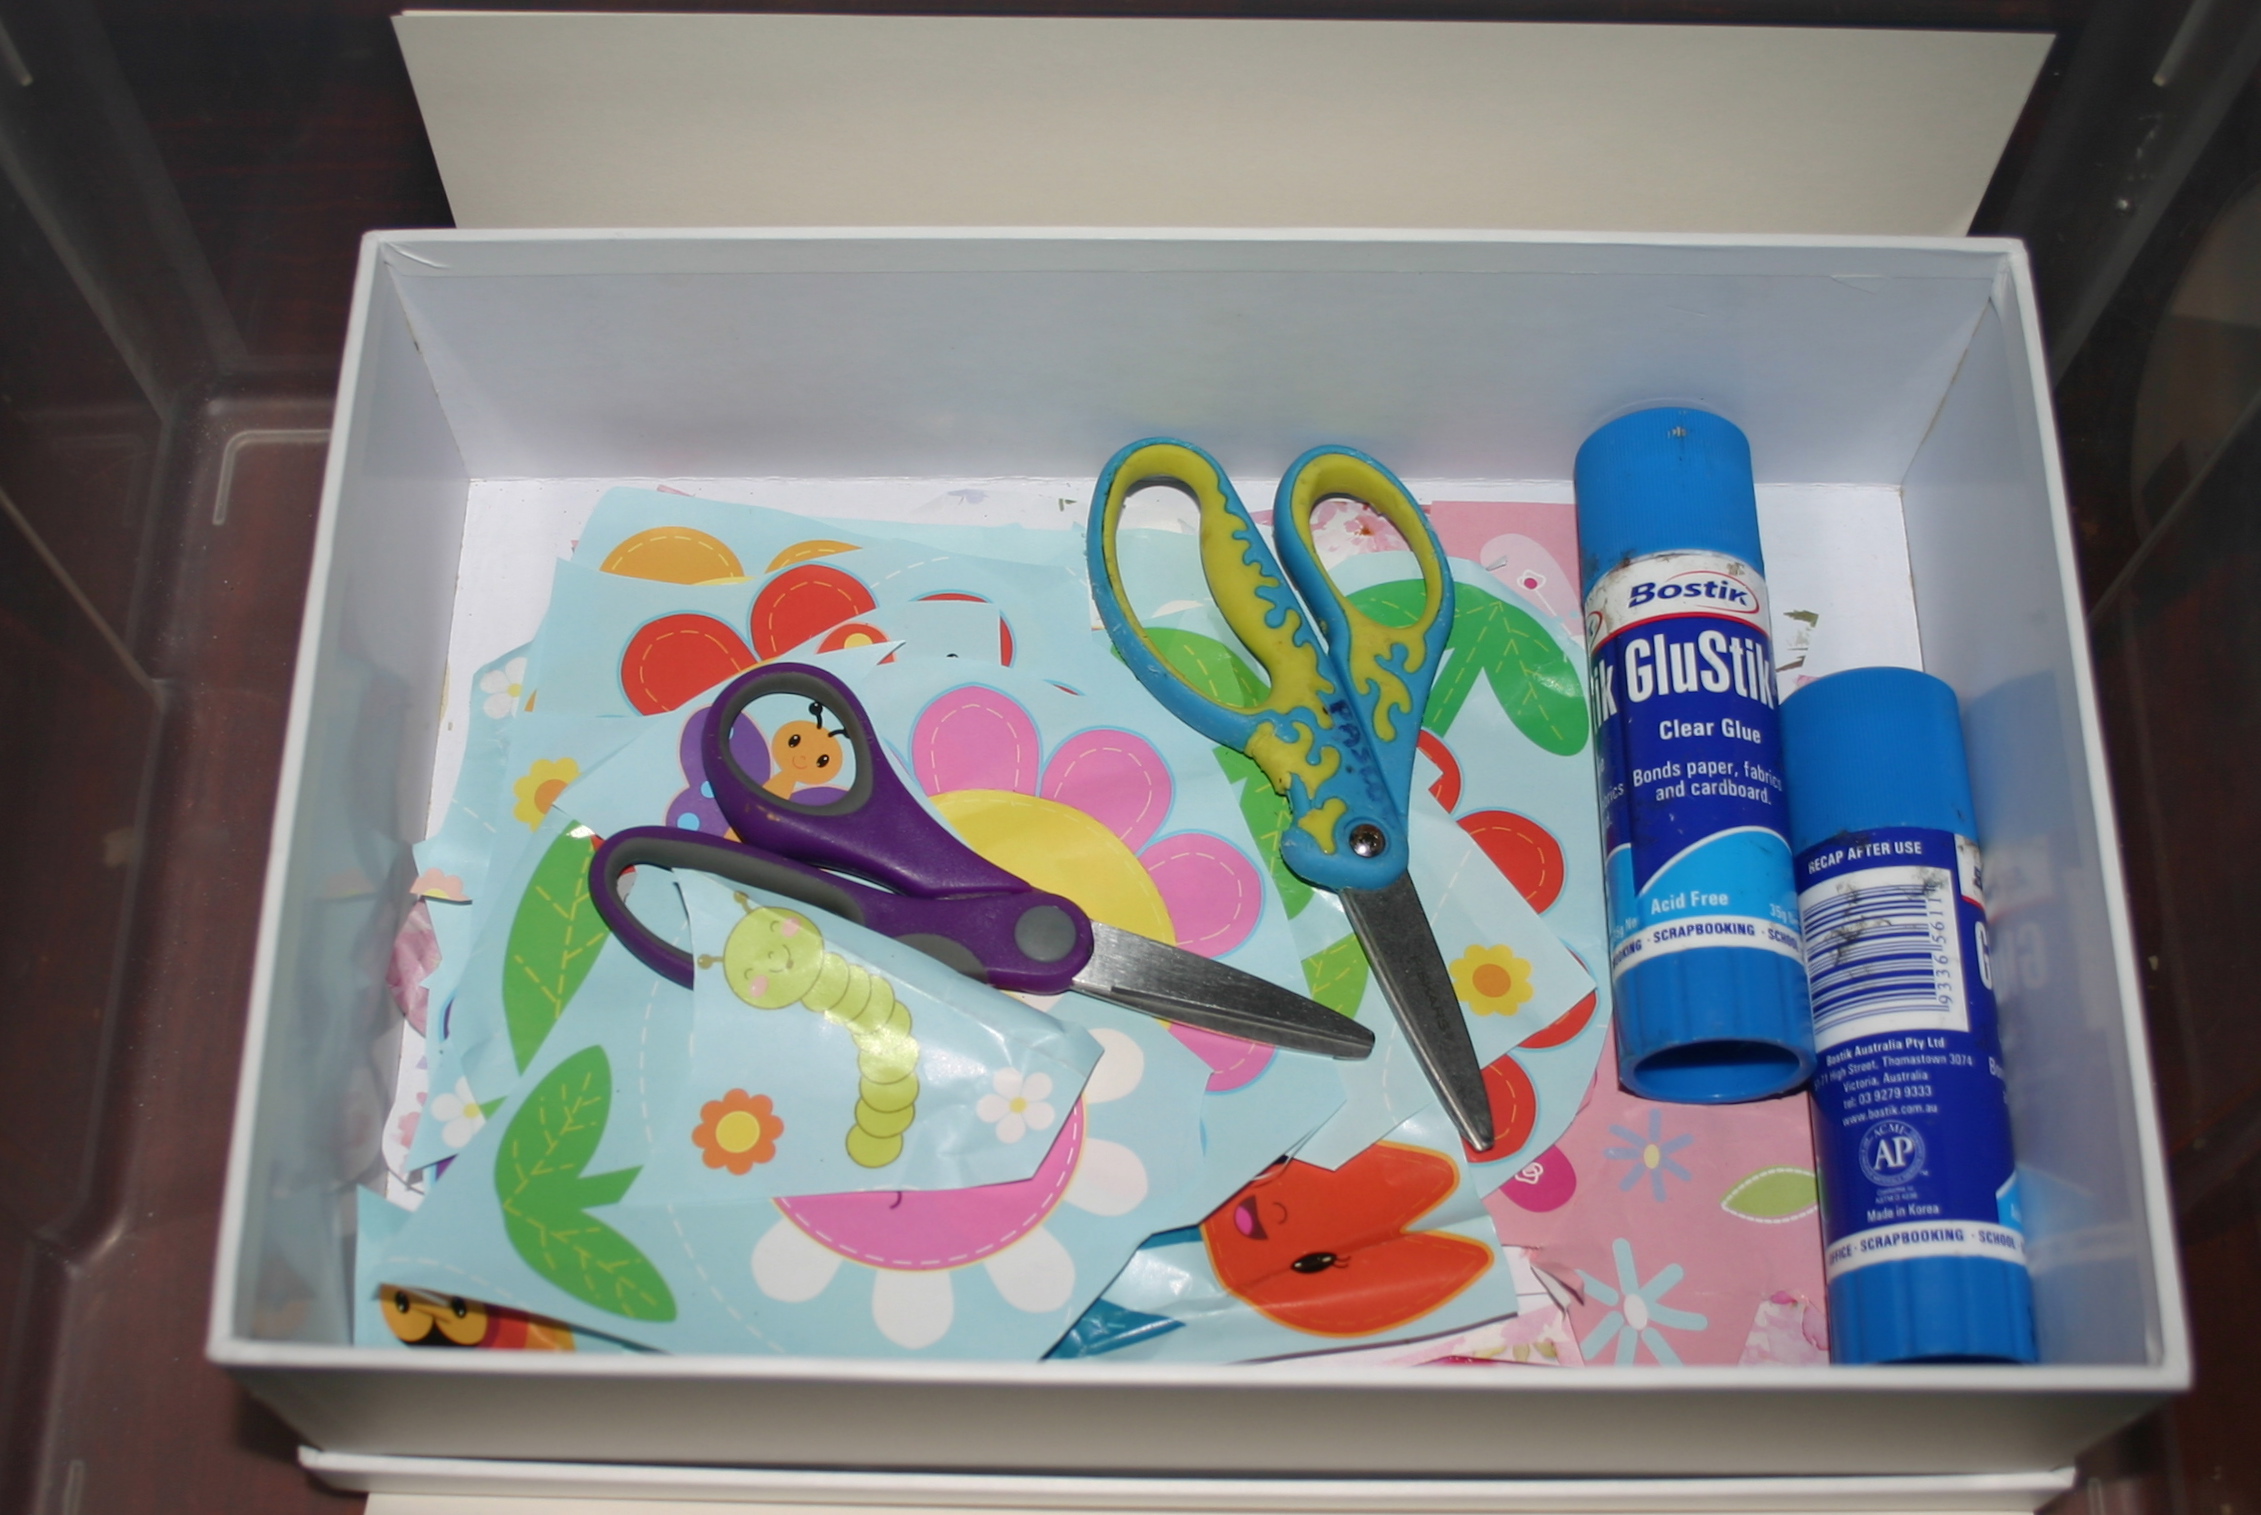
The Friday box includes a puzzle plus magnetic alphabet letters and and magnetic whiteboard, along with some paper, scissors, glue, texts and Star Wars wrapping paper (saved from the Christmas presents) to create with.

Our little man was already asking to have a go at bits and pieces as I was putting these together so that’s a good sign. Keeping school toys out of the general rotation means that these are almost like new and he can’t wait to start.

Next up; the 6 year old twin’s cupboards. Year 1 here we come!


Advertisement

Homeschooling with toddlers; a new year begins!

As our thoughts turn to the new year, it is time for an evaluation of routines and a sort-out of school cupboards. A major part of successfully homeschooling a large family is ensuring that the toddlers and babies have a well structured routine that includes some extended periods of time where they are able to play independently, leaving me free to concentrate on schooling the other children.

I spent a little time today changing over the playpen, mat time and highchair toys; boxing away baby toys that are now at the wrong developmental level and quickly making up some new and interesting activities as well as bringing out some I have stashed away from previous years. A big bottle, a box, some containers and bibs and bobs from around the house and I was all set with stimulating and educational toys that cost nothing at all.

The 12 month to 2 year range is difficult to cater for as they want toys that do something but are usually not yet ready for pretend play. Montessori style practical life tray activities are perfect and are cheap and easy to make. You can put them together in just minutes and throw them out when you are done. Better than buying new plastic fantastic dinging doodads that loose their attraction in a week or two.

IMG_9413

My husband didn’t realise that when he purchase his latest Christmas gift to himself he also bought one for his daughter. This box had the perfect design for a Montessori style object permanence box. Little ones drop the oversized marbles into the hole and watch them disappear and are then astounded as they magically reappear at the bottom. They eventually learn that the object is still there even though they can’t see it and begin to watch for the marbles to roll down into view. Simple concept but fascinating to the right age.

IMG_9411

All I need to do was glue two wood offcuts to the bottom to ensure a slope so that the balls rolled to the front of the box and tape the sliding inner piece in place. 1 minute = new activity. You can buy wooden versions for $40.00 but who needs one? You could use a toilet roll or anything else really to glue underneath to keep one end of the box elevated.

IMG_9419

A shoebox version of exactly the same thing. A hole in top to drop the balls into and a large slot to retrieve them again from the bottom.

IMG_9087

Drop bottles are always lots of fun. Fitting into the Montessori “small spaces” and “posting” categories they require some fine motor control and problem solving to get the objects into the hole at the top of the bottle and retrieve them from the bottom. Watching my 17 month old turning the block laboriously in her chubby little hands and repeatedly poking it at the hole until it dropped in was entertaining. Watching her clap herself each time she did it even more so.

IMG_9417

Something to pull apart is good for a few minutes. There is no way she will be able to put these back on again but she carefully removed every one and then stuffed them all into one of her honey tubs with a hole in the lid. (Yep, expensive toys around here – honey tubs as well!)

IMG_9081

Large garden stones to drop into a yoghurt pot with another hole in the lid. Satisfying clunk sound and weight. Eventually she will figure out how to turn the container upside down and shake them back out again.

IMG_9090

Pom pom posting container. The draw-back of this one is that once they are in they can’t be taken back out again. She does this one first every mat time and then sets it aside to focus on the other items.

IMG_9416

A pile of objects to fill and spill are a must. All the better if the container they go into makes a good metallic sound when they drop in.

IMG_9423

At the moment my youngest (17 months) has playpen time each morning for at least an hour four days a week – we are out for the 5th day. These are her baskets that she uses on a rotational basis. Because they only come out for playpen time once per week I will only need to change them again in a month or two. Using some basic categories that help me come up with ideas I walk around the house and plop items in. An hour or so (most of which is putting away the items from the old boxes) and I have playpen time sorted.

This month the categories were:

  • posting/small spaces
  • something to wear/put on/household object
  • books
  • something to stack/pull apart
  • something to cuddle

I’ll be posting about my other 6 children’s school time activities over the next little while. Next up – the 3 1/2 year old.


Preschool at our house: Workbox system for 5 year olds

IMG_1612

Here is the latest workbox style arrangement for our 5 year old preschoolers which will allow them to get the direct instruction from me that they need as they learn basic reading and writing skills, while at the same time having some degree of independence in their other work. I have always invested some time in one-on-one teaching at this age because helping each child to become a proficient reader is one of the keys to independent learning and self-educating later on (one of my goals for all my children.) The children have access to plenty of creative play opportunities and lots of great hands-on learning tools at other times in the day but this morning period is slightly more “bookish” as we step into more formalised learning.

pp schedule

My older girls (7 and 9) both work from a written schedule for several reasons; they know exactly what to do, when to do it and how much they need to do before they are done for the day. My 11 year old son also works from a schedule, but is free to decide the “when” for himself, having shown responsibility in managing his time in the past. The twins (5 years) have a pictorial schedule to gently ease them into a more independent role in the future but don’t really need it because their boxes are numbered and they are under my direction anyway. (It’s more so that I can keep track of what they are supposed to be doing!)

I researched workbox homeschooling several years ago and most of the examples I found on the web involved nightly or at least weekly changing of the contents. I knew that wasn’t going to work for me so I devised a simple system that only needed to be changed out about once a month. (See details here.) There will be some items in the boxes that needs to be updated more regularly (Sight words as they are learnt for example) but this will require minimal effort as the sets of words etc. that I need are all ready to go.

Some advice that I always give beginner homeschoolers, especially those with a large family, is to set their homeschool up so that  it will continue to run without them as much as is possible. Life intrudes; an unexpected visitor, an unscheduled phone call, the baby is sick and on and on. Set things up so that you are not required to be “teaching” directly all the time or the pace may be too hard to keep up. With only one or two children you may be able to do it but not with the number of blessings we have!

So.. what’s in the boxes?

IMG_1614

Daily diary writing (See full explanation here.)

IMG_1616

Bob Books and a file folder game to practise sight words. As the child chooses a word it is read and fed to Mugs the dog through the hole in his mouth. (See this post for how to teach children to read and this one for some info on beginner readers.)

IMG_1617

Segmenting words game based on All About Spelling level 1. I am using this programme as a rough guide at this stage. We will get into it more next year but for now our activities are loosely base around the progression in this book which is very thorough. We are using the flip boxes to review the single sounds we already know before moving on to more complex phonograms.

IMG_1618

Montessori style counting activity tray. Developing one-to-one correspondence is crucial before any real maths skills can be developed and these simple counting activities give heaps of practise while also working on fine motor skills. In the top activity the expresso cups are set out with the numbers in order from 6 to 10 and the child uses the tongs to add the correct number of sugar lumps to each cup. In the second activity the small tongs are used to transfer the correct number of marbles to the suckers on these soap holding shapes – the kind that suction onto your sink to stop the soap slipping away.

IMG_1619

We use Math-u-see for the first couple of years and Primer is the first book in the series. I cover all of the concepts with  hands-on tray activities first and once they are well mastered the children can work through the book as a bridge to the bookwork they will be doing the following year. We also have the Dive CD’s which have videos for each lesson in the student books so some added “teacher” instruction is given as well to help fill any small gaps that may still be there.

IMG_1620

Tracing letters and numbers. I try to supervise handwriting practise to ensure that the correct letter formations are being made. There are heaps of free worksheets on the net. Look for some in your preferred font and laminate them if you choose for repeat practise. For children who find fine motor control difficult, the channel writing (bubble letter style) are the best because it allows more leeway than dotted letters for wobbly pencil paths. It can be very discouraging for children who try so hard and yet cannot stay on that dotted line. The “fat” letters to keep inside are somewhat more forgiving.

IMG_1621

The last workbox contains a selection from some free printable worksheets to go with the Bob Books that I have found online, mainly for my daughter who finishes all her school work in nanoseconds and wants to know what else there is to do. She loves to do “real” school work like her older siblings so the more books and worksheets I supply her with the happier she is. My son will do them if he wants to which will translate to not doing any at all except possibly using the bingo dotters to follow the word paths simply because he wants to randomly dot paint everywhere 🙂


Teaching preschoolers to write

IMG_1614

Today I will be sharing how to teach writing using a daily diary with some general tips and a quick “how to.” I have started this post 3 times now because there is just so much I could say and it keeps turning into a thesis, so back to dot points 🙂

Tips for turning out great writers:

  • Provide many experiences that develop fine motor skills – playdough, threading, building etc.
  • Make sure your child is using the correct pencil grip – get a moulded pencil grip if necessary.
  • Teach the correct letter formation – bad habits are hard to undo.
  • Teach phonics. A strong grasp of the phonemes (sounds) and how they join together to form words is vital
  • Read examples of good writing every day
  • Avoid have-a-go methods where the child is internalising incorrect letter combinations that will need to re-learnt later. Do not be afraid to tell children how to spell a word. It is better to copy from a good model than to write the word the wrong way over and over again. You can encourage them to use their phonetic knowledge and spelling rules as you work with them to write the word correctly the first time.

Daily diary writing for preschoolers – how to:

  • The child chooses their topic for the day and spends a few minutes drawing a picture.
  • Have them dictate a sentence about the picture for you to write down, leaving every second line blank. Ask questions as you do this; What does the word start with? How do I write the letter “s”? Show me in the air. What sound can you hear in the middle of the word? How do I write a “ch” sound? This is one of your sight words – can you remember which letters go together to say “the”?
  • For beginners, re-write the sentence onto a separate strip of paper. Cut it into individual words (or have them do that) then ask them to match these words underneath the ones you have written in their book and glue them in.
  • When this is easy, have the child trace some of the words you have written. For one of my preschoolers I choose a couple of words each day to write in dots so that he can trace them to write the word.
  • When this is easy, start copy work – where the child copies what you have written underneath. (Don’t be too pedantic about letter formation here – just keep practising with handwriting lessons every day so that the correct strokes are quickly learnt.)
  • Read back the writing together, pointing to each word as you do so. Ask them to find a word for you – Can you see the word that says “house”?
  • Move on to having the child write their own sentence once they have a large enough bank of words to do so. Brainstorm words they may need before starting and write them along the bottom of the page so that they can see the correct spelling as they write the word for themselves. Correct any errors as soon as possible.

Obviously there is a lot more to learning to write than I have covered here but for the sake of clarity I have tried to keep it brief. I have used diary writing with several classes of students and now my own children and it is encouraging for them to watch their skills develop over time, as well as proving a lovely keepsake for later. A few years ago my Mum pulled out a school diary I had written in year one and it was so cool to read through and see what was important in my life at the time. It began with the teacher writing everything and by the end of the book I was writing everything – all in the space of one year. Preschoolers will of course move more slowly than this but you will be surprised at their progress. Reading though my diary bought back some wonderful memories of events that I had totally forgotten about and made us all laugh to see what Mum did when she was in school.


Teaching preschoolers to read

Homeschool has started for the year at our house and with it our routine. As always, there is some tweaking and re-arranging to make the new schedule work for us and I am reminded that flexibility is important, but am also enjoying the more peaceful atmosphere that being back on a schedule has bought.

As we continue the journey to reading proficiency I have also been reminded that learning to read is a process with several steps that need to be mastered before children will become strong readers. Ear training is so important in the early stages and while they have both memorised their letter sounds without any trouble, they are not yet proficient in the skill of segmenting words into their individual sounds so that is the next step for us. (See this post for an explanation of the steps to successful reading with ideas for teaching each stage along the reading ladder.)

So here are a couple of ways to practise segmenting words; breaking them down into their component sounds or phonograms. These are for words which have two phonograms, but can be easily adapted to 3 letter words by moving 3 objects rather than 2.

IMG_5761

Parking the car into the garage. For example, the word “at” has two sounds or programs; “a” and “t.” Say the word slowly out loud, breaking it into 2 parts as each car is moved to represent the sounds heard.


IMG_5778

Sliding the sounds together; bears on a Lego slide.

IMG_5773

The horse jumps the gates as each sound is heard.

These ideas can also be used for learning how many syllables are in words. The word “candle” has 2 syllables; “can” and “dle” so the horse would jump 2 gates also. Don’t use the same game though interchangeably between syllables and sounding out phonograms as it may be very confusing to children. Candle has 5 sounds/phonograms; “c” “a” “n” “d” “l” (silent e), but only 2 syllables.

IMG_5771

Jump the frogs onto the lilipad.

IMG_5764

Jump the grasshoppers onto the leaves.

IMG_5772

Put the food onto the spoons.

After a 5 minute wander through the house I had a bag full of little objects that would do the trick. Even moving counters up and down the desk will do but I thought these were more fun.


Homeschooling with toddlers – independent learners

Monday is crunch time for me – my husband heads back to work and I am managing 7 children on my own, one of whom is a newborn. We have stayed with our usual homeschooling routine and daily rhythm while he has taken holidays and our newest arrival is slowly getting into a steady routine, so the transition shouldn’t be too drastic . Here is a glimpse into my toddler’s activity cupboard to show you what will be keeping him occupied in his highchair after breakfast each day while I feed our baby.

IMG_0883

Colour sorting. One of the many benefits of homeschooling is that the younger children pick up so much from their older siblings just by being around to hear and see them doing their schoolwork. Basic skills like colour identification, counting and reciting the alphabet almost don’t have to be taught – they are “caught” from the constant exposure. Our two year old is a good case in point. He loves to count, constantly asks me if the squiggle he has just drawn is “an A that says a?” and holds up crayons while checking to see if it is indeed orange? This sorting tray was almost too easy for him but he quite enjoyed fiddling around with it and sorting and resorting the pieces.

IMG_0882

Gluing. We also find that the toddlers want to do the same kind of activities that they see their siblings working on so gluing is always in demand. I give him one piece of paper and 1 envelope filled with an assortment of paper shapes to glue. More often than not he uses the glue more like paint and sticks and peels off the paper pieces over and over again, leaving nothing but a soggy page at the end, but it keeps him going for ages.

IMG_0881

Threading beads. Good for fine motor development and also for sorting and colour matching activities. Make sure the string that you provide has a nice long stiff end to make it easier for little hands to poke it through the holes.

IMG_0880

Drawing with vibrant textas is a satisfying experience. While I don’t encourage heaps of colouring in book type drawing (I’d rather they free created) the little ones love the idea of drawing on a picture they recognise.

IMG_0879

Montessori style dry transfer with tongs. Pincer grip is important for writing later on. These golden rings are wedding favours from the local discount store.

IMG_0878

Basic puzzles. Matching two picture halves is an easy way to start with puzzle skills.

IMG_0877

Good quality wooden puzzles will last for years.

IMG_0875

Duplo is a versatile construction toy and one that our whole family enjoys. Even the older children will still sit down and build together. This little set was a birthday gift recently so it is of special interest to our two-year old because it is his own set. As the big kids all have their own Lego sets in separate crates it makes him feel like one of the gang to have his own crate of building blocks, separate to the family collection.

Preschool at our house – work box homeschooling

IMG_0864

The twins (4 1/2) are now using a modified version of preschool workboxes. The way most people use workboxes requires them to change the contents every night in preparation for the next day. The way I use them means that the contents are changed approximately once a month. See this post for an explanation of how it works.

Workboxes allow the twins to work independently if I am caught up breastfeeding during the time when I would normally work with them. Having two sets of workboxes for two children working at the same level means that at the end of the month (or a couple of weeks) I can swap them over with each other’s boxes without having to refill and be set for another couple of weeks.

IMG_0871

We complete one page per day of a basic handwriting book as the twins are very interested in learning to write their letters at the moment and I would rather they learnt the correct shape and pencil grip first off than need to re-learn later.

IMG_0865

There is one workbox per day and in combination with the handwriting books that we work on first, there is enough to keep them going for around an hour. If they finish early, they pull out their Lego or a sensory tub to complete their school time. The older children attend a homeschool group on Wednesdays so we don’t use workboxes on that day.

Monday’s box:

  • Domino Parking Lot game (Free printable available here.)
  • Wikki sticks fine motor page (Free printable here)
  • Simple puzzle

IMG_0866

Tuesday’s box:

  • Dotted line tracing pictures (I pulled apart some pre-writing activity books)
  • Upper and lowercase alphabet letter match (Explanation here)
  • Simple puzzle

IMG_0867

Thursday’s box:

  • Addition cards (Count the pictures or use jewels to solve the sum then find the answer card.)
  • Playdough face mats (Free printables here)
  • Simple puzzle

IMG_0868

Friday’s box:

  • Cutting practise strips (Free printable here)
  • 3 letter word spelling cards (Explanation and link to printable here)
  • Simple puzzle

IMG_0869

Monday’s box:

  • Addition cards (3 possible answers are given underneath the sum with a hole punched through the card. The child uses the blocks to solve the addition sum and threads the string through the hole next to the correct answer.)
  • Simple puzzle
  • Cutting and gluing pages. (I pulled apart an activity book so that they can choose one page to push out the pictures from and then create their own drawing by gluing them onto a page.)

IMG_0872

Tuesday’s box:

  • 3 letter CVC (consonant vowel consonant) word and picture match. (Heaps of free CVC word printables on the web)
  • Dotted picture tracing (Another pre-writing book pulled apart.)
  • Simple puzzle

IMG_0873

Thursday’s box:

  • Plastic cutlery addition (The cutlery have basic addition sums written on them. The child uses the plastic fruits to solve the sum and finds the correct answer circle to place with the item of cutlery.)
  • Playdough skewer threading (Full explanation here.)
  • Simple puzzle

IMG_0874

Friday’s box:

  • 3 letter CVC word and picture card match (Link here)
  • Cutting practise strips (Free printable here)
  • Simple puzzle


Sensory tubs – mermaids and beautiful beads

IMG_0876

Assorted beads, scoops, spoons, jars, bowls, and cups make an attractive Montessori style dry transfer sensory tub.

Now that our long-awaited baby has arrived, planning for uninterrupted breast-feeding times has moved up in priority. We have chosen to keep our flexible routine going throughout these early weeks, rather than taking holidays as we find the children get along so much better with the structure in their day. With Daddy home for a few weeks and a new sister, there is enough change without taking away their daily structure at the same time.

With that in mind, I have overhauled the school cupboards with new preschool activities (photos coming soon) in preparation for Daddy heading back to work next week and created a couple of new sensory tubs for quiet afternoon table or mat play.

Training my little ones to sit in one place and play with what I give them has paid dividends on many occasions, but especially in times such as these. Knowing that I can sit down and feed with everyone happily occupied means no mess to clean up later and no bickering to deal with.

IMG_0863

Rice, mermaids, fish tank plants, blue plastic shells, bowls and sea creatures allows much scope for pretend play and imagination. My girls have been drooling over this since they saw me putting it together!

Homeschooling with toddlers (and a new baby!)

IMG_0504

The arrival of a new baby will always cause some disruption to the family but can and should be an enjoyable and joyous occasion. A smooth transition is helped immensely by being prepared. Whether in the kitchen with menu planning and stocking the freezer, preparing the children for the arrival of their new sibling, setting up a new routine, teaching your homeschooled children to work independently,  or simply making sure there is a good selection of suitable activities for mat time, highchair time and table time will make life much easier for the whole family.

Today’s post is a peek into my 2 year old’s activity cupboard. He uses these trays after breakfast for highchair time while our preschoolers are doing their “school” work and the older children are completing their own school tasks. A good indicator that I have set up attractive materials is that both he and the twins have been pestering me daily about when they can do their school work! We are on holidays at the moment so while we do have some structure in our day, we are not dipping into the school cupboards until after the break so they are still fresh and interesting once the baby arrives. It’s killing them!!

The great thing about a lot of these activities is that the preschoolers are interested in several of the toddler’s trays and vice versa. This gives them almost double the number of choices and will help keep them interested for longer before I need to swap out their cupboards again.

IMG_0490

Sensory tubs are always a hit. So easy to prepare and with open-ended play possibilities they should keep little ones engaged for some time. A tub of jewels with a variety of tongs and containers (pill boxes, ice block tray  and chocolate box insert in this one) will be great for a week or two and can easily be made “new” again by changing the containers and tongs for something different. A variety of scoops, spoons, measuring cups, boxes, tins, jars, lids and anything else that can be tipped, poured, filled, opened and emptied will work well. Perhaps add a small teddy for pretend play fun.

IMG_0462

Our rice tray can be a sensory play tub or in this case a dry transfer activity. A small necked bottle, funnel and scoop are all that is needed for some filling and pouring play. Again, the contents can be very easily changed every week or two to keep things fresh.

IMG_0483

Threading, beading or lacing are all great for fine motor development. Young children find it difficult to push a floppy lace through. Starching the end of wool, using commercial threading laces with stiffened ends, tying the string to a thin dowel, taping the end or any other method of stiffening the thread will make it manageable for young children. This is a small piece of dowel with a hole drilled in the end. The shoelace is glued into the hole, proving a strong length that allows a chubby toddler hand to hold the wood and fit a bead onto it at the same time. Don’t forget to tie one of the beads onto the end of the string to stop the rest rolling off onto the floor.

IMG_0495

A small ball of dough in a plastic container  provides a steady base for some wooden skewers. A variety of coloured noodles and straws are available to thread onto the sticks. (Cut the pointed end off for safety.) This is one I found on Pinterest (see my toddler pinboard for more ideas.)

IMG_0499

Storing the dough in the small orange plastic container means the lid can be popped back on to stop it drying out. Once the toddler has seen it once, poking the skewers in will be part of the attraction.

IMG_0491

Basic puzzles are great. Matching picture halves make a good starting point for  a child who is too young to be able to complete a regular puzzle.

IMG_0481

These are laminated playdough mats. With another small tub of dough the child can add a face, hair etc. Free printable available here.

IMG_0465

Free experimentation with a basic set of scales and blocks will develop a child’s understanding of heavier, lighter, more, less, up and down and other mathematical language. Older children will tend to count, predict and experiment in a more sophisticated way.

What does your toddler love to play with?

Preschool at our house – ready for a new baby!

IMG_0487

Here is the latest change-over for the twin’s preschool activities for homeschool time each morning. We are currently taking a school holiday break for 2 weeks, leading up to the birth of our 7th blessing.

I have found from experience that everything goes much more smoothly if we continue with school, rather than take a break at the same time as the newest arrival. Too much free time and lack of structure and supervision creates cranky kids who bicker all day and drive me crazy! I have made sure that the activities for this term do not require a lot of 1 on 1 time with Mum and the older children especially are able to work through without requiring my assistance, other than for the occasional question etc.

IMG_0486

These handwriting books are the one item in the preschool cupboard that will need my 1 on 1 attention. The twins are asking me how to write certain letters now and are keen to write their names. My opinion is that if they are going to write letters, they may as well learn how to do it properly right from the start, rather than need to re-learn later and correct bad habits. I should be able to fit in the 15 minutes or so that is needed to complete 1 page per day.

IMG_0478

I picked up some old activity books with dotted pictures. Tracing these dotted lines to make the figures is great fine motor practise. I have removed the pages from their covers so that the twins can easily grab one page at a time.

IMG_0477

I also found some old sticker books. Again, I pulled all the pages out so that they can choose one at a time. Some paper to stick them on to and a packet of textas is all that is needed for some creative fun.

IMG_0474

I have had these pattern block puzzles out before but the children do not choose to do them unless directed to do so. I have made a list of each picture with space for a sticker or stamp next to each one. After finishing a puzzle they can mark it as completed by stamping or sticking next to the corresponding name. A little added incentive!

IMG_0473

Cutting and gluing are still exceedingly popular with both children. This box has some large plain paper sheets, wrapping paper pictures, glue sticks and scissors for free creating.

IMG_0469

A carry on from last month – matching upper and lowercase alphabet letters. More work is needed on this skill so I have just changed the presentation and popped it back out again. The large jewels have capital letters on them and the ice block trays have both upper and lowercase. It is a basic matching activity.

IMG_0468

Addition and counting skills will be something we continue to work on for a while. With the rocks as the manipulatives, the children solve the simple addition sum on each peg before clipping it to the correct segment on the paper plate. Using pegs means that this also improves fine motor skills as well. The circle in the centre is the inside of a used roll of sticky tape. I just glued it onto the paper plate which provides a great place for the pegs and rocks to be stored when not in use.

IMG_0464

Three letter CVC words are going to be out for quite a while. With the same letter tiles and a new set of pictures (free printables here) the twins already know how to do this and need only a little help. Last time I had them lucky dip the tiles out of a bag but I found that they wanted to be able to see all the letters and find the one they needed so ended up tipping them all out anyway. Having them in the plate means they can see the tiles and choose the sound they are up to.