Learning letter names and sounds

Whether you are homeschooling or have a young child at school, most of us will at some stage be helping our children learn their letter names and sounds. There are many different ways to do this, from rote learning with flash cards to games and hands on workjob style activities.

I use quite a few different methods depending on the child, their rate of learning and preferred learning style and the time I have available to teach them. One of the more hands-on approaches I have employed is an alphabet chart. Again, this is something I made way back in my Uni teacher training days that has been useful through 7 years of teaching and now has made it’s way to the third child in our family.

I do not introduce the letters for the first time using the chart – there are too many all at once and it is too overwhelming. We go through the alphabet one letter at a time, adding more as the child is ready. (I’ll post about this another time.) Once the child knows quite a few letter names and most sounds I introduce the pocket chart. It can be used in many different ways. Here are just a couple:

  • Matching lowercase letters to uppercase letters.
  • lucky dipping letter cards from a pillowslip, naming them, saying their sound and then sliding them into the correct pocket.
  • sorting small objects by their initial sound (first sound you hear when you say the word) into the correct pocket.
  • setting up a word bank system with picture and word cards that begin with each letter “filed” in each pocket for children to use during creative writing.
  • find the hidden toy games where the child checks the pockets for a hidden items and must name the letter and sound to be able to keep the item. (Just for the duration of the game though, although you could include a little treat surprise every now and then.)

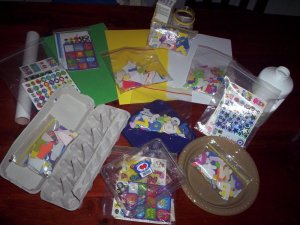
These objects are one set I use for initial sound sorting.

A second set of objects for initial sound sorting.

To begin with, all alphabet chart work is done one-on-one with me, however once the child begins to grasp the concept of initial sounds, I give them a bag or box of objects to sort into the correct pocket as an independent activity. It is self-checking because there is never more than one object for each pocket so if they find one already there, they know they have made an error and can self correct.

If you are not able to sew a chart, you could make one using cardboard and add Velcro spots to attach the letter cards or large sturdy envelopes to act as pockets for the items. If you plan to use it for any length of time or with more than one sibling it would be worth taking the time to sew one up. It might be a nice project for Grandma perhaps??

Teaching Children To Read: Readers

It is very important to expose children to a wide variety of excellent quality literature from an early age. Way before a child can read, they will be able to appreciate a wonderful story and surprise you with their ability to concentrate and enjoy listening to a chapter or so at a time from quality chapter books that would otherwise be way above their reading level.

Those who are familiar with the Charlotte Mason style of education through living books will already be acquainted with the idea that children should be reading “twaddle free” literature that has not been “dumbed down” for children, but rather includes all the richness and fullness of the English language at it’s best.

Today I am listing the beginning readers that my children have enjoyed learning to read from because I do believe that there is a place for the more traditional first reading books or vocabulary controlled readers for beginning readers. Some parents are reluctant to use these because they do not fit into the “quality literature” category, however you need to be clear why you are using them. If they are your child’s only exposure to books then yes, they will not be getting the rich language experiences they need. However, if you are reading aloud or playing audio recordings of classic books and using readers in a structured fashion to teach word decoding and first reading skills, then they have a valuable purpose.

When children are learning to read they will often find it hard work and be easily discouraged with texts that are too difficult. With carefully levelled and graded readers, they will be able to see ongoing progression and experience success and that wonderful feeling of being able to say “I read it myself!” Once a good bank of sight words has been learnt, we go on from levelled readers to plowing through the many picture books in our collection. By the time we have exhausted them, the children are usually ready for easier chapter books and move gradually on to more general chapter books.

There are some beginning readers that are definitely better than others and the following are some of the best that we have used.

Bob Books First!Bob Books Set 3: Word FamiliesBob Books Set 2: Advancing Beginners

Bob Books Set 3: Word FamiliesBob Books Set 5: Long Vowels

Bob Books level 1 2 3 4 and 5  are a relatively cheap way to get a good set of beginning reading books. They have very plain line drawings with stories that have simple appeal. The difficulty increases in very small steps, unlike some early reading sets that jump very quickly from 3 letter words through to sight words, leaving some struggling readers behind. Each level is a boxed set of 12 reading books.

Little BearLittle Bear's VisitA Kiss for Little BearLittle Bear's FriendFather Bear Comes Home

Little Bear books have lots of basic sight words in simple stories that children actually want to read. Very appealing and most are presented in chapter book format to ease through the transition from picture books to chapter books. Level 1 in the “I Can Read” series is a good follow-on from the Bob Books.

Frog and Toad Are FriendsFrog and Toad TogetherFrog and Toad All YearDays with Frog and Toad

The Frog and Toad Series is another set of simple sight word books that have enough in the plot to keep children interested. Frog and Toad’s adventures together are engaging with a touch of humour. Level 2 in the I Can Read series is the next step up from the Little Bear books.

Amelia Bedelia

Amelia Bedelia and the rest of the series tell the story of a cheerful young lady who always seems to get things mixed up in a silly and humorous way. Level 2 in the I Can Read series. (I haven’t read all of these but we liked Amelia Bedelia.)

The Josefina Story Quilt

The Josefina story quilt tells the heartwarming tale of Josephina hen as she heads off with a family in a covered wagon. Level 3 in the I Can Read series.

Step into Reading Bravest Dog Ever

Balto tells the story of a sled dog who saves the day with his heroic trip through icy conditions bringing medicine to sick children and villagers. Level 3 in the I Can Read series.

Tornado

Tornado is a good beginner chapter book. More text but simple enough for children to move on with. It is the story of a dog who literally falls out of the sky during a tornado and becomes firm friends with a young boy. One slightly sad section that turns out happily in the end – I always warn my children about these sections as they tend to be quite sensitive to sad events in stories.

Courage of Sarah Noble

The Courage of Sarah Noble by Alice Dalgliesh is a Newbury honour book. An eight-year-old girl finds courage to go alone with her father to build a new home in the Connecticut wilderness and to stay with the Indians when her father goes back to bring the rest of the family.

The Velveteen Rabbit

The Velveteen Rabbit by Margery Williams is the story of a little boy’s stuffed rabbit and how he became real. Considered to be one of the classics by many and is stepping into longer chapter book reading.

Outdoor activities: Painting


I have a confession to make. As a homeschooling Mum it’s difficult to admit it, but I really don’t like to paint. That is, I like to paint, I just don’t like setting up painting for my children to do. It takes time to set up, creates heaps of mess and takes ages to pack up again, all for a few minutes of colourful fun.

In an effort to overcome this dislike and occasionally provide this apparently vital experience for my children, we have developed a method that works for us… occasionally….when I can mentally gear up for it.

I have some large packing boxes that I keep folded down flat. We set these up outside on the lawn with the top flaps folded shut to hold them together and the bottom flaps bent outwards to catch the drips. Now that the children are a little older they set up the whole experience pretty much by themselves. They cart out the boxes, taping paper on every single side, 2 per side so that each child gets several pages to do. The children pull out the paint pots and brushes and even mix up the colours from the prime colours we own. (It’s amazing how their knowledge of paint mixing, creating a variety of  shades etc. has developed when they do not have the option of prepared colours and have to mix their own.)

Off come the clothes and on go the painting shirts and we’re all set. I plop a bucket of water out on the grass with some cloths and hands are washed here, as well as the brushes once they are done. Pictures stay taped to the boxes until dry, eliminating paint splodges from all over my clothes drying rack and everyone has a ball. They even seem to enjoy the clean-up time. If they are really covered in paint I line them up and spray them down with the hose before sending everyone inside for an early shower.

The children get to paint, I get to …. not do anything much at all except supervise and everyone enjoys the process. Obviously the weather must be fine but in winter we use tablet water colours at the table. These are far less drippy and messy and I can cope with them inside far better than liquid paints. My children will not be artistically deprived or have to see counsellors to work through the fact that they never got to paint and I don’t feel guilty when I see all those arty blogs about painting!
Other posts you may like:

Homeschooling with toddlers: Duplo copy and build

Here’s another fun yet educational activity for your toddlers or pre-schoolers to do while you homeschool the older children (or just get some dinner cooked!) It works as a Montessori style tray activity, table activity, playpen activity or mat time (blanket time) activity and can be adapted in difficulty to suit a wide range of ages.

Assuming you own Duplo (or any other suitable construction toy) and a digital camera, it costs almost nothing to make and is simple to put together. Older children could be enlisted to make the models required.

Simply make a selection of small models, photograph them individually and put only the pieces needed to construct each one into separate containers. Print the photos (laminate if you want them to last) and put them with the corresponding model and that’s it! The child simply uses the blocks supplied to copy the photo. The activity is self-checking in that there will be no spare blocks left at the end if they have copied correctly.

The easiest model for a 2 year old to copy might simple be a stack of 3 or 4 square Duplo blocks. Each set given from then on can increase in difficulty by adding more blocks and changing the complexity of the designs. It may need some teaching at first for the very young children to grasp the concept, but once they understand what to do they will be off and running. After each model is created children can play with the little set of bricks and try to make something different with it. Little boys in particular love to build, however my girls have enjoyed the challenge of making the colours and shapes of the blocks match exactly.

Homeschooling activities for toddlers: Cutting, gluing & stickers

We survived our plane trip to Melbourne despite our flight being cancelled and having to travel in the middle of the night.  All those carefully planned activities for the children (ideas here, here and here) weren’t even touched as the youngest 3 were snoozing both on the way there and on the way back! Oh well, there were plenty of times during the conference itself that the twins enjoyed their activities while having some quiet mat time during the day.

We were home just in time to finalise all our new year school plans for our moderator visit this week and to continue getting organised for our new addition as that due date is looming ever closer.

If you are looking for ideas to keep a toddler well occupied while you school older children, then stickers, glue and cutting have always been a big hit in our family.

The stickers and coloured paper are separated into separate sheet protectors so the toddler can take out just what is needed for that morning (and to stop all the stickers being used in one day!) After the stickers are stuck they draw on the paper as well and some quite interesting scenes have been created.

For a younger toddler, I set stickers out in individual zip lock bags with an interesting item to stick them on to. This is for the age where just getting the stickers off the page and onto something is quite time-consuming and absorbing in itself.

This picture shows 10 weeks worth of sticker activities. One morning a week was designated as "sticker day" and that kept the activity fresh and interesting. Card tubes, paper plates, bottles and any other interesting containers are great.

Another quick and easy to prepare activity is gluing. I filled old photo envelopes with an assortment of pre-cut paper shapes (from the scrapbooking isle at K Mart) and put each with a sheet of coloured paper. A glue stick completes the activity (I use the blue glue sticks so the toddlers can see where they are putting the glue) and away they go.

10 used photo envelopes, 10 sheets of paper and a bunch of paper shapes to glue equals 10 weeks worth of happy toddler fun during school time with the older children. Again, one morning a week is "Gluing day" to keep it fresh and interesting.


The cutting activities I used this year came from a variety of sources on the web. I googled “free printable cutting activities” and just printed away! Lots of dotted lines to cut on, pictures to cut out etc. For a younger toddler, see “Teaching toddlers to cut” for ideas on how to set up their cutting activities.

Circle Time Planning

Circle time is next on the planning agenda. I’ve missed starting the day off together each morning and am looking forward to beginning our day with circle time again once we start our homeschooling programme.

We’ve used a lot of wonderful resources already. Here is our list of materials we have already worked through, plus the ones we will continue on with or start fresh this year. I have been very happy with those we have used so far and expect the new ones to be just as good as they are all based on the highest recommendations of homeschooling friends with similar philosophies to mine.

Click on these titles to see my reviews from previous posts and where to get them.

Our resources for 2011:
  • Building On The Rock Series by Joel Beeke (These 5 books of short stories contain a very strong gospel and biblical message. Stories of great faith, conversions, answers to prayer and miraculous happenings will help you to explain the great truths of the Christian faith, challenge you and your children in their own Christian walk and inspire you to serve God with renewed vigour.)

  • Go To The Ant Check-list (Another great chart to work through with children and then put on display as a reference. In the publisher’s words: “Use the Go To The Ant Chart to help your children examine themselves and replace laziness with habits of godly diligence.”
  • The Answers Book For Kids Volume 1 to 4 by Ken Ham (Answering tricky questions about God and this world in a way that children can understand, yet without oversimplification.)

Copywork and narration ideas for the new school year.

The school year start is fast approaching and I am aiming to be extremely organised as we will be interrupted soon into it by the arrival of baby number 6. Everything needs to be sitting there, prepped and ready to go, so today’s thought processes revolve around Charlotte Mason style copywork and dictation for the oldest.

Depending on the age of the child, this year’s copywork and dictation will be a selection from the following:

At least one of my children is excited by brand new fresh workbooks and the opportunity to fill them with beautiful work. I remember the feeling of being given a brand new pad in Primary School and ruling up those fresh unblemished pages. Surely everyone gets at least a glimmer of excitement out of new school books? Stationary shops? Organisational systems?? Hmmm, perhaps that’s just me!

Workboxes – homeschooling multiple ages

With many children in the family, juggling different levels of homeschooling can at times be a challenge. One of my long-term goals is for each child to become a completely independent learner, to be able to educate themselves in any way necessary to equip them for their future careers and life. Once each child is an independent reader, this becomes much easier and it is therefore the children in the 4 to 6-ish bracket that receive the most one-on-one parent directed teaching as they learn their basic phonics, reading and mathematic skills. As they progress through the next couple of years or so and become proficient readers, they begin to work more and more independently.

Workboxes are one method of encouraging independence and organising several different learners at different stages. They can take different forms; some families have a system of drawers whereby the child starts at the top drawer, completes the set task in it, moves on to the drawer below and so on until their daily responsibilities are completed. This allows them to see their progress and gives even non-readers a very clear indicator of what they are to do next. There is no wandering around collecting or organising supplies as everything necessary for the activity is in the drawer (other than a caddy or pencil-case of stationary items that is collected with the first drawer work.)

This kind of system is great for all children and is particularly helpful for those who like to know what is coming next, those who tend to argue or complain about what they do or do not have to do for the day and those who waste a lot of time finding books and supplies instead of working. Everything is black and white and dictated by the drawers. You are not finished until the last drawer is done. They can even include music practice, computer time, chores or any other kind of task a child is responsible for in a day.

I love the idea of workboxes set out in this way but didn’t want to have to swap out activities on a nightly basis. While the year one child for example does reading and phonics every day, they do not do exactly the same activity so the drawer system would require me swapping out the phonics drawer every night. The same applies for maths which is a daily activity, however the form that it takes changes daily.

Miss 3 1/2 year old’s cupboard – 1 workbox and 1 tray per day.

Miss 6 year old’s shelf – 1 workbox per day.

In the end I took the basic idea of the workbox (that is every piece of equipment necessary and every activity needing to be completed throughout the day is in the box) and tweaked it to fit our family. Our workboxes are simply a plastic crate containing every activity that must be completed throughout the day for each child within the one box (or in some cases a box and a tray for each day.) There is a box for each day of the week, apart from Wednesdays when our eldest son attends a homeschooling co-op and the girls have a more relaxed day of craft and cooking etc.

I set them up at the beginning of the term and only need to change them when content such as reading books need to be updated, rather than on a daily or weekly basis.

For those of you who are interested, here is what’s in the boxes.

Miss 3 1/2:

Monday: counting workjob, starter styles (Pre-number at the moment) and peg board. (She is learning the alphabet letter names and sounds but we do them everyday so they sit separately on the top shelf, rather than in any one box.)

Tuesday: Letterland phonics, counting workjob, puzzle and colouring in.

Thursday: Montessori style tong activity, book, counting workjob, pattern blocks and puzzle cards.

Friday: counting workjob, Montessori style spooning activity, diary writing and puzzles.

Miss 6’s work boxes:

Monday: Reading, 3 letter words spelling book, addition workjob, phonics & spelling starter styles and Montessori sight words picture match.

Tuesday: reading, handwriting, Montessori sight words picture match, phonics digraphs, number starter styles and subtraction workjob.

Thursday: Diary writing, Montessori sight words picture match, number starter styles, reading and geoboard activities.

Friday: Reading, calculations starter styles, Montessori sight words picture match, sight words activity book and base 10 activities.

Master 8 yr old’s school work is not in workboxes. He has his own desk with drawers and keeps his school book sorted into those. He does do some hands on work; however the morning session (which is when we use the workboxes) is when he does his book work. He has a weekly schedule to follow which tells him which subject to do on what day and  he works through this in order; a kind of “workbox on paper.”

He uses a mixture of Saxon Maths and Maths-U-See, Mystery of History, Exploring Creation, copywork, lapbook activities, Color the Classics and English for the Thoughtful Child.

We all have circle time together, with the focus on bible reading, character training, scripture memorization, catechism and prayer. I spend time with Miss 3 1/2 while Master 8 and Miss 6 work independently, then one-on-one with Miss 6 while the others work independently and finally time with Master 8 while both girls finish off their activities and head outside.

This is what is working for us at the moment, although as life changes and new challenges appear (such as the twins dropping their morning nap sometime soon!), everything changes again. But that’s life with little ones!